These steps are required to use the App SDK. Skipping any step will result in data loss.
SDK basic information
SDK name | Version number | md5 | Package name |
QuickTracking Android SDK | Latest version: 1.8.9.PX Update Log: Android SDK Update Log | 14b886d32366c7c170b1c4de264a767b | com.lydaas.qtsdk:qt-px-common |
gradle plugin | Latest version: gradle 9+: quick-gradle-plugin2:2.0.1 gradle 7.5+ to 8+: quick-gradle-plugin2:2.0.0 gradle 7.1.2 to 7.5: quick-gradle-plugin2:1.0.2 Versions earlier than gradle 7.1.2: quick-gradle-plugin2:1.0.0 | 2.0.1: 1b5632379468b0dd4e559ecdd3c3c9e4 2.0.0: bb00122c48a471cf94fc81db3bfb951a 1.0.2: 494dc42eb188ed02a56d1b90292961b6 1.0.0: c258edaeb03340f33a5782ff023bcd9f | com.lydaas.qtsdk:quick-gradle-plugin2 |
1 Quick integration
Quick Tracking generates unique integration code for each app. Follow the in-product guide to complete the integration.Note: If you are already using the Umeng+ SDK, you must change the SDK file path. For more information, see section 1.2 in this document.
1.1 Product path
Go to the Quick Tracking homepage and open the Management Console. Navigate to the Organization List, find the organization that contains your application, and click Manage Application. On the Application Management page, click Integrate next to your application.
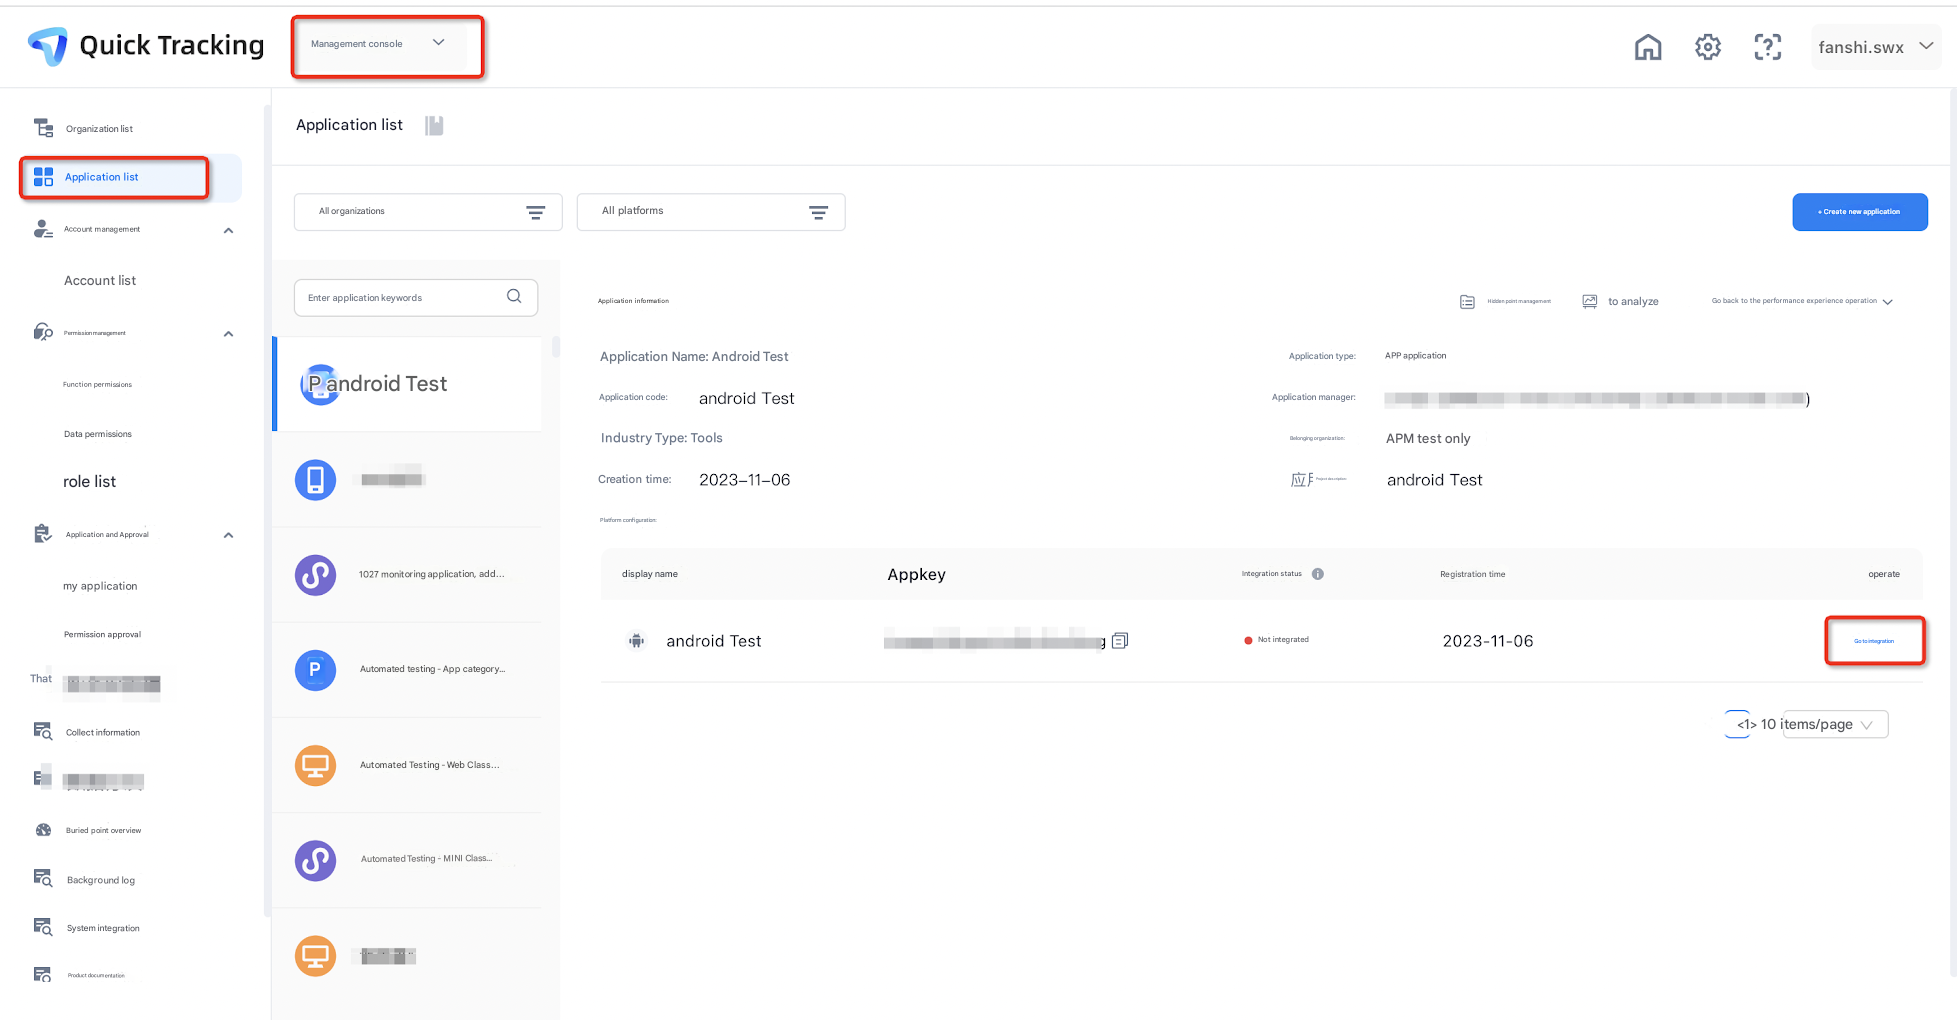
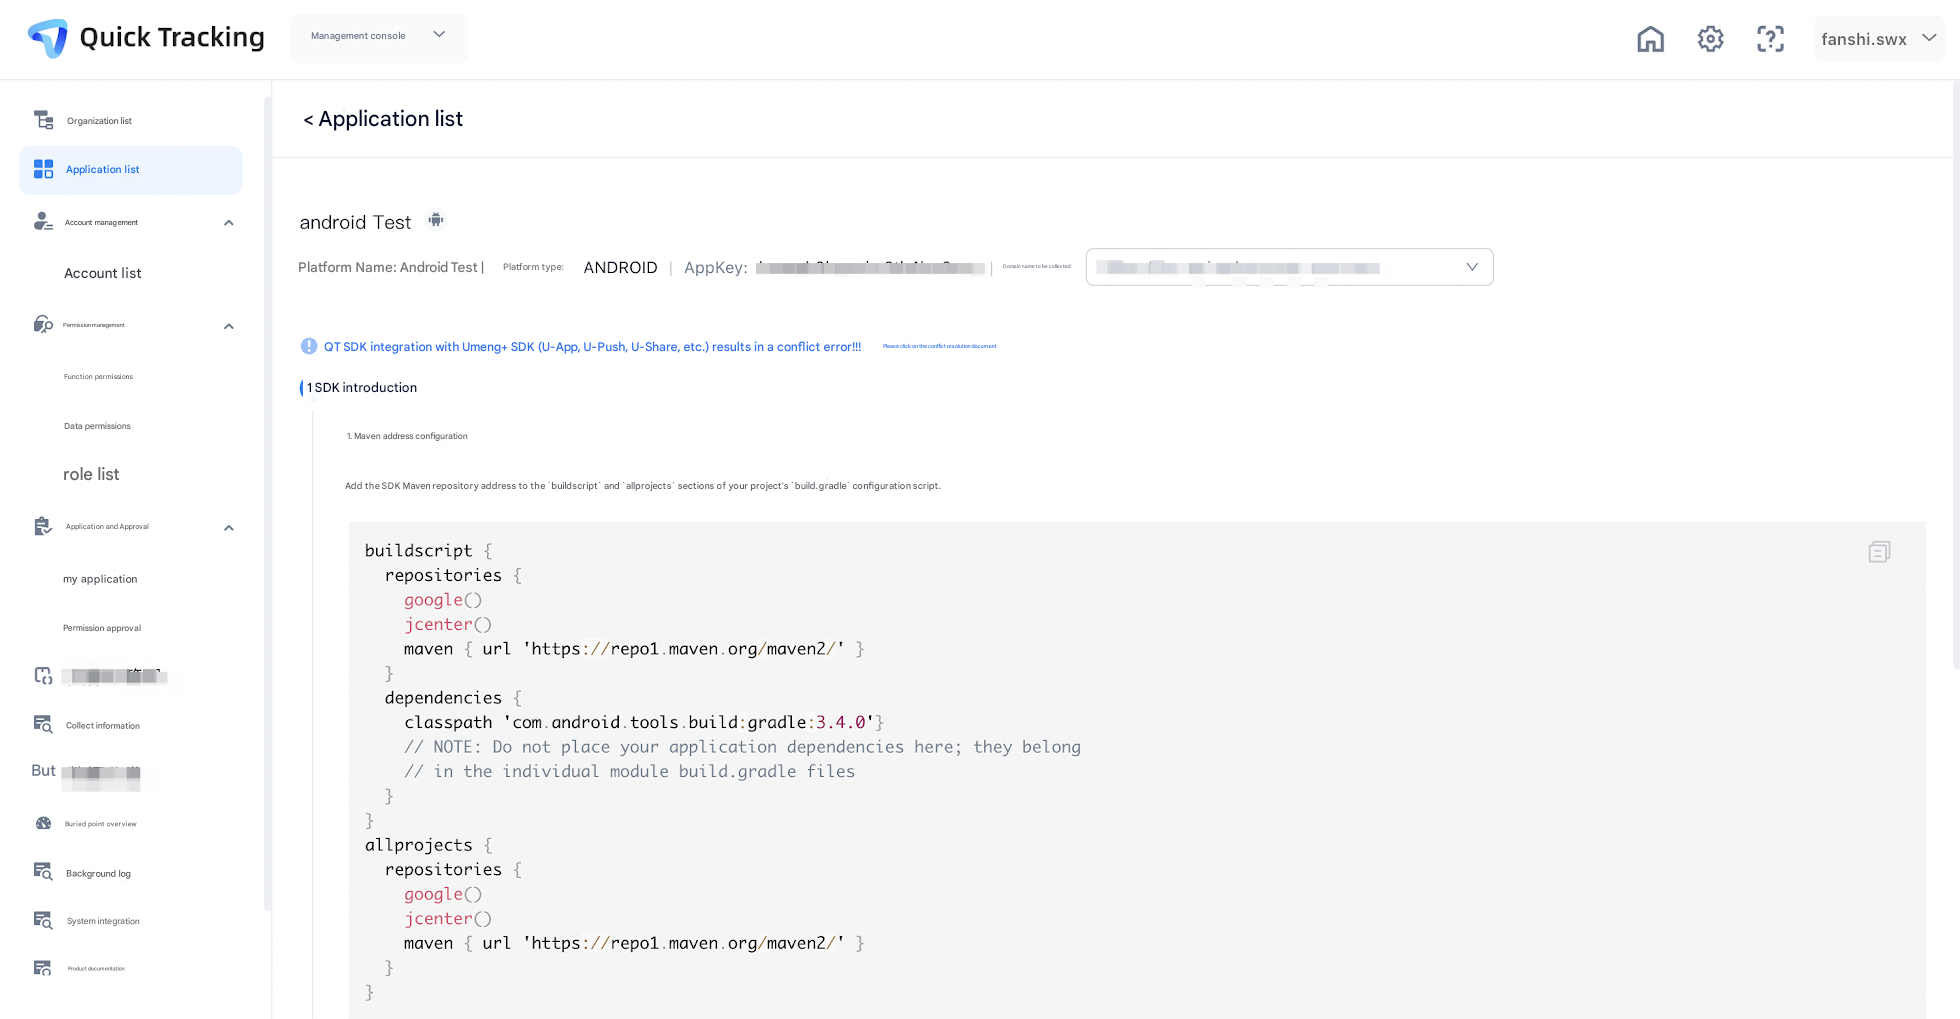
After you click Integrate, a new page appears where you can obtain the unique integration code. Click Next to proceed to Integration Validation. You can then scan the QR code to launch the app and confirm that the integration was successful.
1.2 Check for conflicts with the Umeng+ SDK
Note: If you are already using the Umeng+ SDK, you must change the SDK file path.
To change the SDK file path:
If you have already integrated the Umeng+ SDK and now need to integrate the QT SDK, add QTConfigure.resetStorePath before any other QT or Umeng+ code is called. You must do this before you configure the data collection domain name.
If you have already integrated the QT SDK and now need to integrate the Umeng+ SDK, add UMConfigure.resetStorePath before any other QT or Umeng+ code is called. You must do this before you configure the data collection domain name.
If you do not follow this procedure, the Umeng+ SDK and the QT SDK will use the same storage path, which causes log conflicts. The correct procedure is to reset the file path of the SDK that is initialized second. For example, if you initialize the Umeng+ SDK first, you must call QTConfigure.resetStorePath. If you initialize the QT SDK first, you must call UMConfigure.resetStorePath.
Note: If you reset the QT SDK path, the storage key values for feature information that you set, such as user accounts and application versions, will change. If your business logic depends on these fields, you must reset them. We strongly recommend that you perform this configuration during the initial integration to prevent data loss.
2 Detailed integration code
If you cannot access the page mentioned in the previous section for any reason and need to use this document for the integration, the detailed integration code is provided in the following sections.
2.1 Prepare parameters
appKey: Obtain this from the application list.
Data collection domain name: Obtain this from the Collect Information module in the Management Console.
SDK information: Obtain this from the Collect Information module in the Management Console.Add web link
2.2 Import the SDK
2.2.1 Automatic integration
Older Gradle versions
In the build.gradle configuration script for your project, add the Quick Tracking SDK Maven repository address to the buildscript and allprojects sections.
maven { url 'https://repo1.maven.org/maven2/' }In the build.gradle configuration script for your project, add the SDK Maven repository address to the repositories section:
buildscript {
    repositories {
        google()
        jcenter()
        maven { url 'https://repo1.maven.org/maven2/' }
    }

    dependencies {
        classpath 'com.android.tools.build:gradle:3.4.0'
    }
}

allprojects {
    repositories {
        google()
        jcenter()
        maven { url 'https://repo1.maven.org/maven2/' }
    }
}
In your app's build.gradle configuration script, add the analytics SDK library and other library dependencies to the dependencies section:
dependencies {
    implementation fileTree(include the following:['*.jar'], dir:'libs')

    //QuickTracking analytics SDK
    implementation 'com.lydaas.qtsdk:qt-px-common:1.8.9.PX'

}
In Android Studio 3.1 and later, using "latest.integration" to specify the latest dependency version may cause the library download to time out. If this occurs, you must specify a version number.
AGP 7 and later
In your project's settings.gradle configuration script, add the SDK Maven repository address to the repositories section:
pluginManagement {
    repositories {
        google {
            content {
                includeGroupByRegex("com\\.android.*")
                includeGroupByRegex("com\\.google.*")
                includeGroupByRegex("androidx.*")
            }
        }
        mavenCentral()
        gradlePluginPortal()
        maven { url 'https://repo1.maven.org/maven2/' }
    }

}
dependencyResolutionManagement {
    repositoriesMode.set(RepositoriesMode.FAIL_ON_PROJECT_REPOS)
    repositories {
        google()
        mavenCentral()
        maven { url 'https://repo1.maven.org/maven2/' }
    }
}
In your app's build.gradle configuration script, add the analytics SDK library and other library dependencies to the dependencies section:
dependencies {
    //QuickTracking analytics SDK
    implementation 'com.lydaas.qtsdk:qt-px-common:1.8.9.PX'
}
2.2.2 Manual integration
Select and download the SDK components. Unzip the .zip file to obtain the component packages:
qt-px-common-1.x.x.PX.aar // Analytics SDK. This component is required.
In Android Studio, copy the relevant component JAR packages to the libs directory of your project. Then, right-click the project and select Open Module Settings. In the Project Structure dialog box, select the Dependencies tab. Click the plus sign (+) in the lower-left corner, select the component package type, and import the corresponding packages.
In Eclipse, right-click the project root directory and select Properties > Java Build Path > Libraries. Then, click Add External JARs..., select the path to the JAR file, and click OK to complete the import. (Manual import is not required for ADT 17 and later).
Older Gradle versions
In your app-level build.gradle configuration script, add the libs directory to the repositories section and add the analytics SDK library to the dependencies section.
repositories{
    flatDir{
        dirs 'libs'
    }
}

dependencies {
    implementation fileTree(include the following: ['*.jar'], dir: 'libs')
    implementation files('libs/qt-px-common-1.x.x.PX.aar') // Required
}
AGP 7 and later
In your app-level build.gradle configuration script, add the analytics SDK library to the dependencies section.
dependencies {
    implementation fileTree(include the following: ['*.jar'], dir: 'libs')
    implementation files('libs/qt-px-common-1.x.x.PX.aar') // Required
}
2.3 Configure permissions
The analytics SDK requires the host app to grant the following permissions:
Permission | Purpose |
ACCESS_NETWORK_STATE | Detects the network connection type. This prevents data from being sent during network anomalies to save traffic and power. |
READ_PHONE_STATE (Optional) | Gets the device's International Mobile Equipment Identity (IMEI). The IMEI is used to uniquely identify users for statistical analysis services. |
ACCESS_WIFI_STATE | Gets the Wi-Fi MAC address. On tablets or TV boxes where a device cannot be identified by its IMEI, we use the Wi-Fi MAC address as the unique user identifier to provide statistical analysis services. |
INTERNET | Allows the application to connect to the internet and send statistical data to provide statistical analysis services. |
The following code provides an example of the AndroidManifest.xml manifest file:
<manifest>
    <uses-permission android:name="android.permission.ACCESS_NETWORK_STATE"/>
    <uses-permission android:name="android.permission.ACCESS_WIFI_STATE"/>
    <uses-permission android:name="android.permission.READ_PHONE_STATE"/>
    <uses-permission android:name="android.permission.INTERNET"/>
</manifest>
2.4 Obfuscation configuration
If your application uses code obfuscation, you must add the following configuration. This prevents the Quick Tracking SDK from being incorrectly obfuscated, which would render it unusable.
-keep class com.umeng.** {*;}
-keep class org.repackage.** {*;}

-keep class com.quick.qt.** {*;}
-keep class rpk.quick.qt.** {*;}

-keepclassmembers class * {
   public <init> (org.json.JSONObject);
}
-keepclassmembers enum * {
    public static **[] values();
    public static ** valueOf(java.lang.String);
}
The SDK needs to reference resource files that are imported into the project. It uses a reflection mechanism to obtain the resource reference file R.java. However, when you process the APK with obfuscation or optimization tools, such as ProGuard, the R.java file might be deleted. If this issue occurs, add the following configuration:
-keep public class [your_app_package_name].R$*{
public static final int *;
}
2.5 Tracking validation configuration
In the AndroidManifest.xml file, find the activity that responds to android.intent.action.MAIN. This is the first activity that can be launched from outside the application. Add the following code to allow a specific scheme link to launch the application:
<intent-filter>
    <action android:name="android.intent.action.VIEW"/>
    <category android:name="android.intent.category.DEFAULT" />
    <category android:name="android.intent.category.BROWSABLE" />
    <data android:scheme="atm.your_appKey" />
</intent-filter>
Note:
1. Use a separate intent-filter. You must place it at the same level as other intent-filters. Do not add the preceding code inside another intent-filter.
2. Replace "your_appKey" with your application's appKey.