Permission administrators can grant users the permissions to edit workbooks, export data of workbooks, or view data of workbooks.
Background information
When a permission administrator grants permissions to a user, the permission attributes in the Collaborative state and the Private state are different, as shown in the following figure.

Take note of the following points on collaborative authorization:
Edit: If a user is granted the Edit permission on a specified workbook, the user can edit the workbook, and view and export data of the workbook.
Export (Including View): If a user is granted the Export (Including View) permission on a specified workbook, the user can view and export data of the workbook.
View: If a user is granted the View permission on a specified workbook, the user can only view data of the workbook.
Use scenarios
Scenario | Expected effect |
This allows Analyst A (Analyst A is in the same space as the resource) to edit and unlink workbooks in the workspace. | |
Scenario 2: Grant the permissions to export and view a workbook |
|

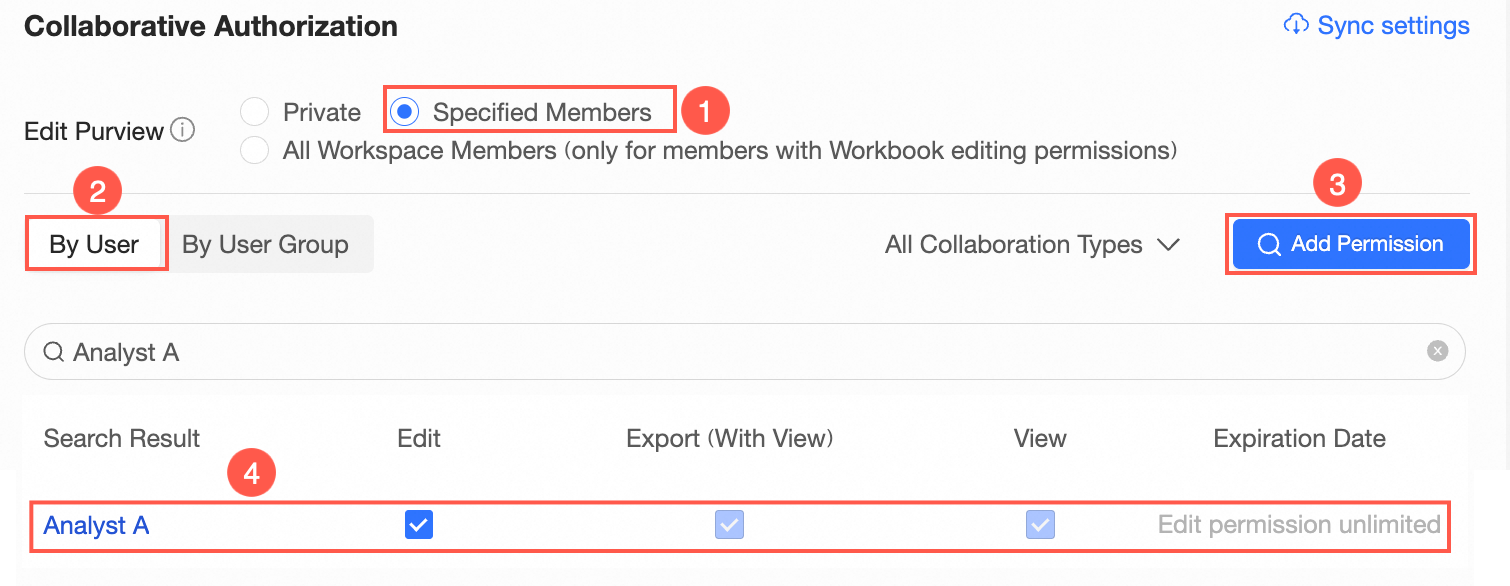
Scenario 1: Grant a user the permissions to edit a specified workbook
Collaborative editing is supported only when Specified Members or All Workspace Members(except members with the view permission) is selected for Editing Permission.
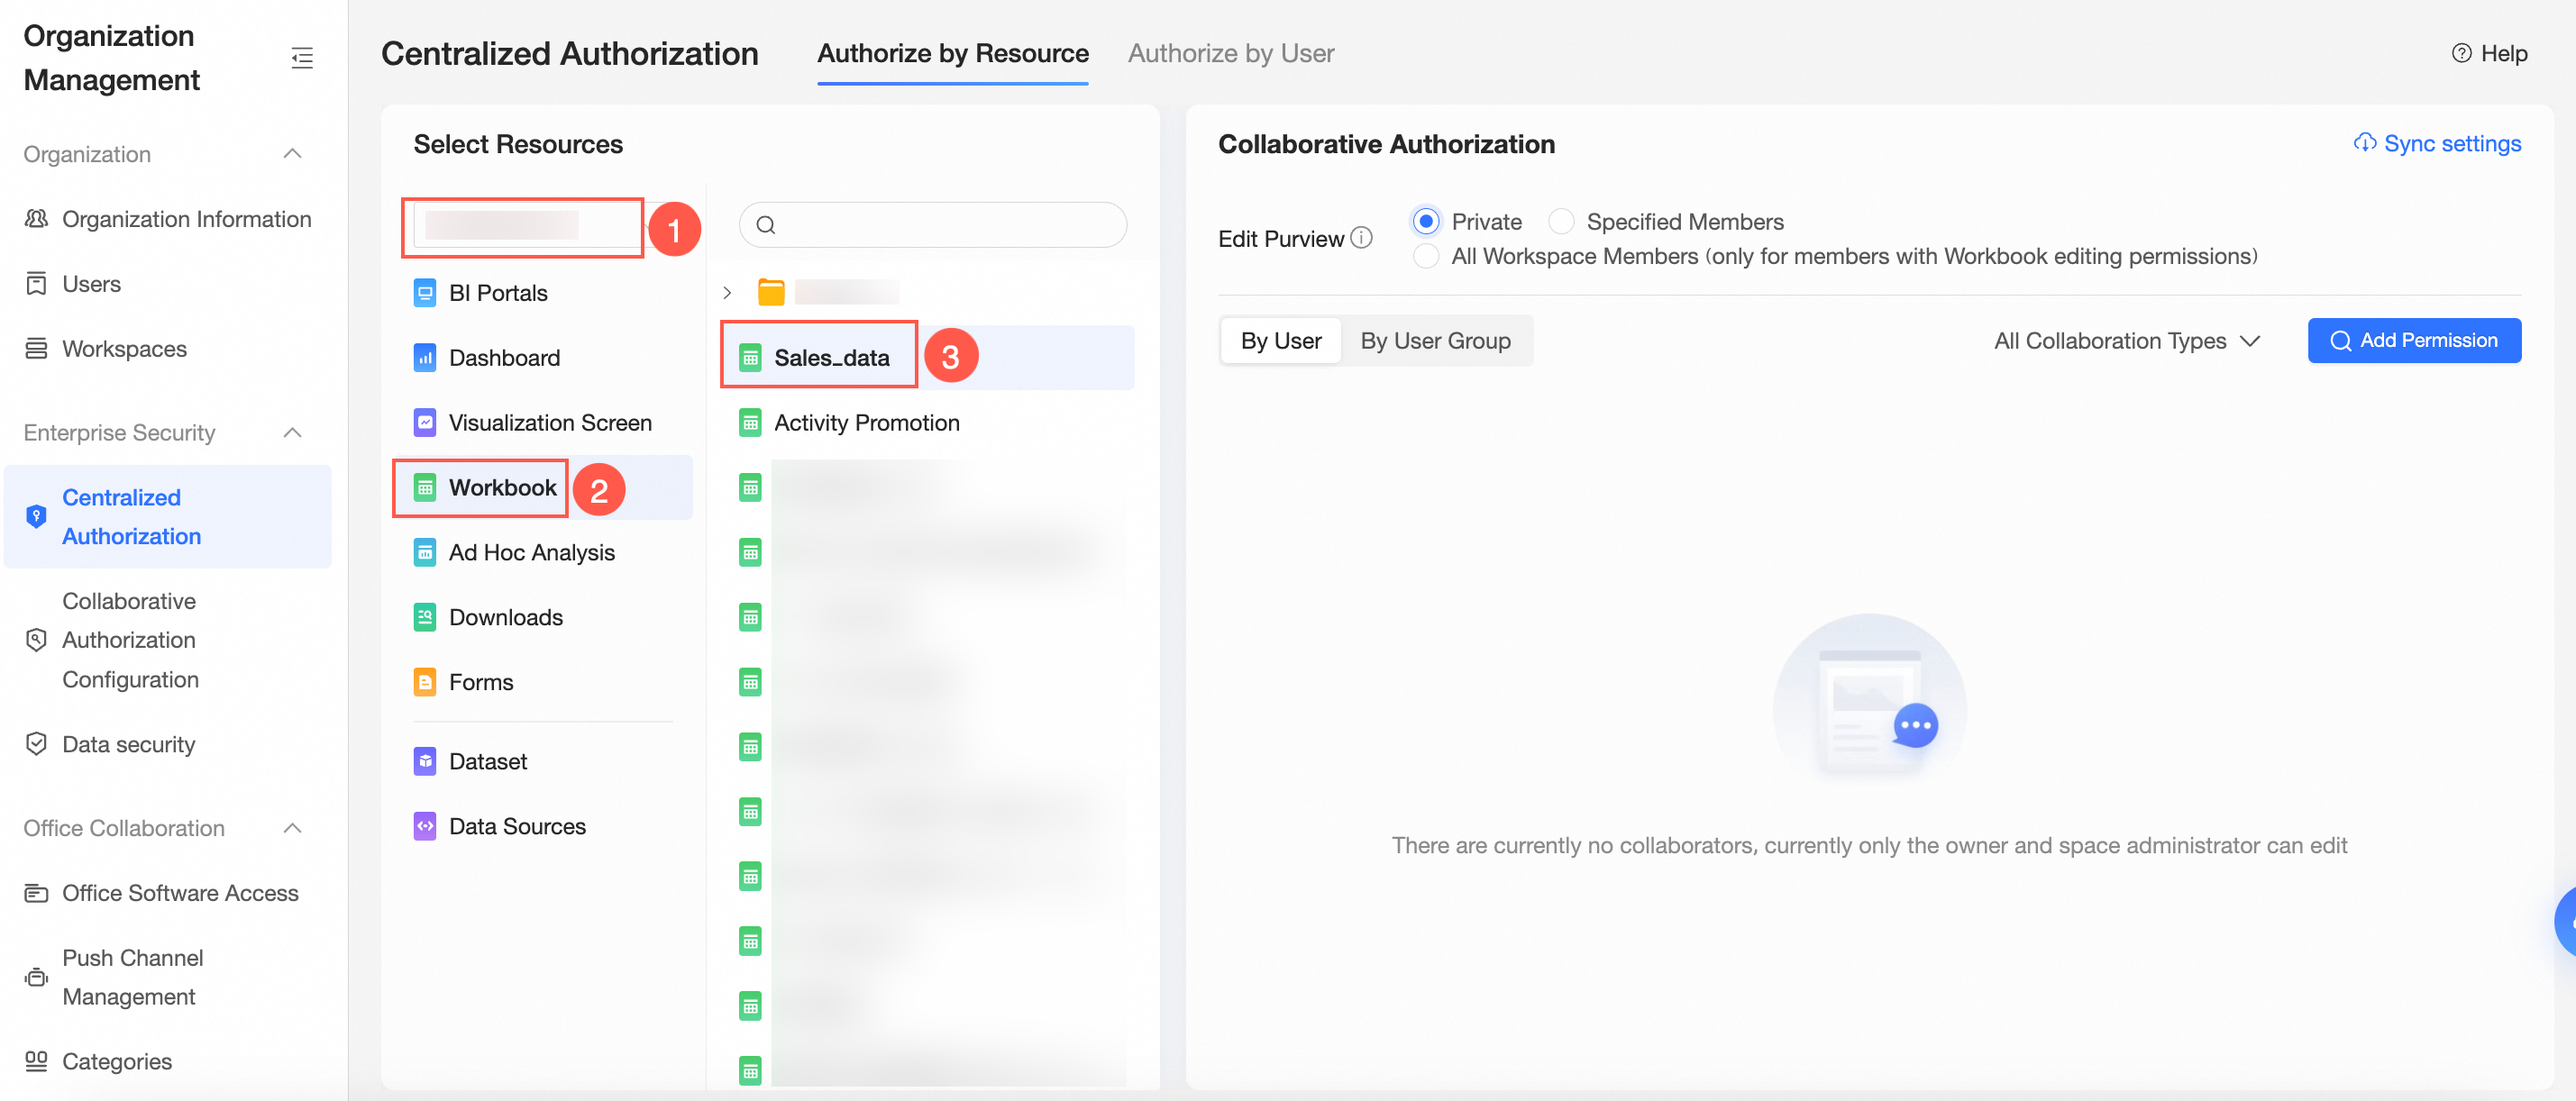
On the Centralized Authorization page, select the target workspace and workbook resource.

On the Collaboration Authorization page, select Edit Permission and grant permissions.
The following figure shows that Specified Members is selected for Editing Permission and Analyst A is granted the Edit permission.
 Note
NoteAfter you select Edit for Analyst A, Analyst A can also view and export data of the workbook. You can also select Export (Including View) or View later to change the permissions that are granted to Analyst A on the workbook.
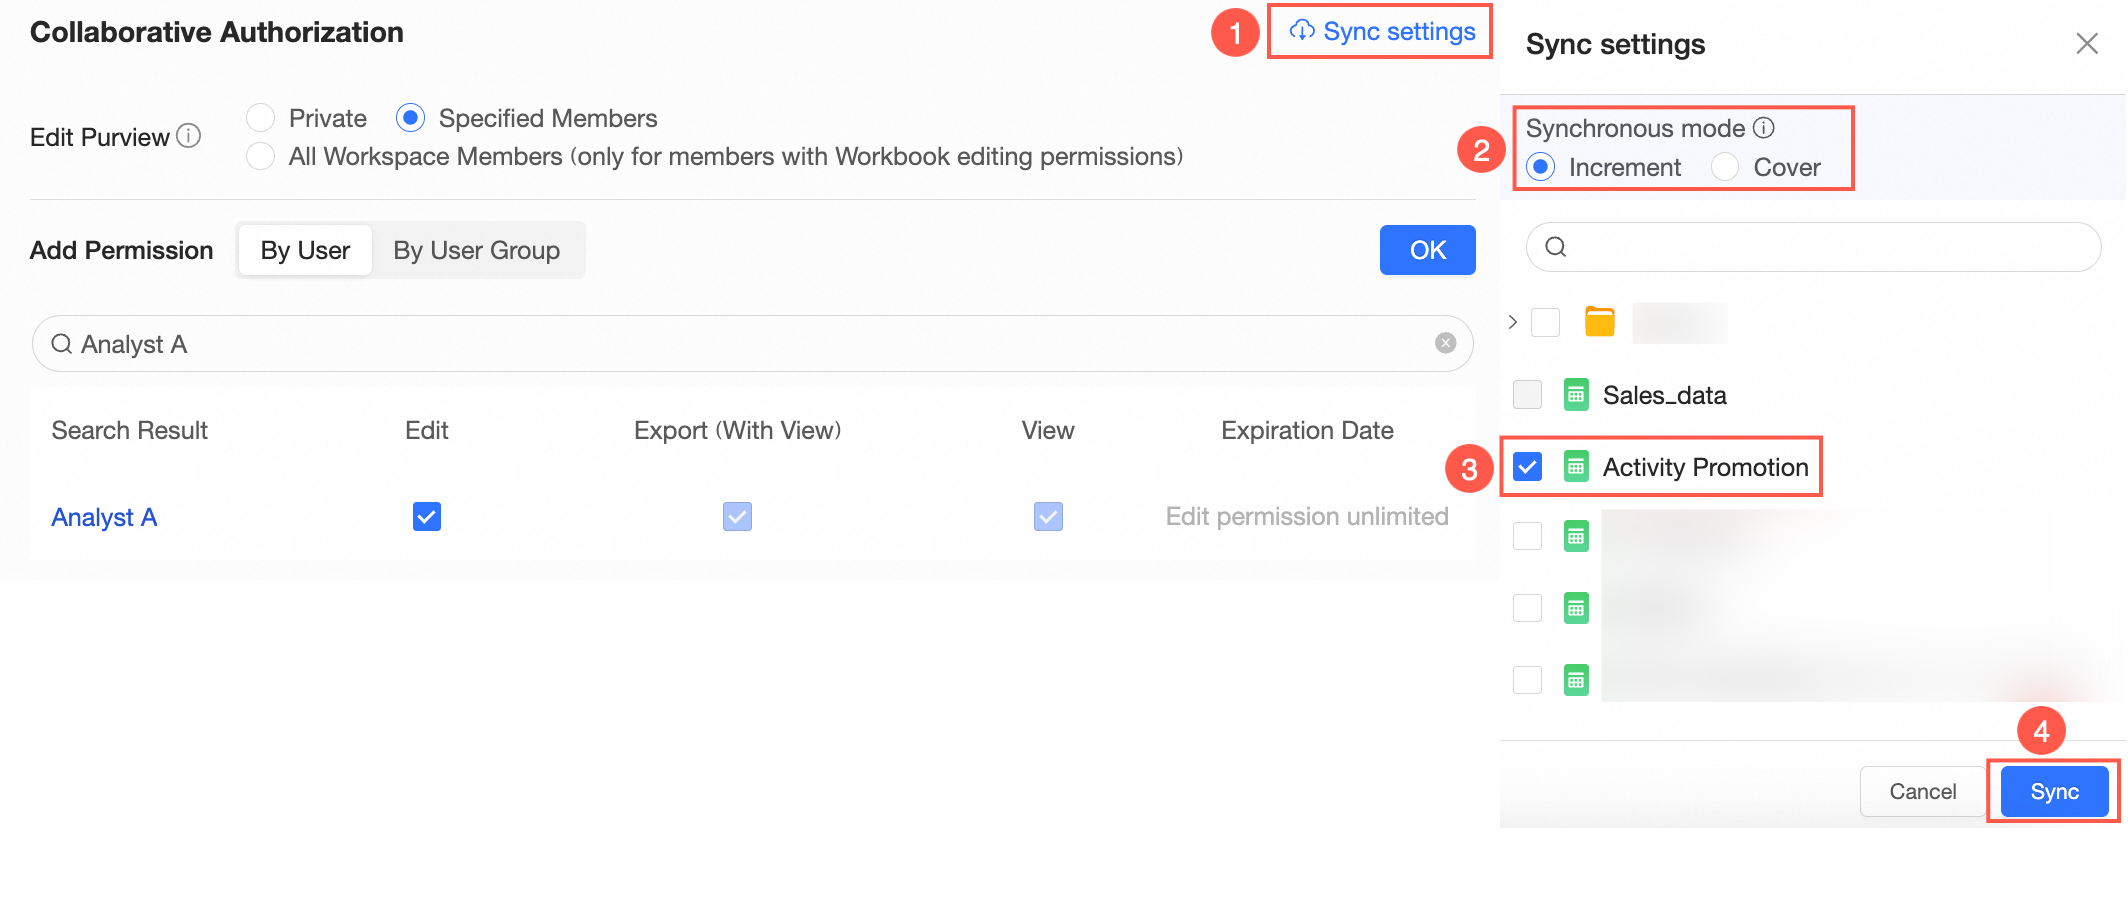
Optional: Synchronize permissions.
If Analyst A needs to edit another workbook in the workspace, you can click Synchronization Settings in the Collaborative Authorization pane. Then, select the workbook that Analyst A needs to edit and click Sync in the Synchronization Settings panel.
For example, Analyst A is granted the Edit permission on Sales Data Analysis. After the permission is synchronized, Analyst A can also edit the Promotion List workbook.
 Note
NoteSynchronization Mode supports Incremental Synchronization and Overwrite Synchronization.
Incremental Synchronization: The original permissions of the resources to be synchronized are not affected.
Overwrite Synchronization: clears the original permissions of the resource to be synchronized and overwrites the permissions of the resource with the permissions of the current resource.
Scenario 2: Grant a user the permissions to export and view data of a specified workbook
In this example, Visitor B is granted the Export (Including View) permission on the Cross-block Query workbook.
On the Centralized Authorization page, select the target workspace and workbook resource.
On the Collaboration Authorization page, select Edit Permission and grant permissions.
The following figure shows that Private is selected for Editing Permission and Visitor B is granted the permission to export the workbook.
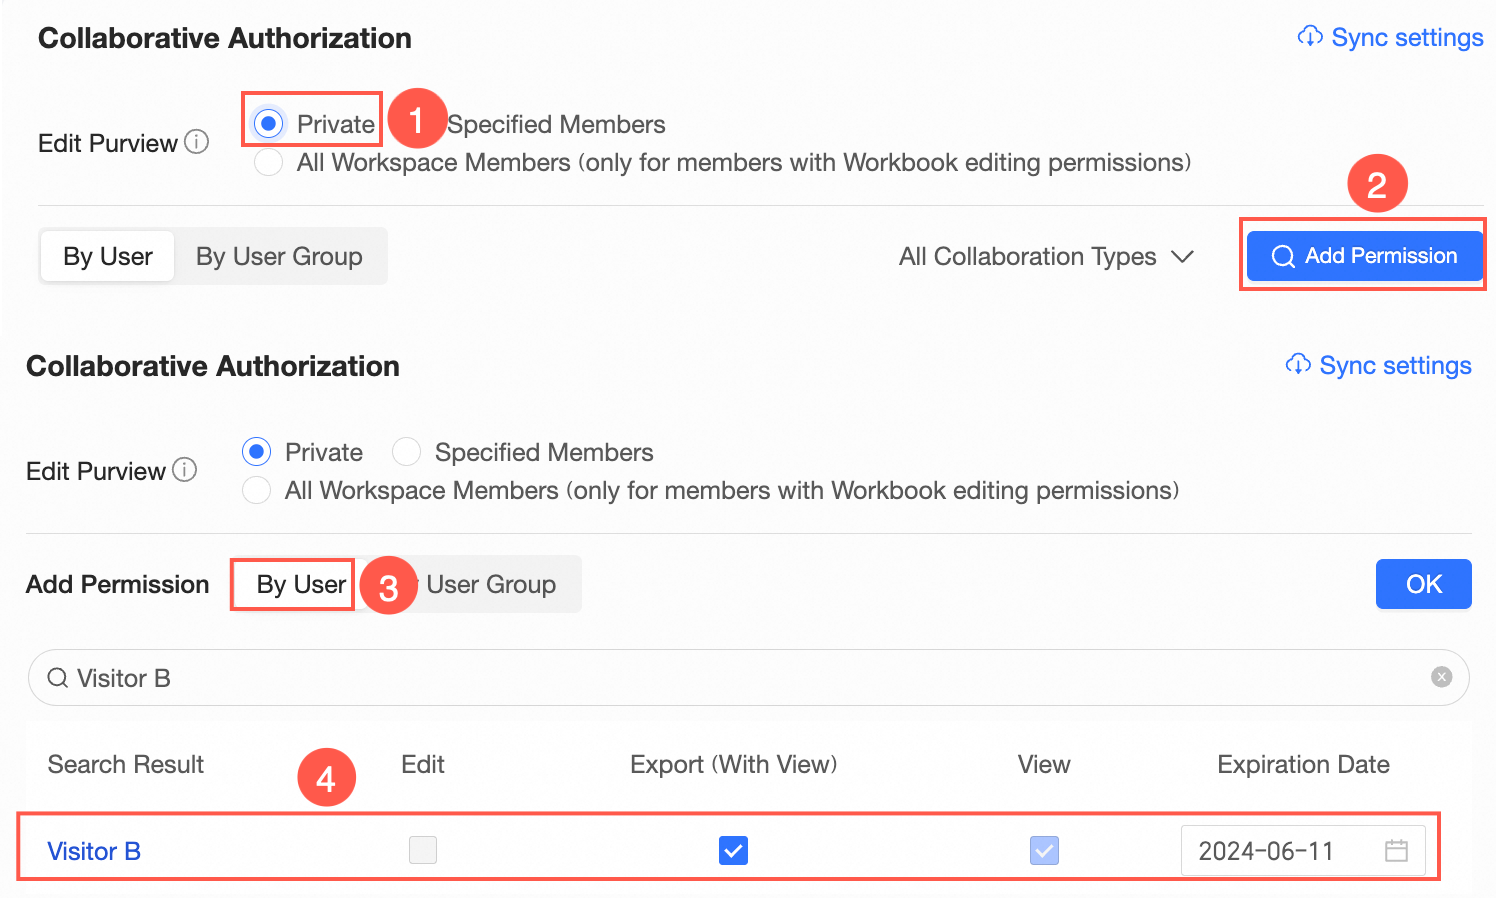 Note
NoteYou can also select View for Visitor B. If you select View, Visitor B can only view the workbook.
Optional: Synchronize permissions.
If Visitor B needs to export data of another workbook in the workspace, you can click Synchronization Settings in the Collaborative Authorization pane. Then, select the workbook whose data Visitor B needs to export and click Sync in the Synchronization Settings panel.