You can view the created report on the mobile terminal. When there are a large number of reports, it is slower for business personnel to find them. You can use the collection management function to add the specified reports to the favorites of business personnel and set the reports to be displayed by default on the mobile terminal. At this time, you can open the micro application to see the data that you are most concerned about. This topic describes how to configure the collection management feature.
Limits
Only the Advanced and Enterprise Standard editions of the group workspace support the collection management feature.
Only the user settings of the organization administrator are supported for the collection management function.
Entry
Log on to the Quick BI console.
On the Quick BI product homepage, follow the instructions shown in the following figure to go to the collection management page.
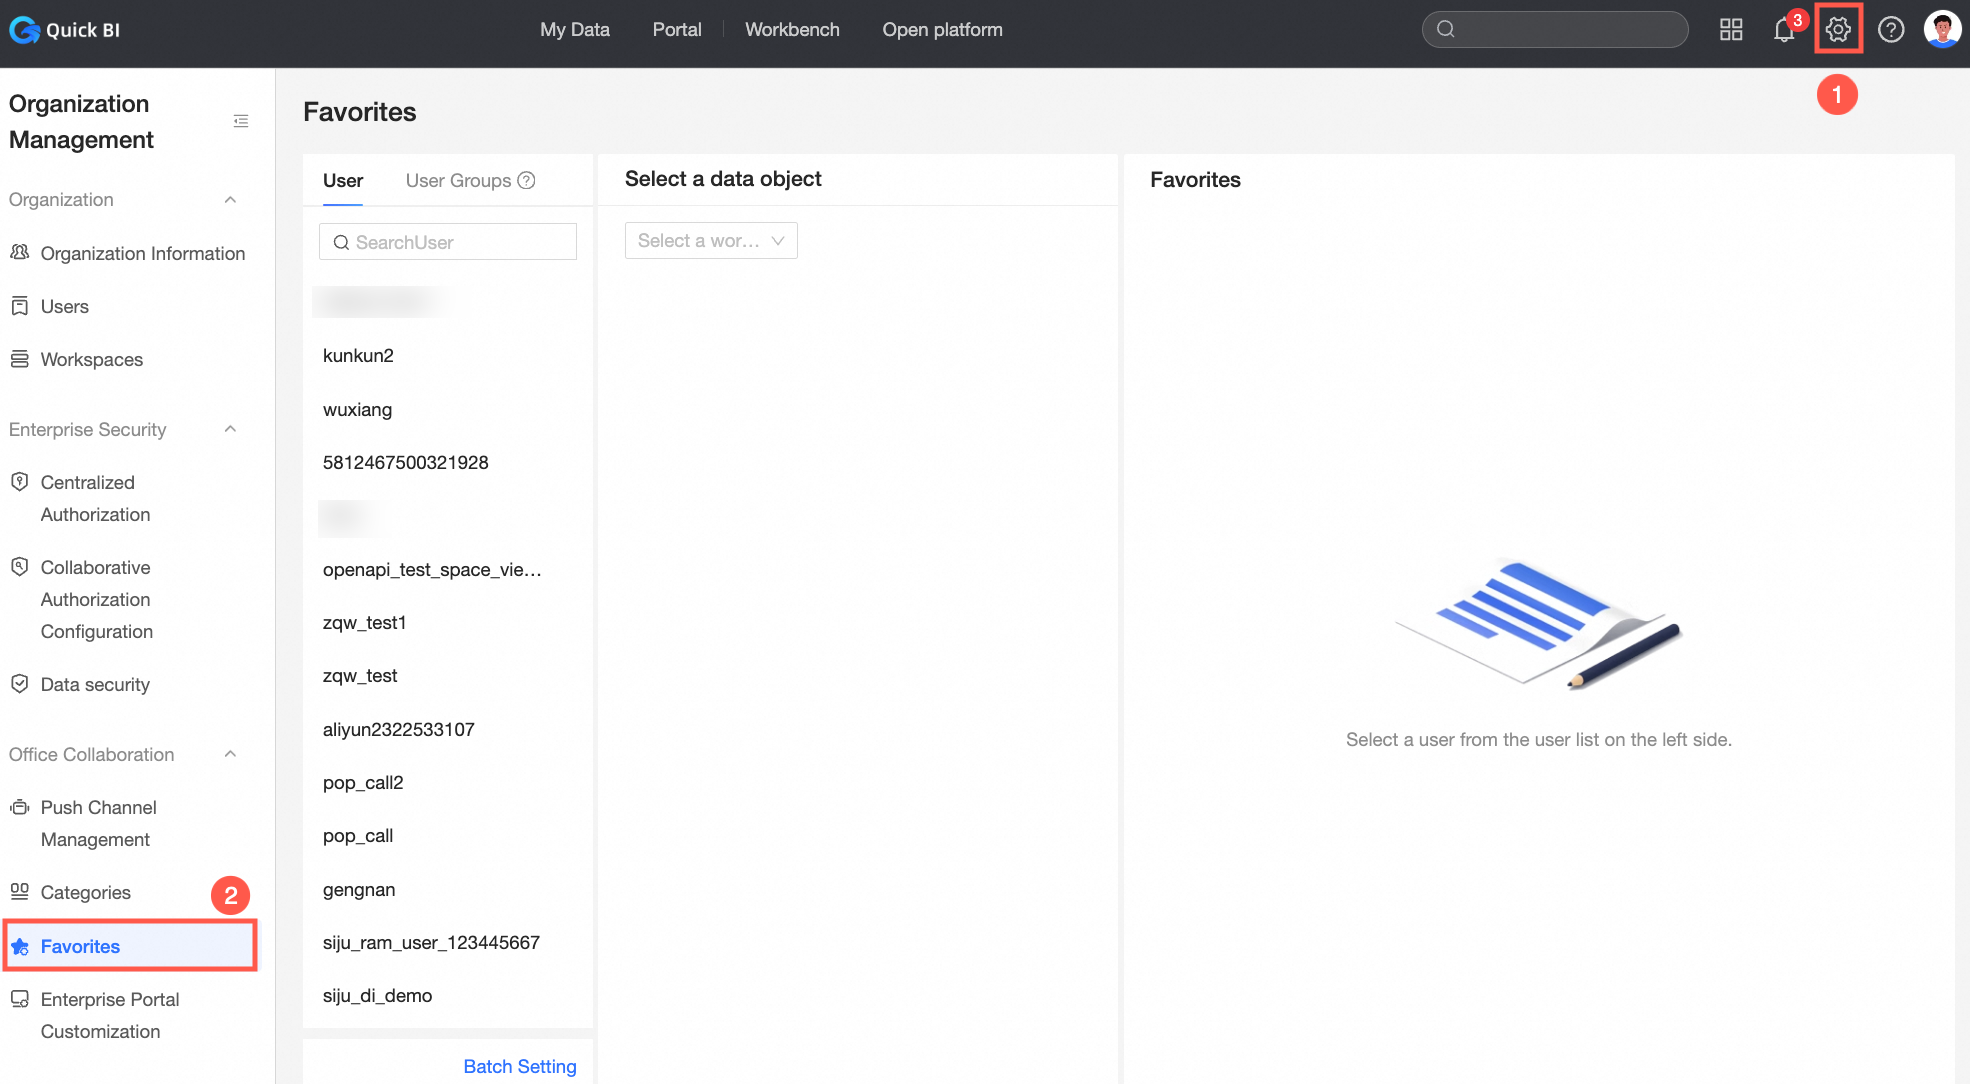
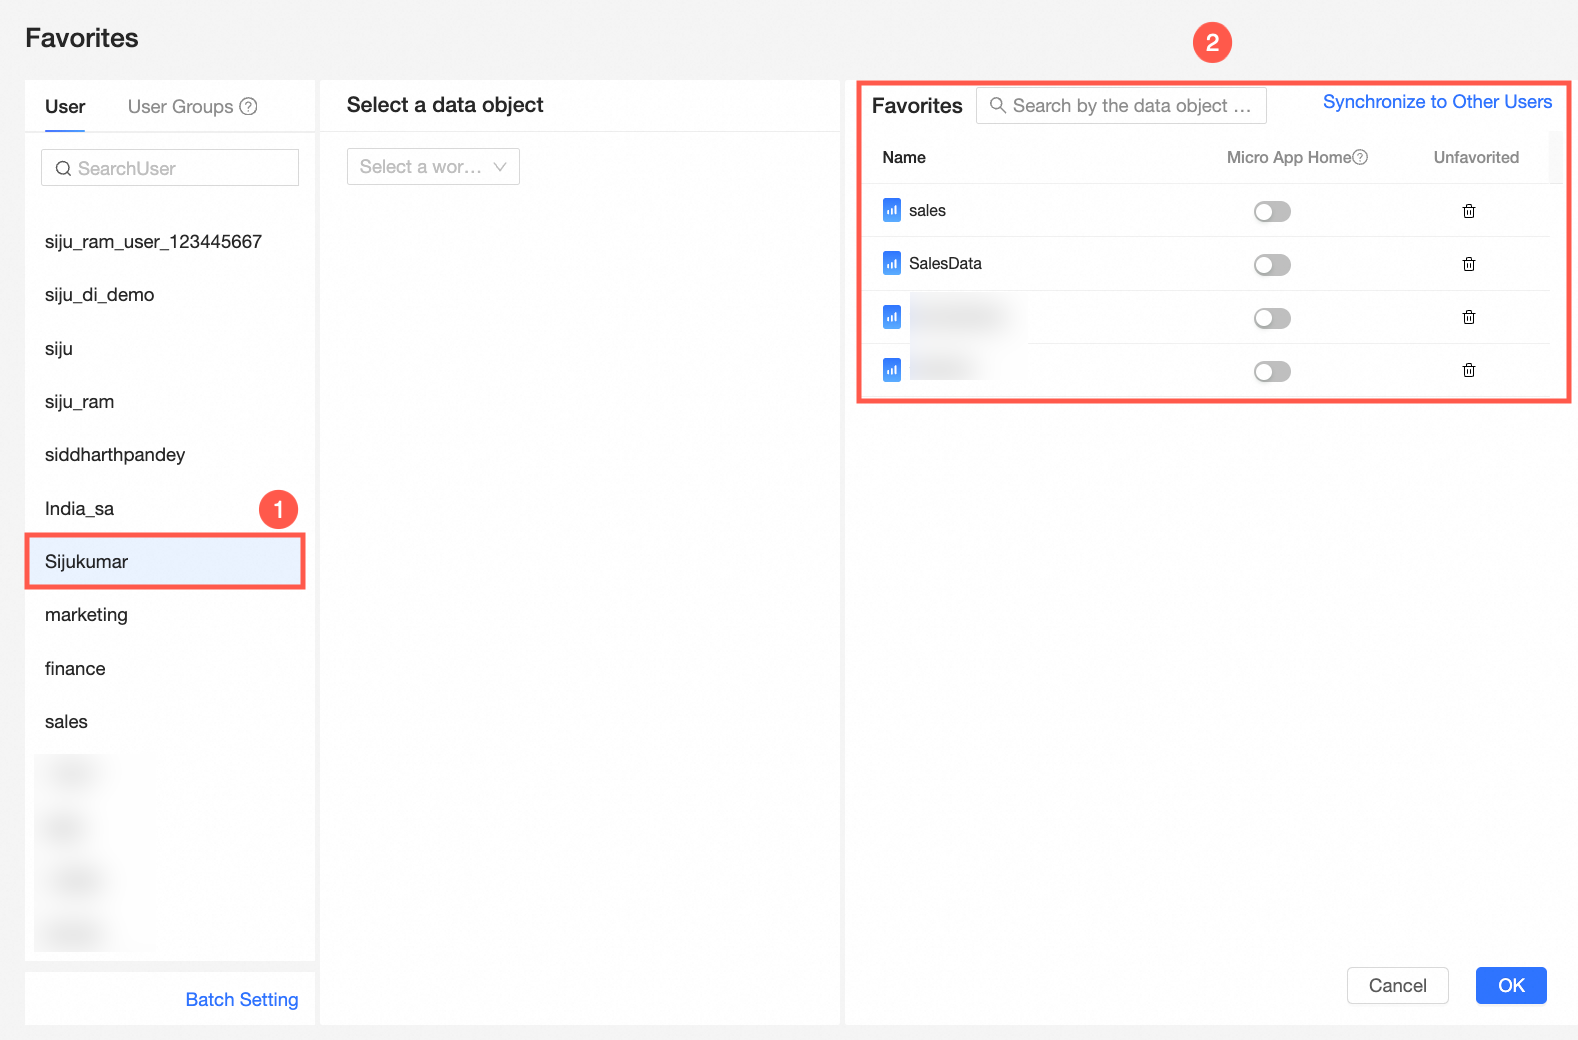
On the Favorites page, select the target user. You can view the data objects that are added to the favorites list in the Favorites list.
Add to favorites
Add favorites for users
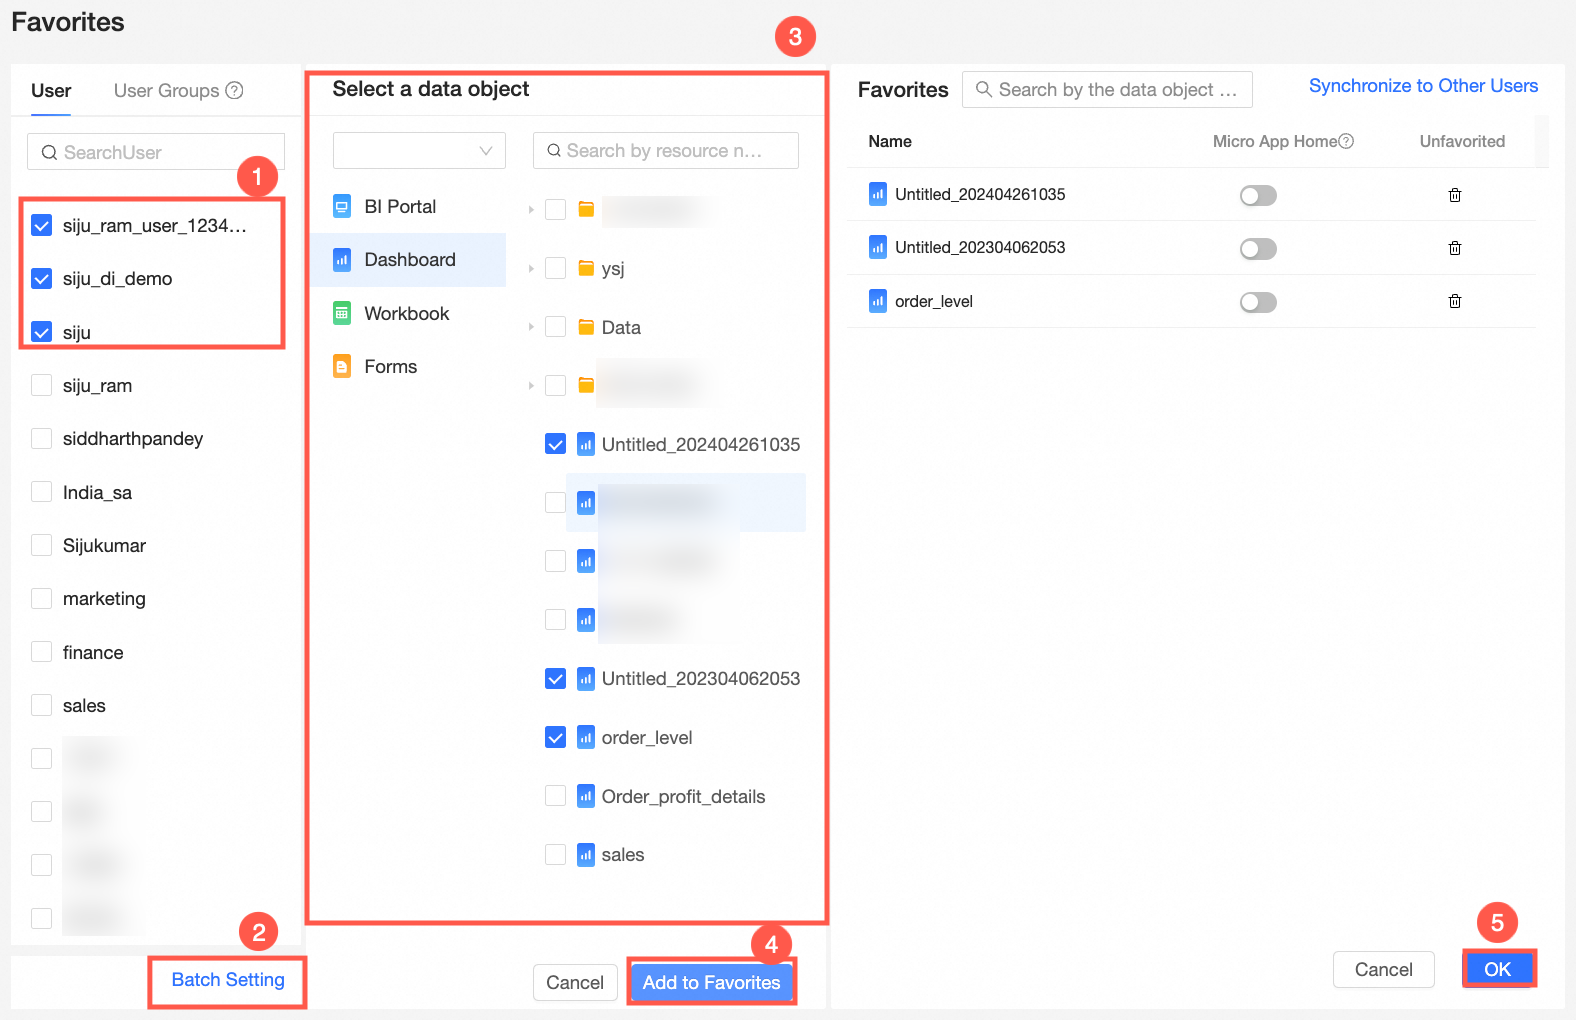
On the Favorites page, follow the instructions shown in the following figure to add a data object to the favorites list.

You can click Batch Settings to add favorites for multiple users at a time.
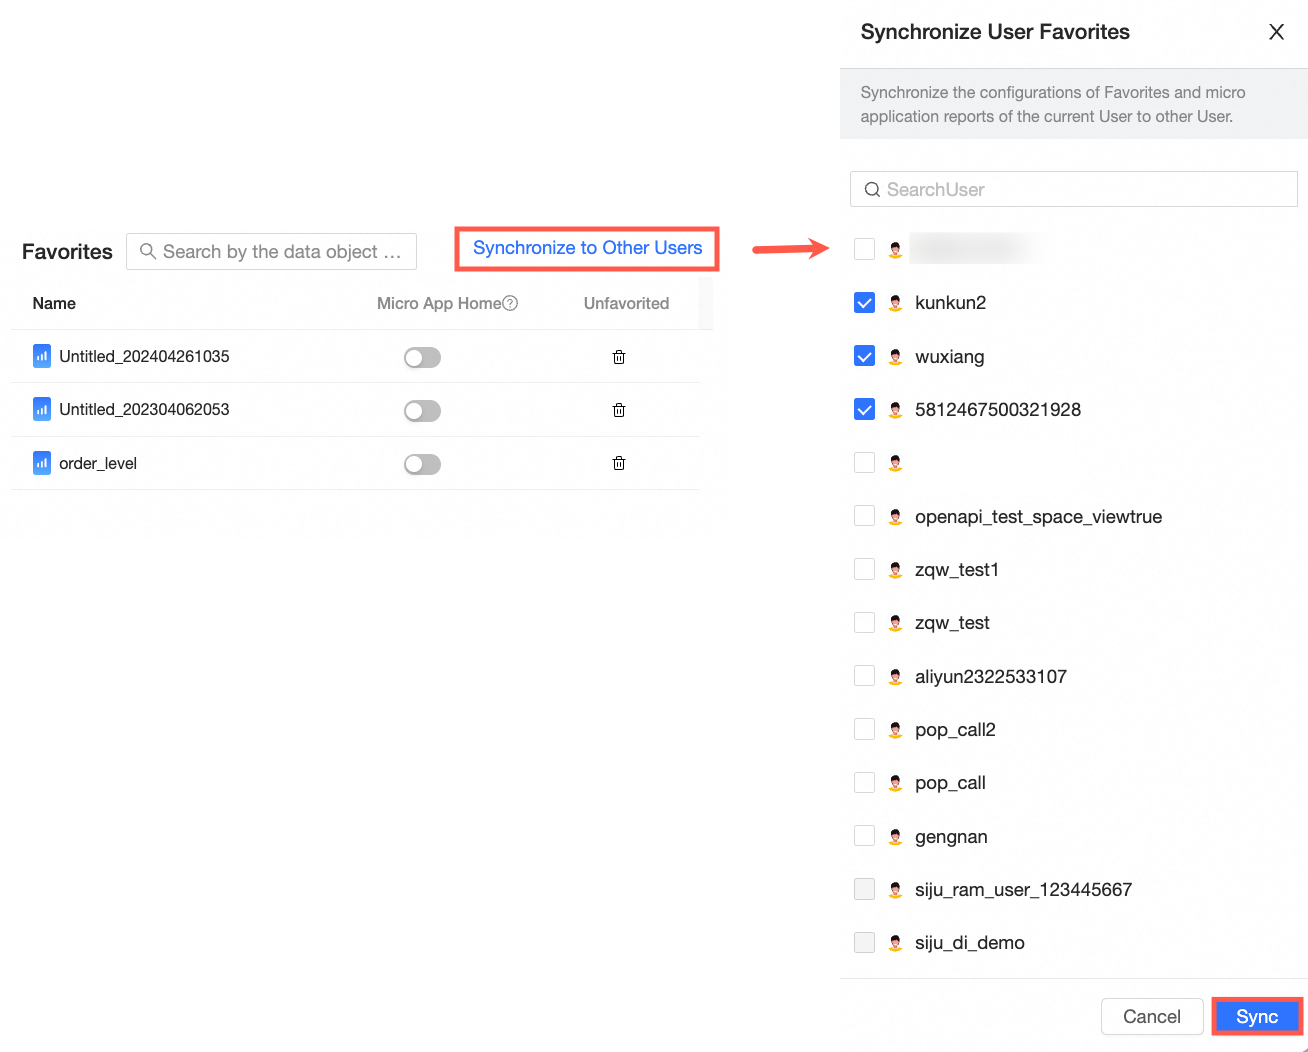
(Optional) Add favorites synchronously.
After you add a favorite, click Synchronize to Other Users.
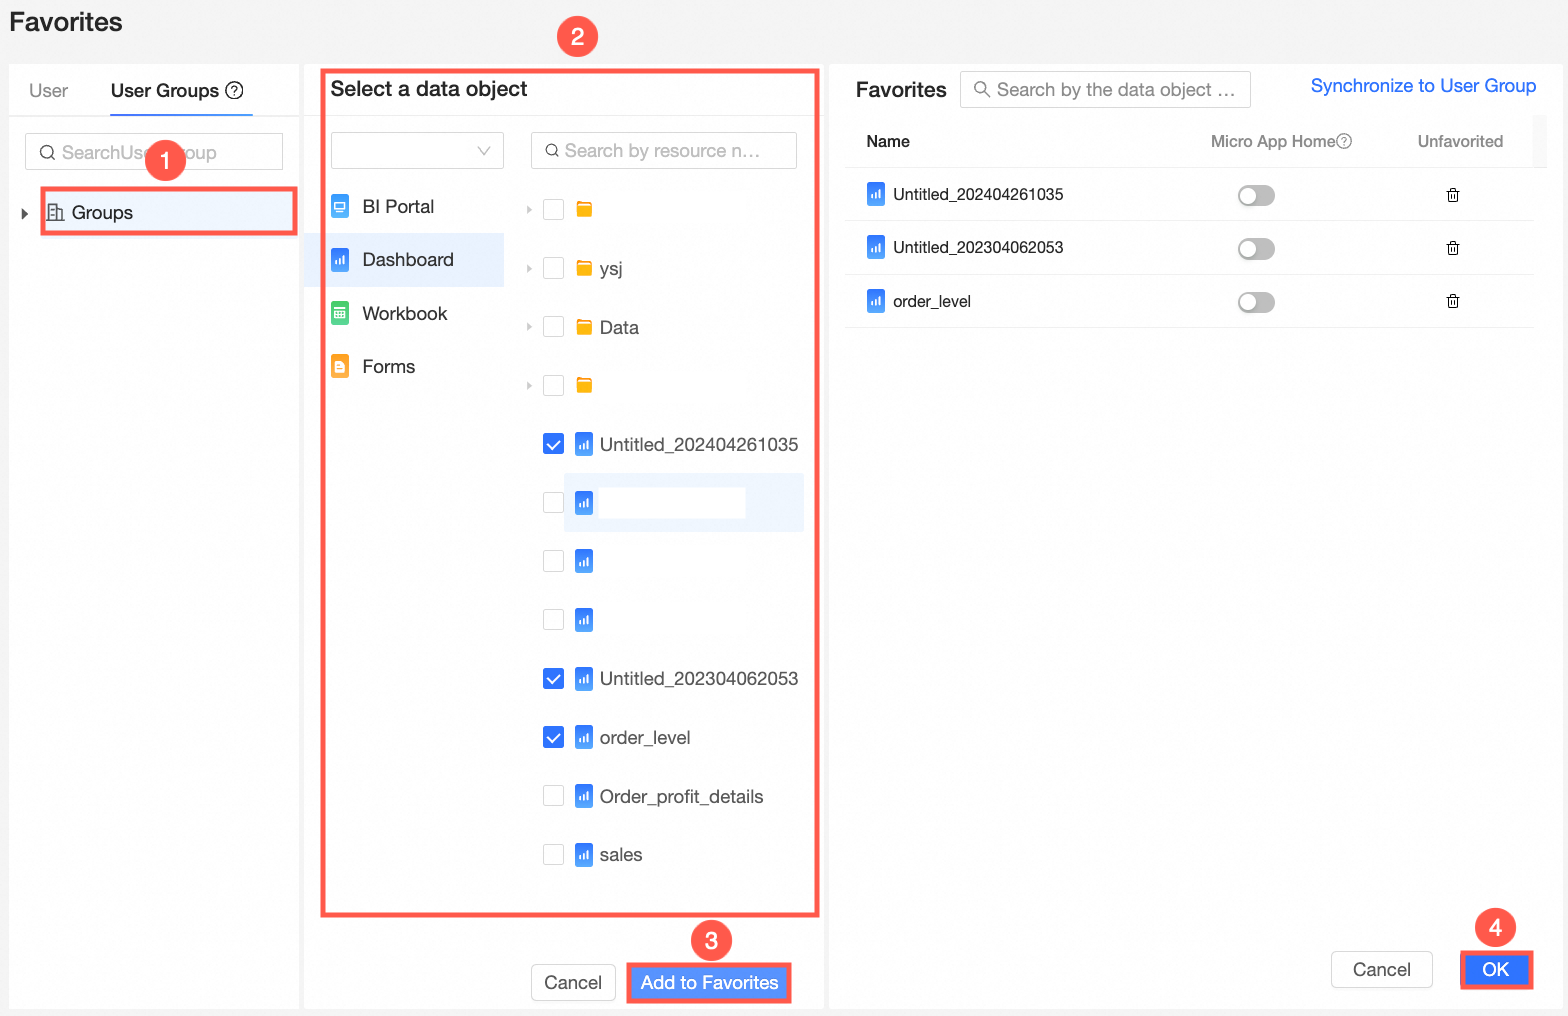
Add favorites to a user group
On the Favorites page, follow the instructions shown in the following figure to add a data object to the favorites list.
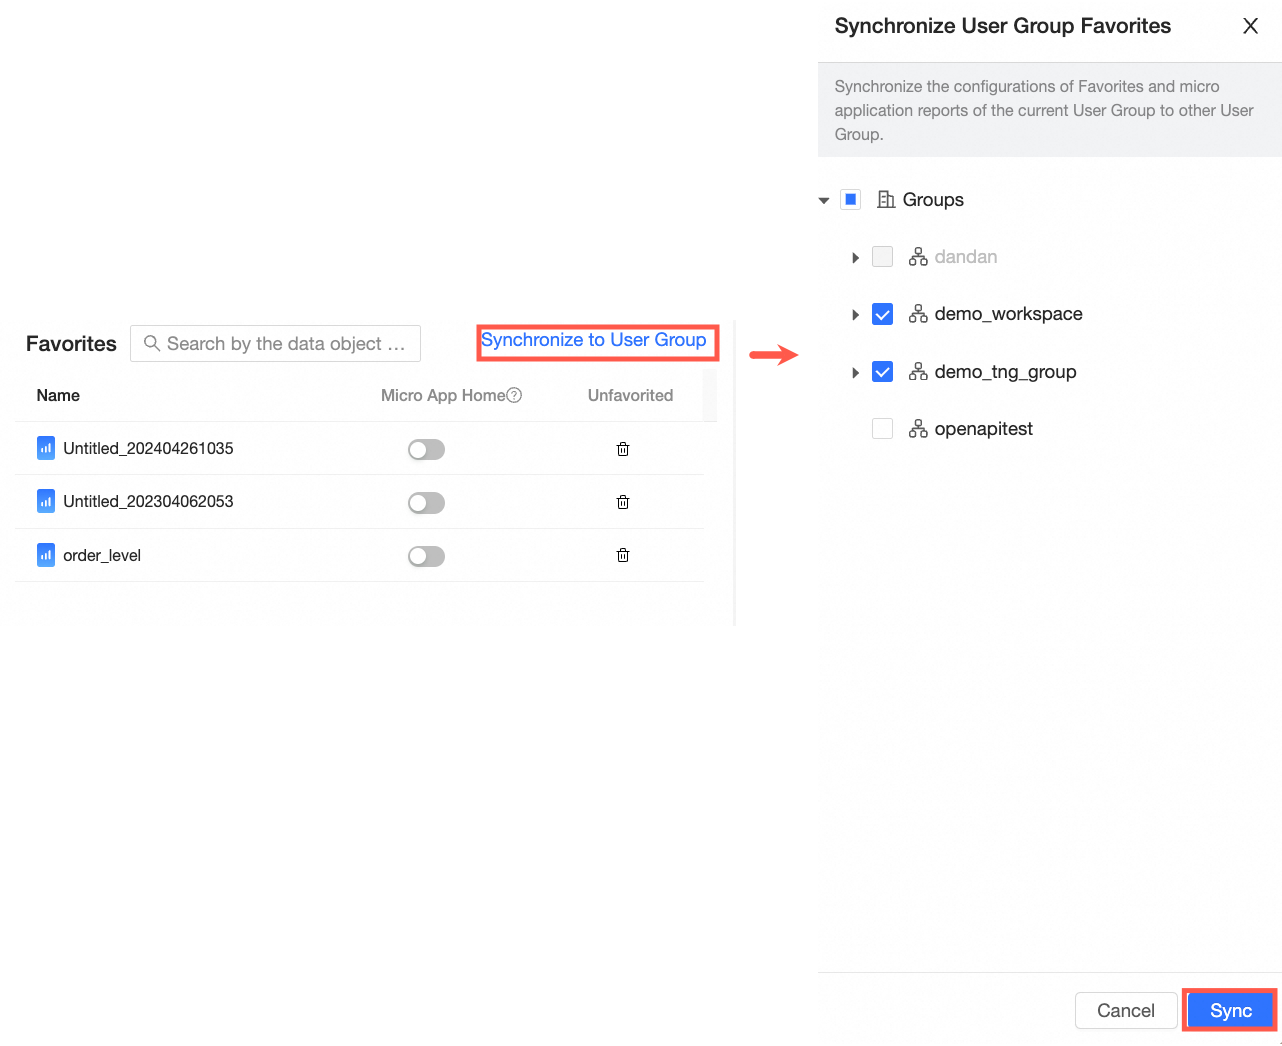
(Optional) Add favorites synchronously.
After you add the favorites list, you can click Synchronize to Other User Group to synchronize the favorites list to other user groups.
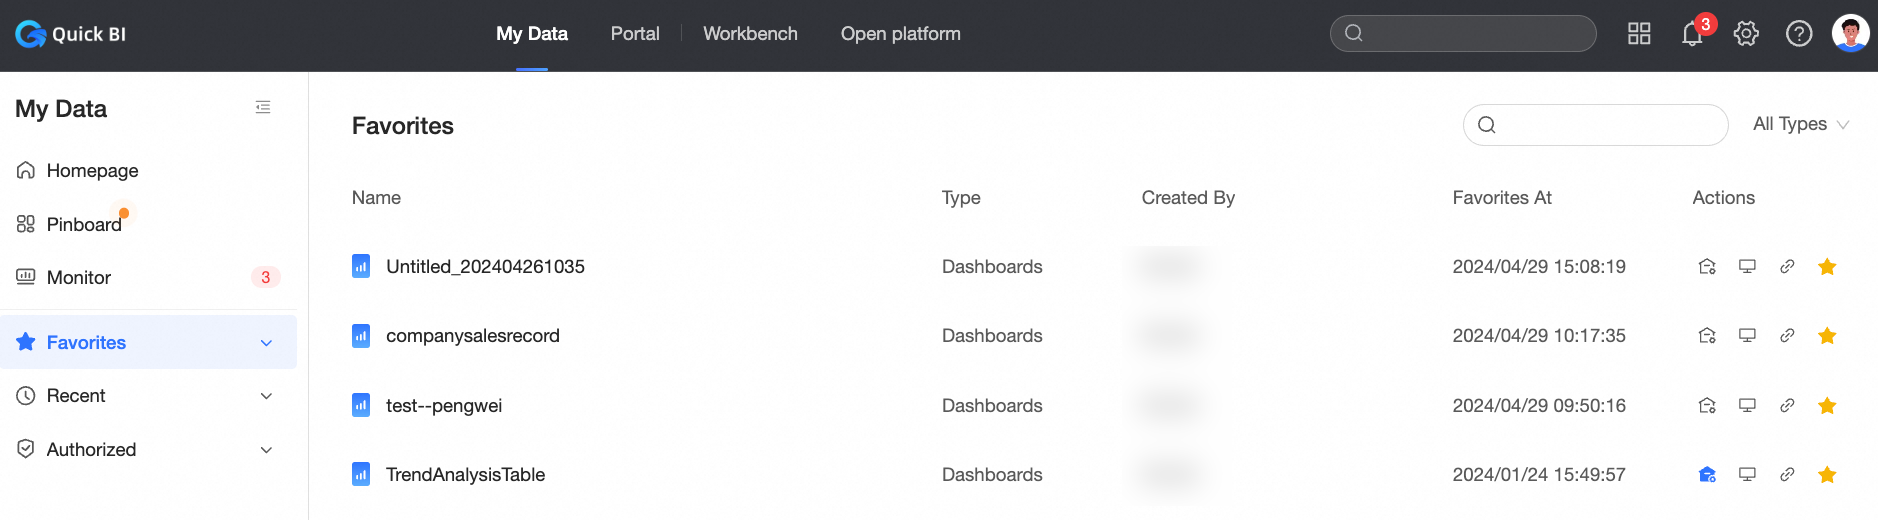
After you add a data object to favorites, you can view the data object in the favorites list.
You can in My Data-> My Collection. See the data object added.
Set the collection homepage
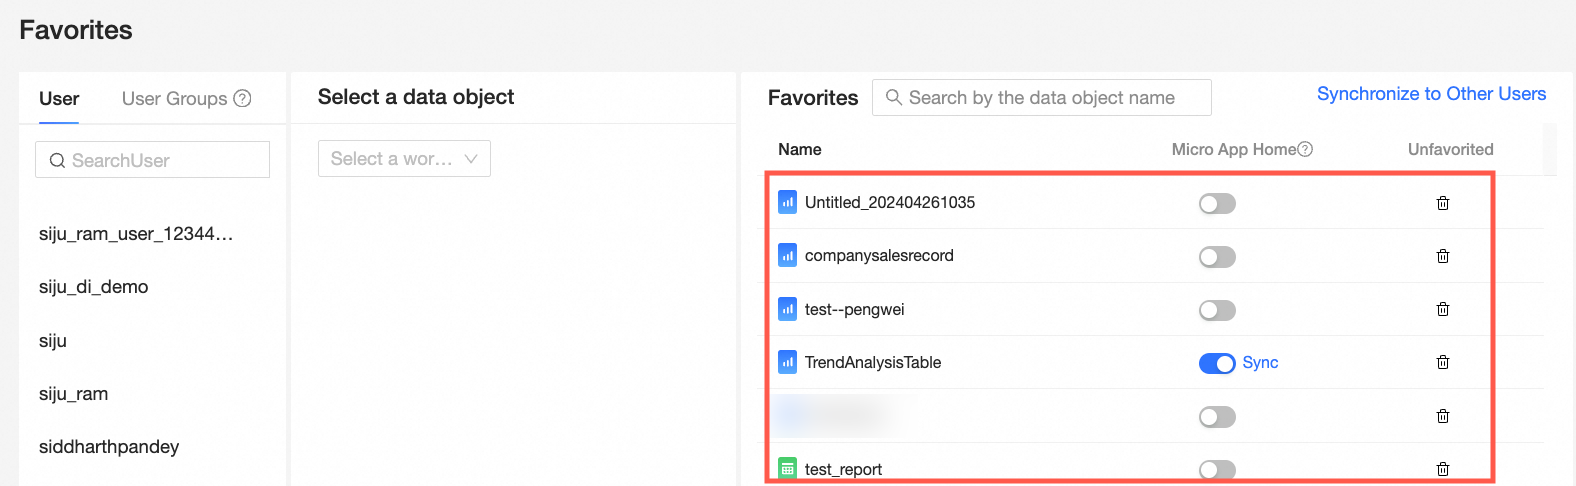
On the Favorites page, select the target user. You can view the added data object in the Favorites section.
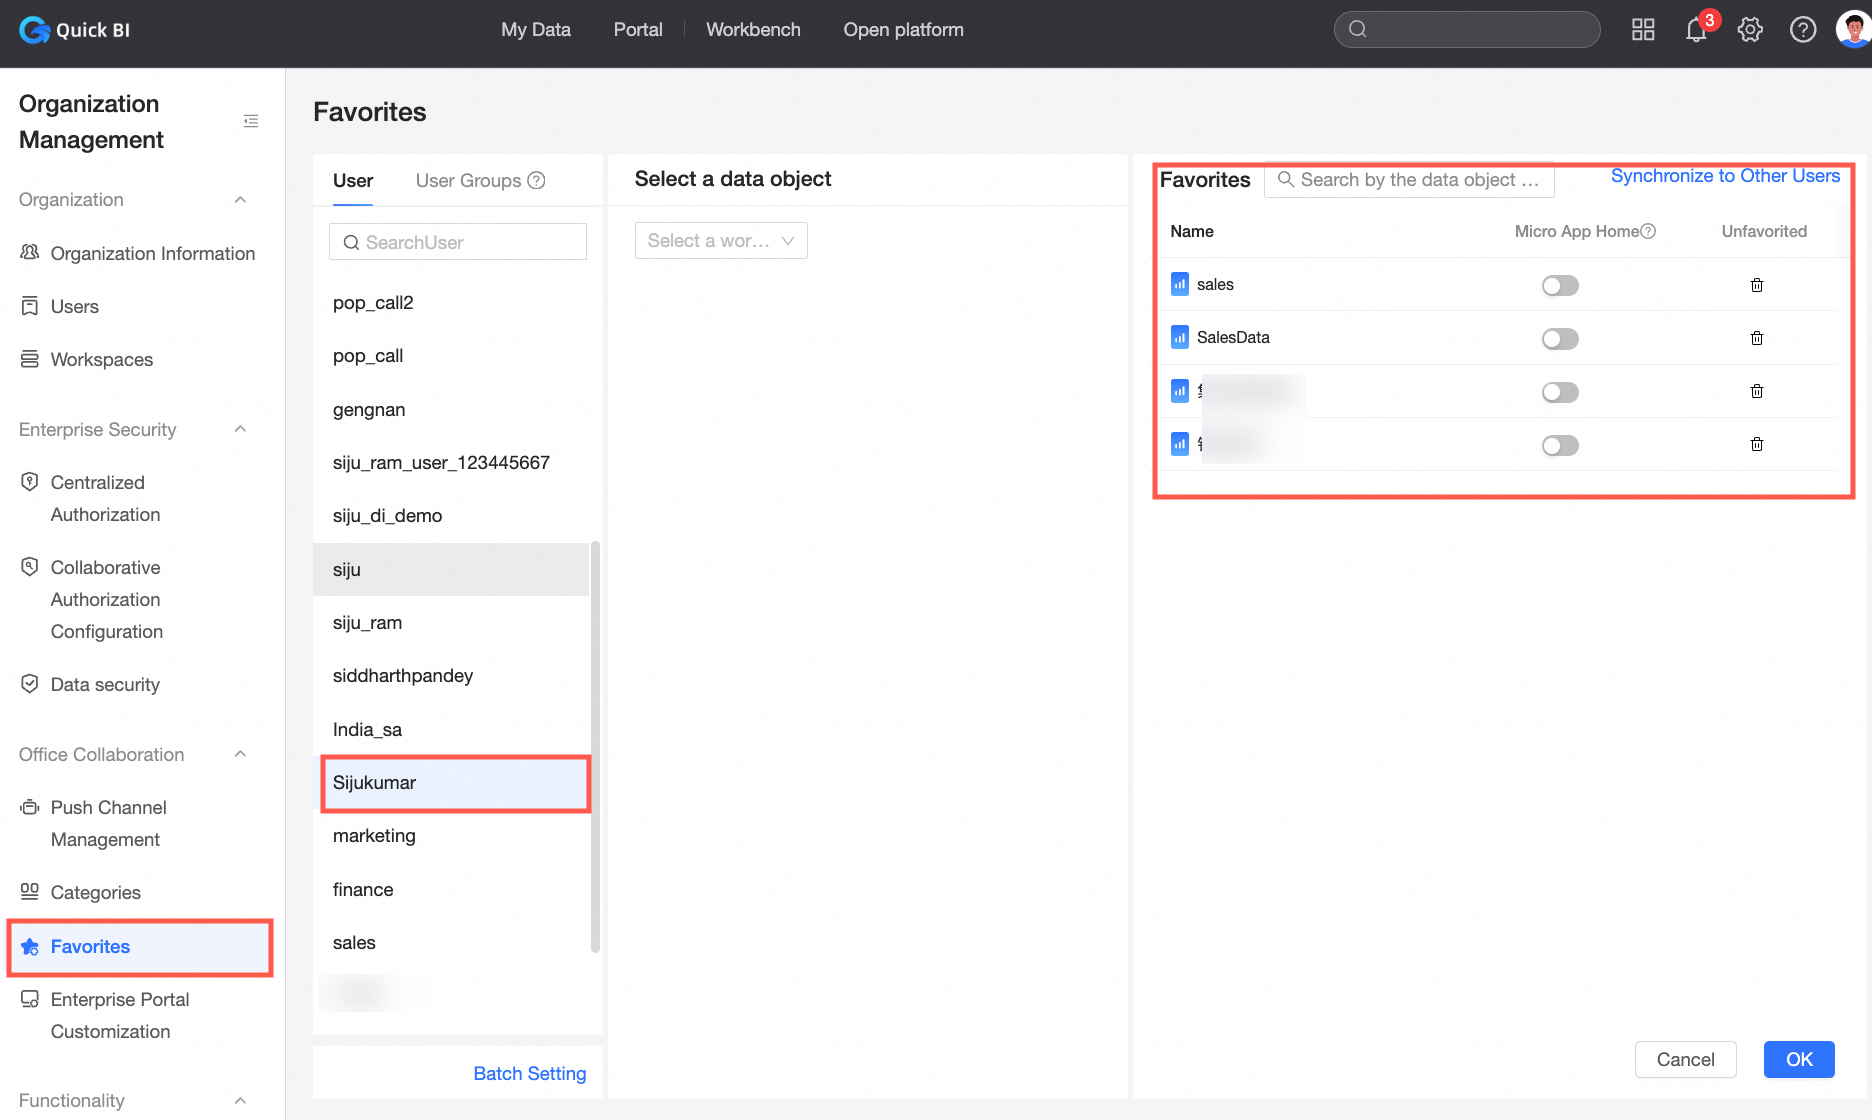
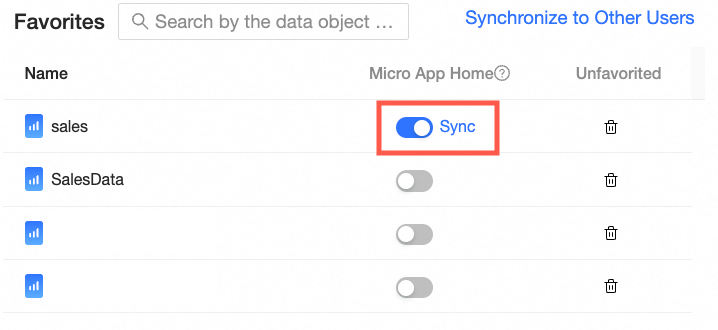
In the Favorites section, find the target object, turn on the Micro App Home switch, and then click OK.
At this point, the microapp home page for the current user is updated to this report.
Only one micro-application homepage can be configured:
If no homepage is configured for the microapp, turn on the Micro App Homepage switch for the target data object.
If a homepage has been configured for the current microapp, the homepage of the microapp is replaced after you turn on Microapp Homepage for the target data object.
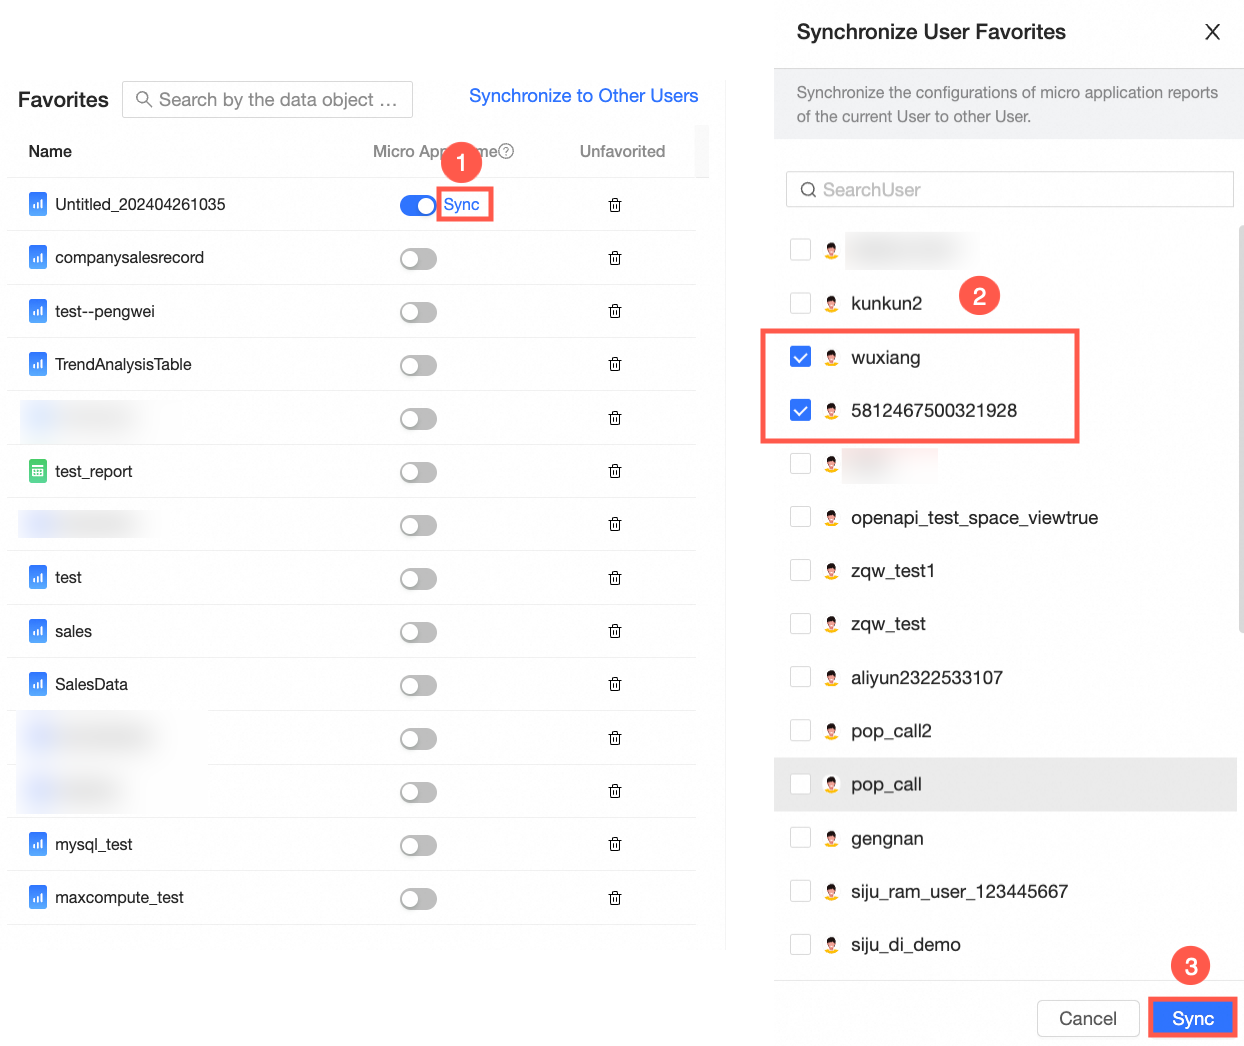
Synchronize settings on the collection homepage.
If another user still needs to set the data object as the microapplication homepage, follow the instructions in the following figure to quickly set the microapplication report of the current user to the other user.