You can create download tasks for a self-service data retrieval and manage them from the task list or edit page.
Access the Self-service Data Retrieval Page
-
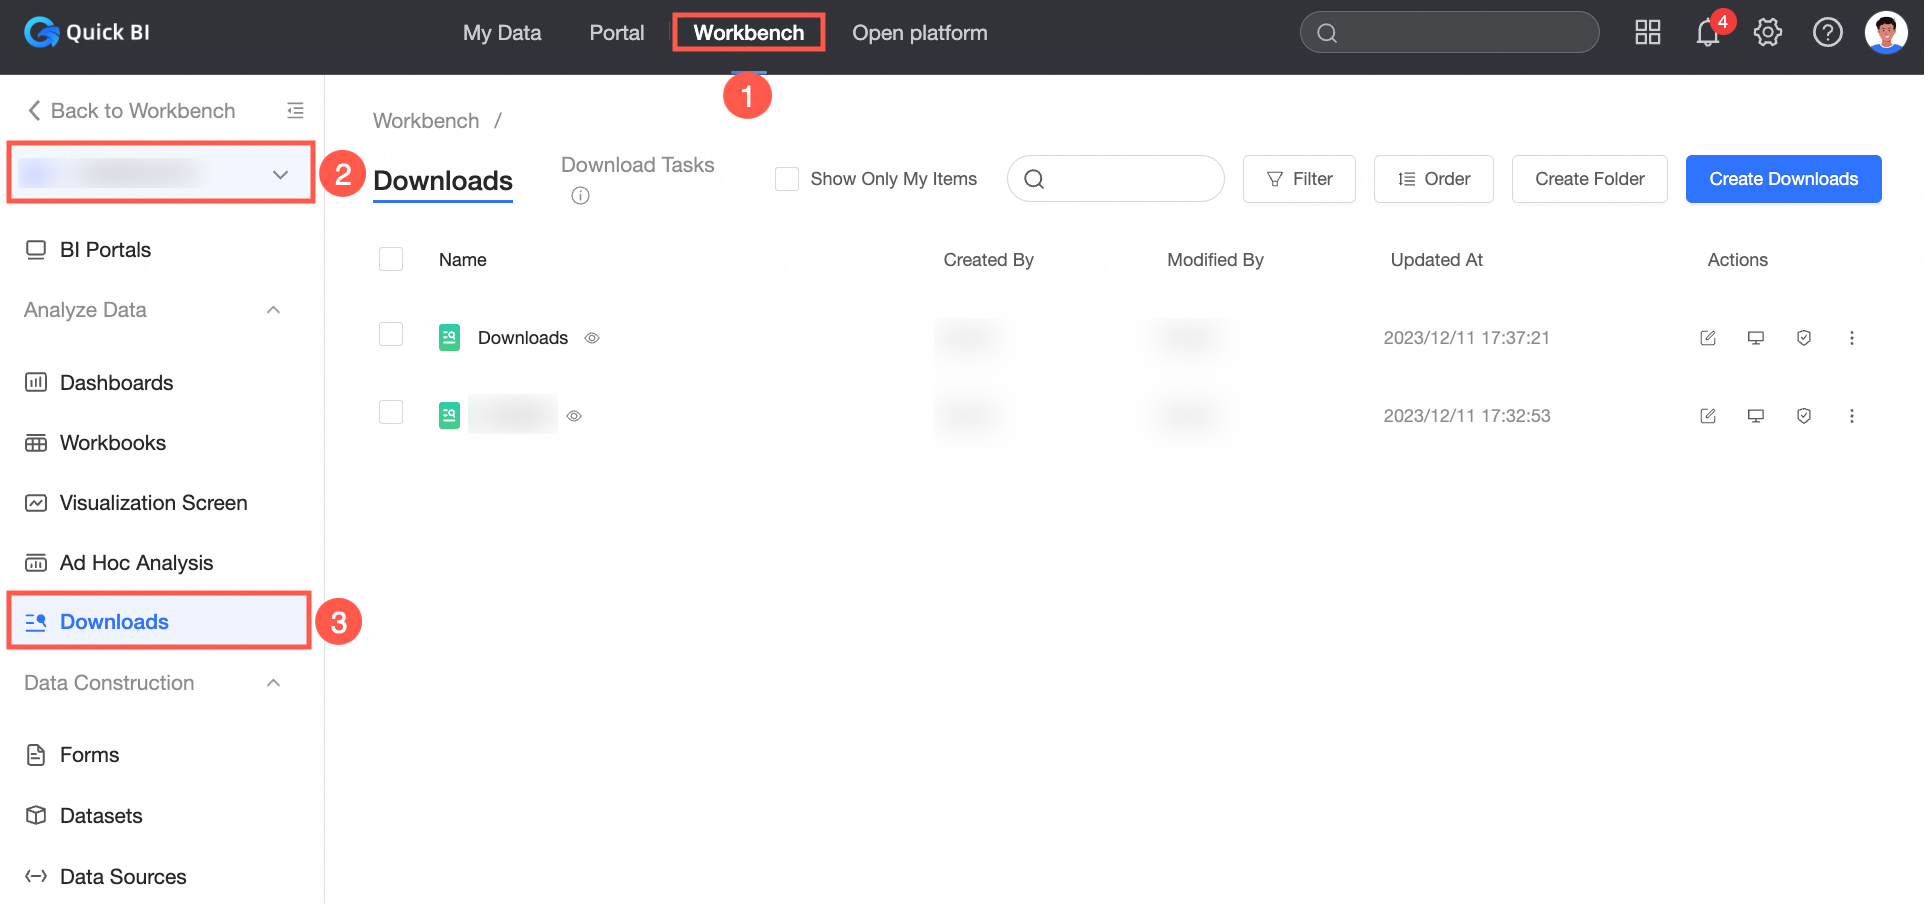
Log in to the Quick BI console.
-
On the Quick BI homepage, click workbench.
-
In the left-side navigation pane, click self-service data retrieval.
Create a Data Retrieval Task
-
Create a task on the edit page
-
Click the self-service data retrieval that you want to use.
-
On the self-service data retrieval edit page, create a data retrieval task using one of the following methods:
-
Method 1: Click the
 icon below the task list to create a data retrieval task.
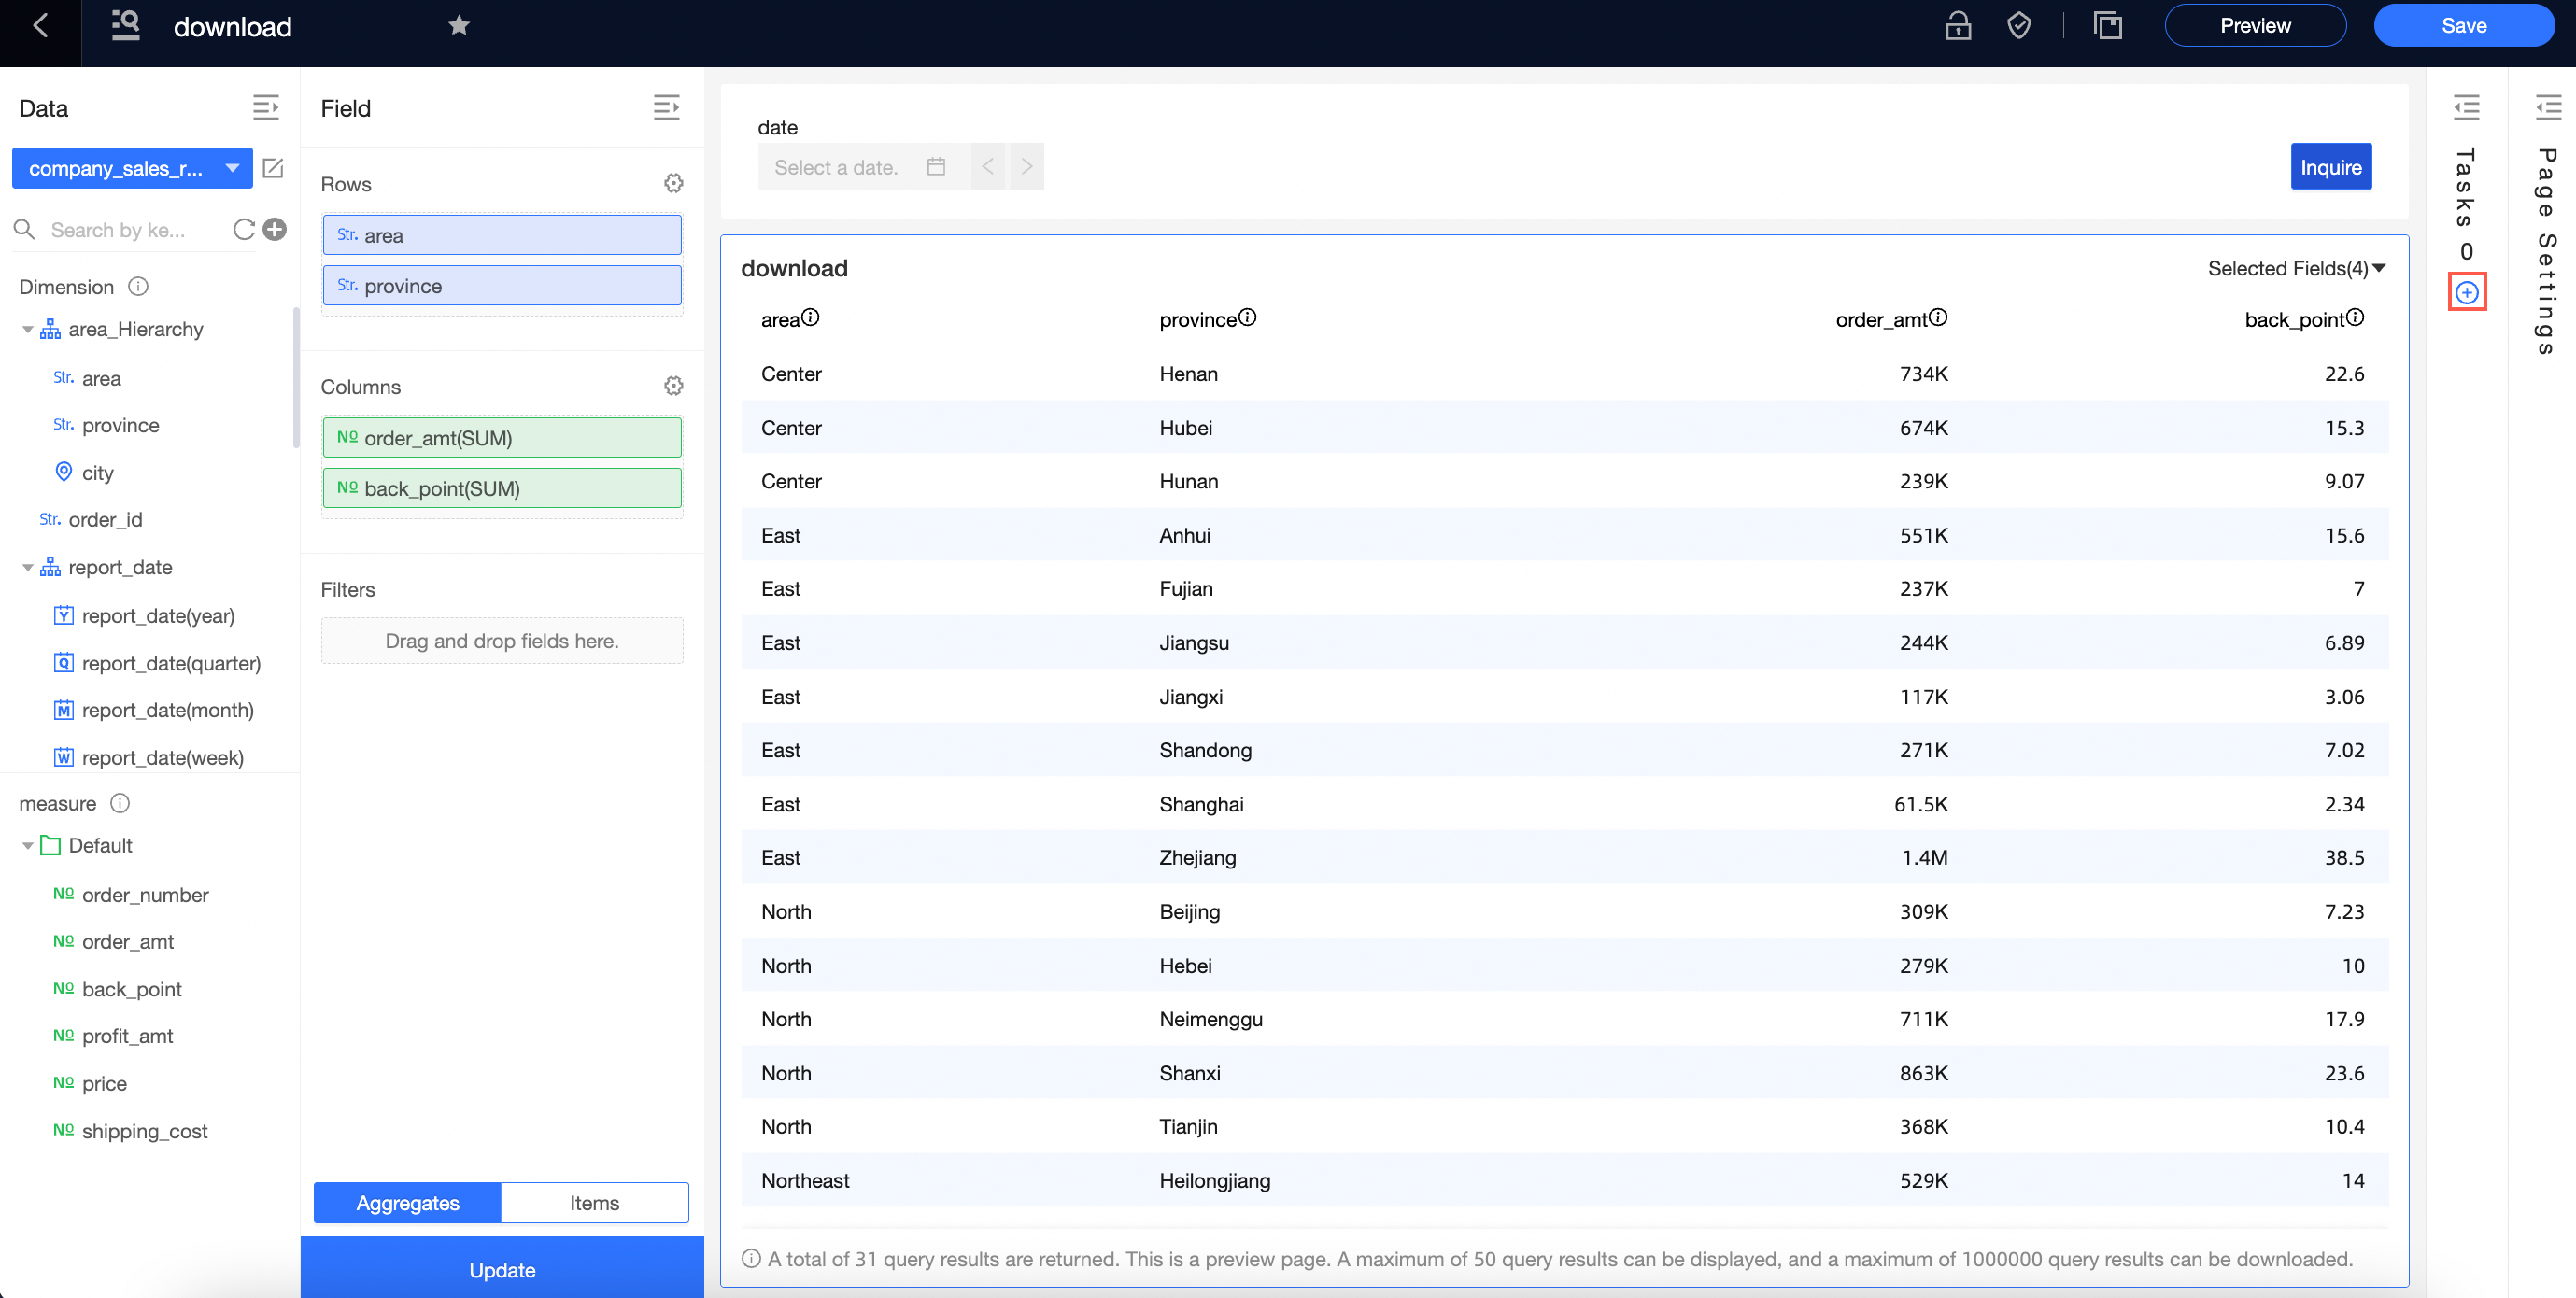
-
Method 2: Click the
 icon above the task list to open the task list, and then click Create Data Retrieval Task.
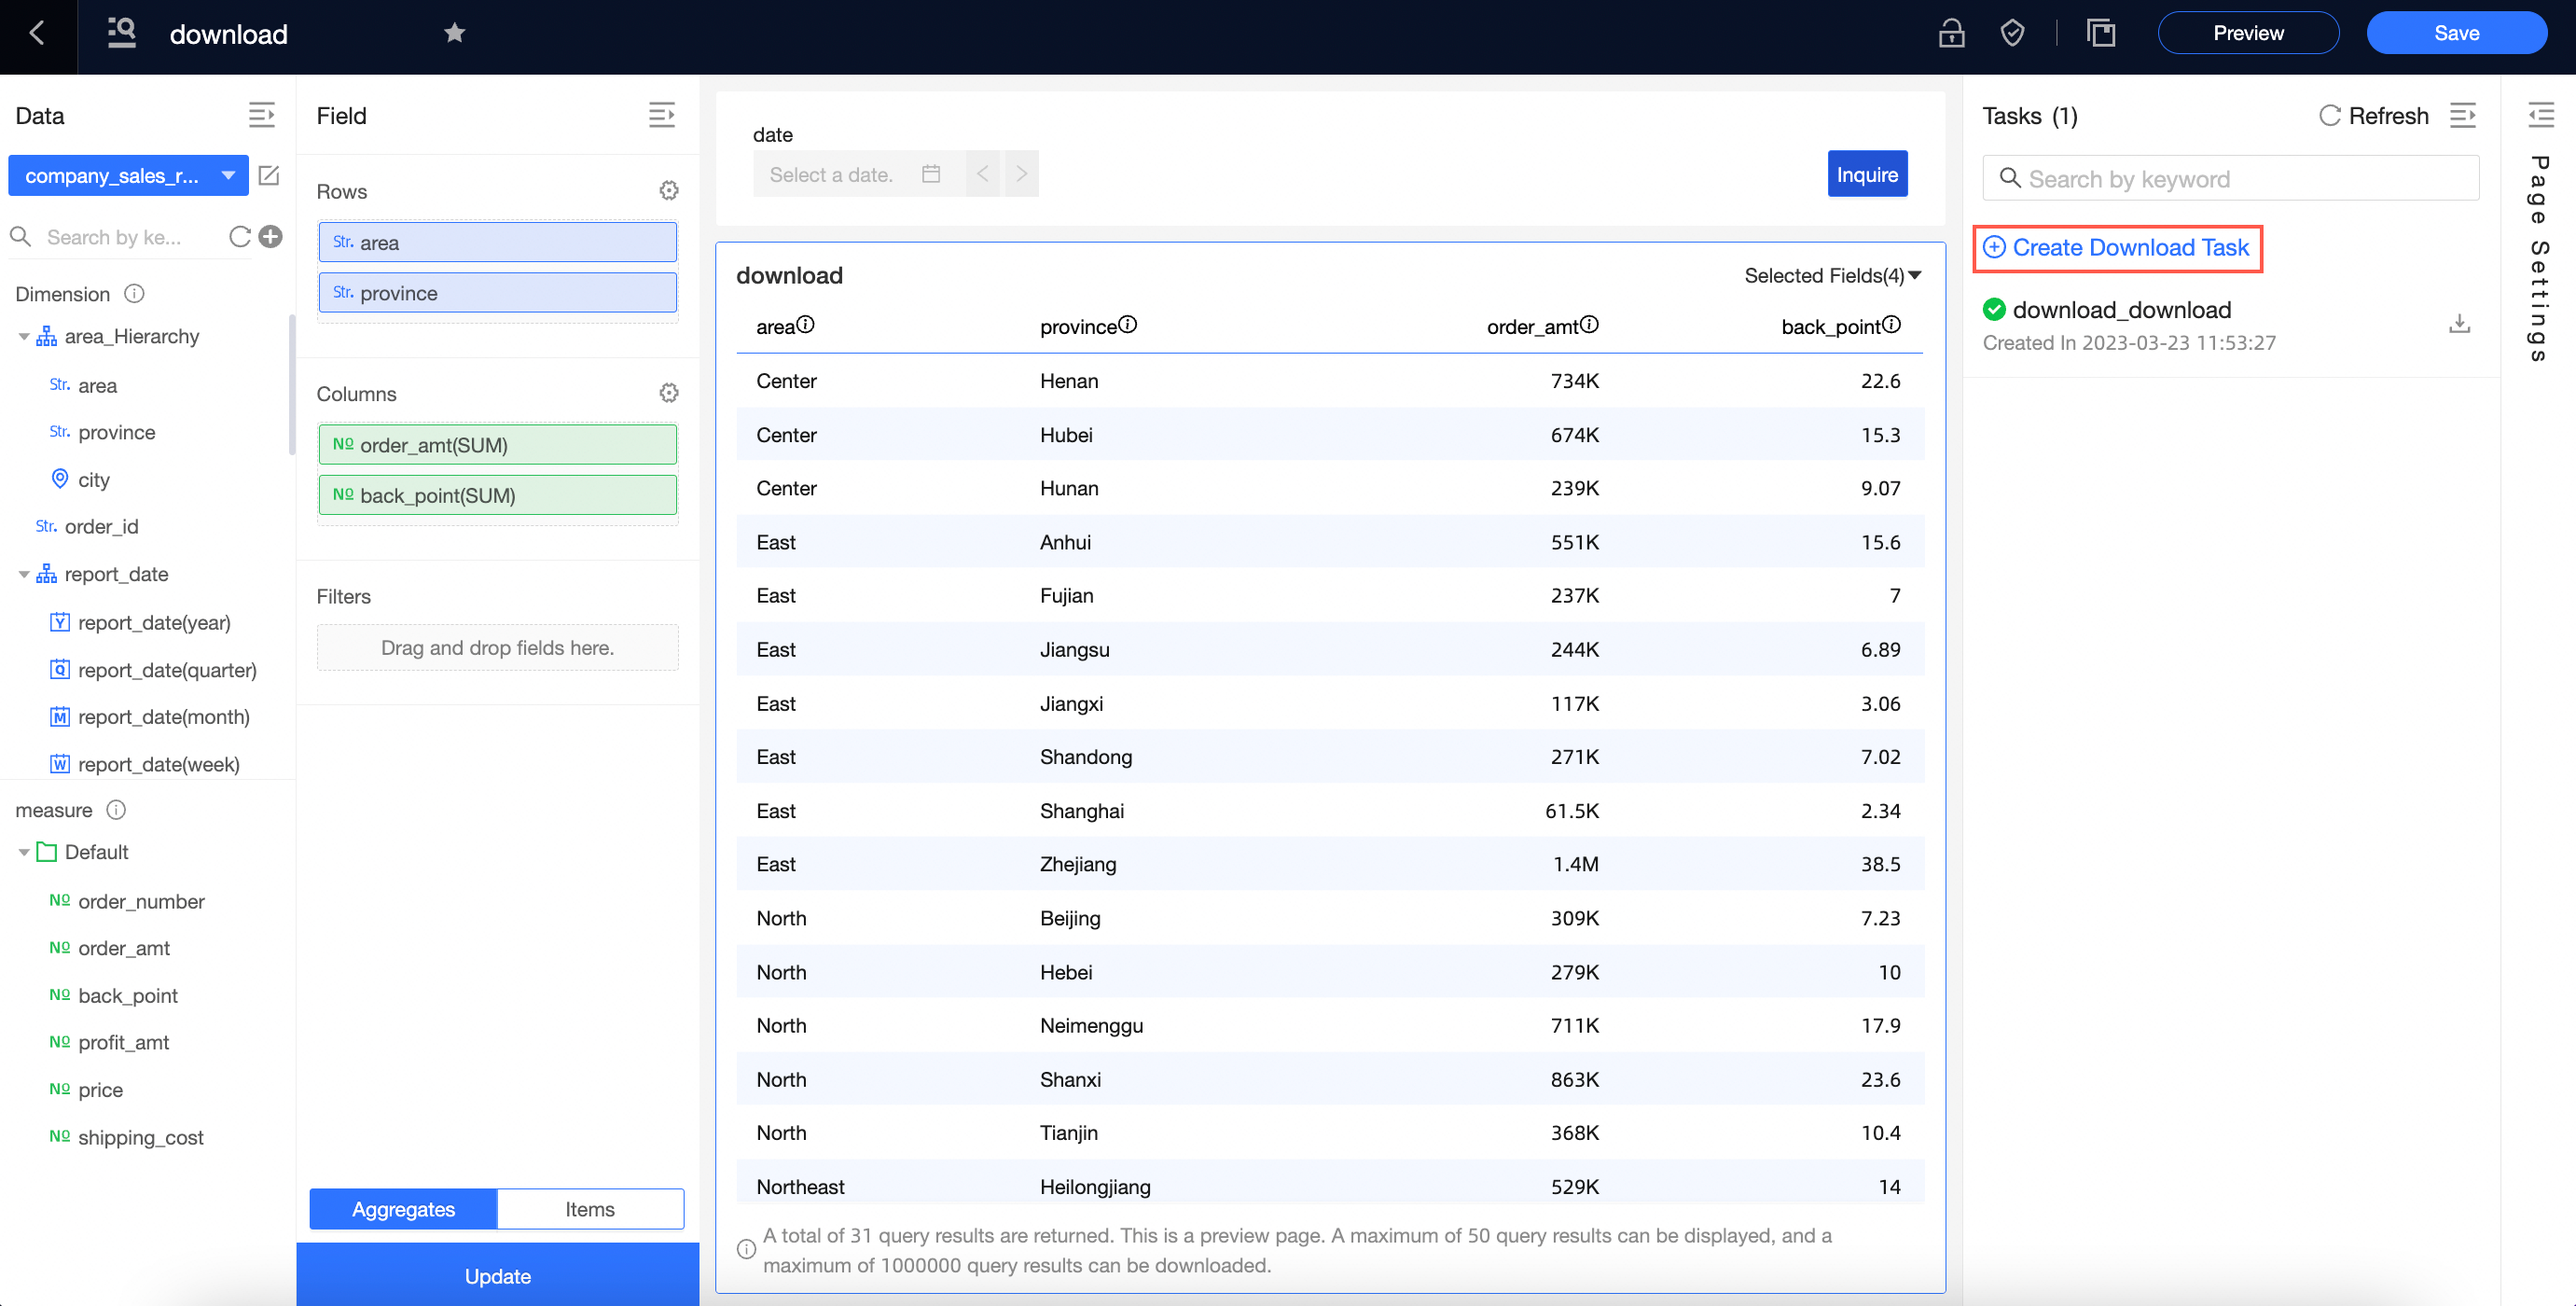
-
-
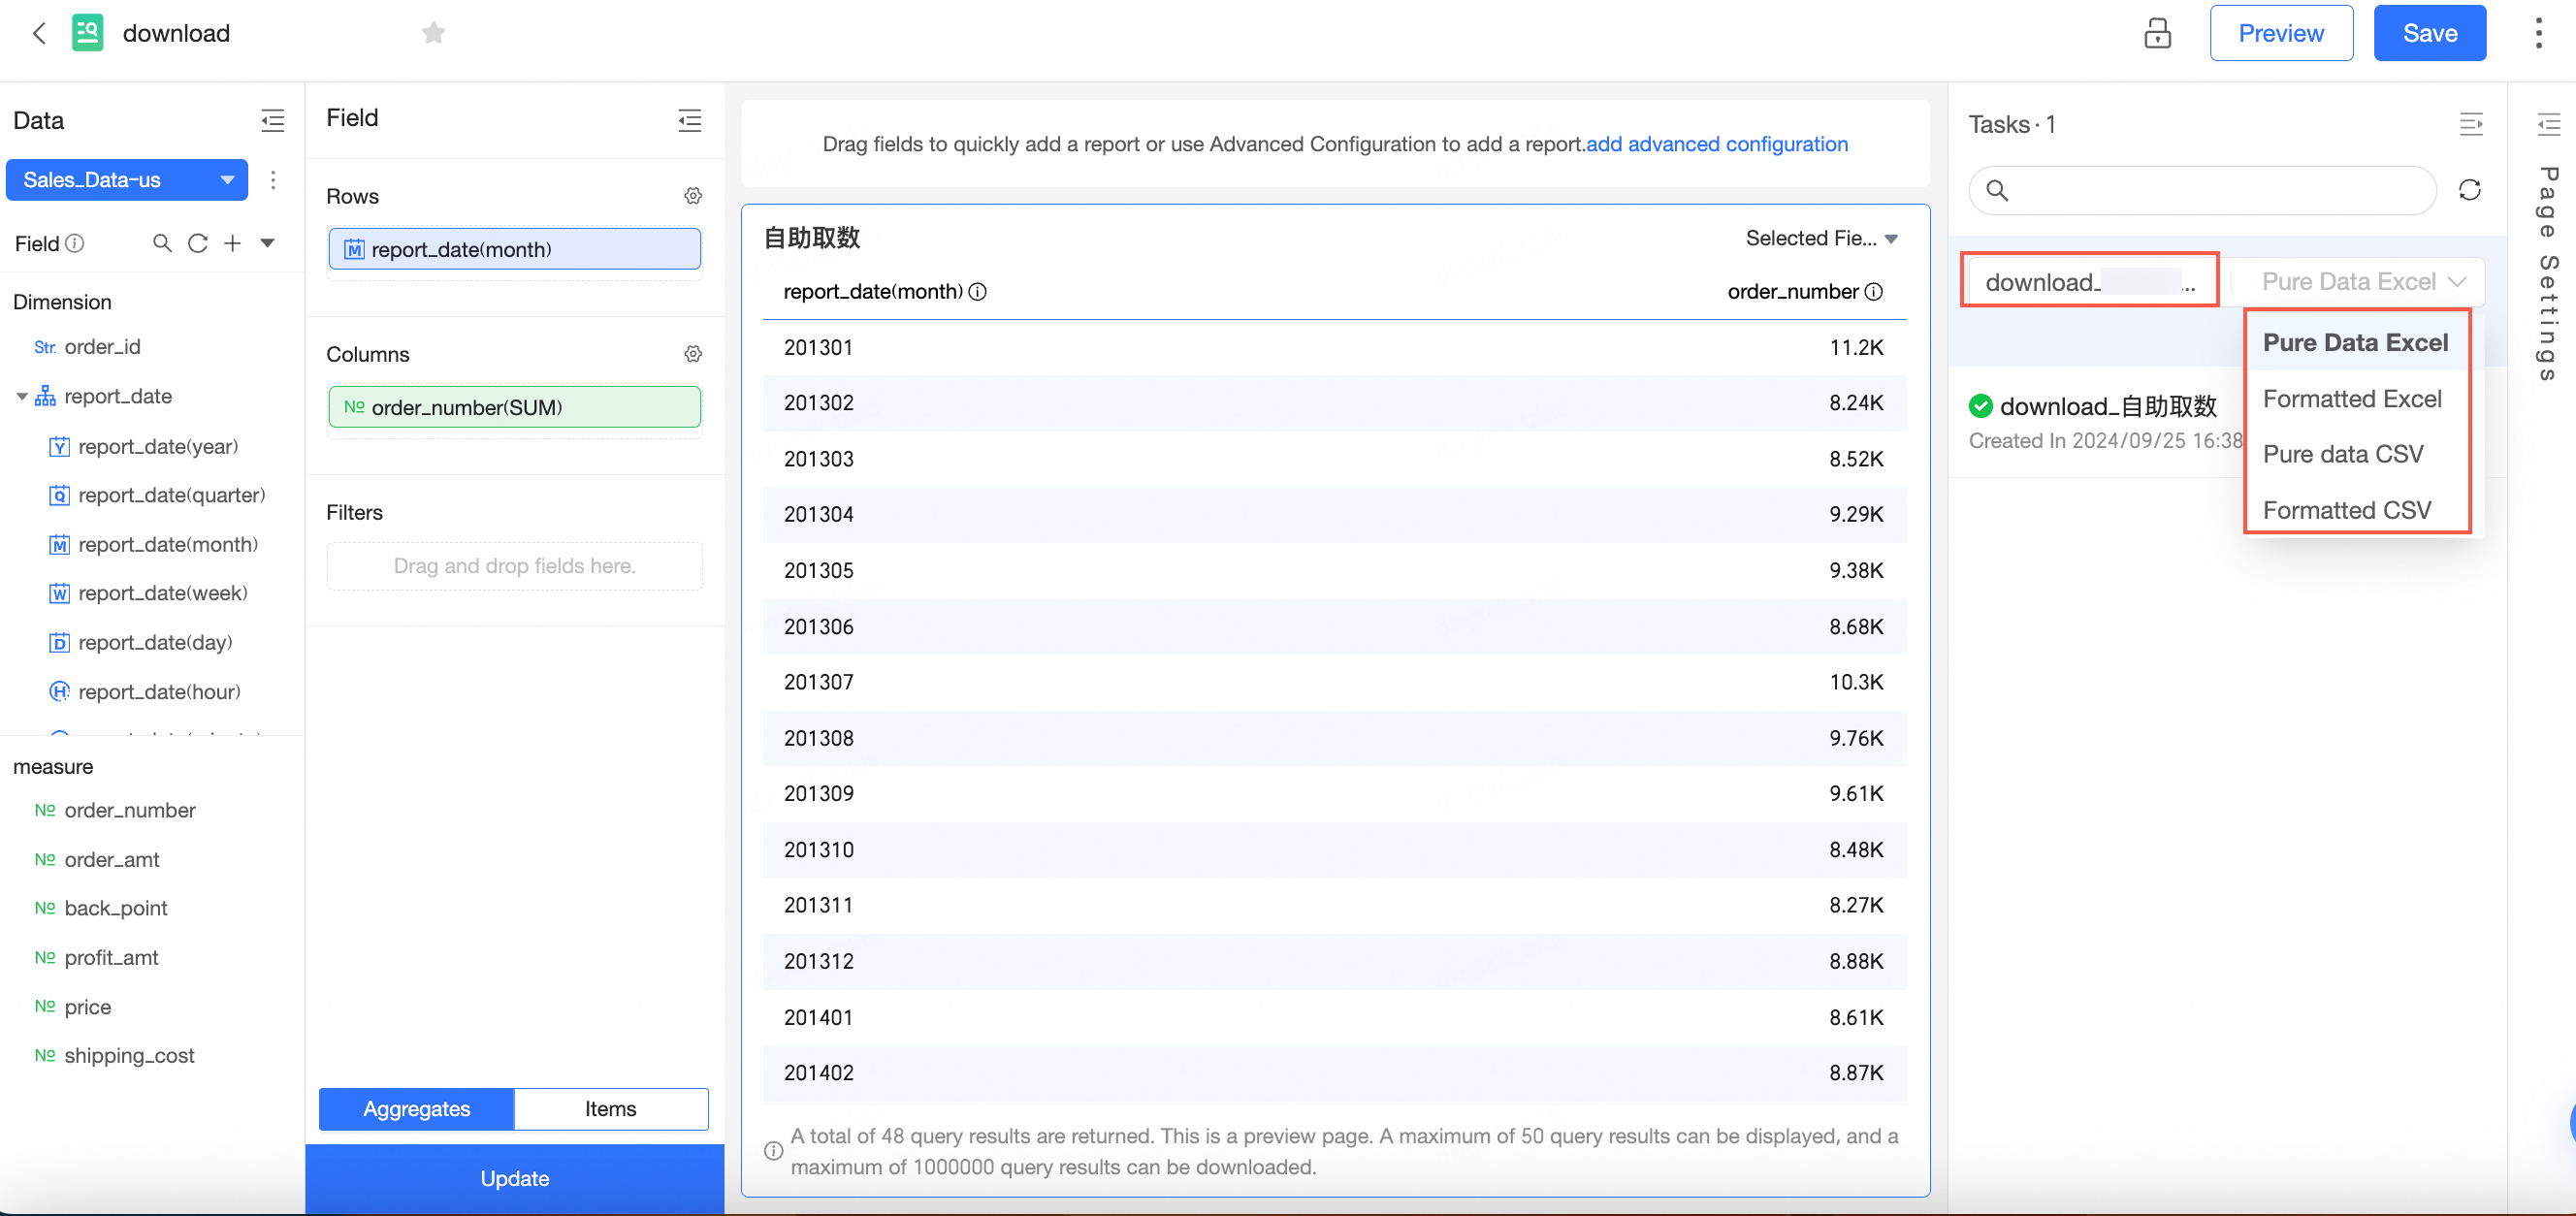
Set a name for the data retrieval task and specify the export format. The supported export formats are Excel with raw data, formatted Excel, CSV with raw data, and formatted CSV.
-
Click OK.
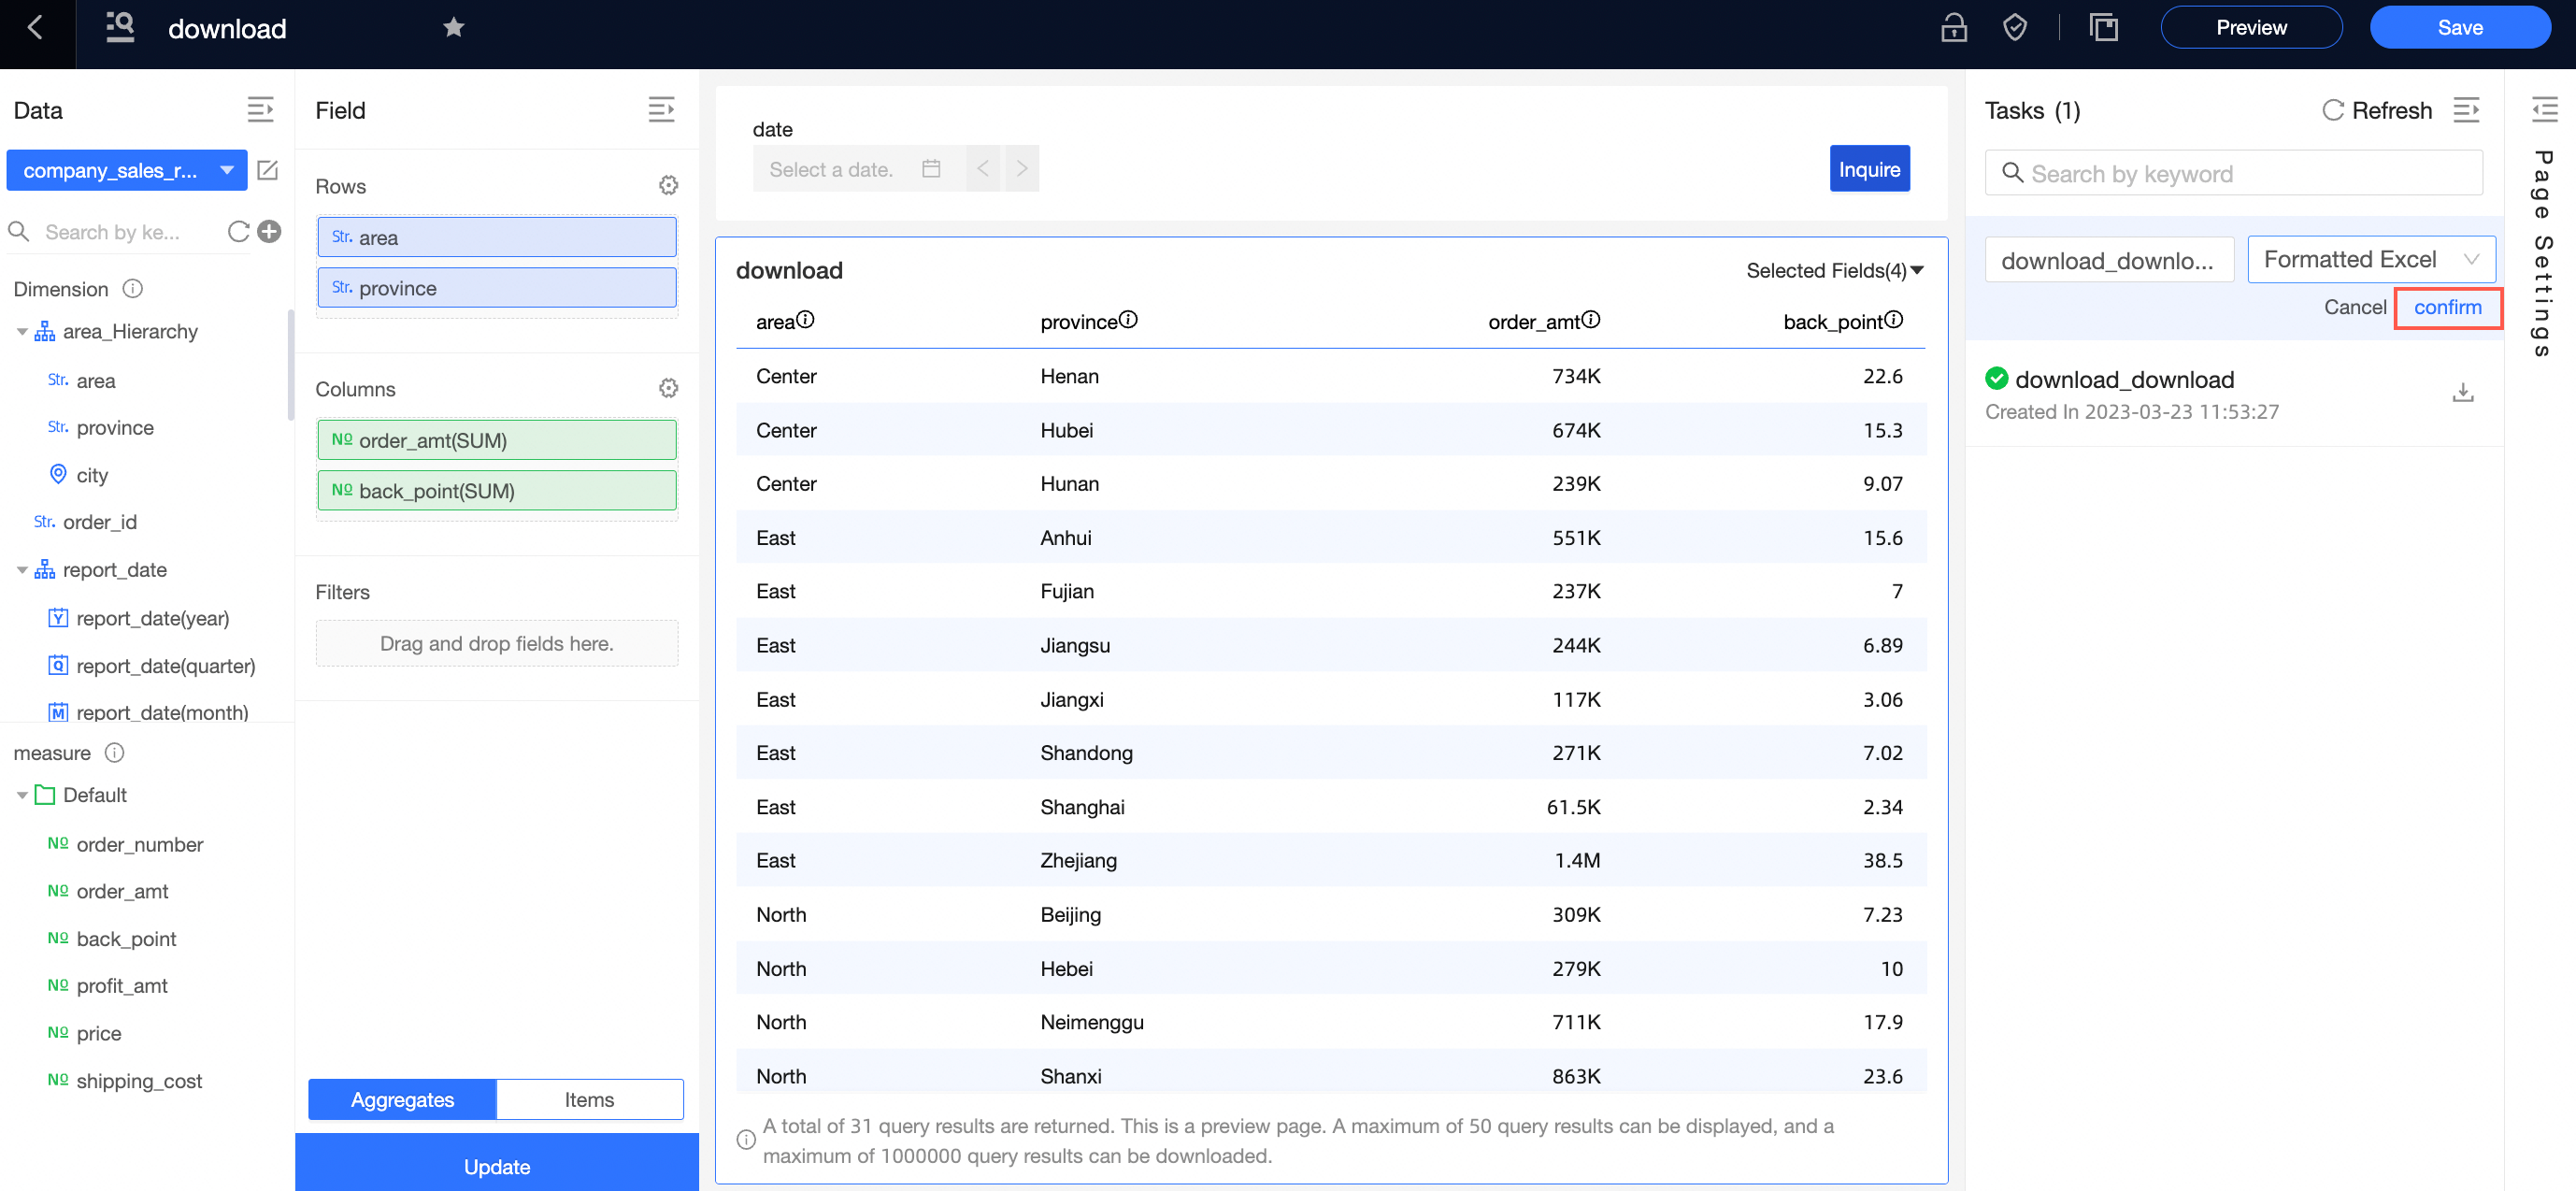 The data retrieval task for the current self-service data retrieval appears in the task list.
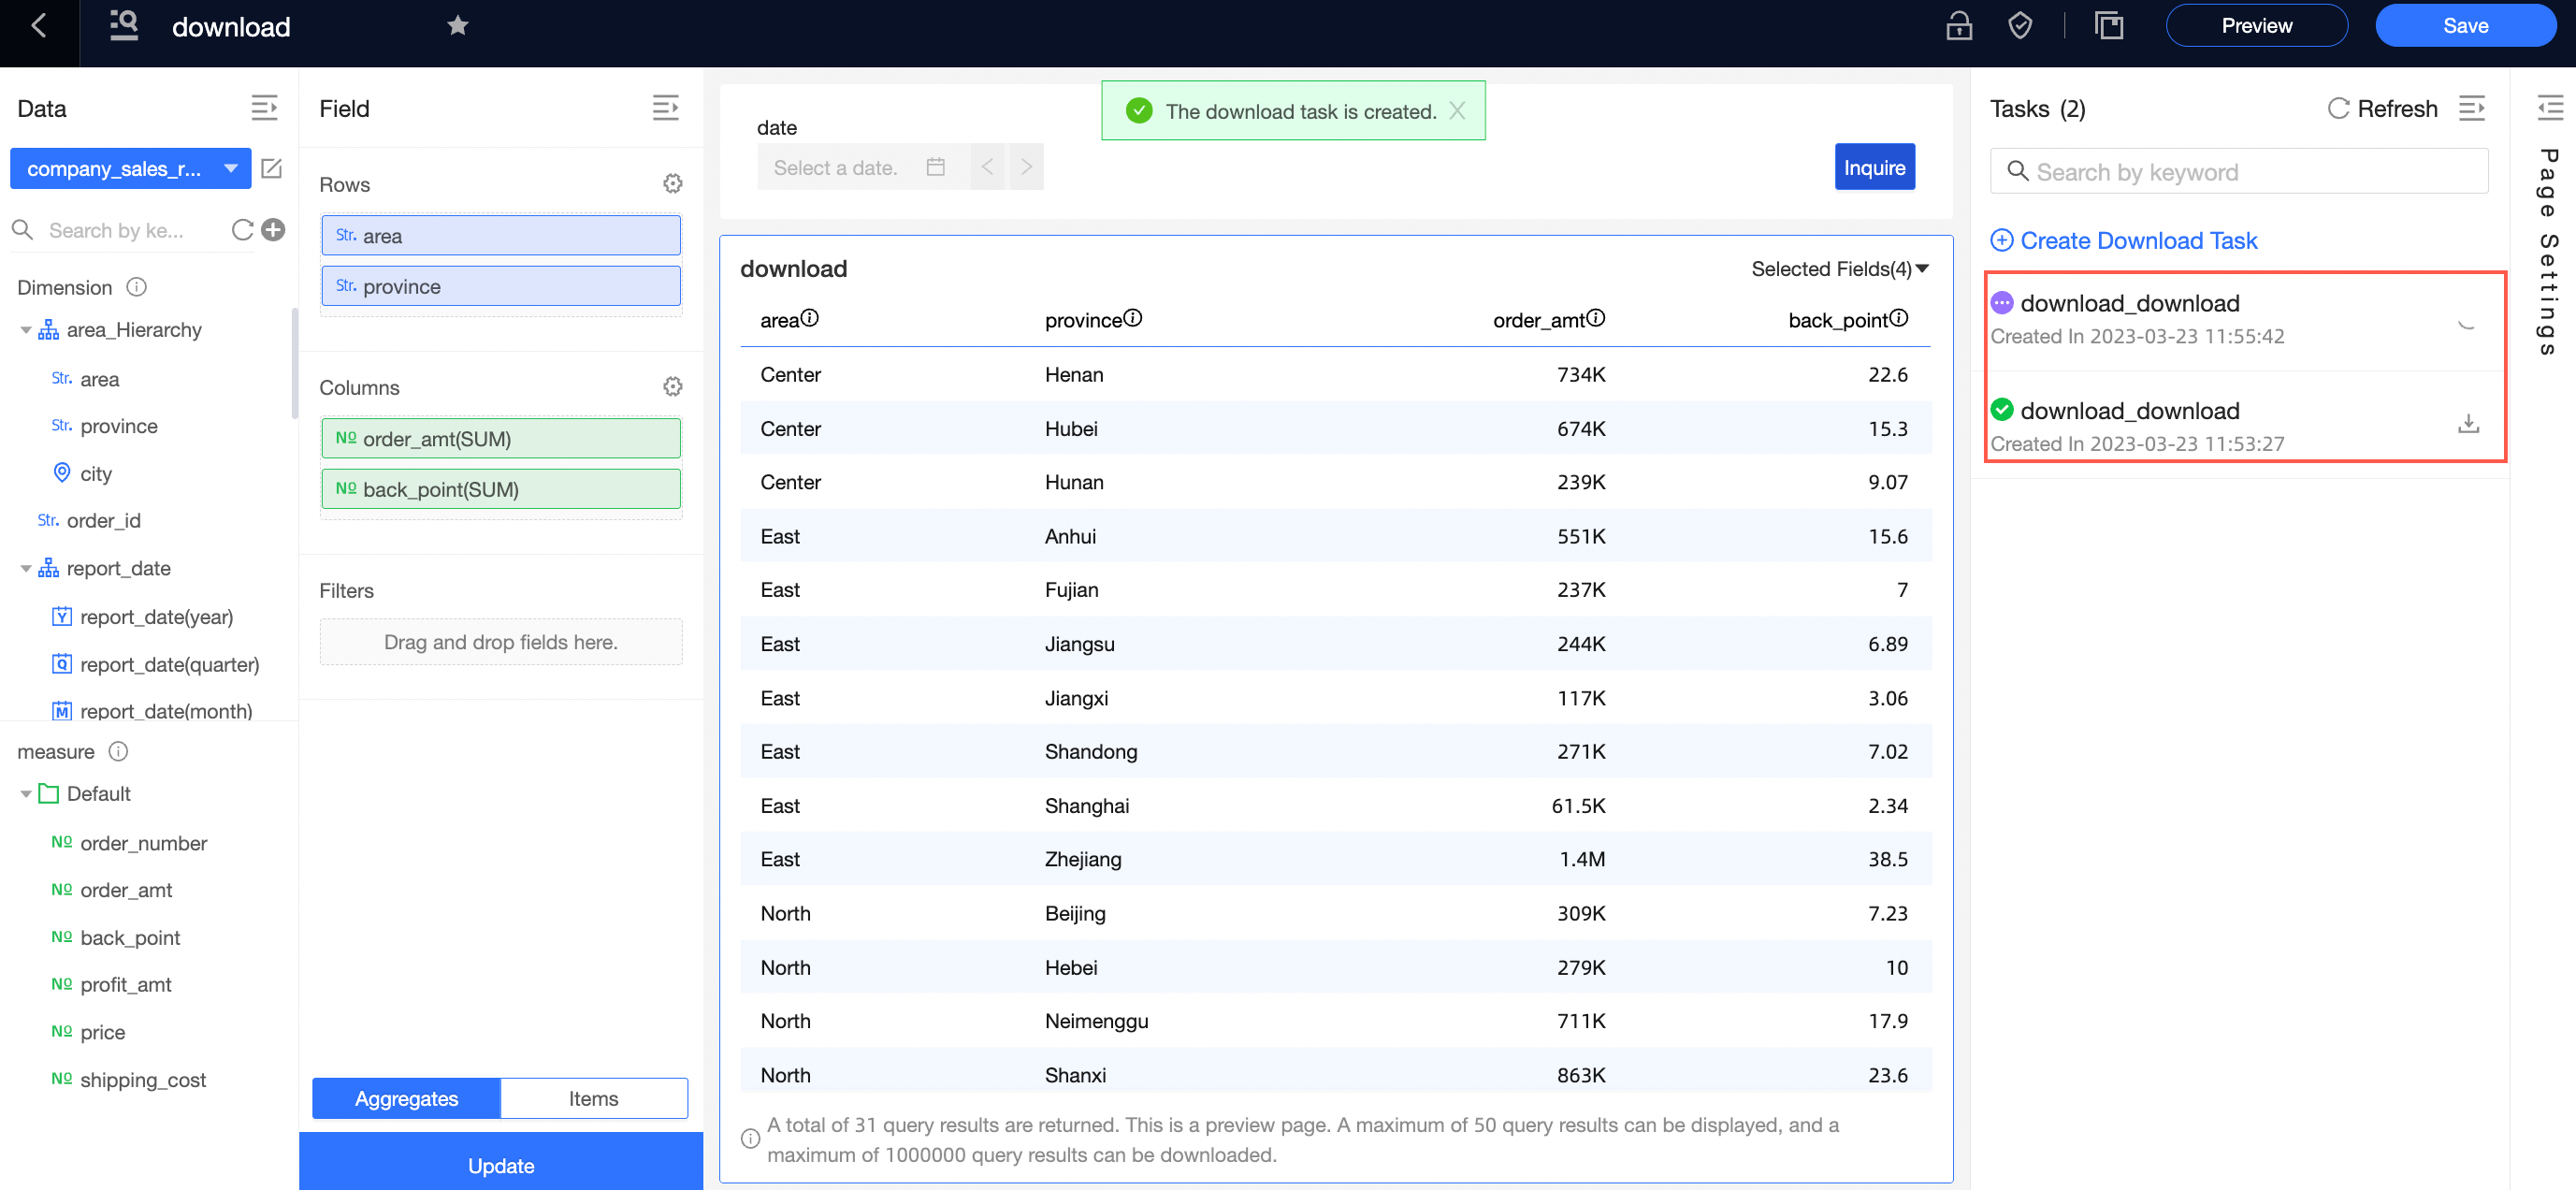
-
-
Create a data retrieval task from a crosstab
-
On the crosstab editing page, open self-service data retrieval.
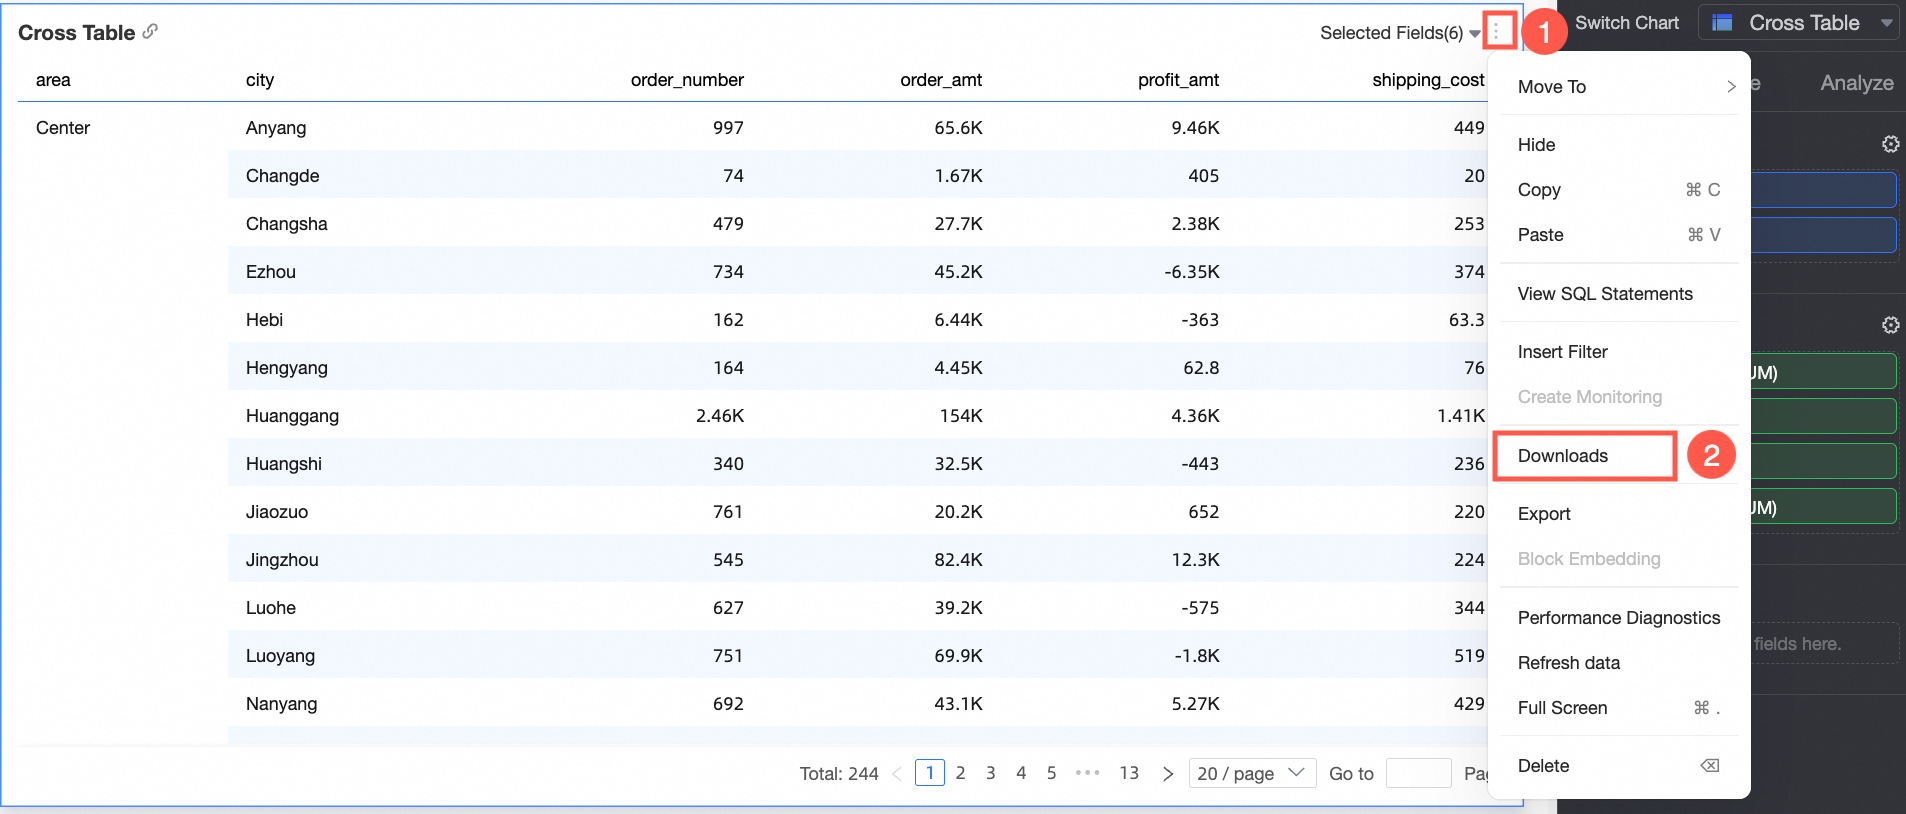 Note
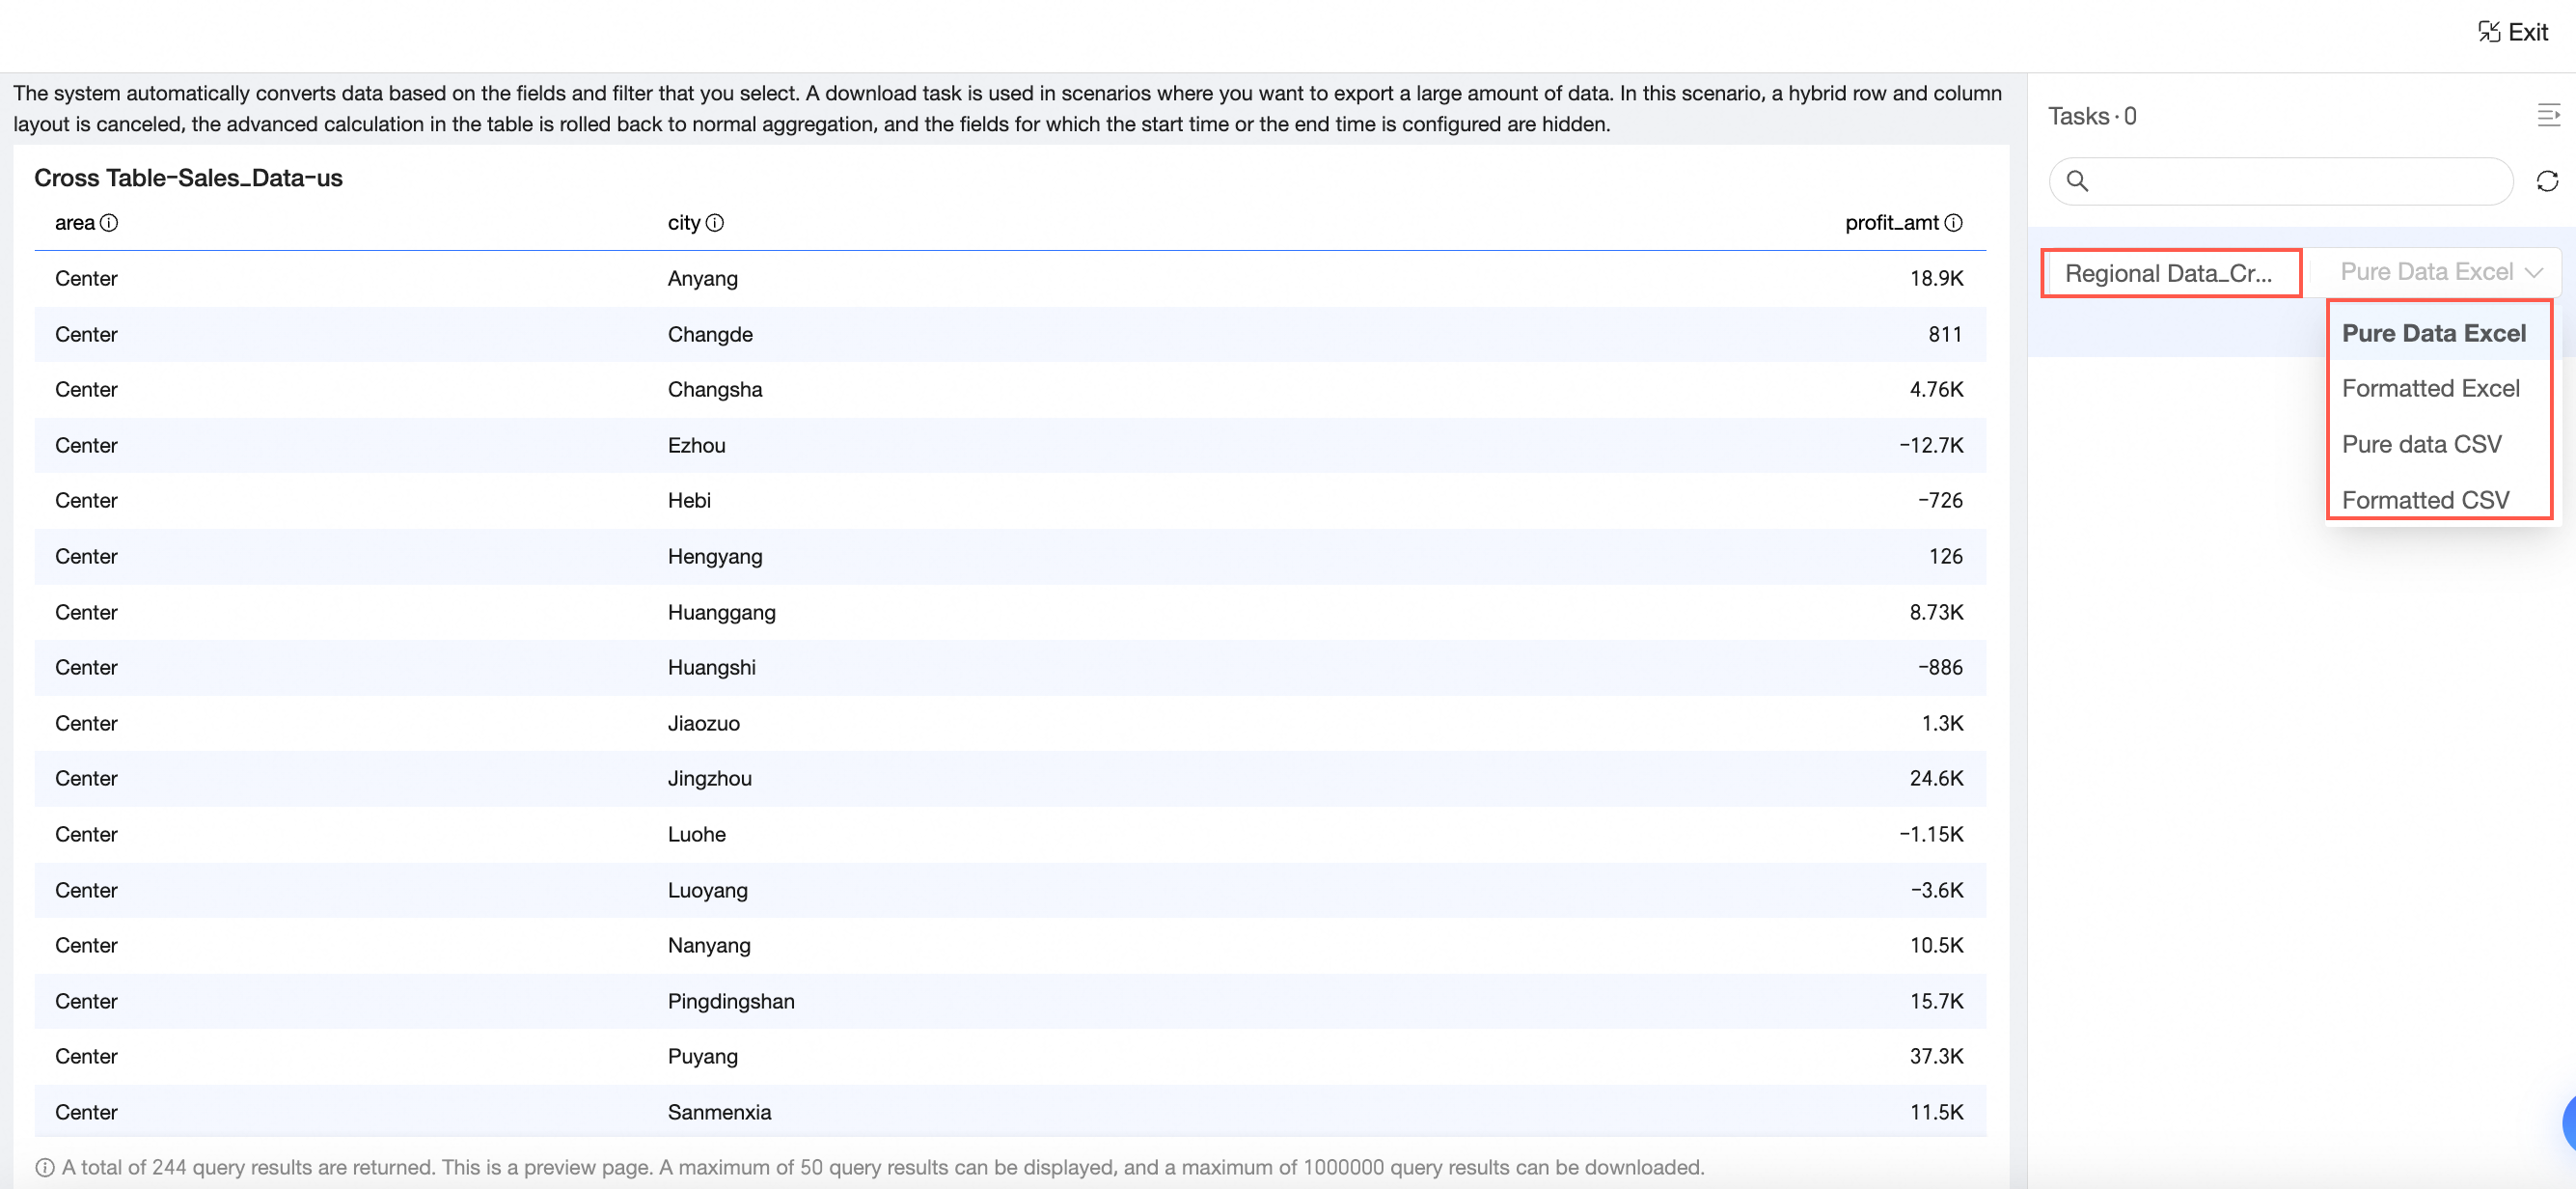
NoteAfter you click self-service data retrieval, a preview page opens. The preview reflects the exact style of the downloaded file:
-
Self-service data retrieval does not support row and column blending. If configured for the crosstab, row and column blending is disabled during data retrieval.
-
Self-service data retrieval does not support advanced calculations. If advanced calculations are configured for the crosstab, they revert to standard aggregations. Fields configured for the last day are hidden.
-
-
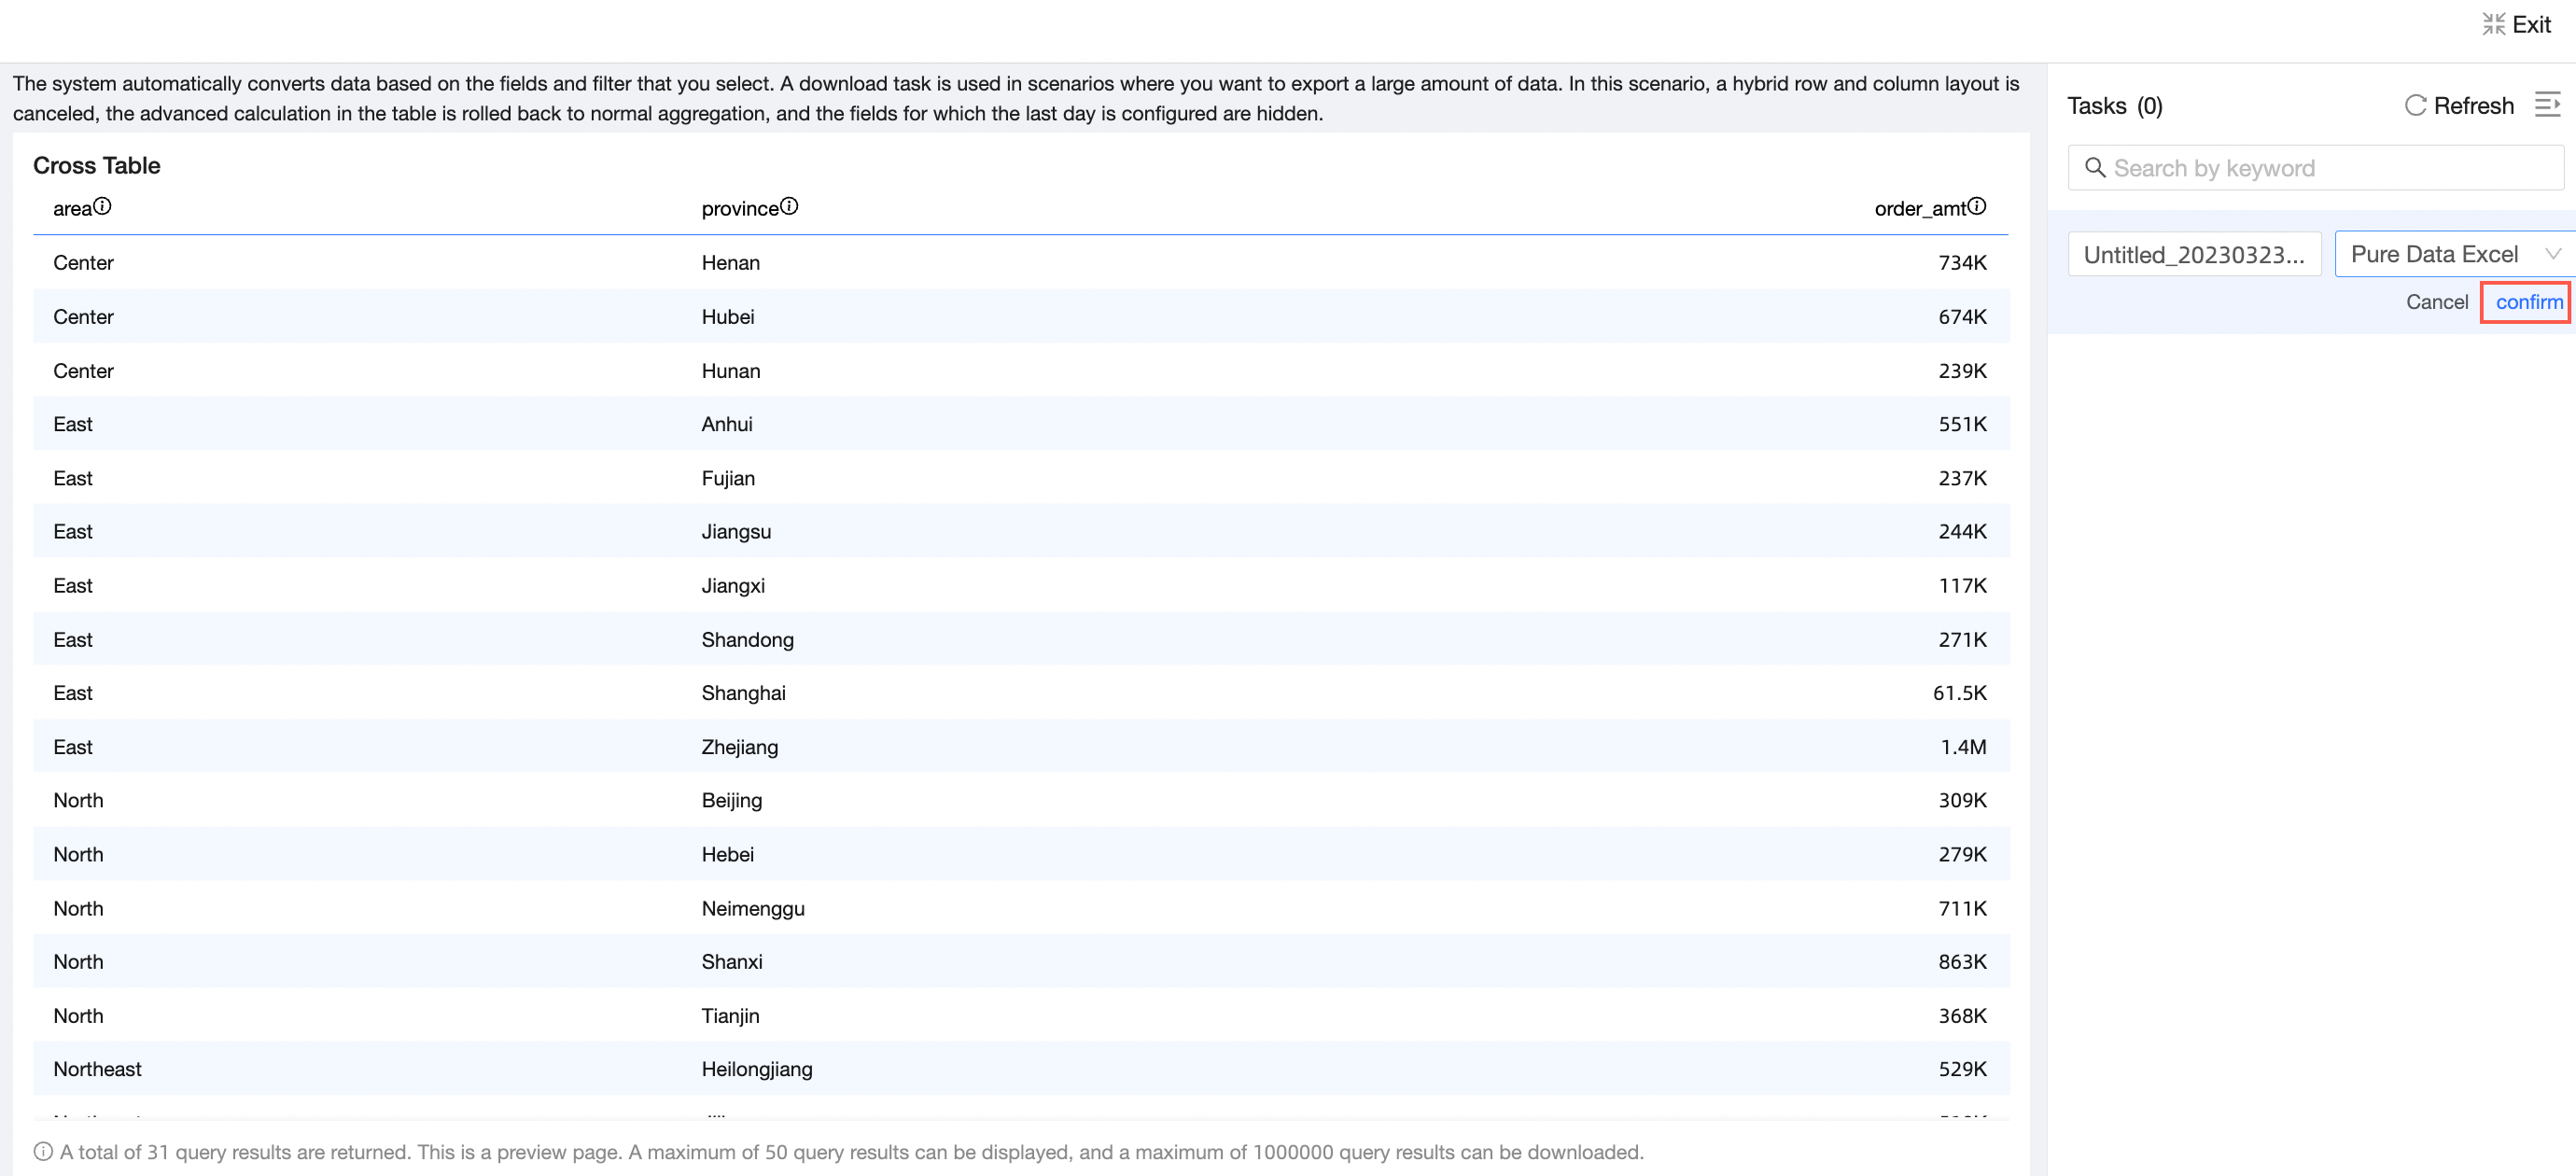
On the self-service data retrieval preview page, create a data retrieval task using one of the following methods:
-
Method 1: Click the
icon below the task list to create a data retrieval task.
-
Method 2: Click the
icon above the task list to open the task list, and then click Create Data Retrieval Task.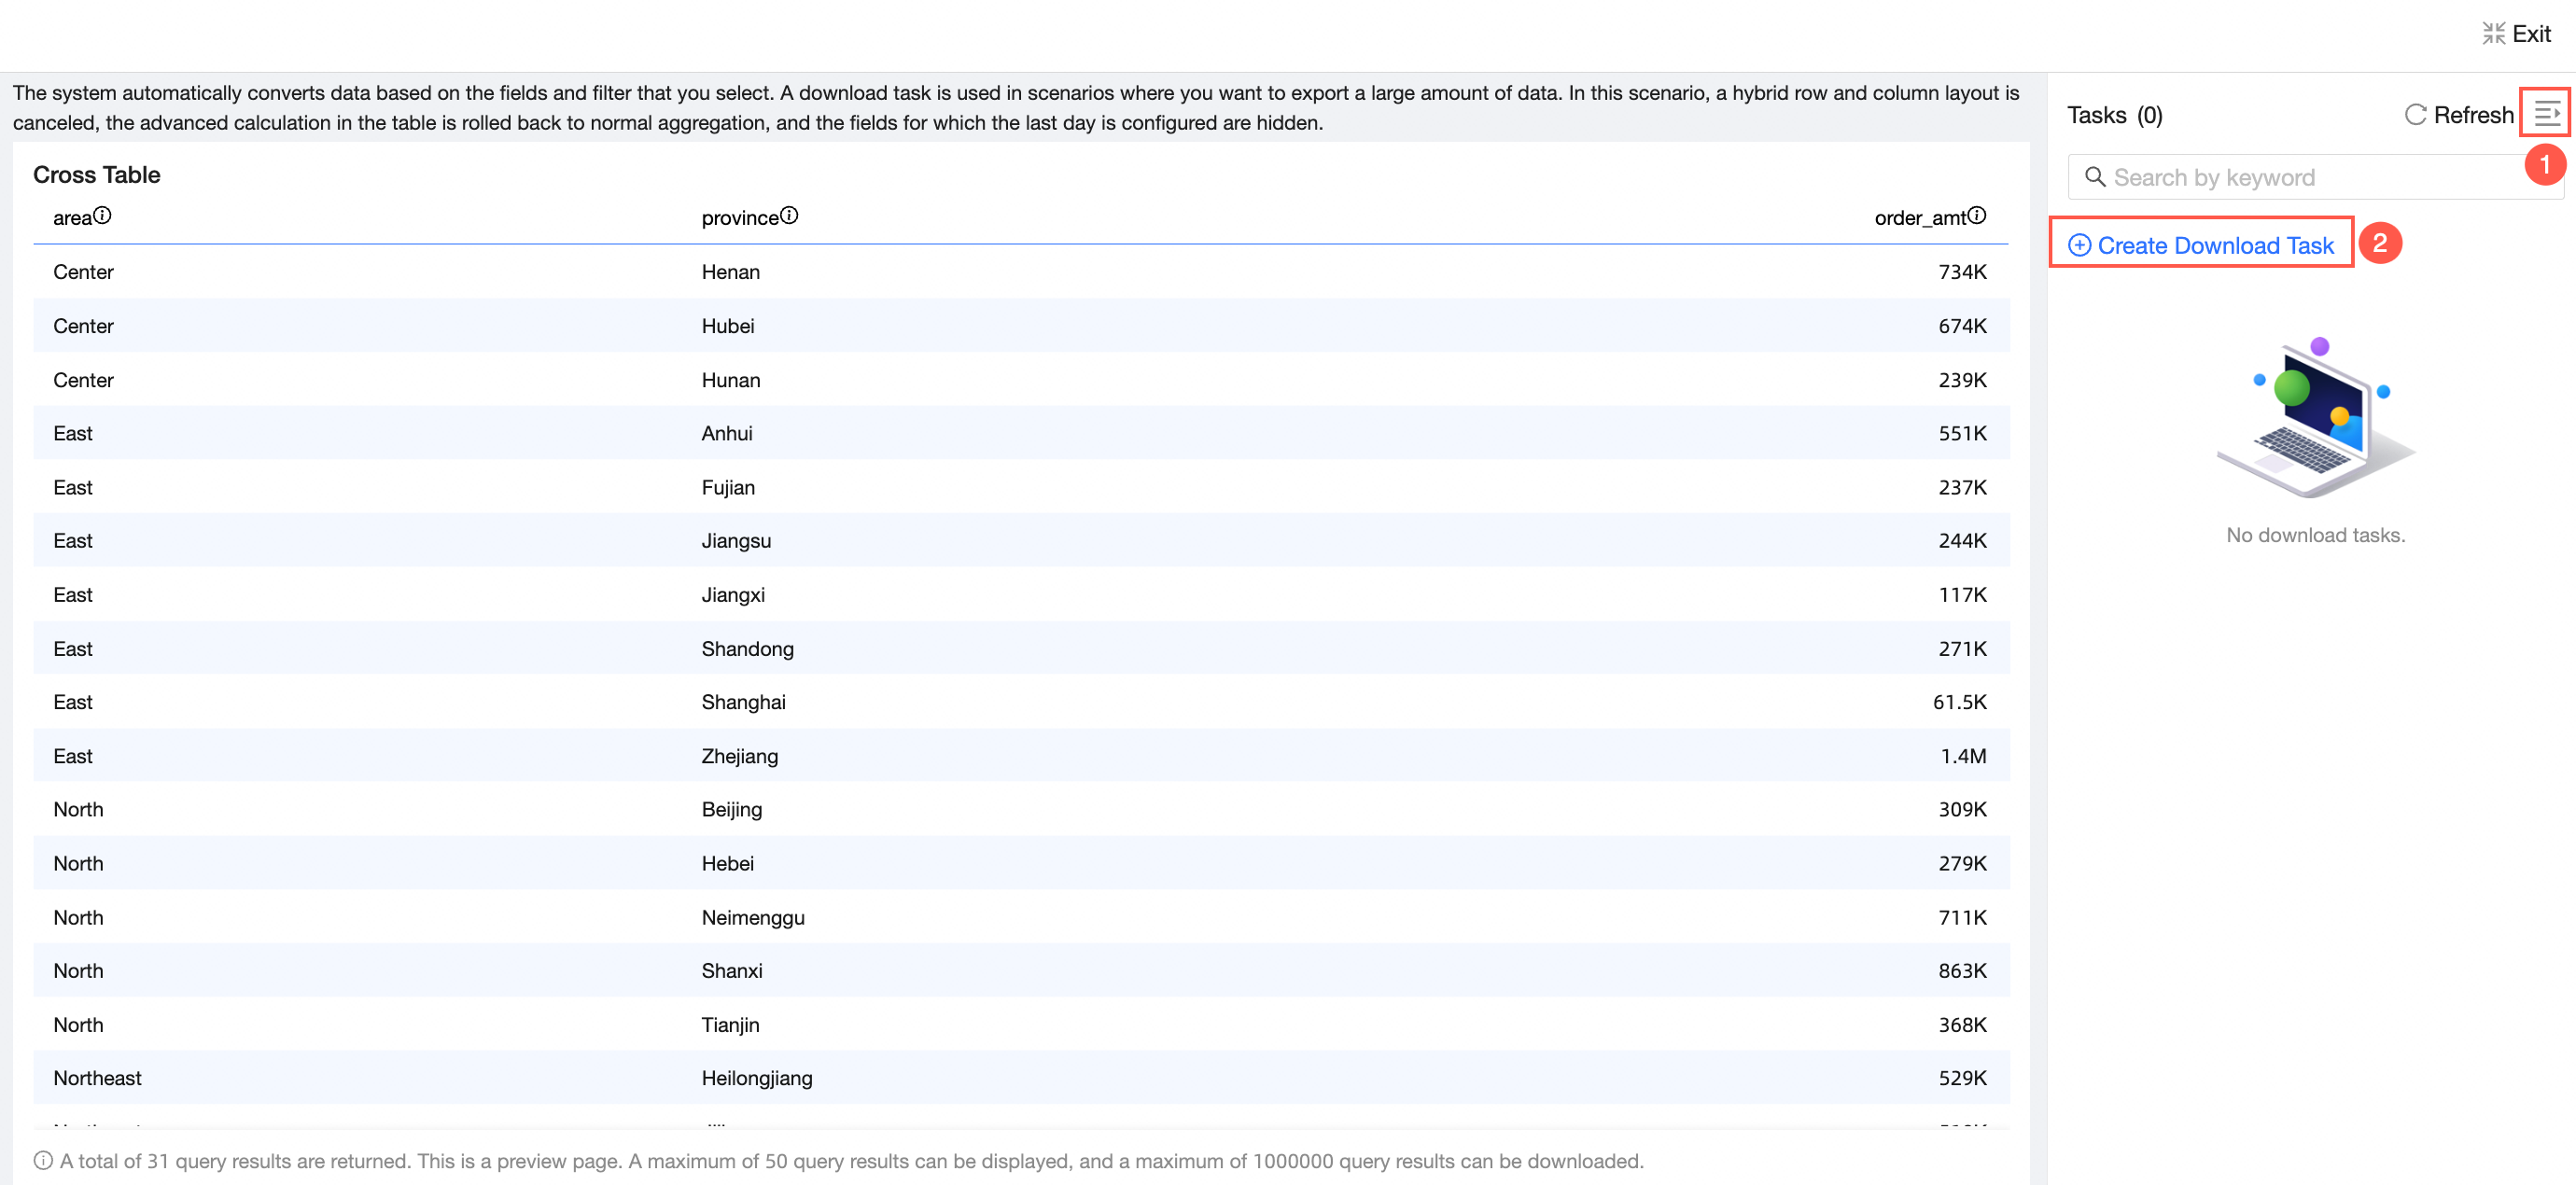
-
-
Set a name for the data retrieval task and specify the export format. The supported export formats are Excel with raw data, formatted Excel, CSV with raw data, and formatted CSV.
-
Click OK.
-
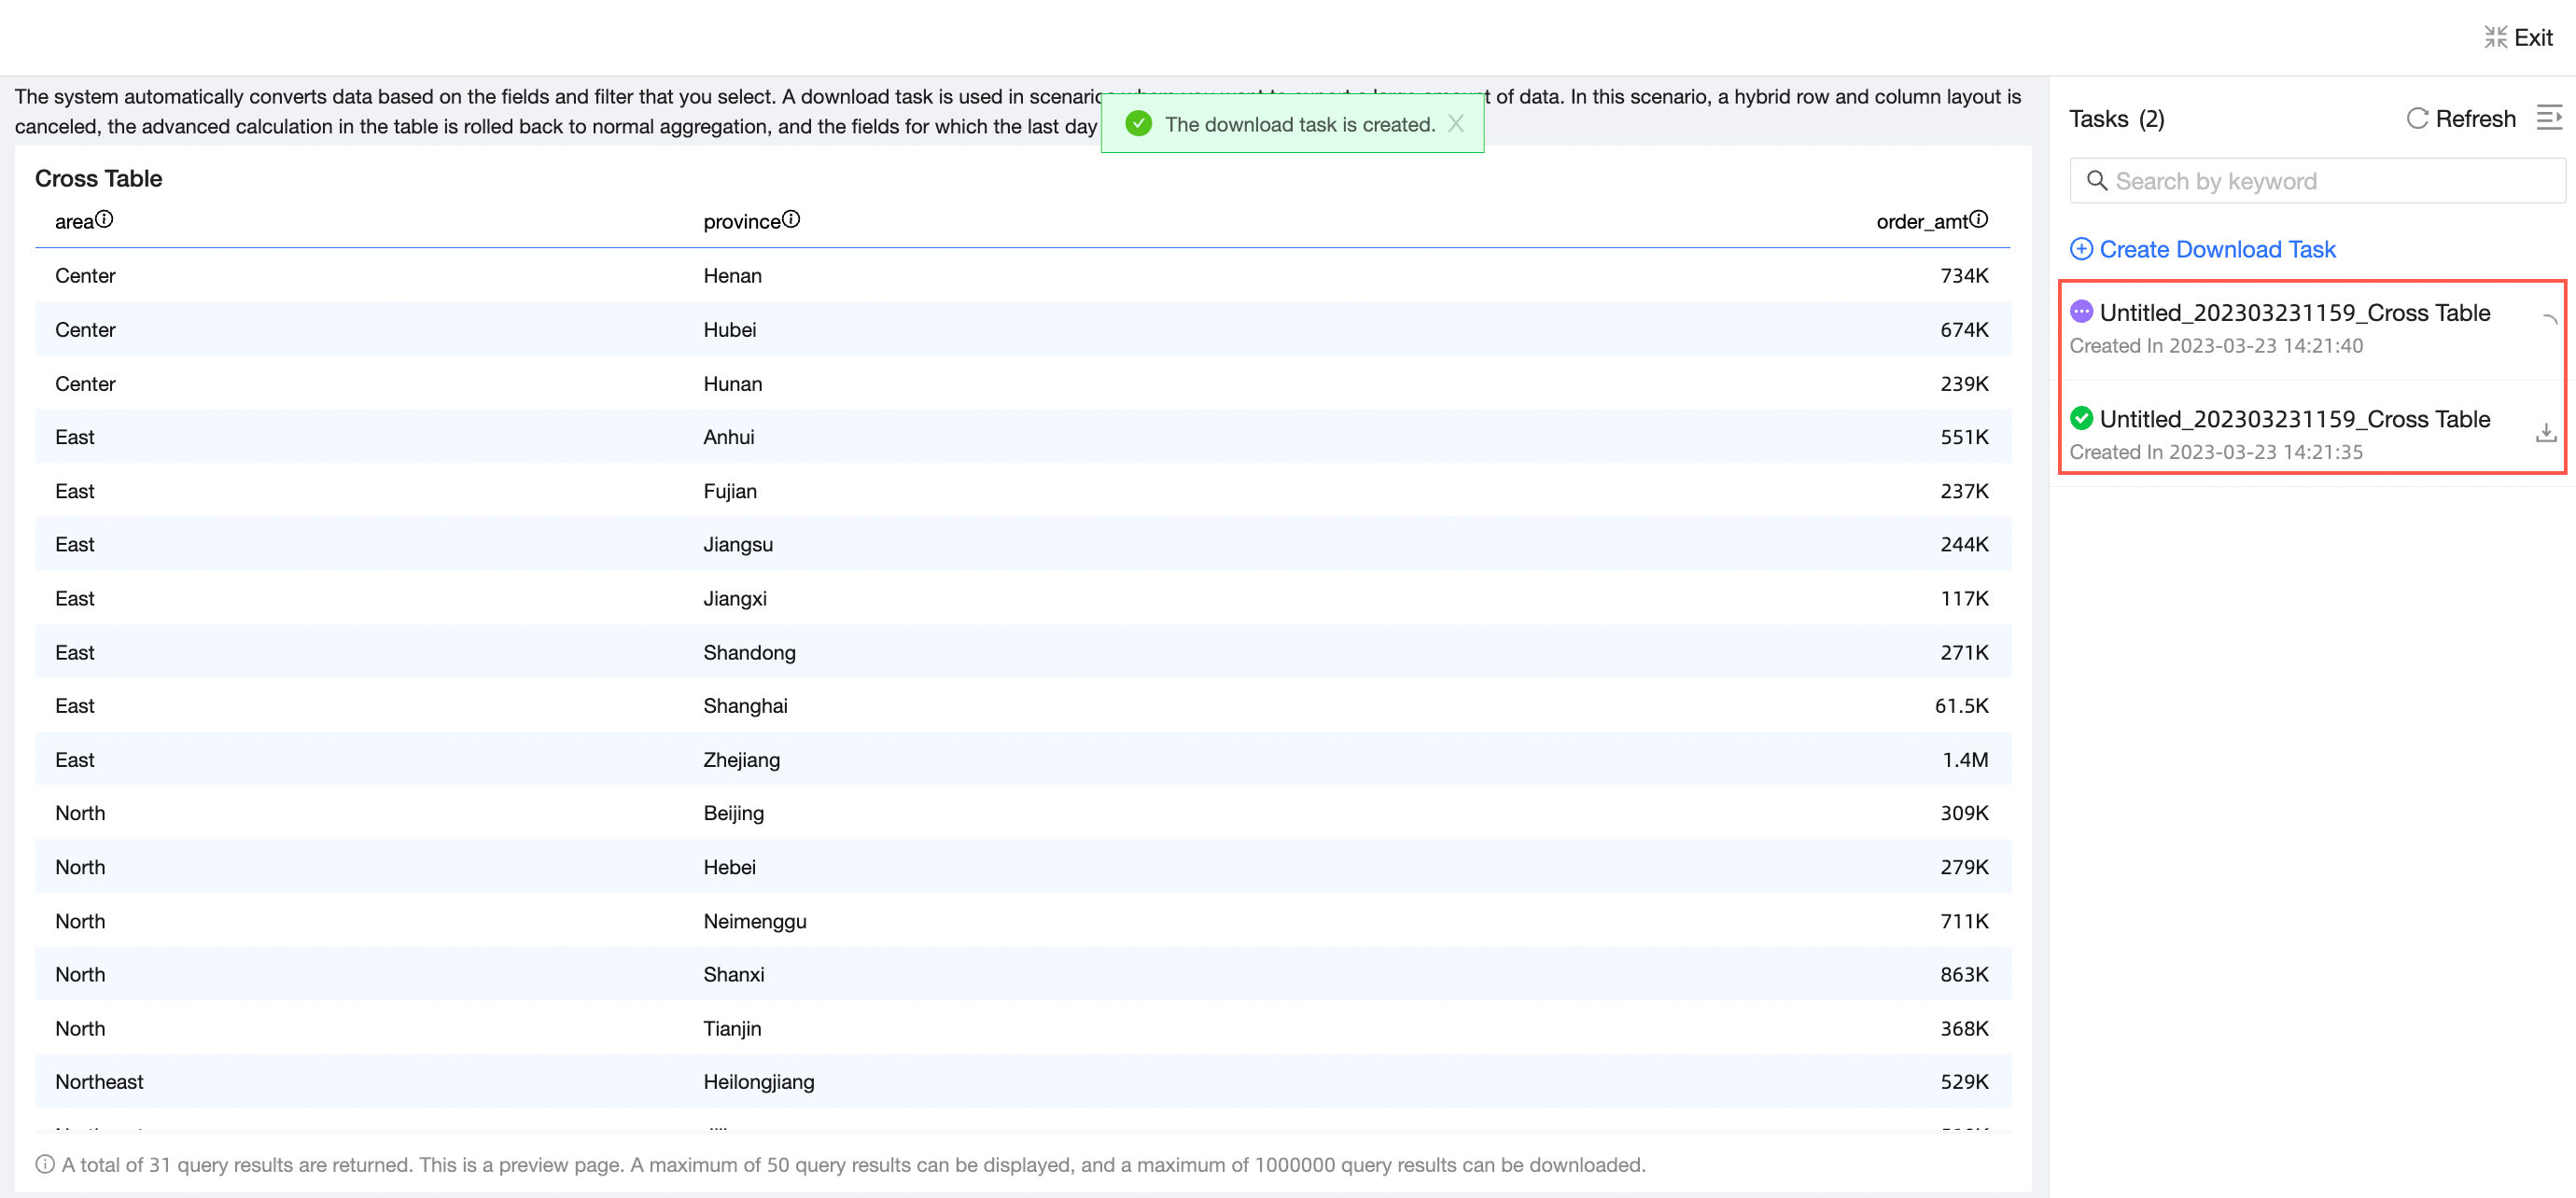
The data retrieval task for the current crosstab appears in the task list.
-
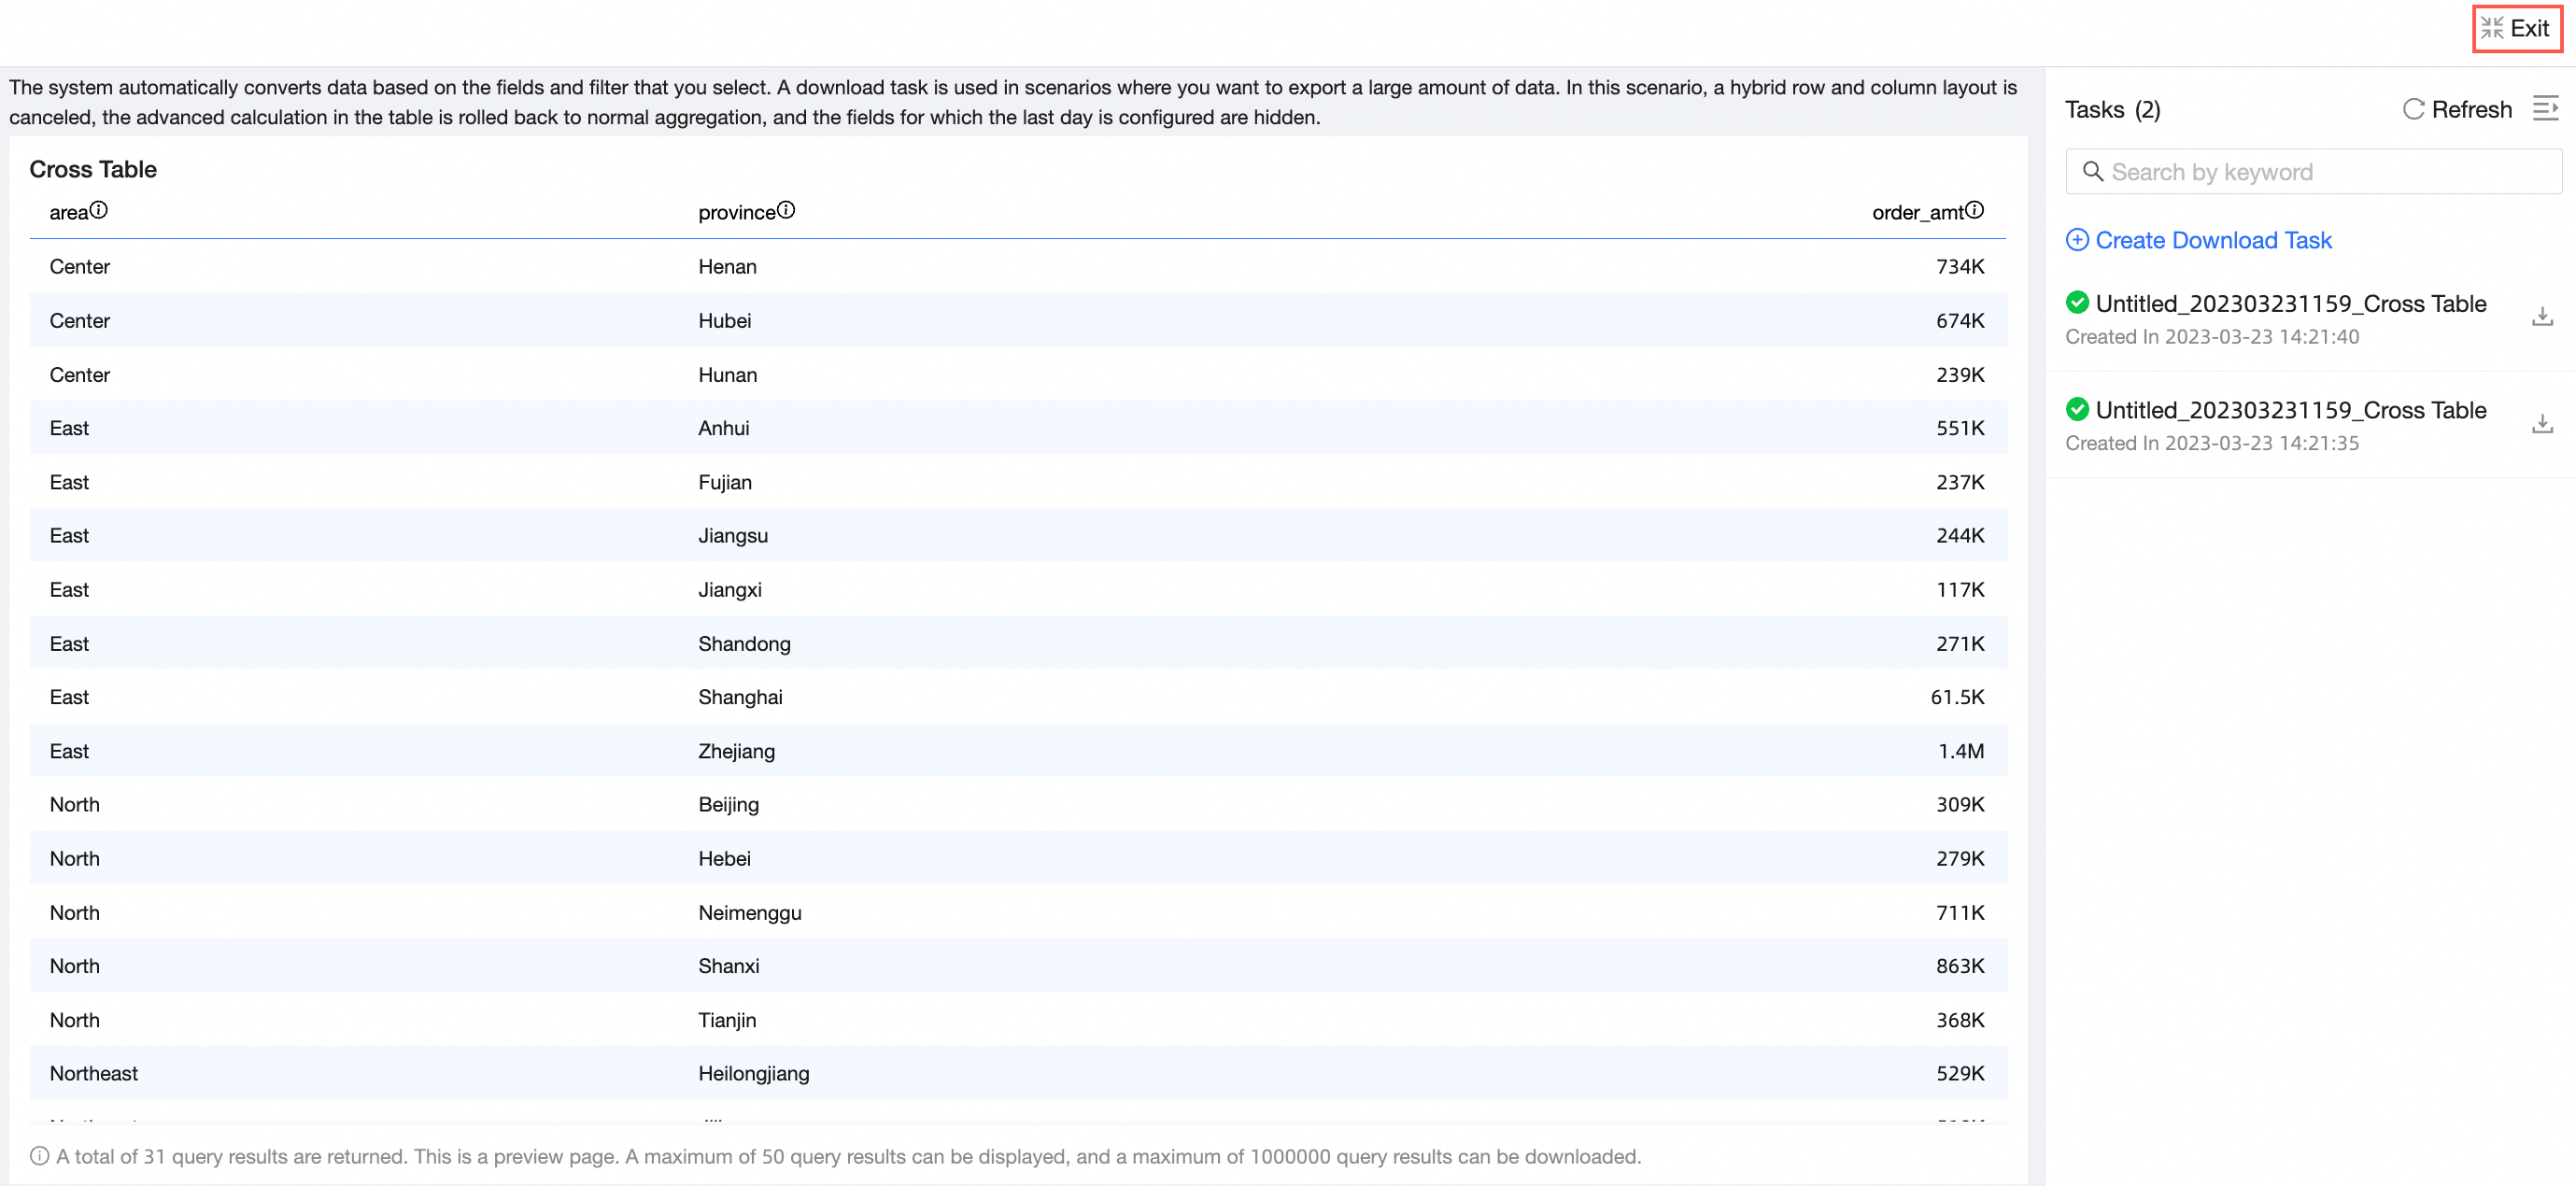
Click Exit Data Retrieval in the upper-right corner to return to the crosstab editing page.
-
Manage Download Tasks
-
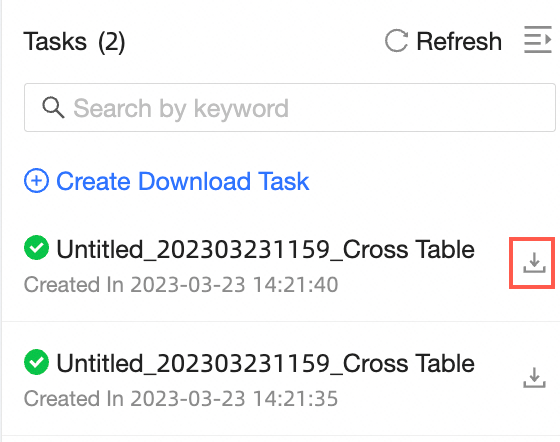
On the download tasks tab of the self-service data retrieval page, find the target task and click the Download icon in the Actions column to download the data to your local computer as an Excel or CSV file.

-
On the self-service data retrieval edit page or in the task list of a crosstab data retrieval task, find the target task and click the Download icon in the Actions column to download the data to your local computer as an Excel or CSV file.
Data Retrieval Download Formats
-
Excel with raw data
Exports data without formatting as an Excel file.
-
Formatted Excel
Exports data, preserving formatting for data display format, date field format, alignment, and field renaming.
Note-
You can configure field renaming in the field display settings.
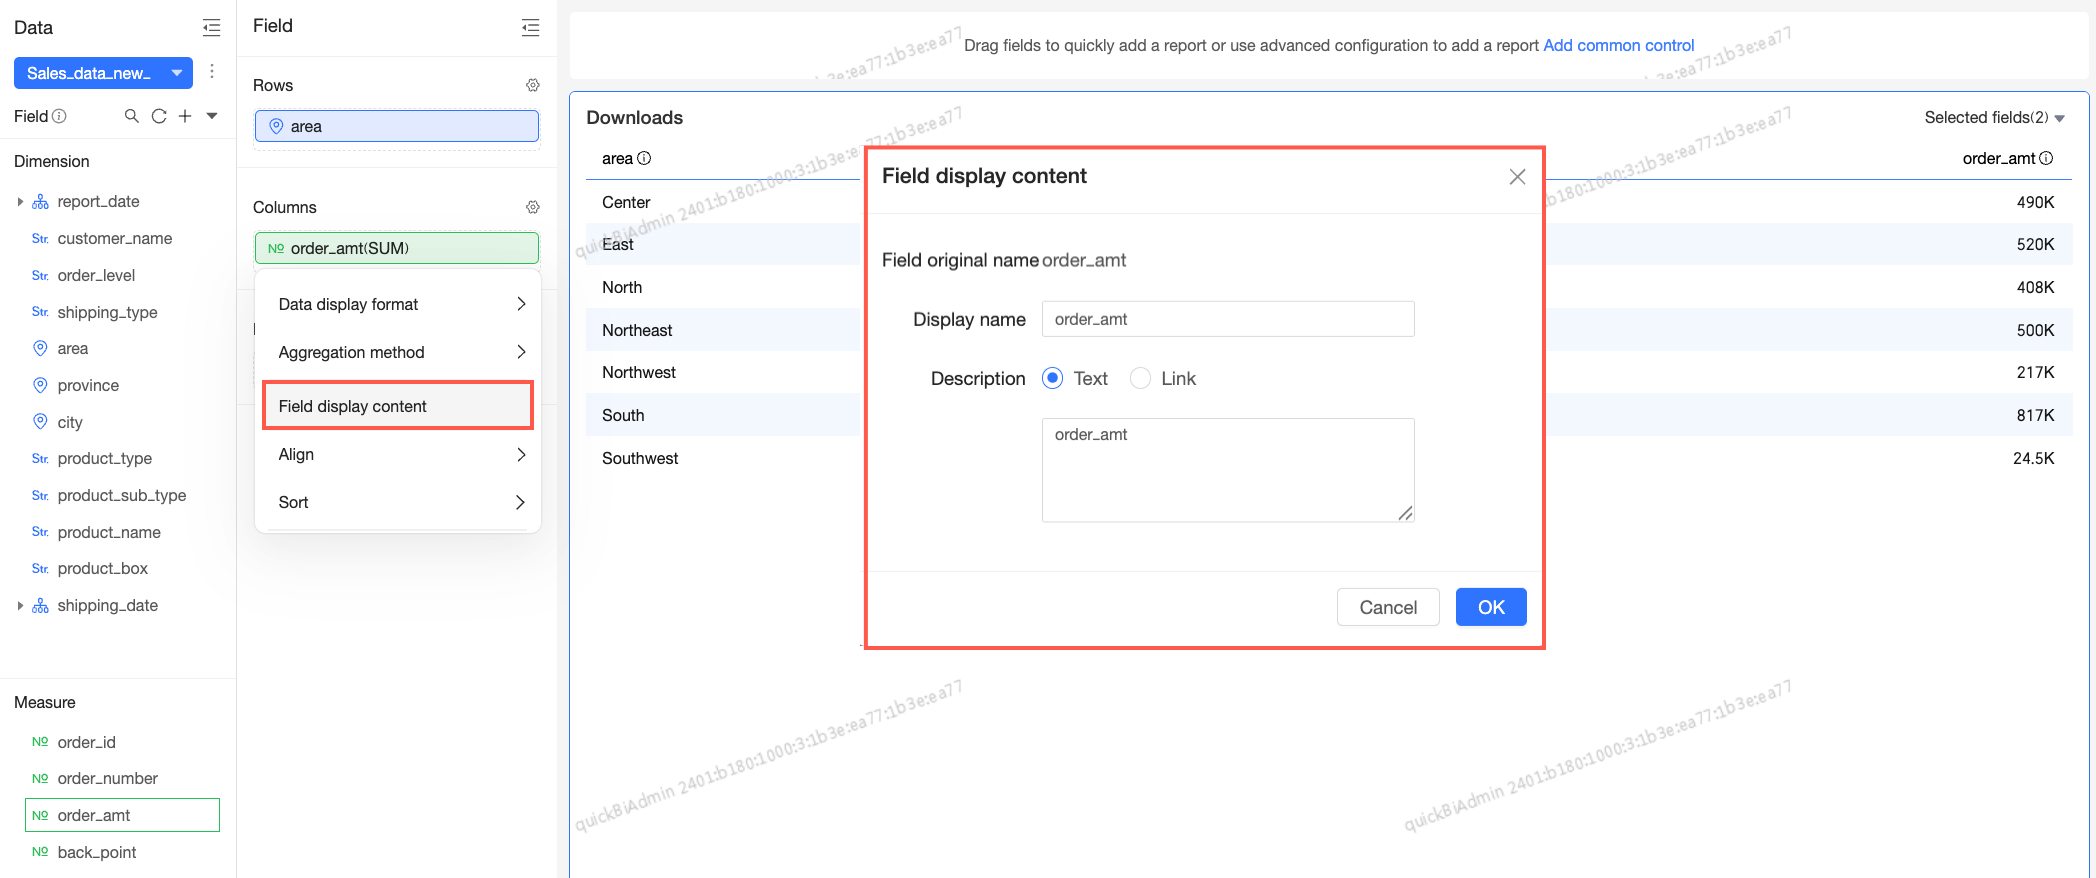
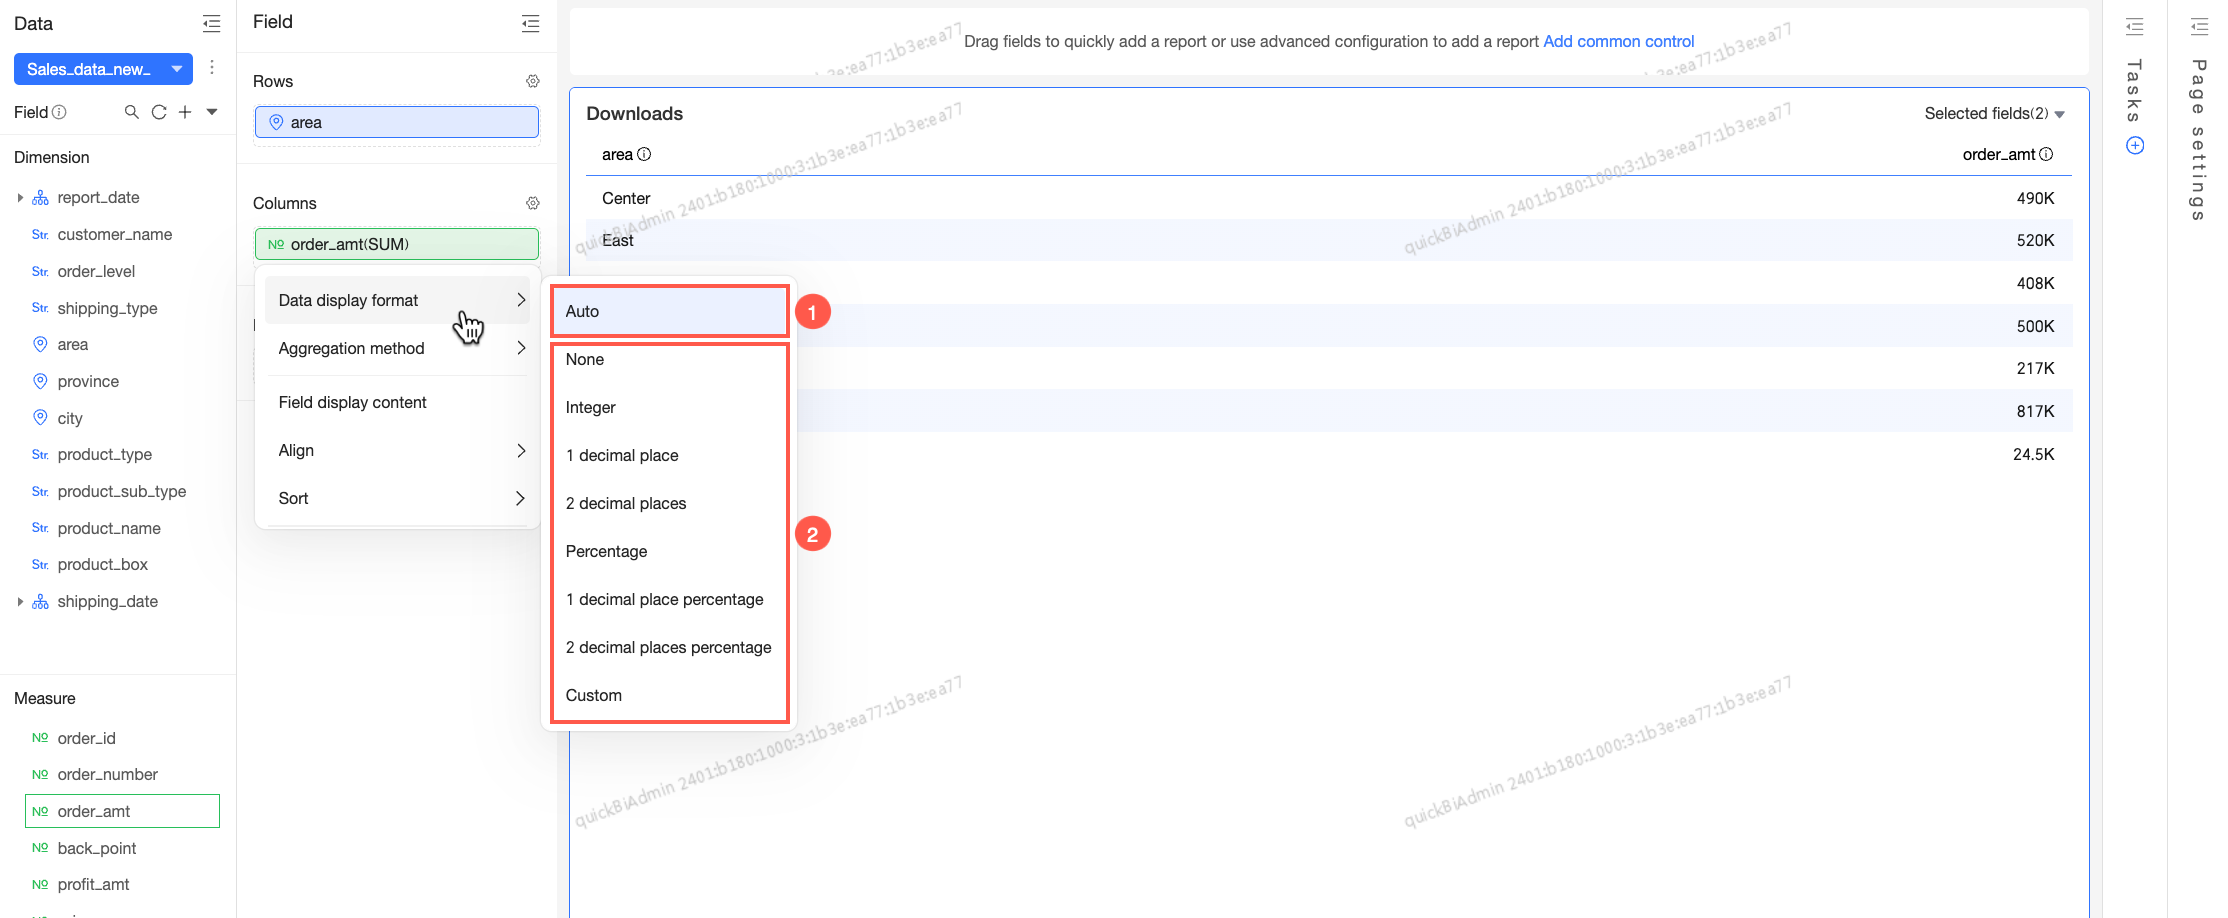
If the data display format for a self-service data retrieval or crosstab is set to Custom, the exported formatted Excel file follows Excel's custom formatting rules. Complex data format configurations may not be fully preserved and could be exported without formatting. For more information about configuring data display formats in custom mode, see Customize the data display format.
-
-
CSV with raw data
Exports data without formatting as a CSV file.
-
Formatted CSV
Exports data, preserving formatting for data display format, date field format, alignment, and field renaming.