You can organize reports into business domains using business categories, or feature a specific BI portal, custom page, or external link.
Limitations
Only Quick BI Pro and Quick BI Enterprise Standard support customizing the enterprise portal for PC.
Only an organization administrator can customize the enterprise portal for PC.
Developing a custom page to customize the enterprise portal is a value-added feature available only with Quick BI Enterprise Standard.
Example

Entry Point
Log on to the Quick BI console as an organization administrator to configure your enterprise portal homepage for PC.

Based on your business scenario, choose one of the following methods to build the enterprise portal.
To organize reports into business categories, see Customize the enterprise portal by using a template.
To embed content from a BI portal or an external link, see Customize the enterprise portal by embedding a page.
If neither the Custom Portal nor the Embed Page is configured, Quick BI hides the enterprise portal module in the top navigation bar.
Customize Using a Template
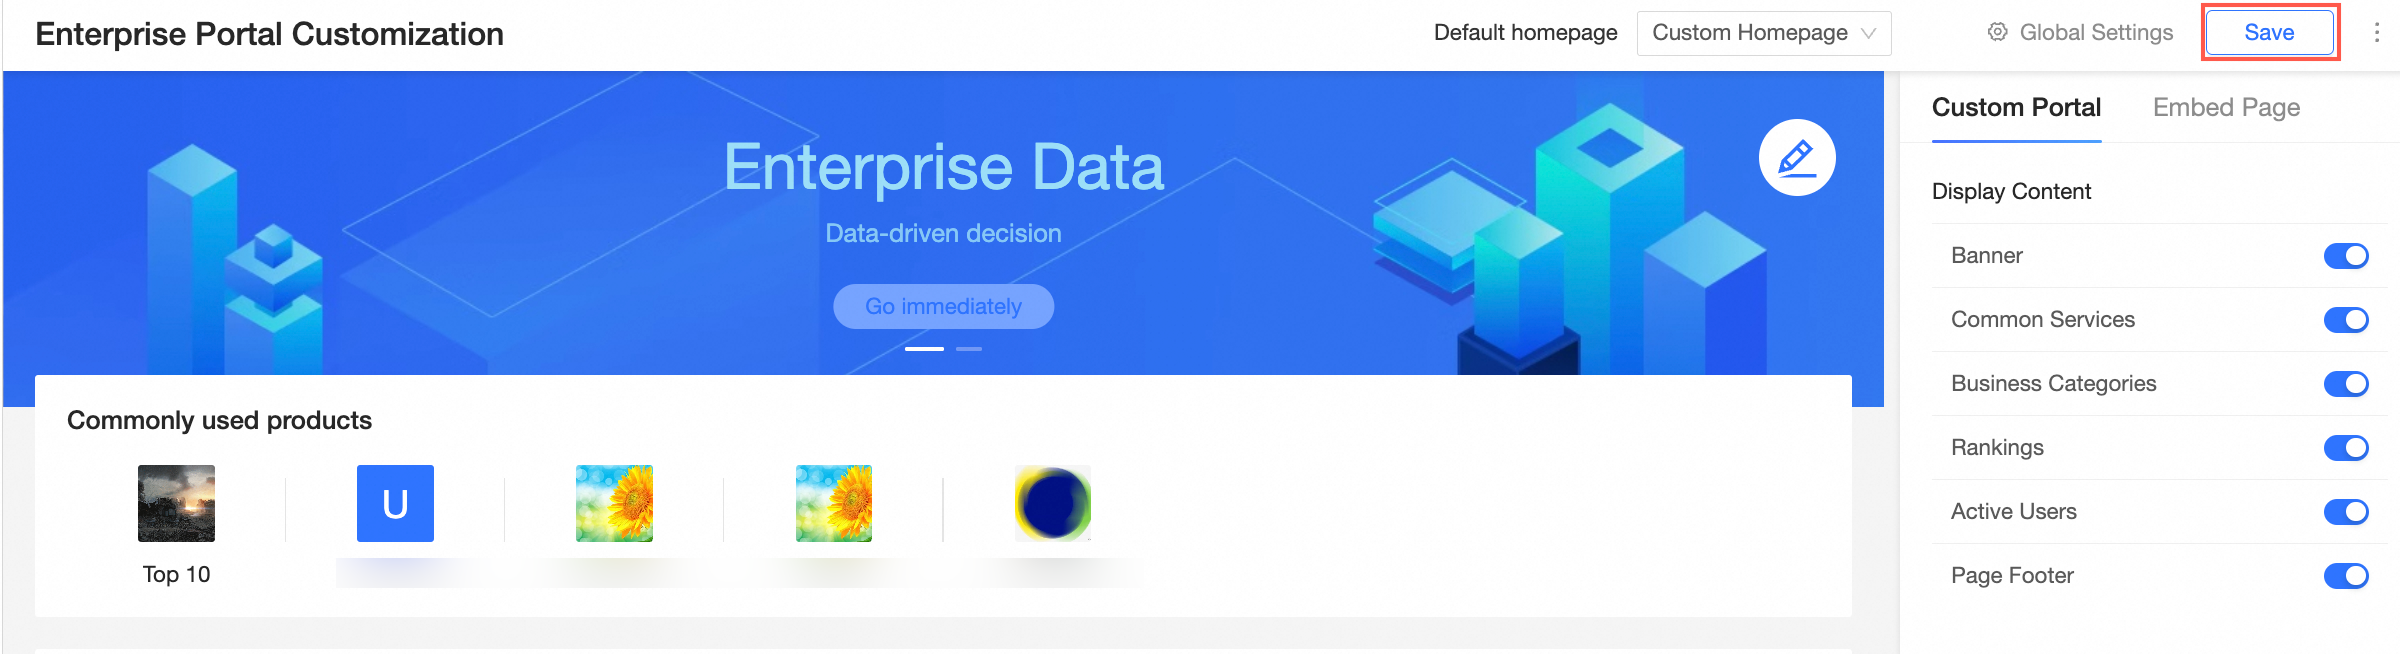
By default, the portal template includes the Banner, Common Services, Business Categories, Rankings, Active Users, and Page Footer sections. You can configure the style of each section to customize the enterprise portal.
On the right side of the PC Enterprise Portal Customization page, click the Custom Portal tab.

In the Display Content area, hover over the desired section and click the
 icon to configure the content format.
You can also select the target section directly and configure its format on the right.
In the configuration panel on the right, configure the format of the following sections:
Banner: Use this section to push important data content, such as advertisements.
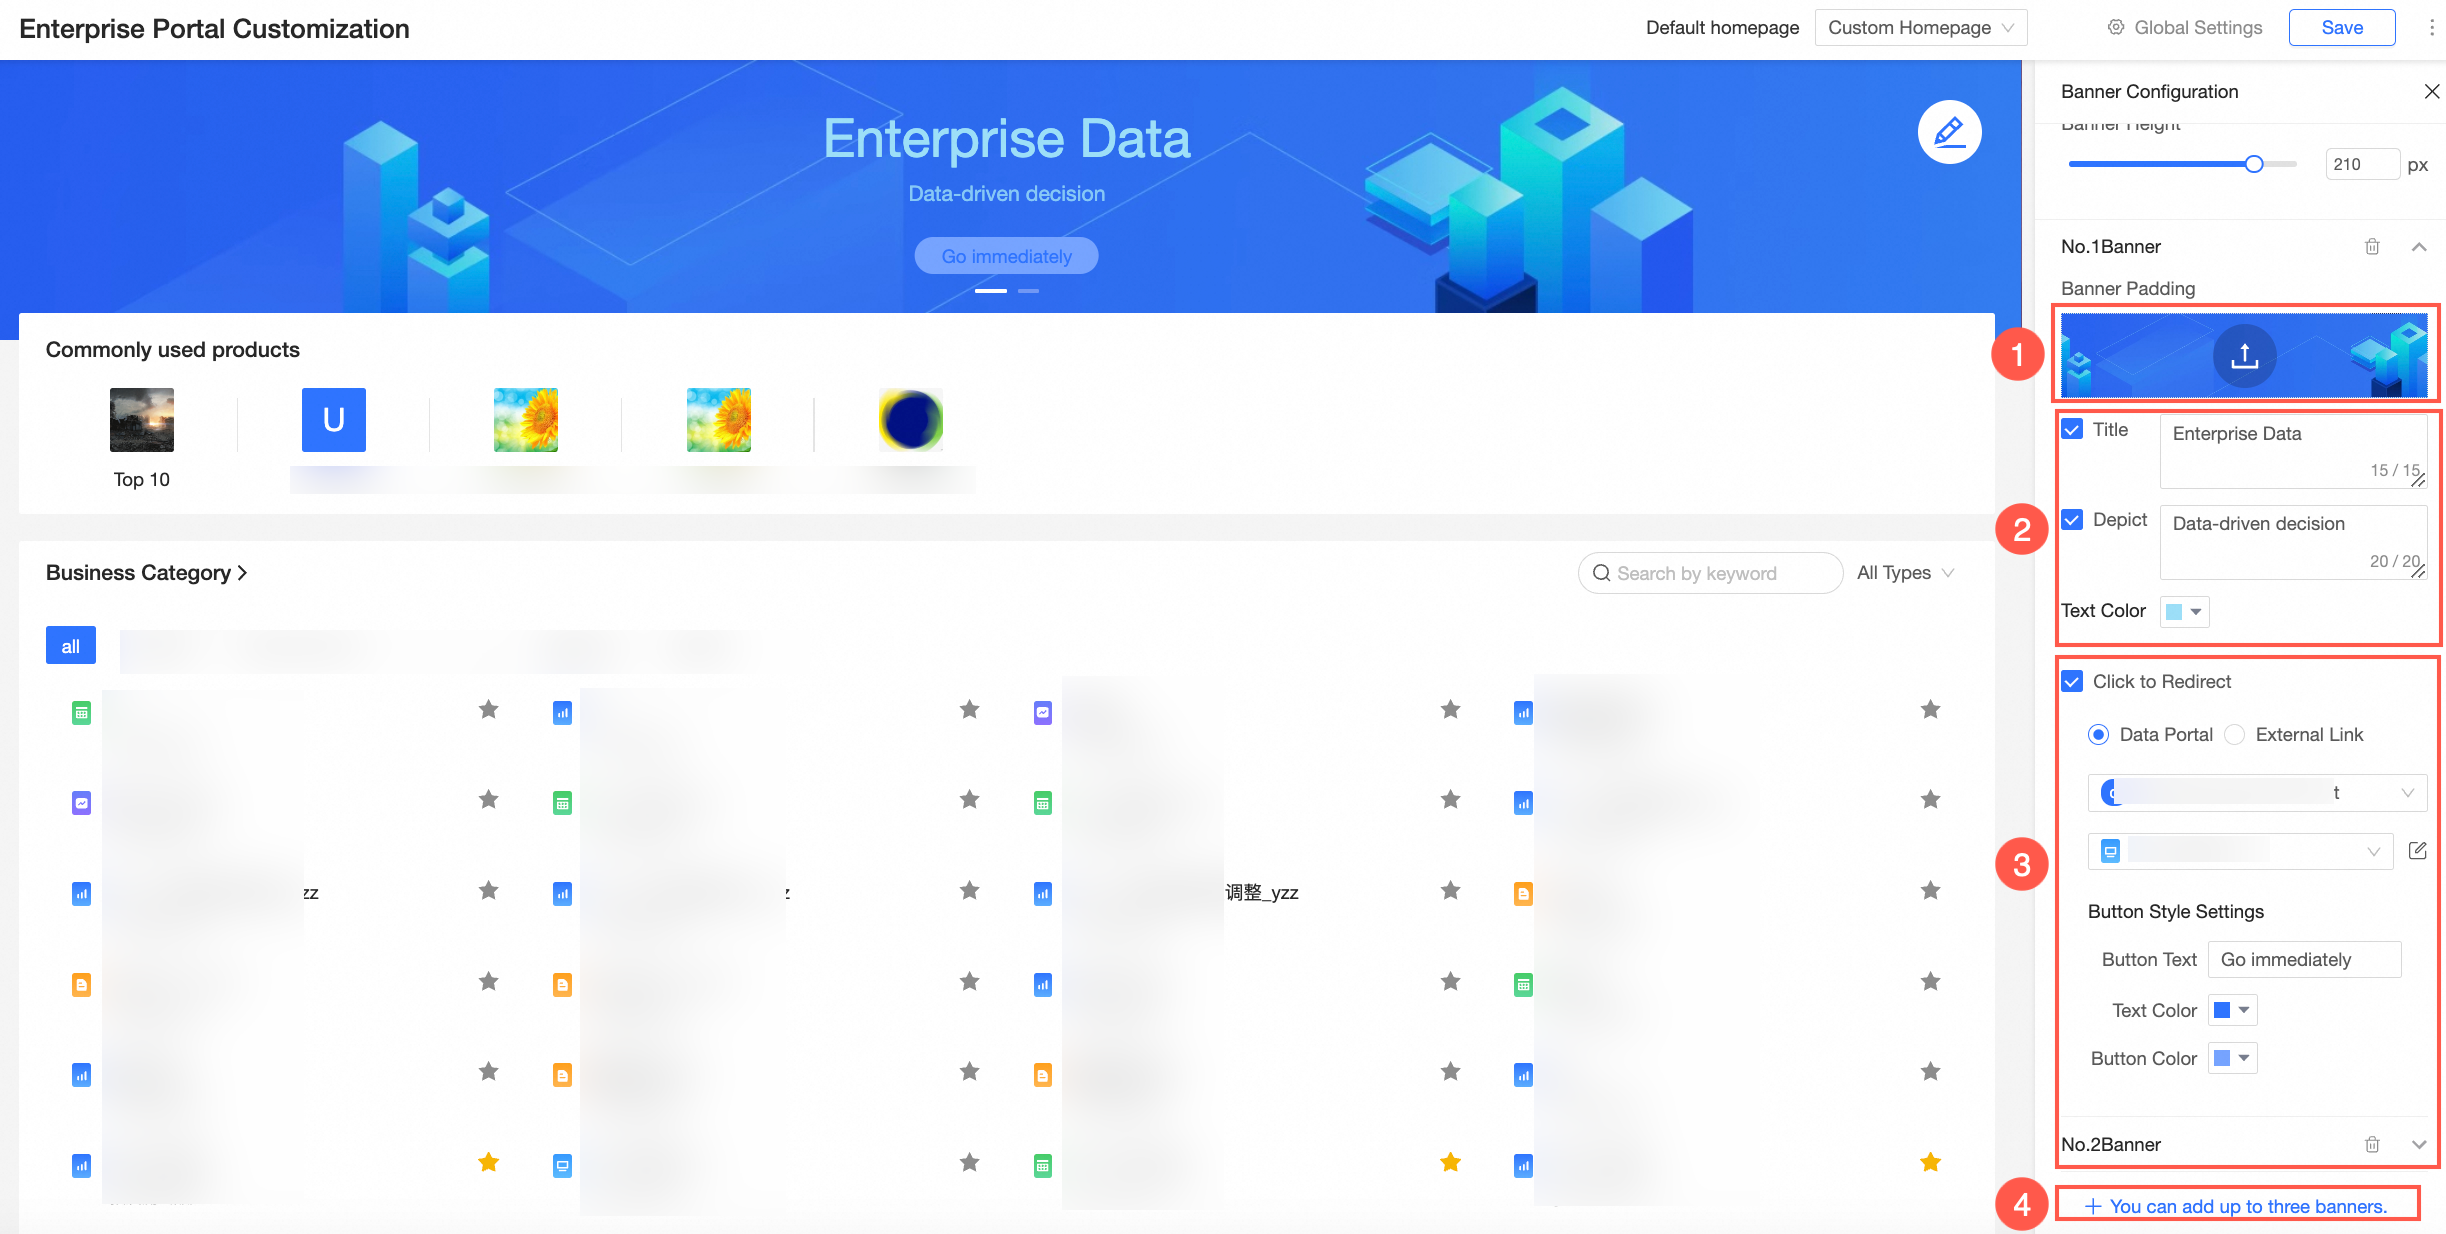
You can add up to three banners. The following figure shows the style configuration for a single banner.
① Configure the banner's background image (supports built-in images and local uploads).
② Configure the banner title, description, and text color.
③ Configure the embedded portal and call-to-action button (supports embedding an existing portal or an external link).
④ If you add multiple banners, they are displayed in a carousel.
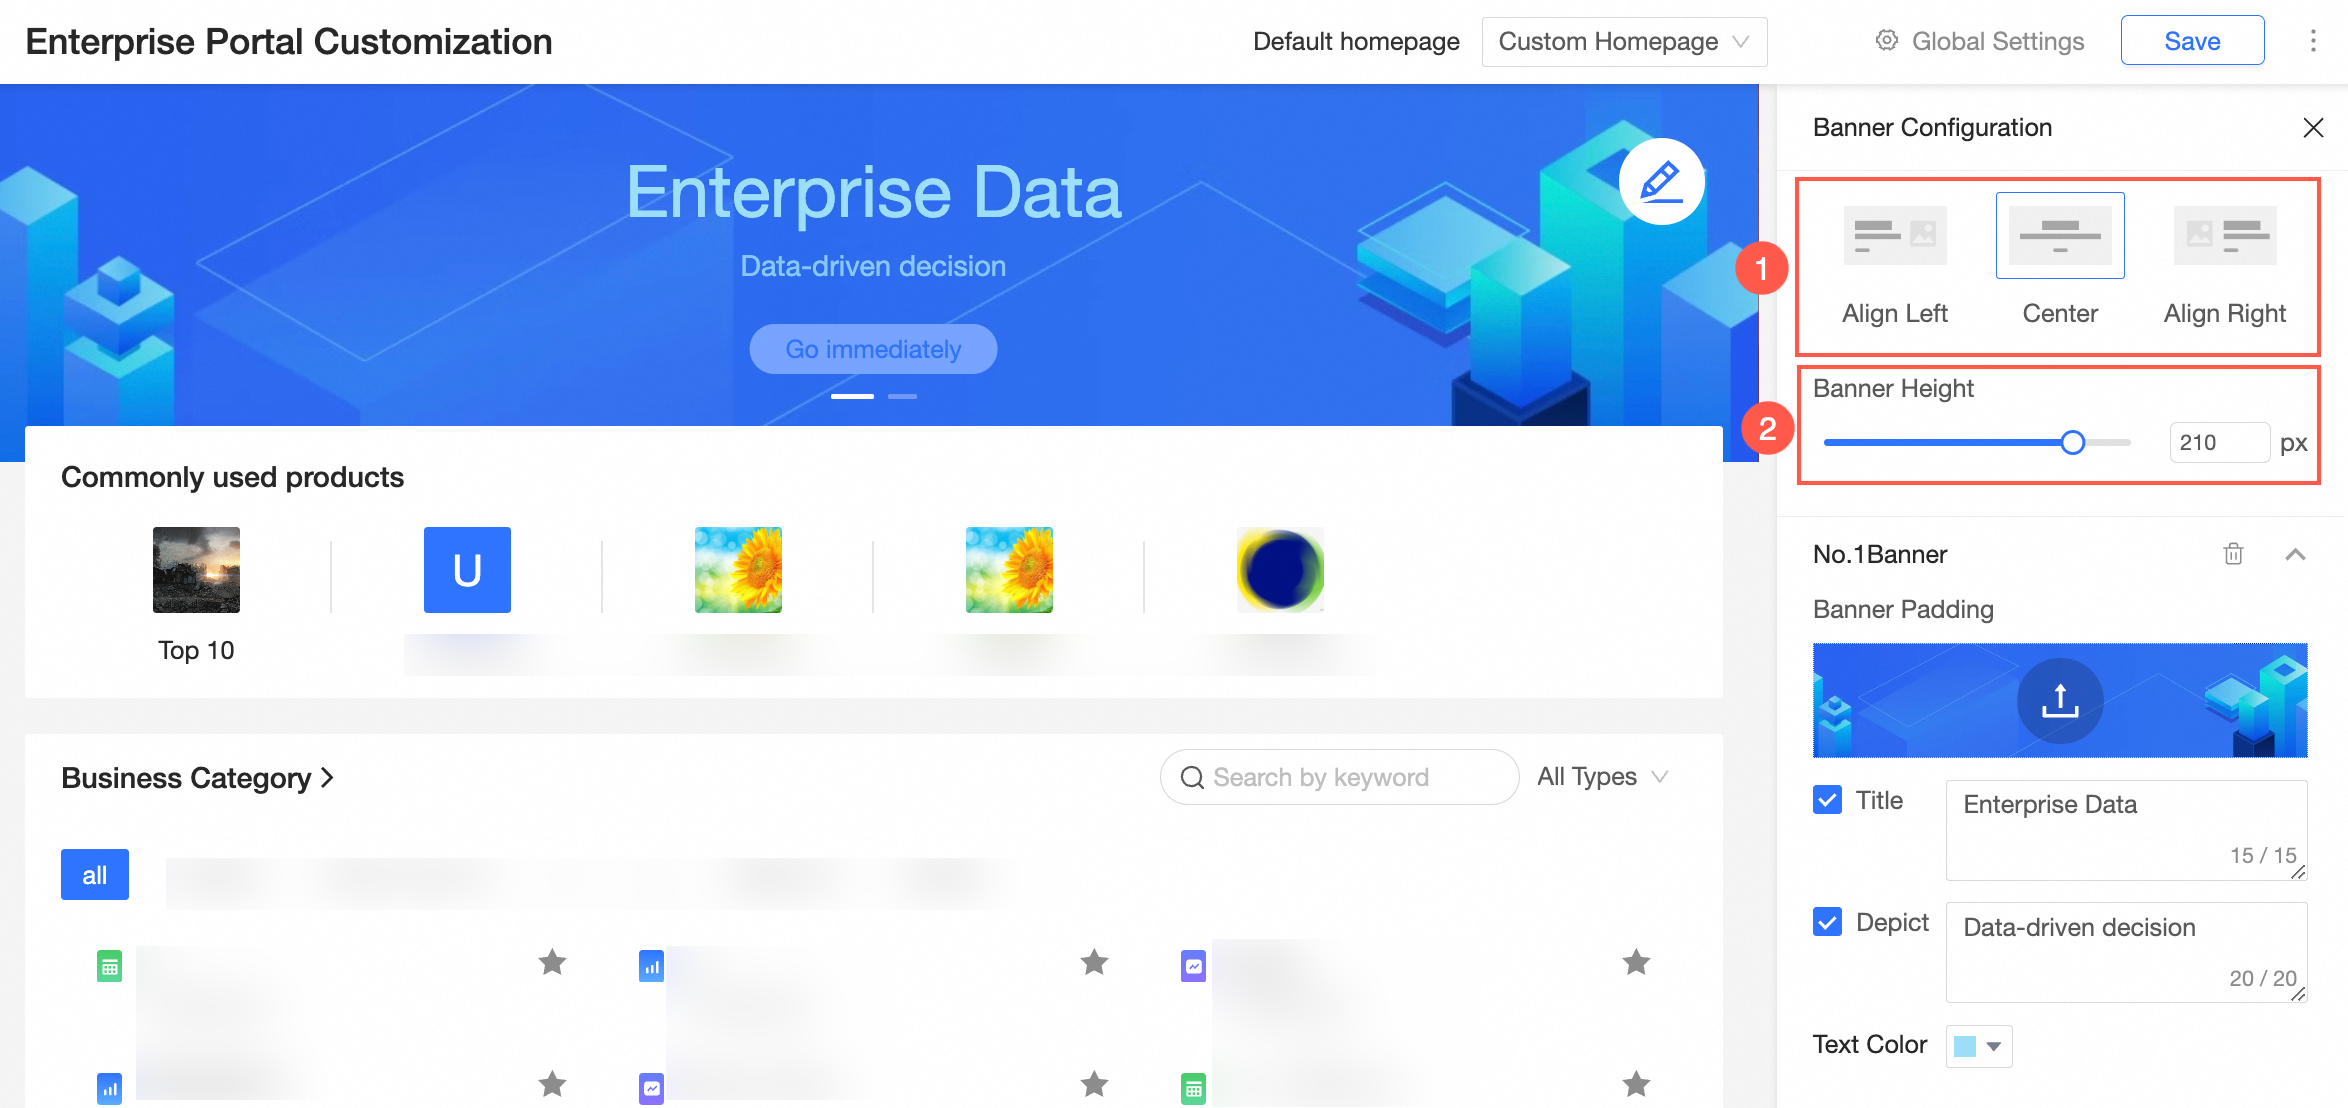
You can globally adjust the title alignment (①) and height (②) for all banners.
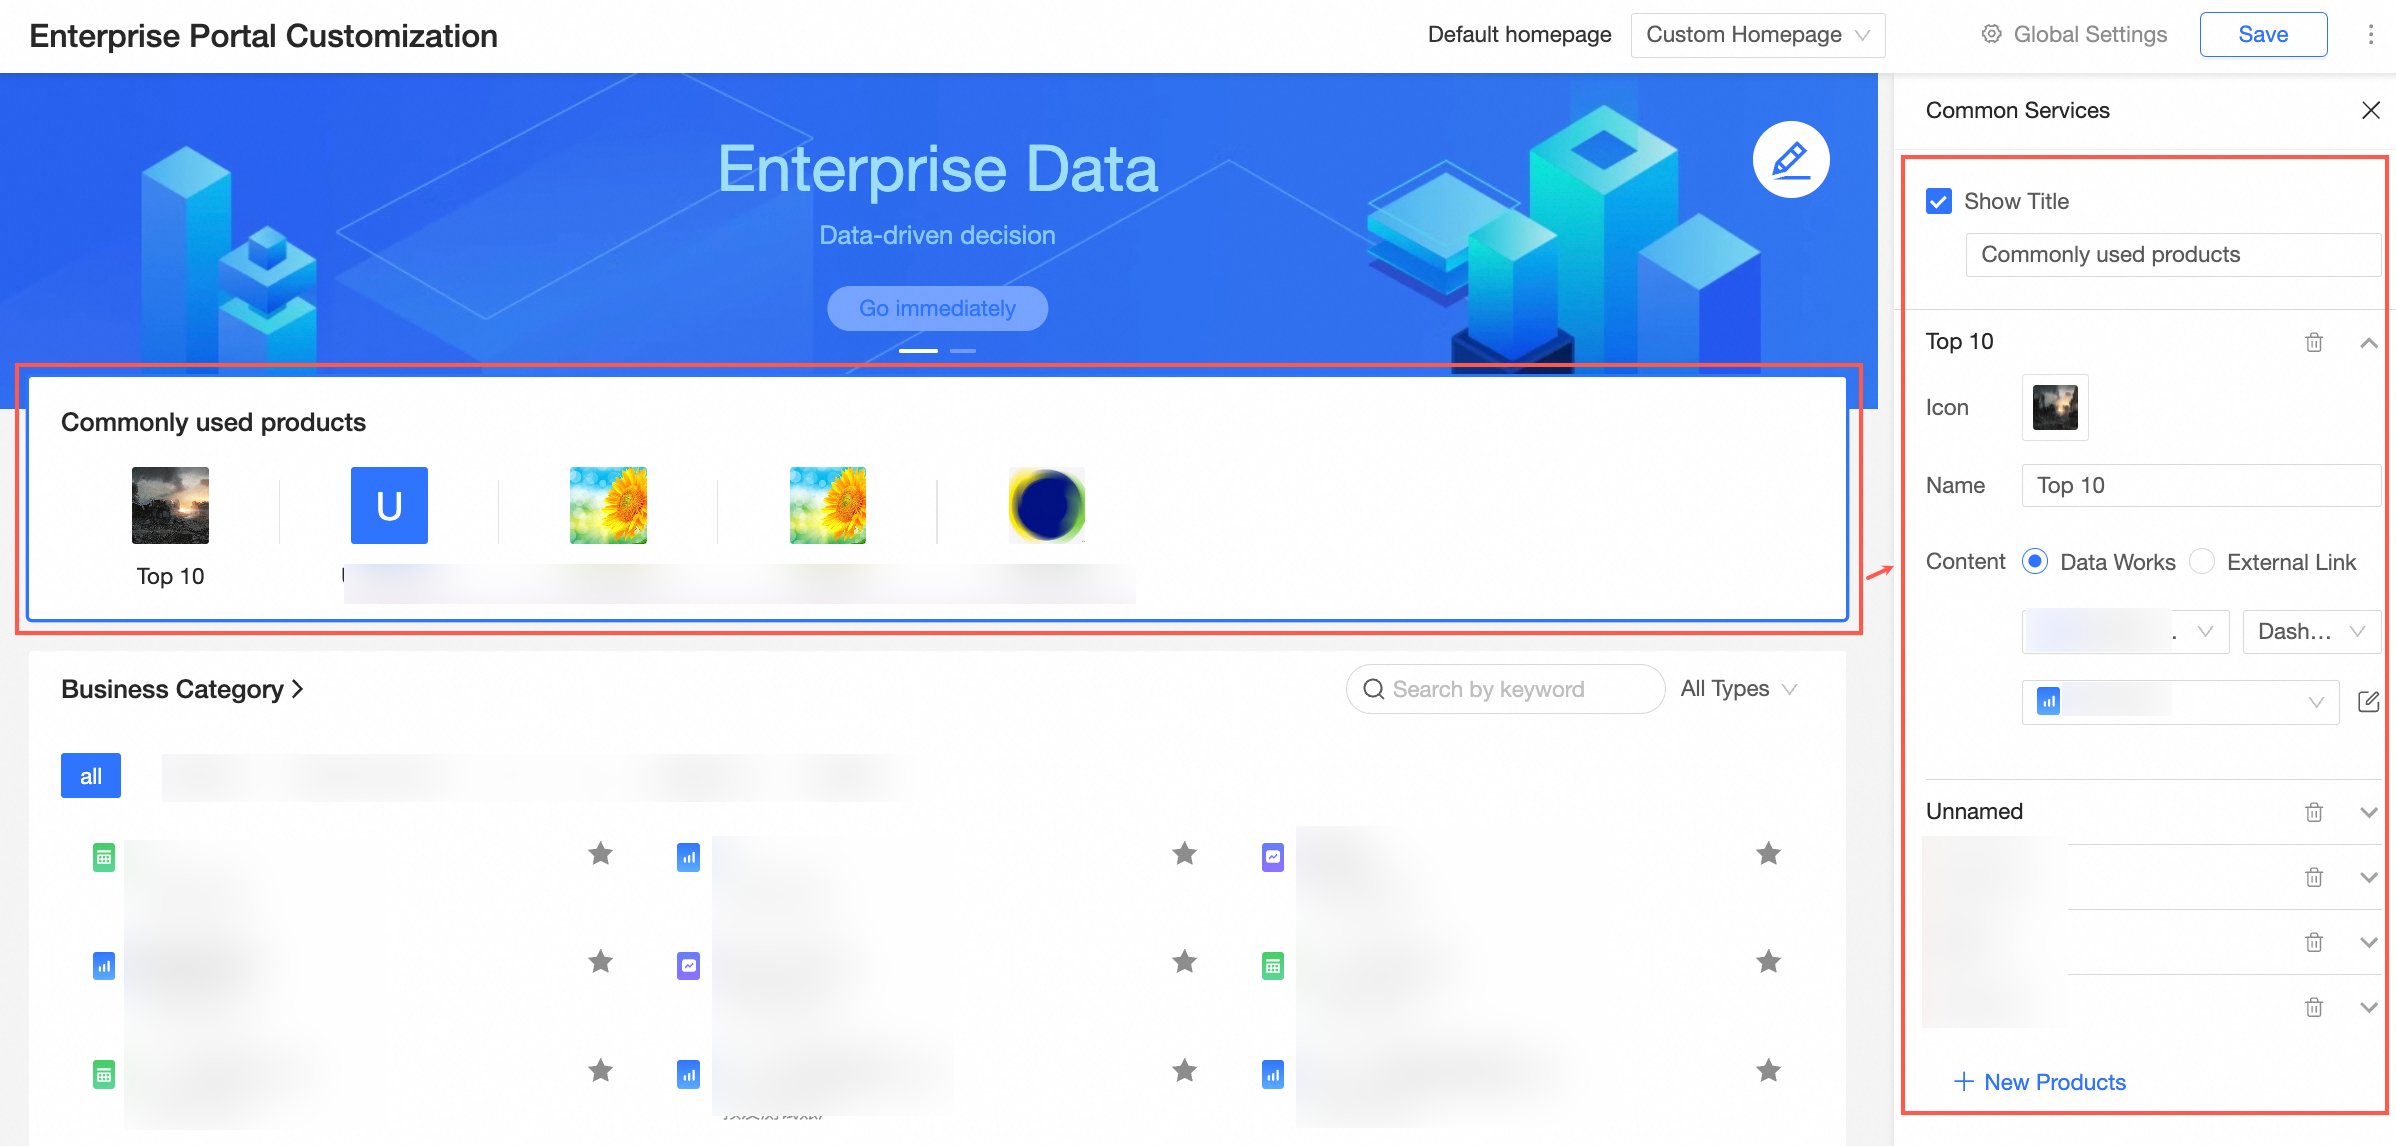
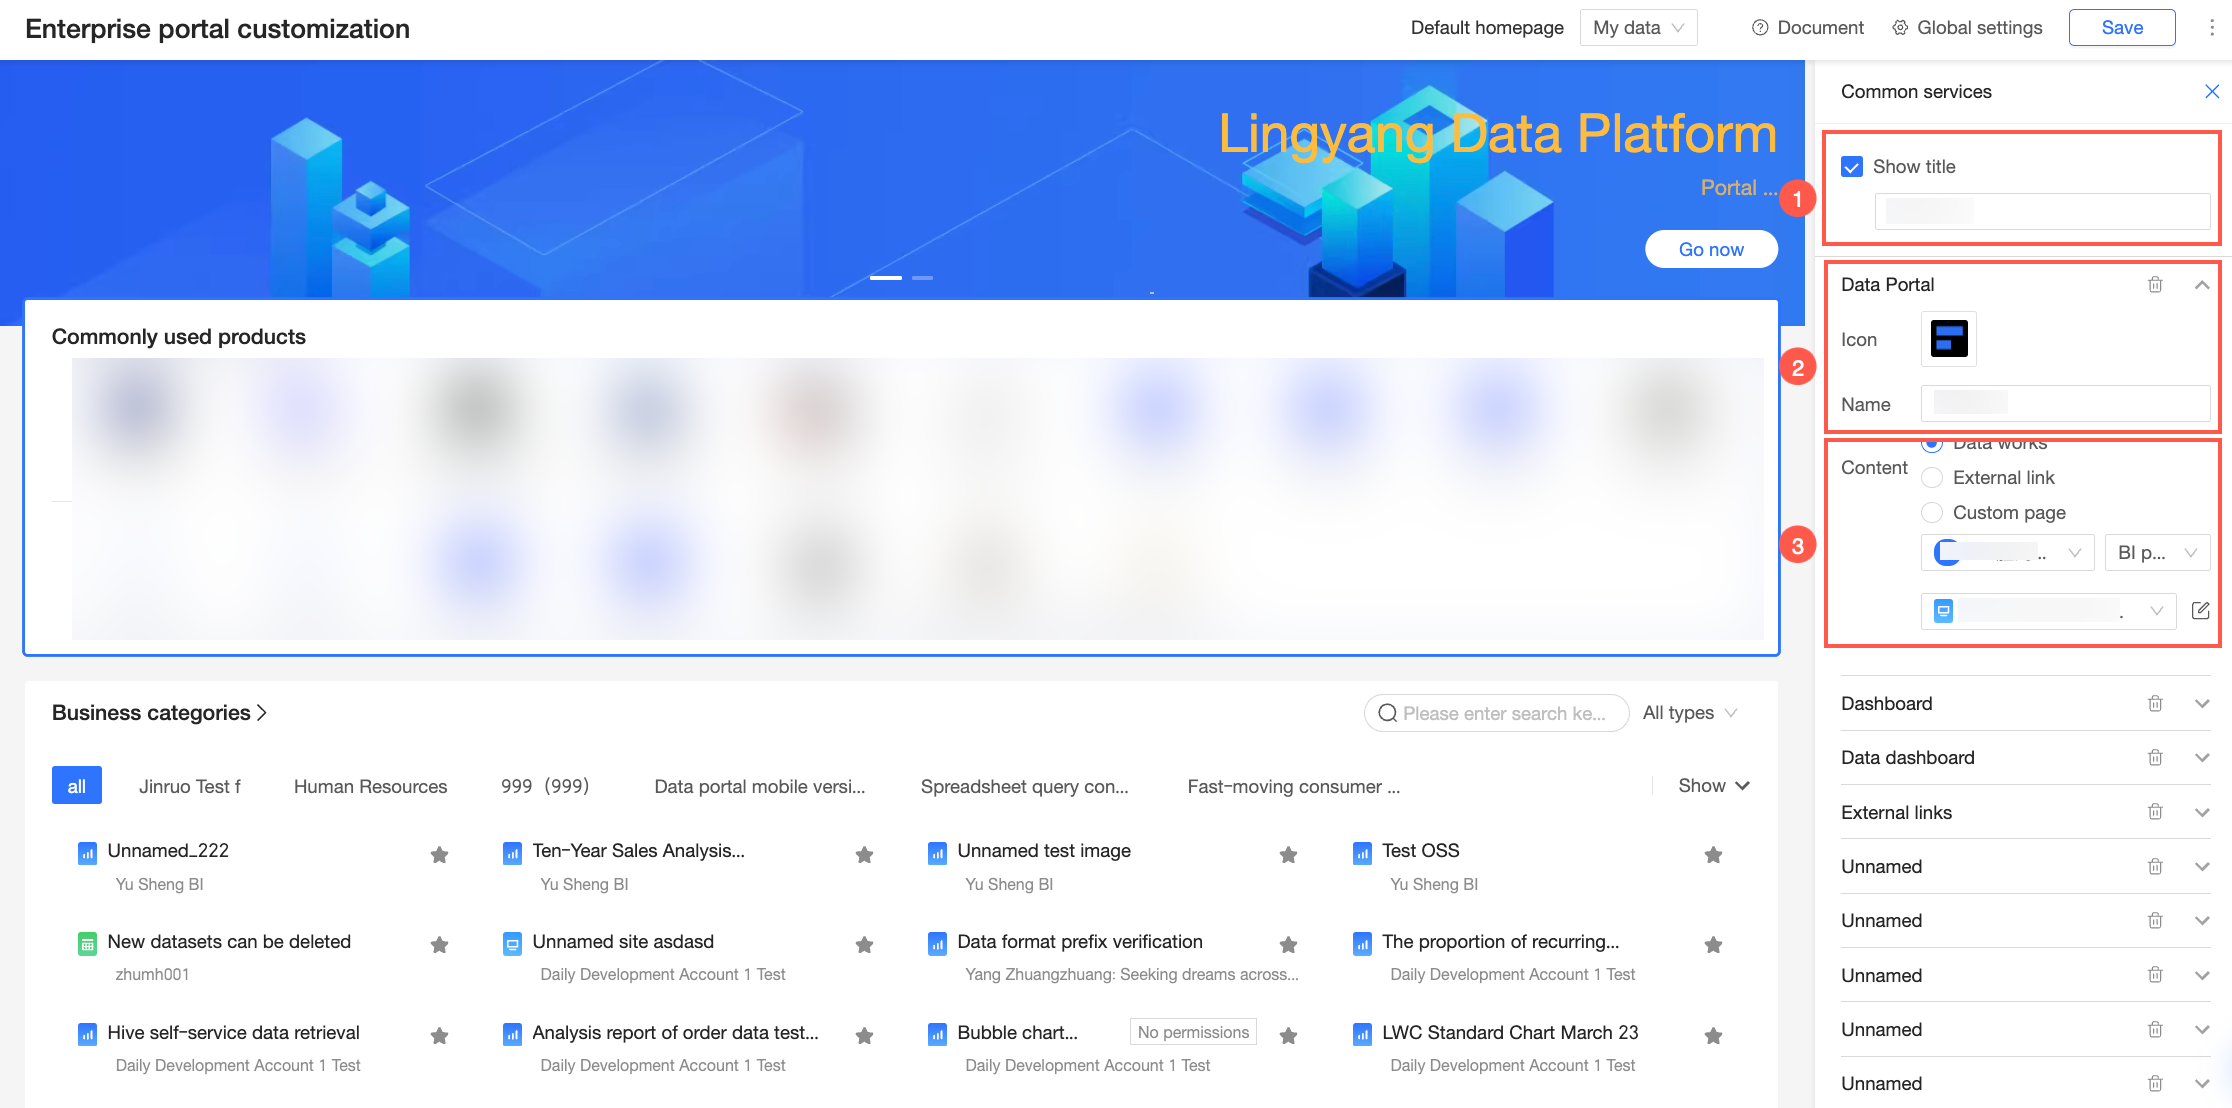
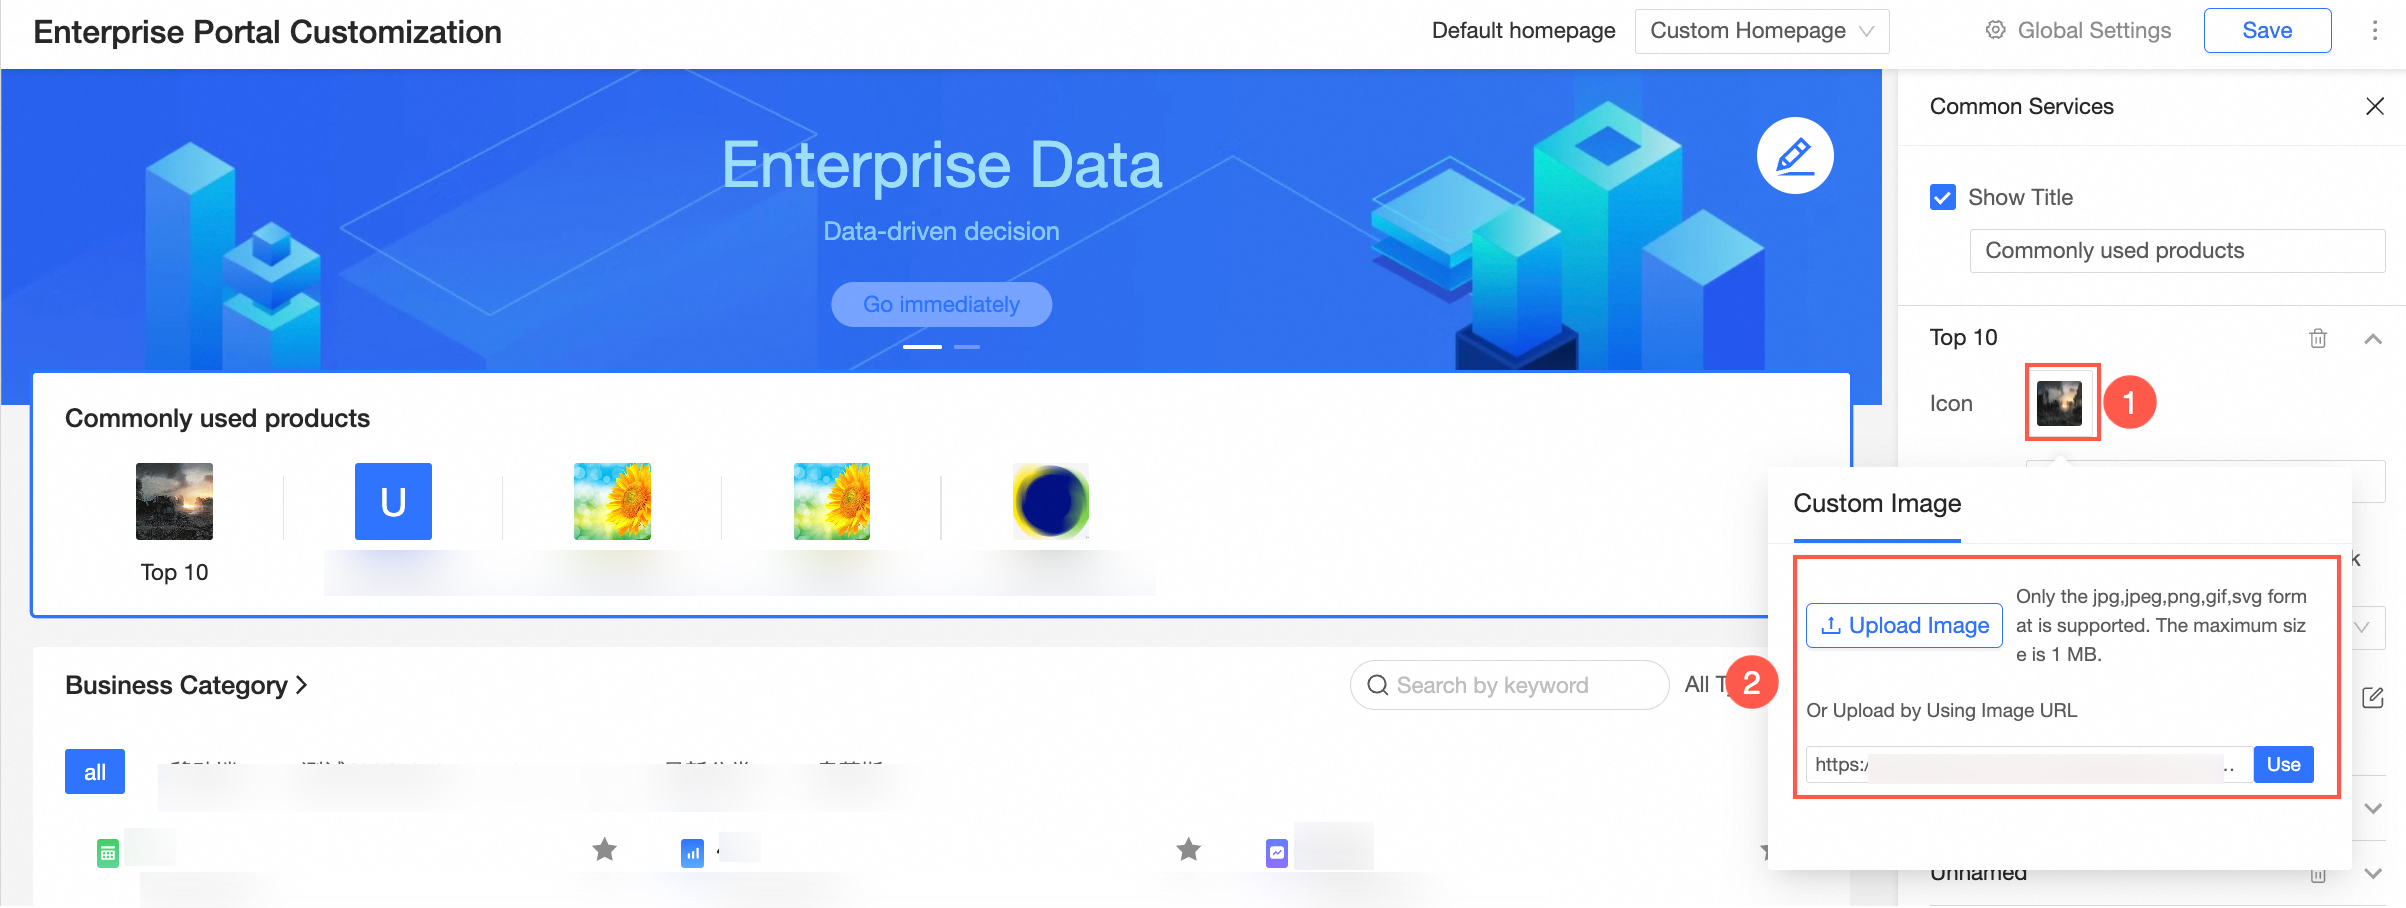
Common Services: Use this section to display recommended portals, such as a master dashboard or other key portals featured by the organization administrator.
① Customize the section title.
② Configure the portal's icon and title.
③ Configure the content to embed. You can embed Quick BI Works, an external link, or a custom page.
NoteThere is no limit to the number of portals you can add to the Common Services section. However, for the best display, we recommend adding only as many portals as you need.
Parameter
Description
Show Title
Specifies the title of the displayed content.
The naming rules are as follows:
It can contain only Chinese characters, letters, digits, underscores (_), and hyphens (-).
It must be globally unique.
Icon and Name
Customizes the icon and title of the added portal.
You can set a custom icon. You can upload a local image or provide an image URL.
 Note
NoteIf you do not upload an image, a default color-block icon is used, which displays the first character of the title.
Content
Specifies the content to embed in the portal.
You can embed Quick BI Works, an external link, or a custom page.
Quick BI Works: Embeds Quick BI Works created in a workspace of the current organization.
external link: Embeds content from other websites or platforms by using an external URL.
custom page: Embeds a custom page developed in Quick BI for the current organization.
Business Categories: Configures the business navigation displayed on the Quick BI homepage.
You can customize the display title and style.

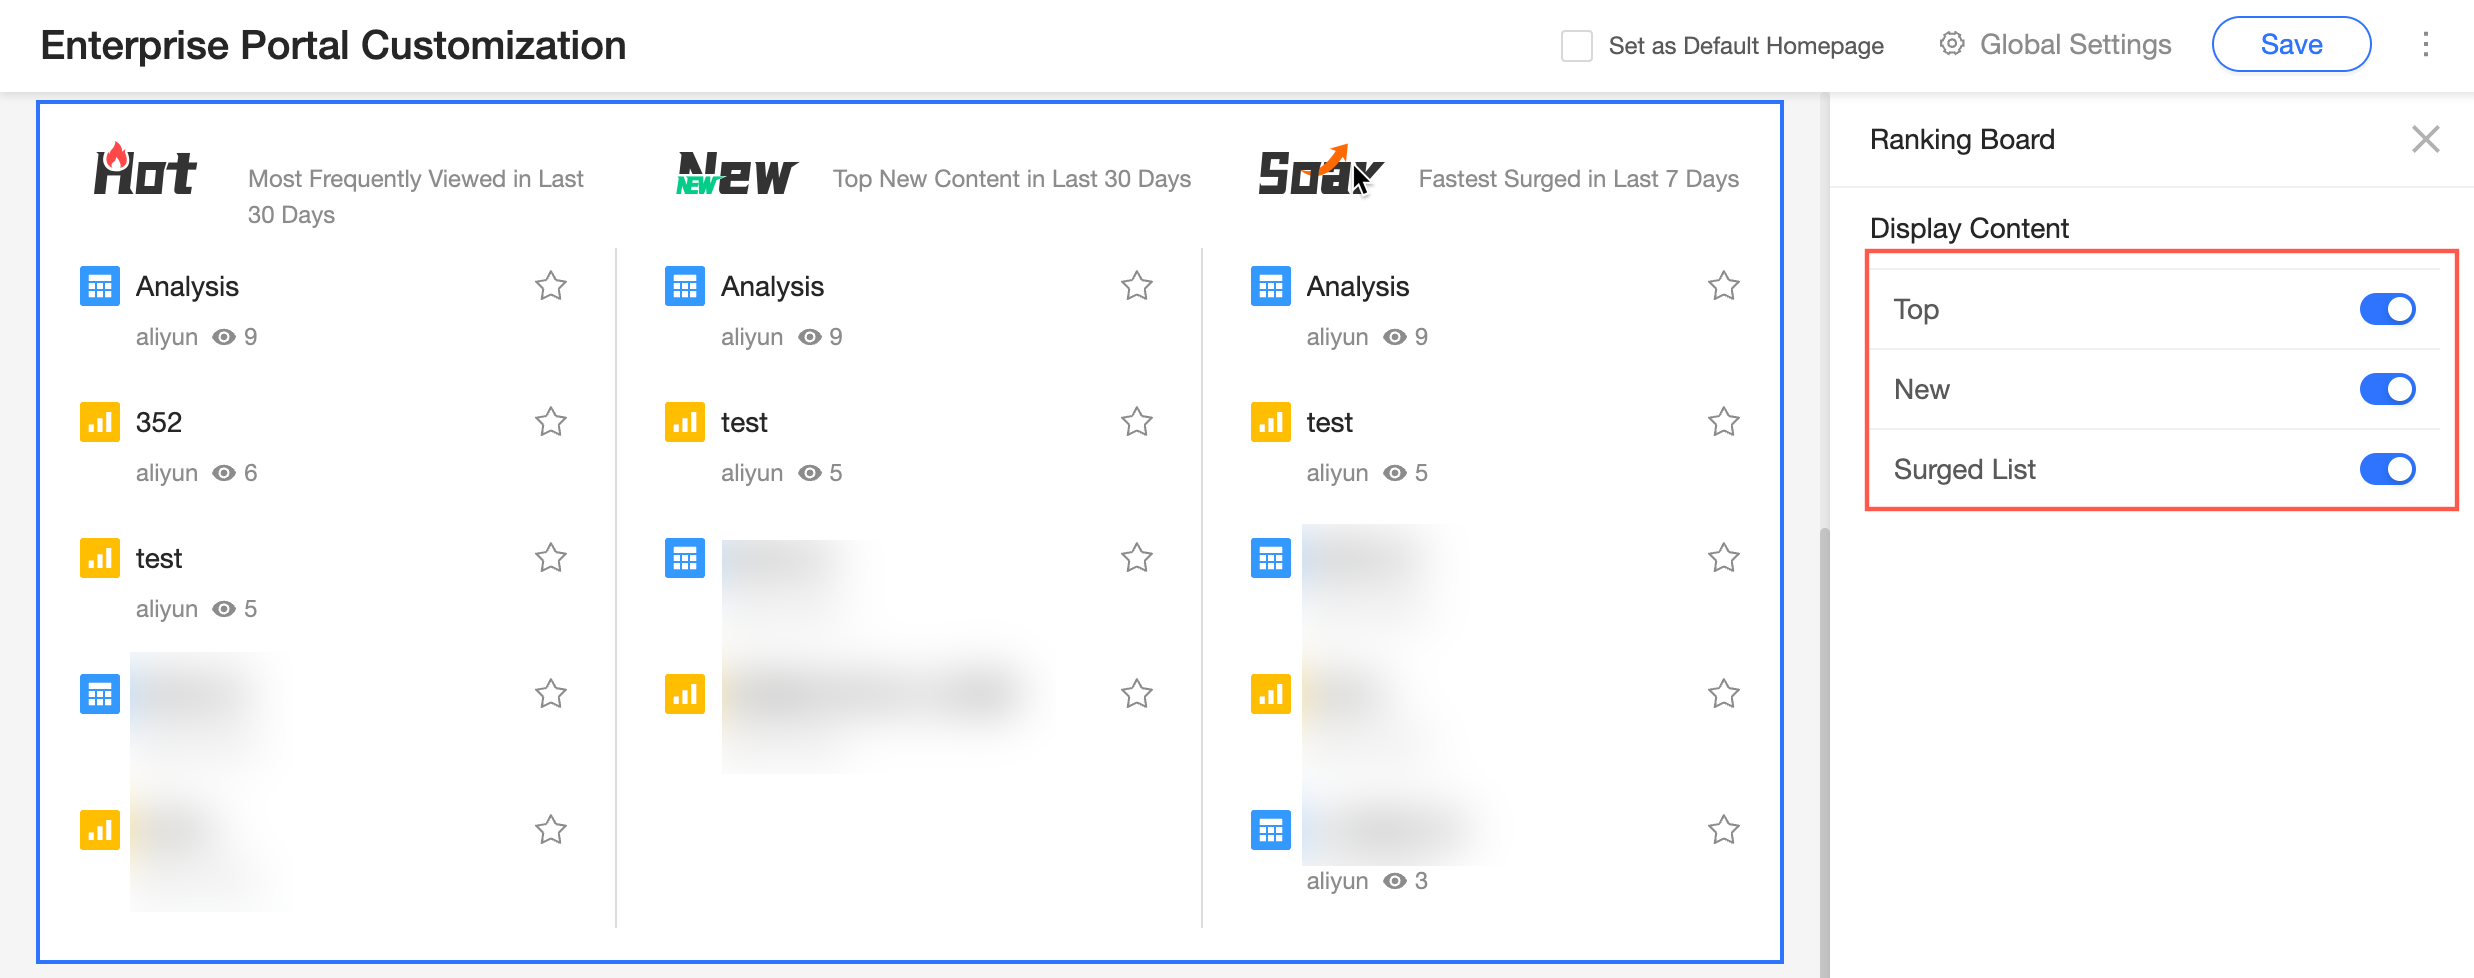
Rankings: Displays the Top, New, and Trending lists based on the page views of Quick BI Works.
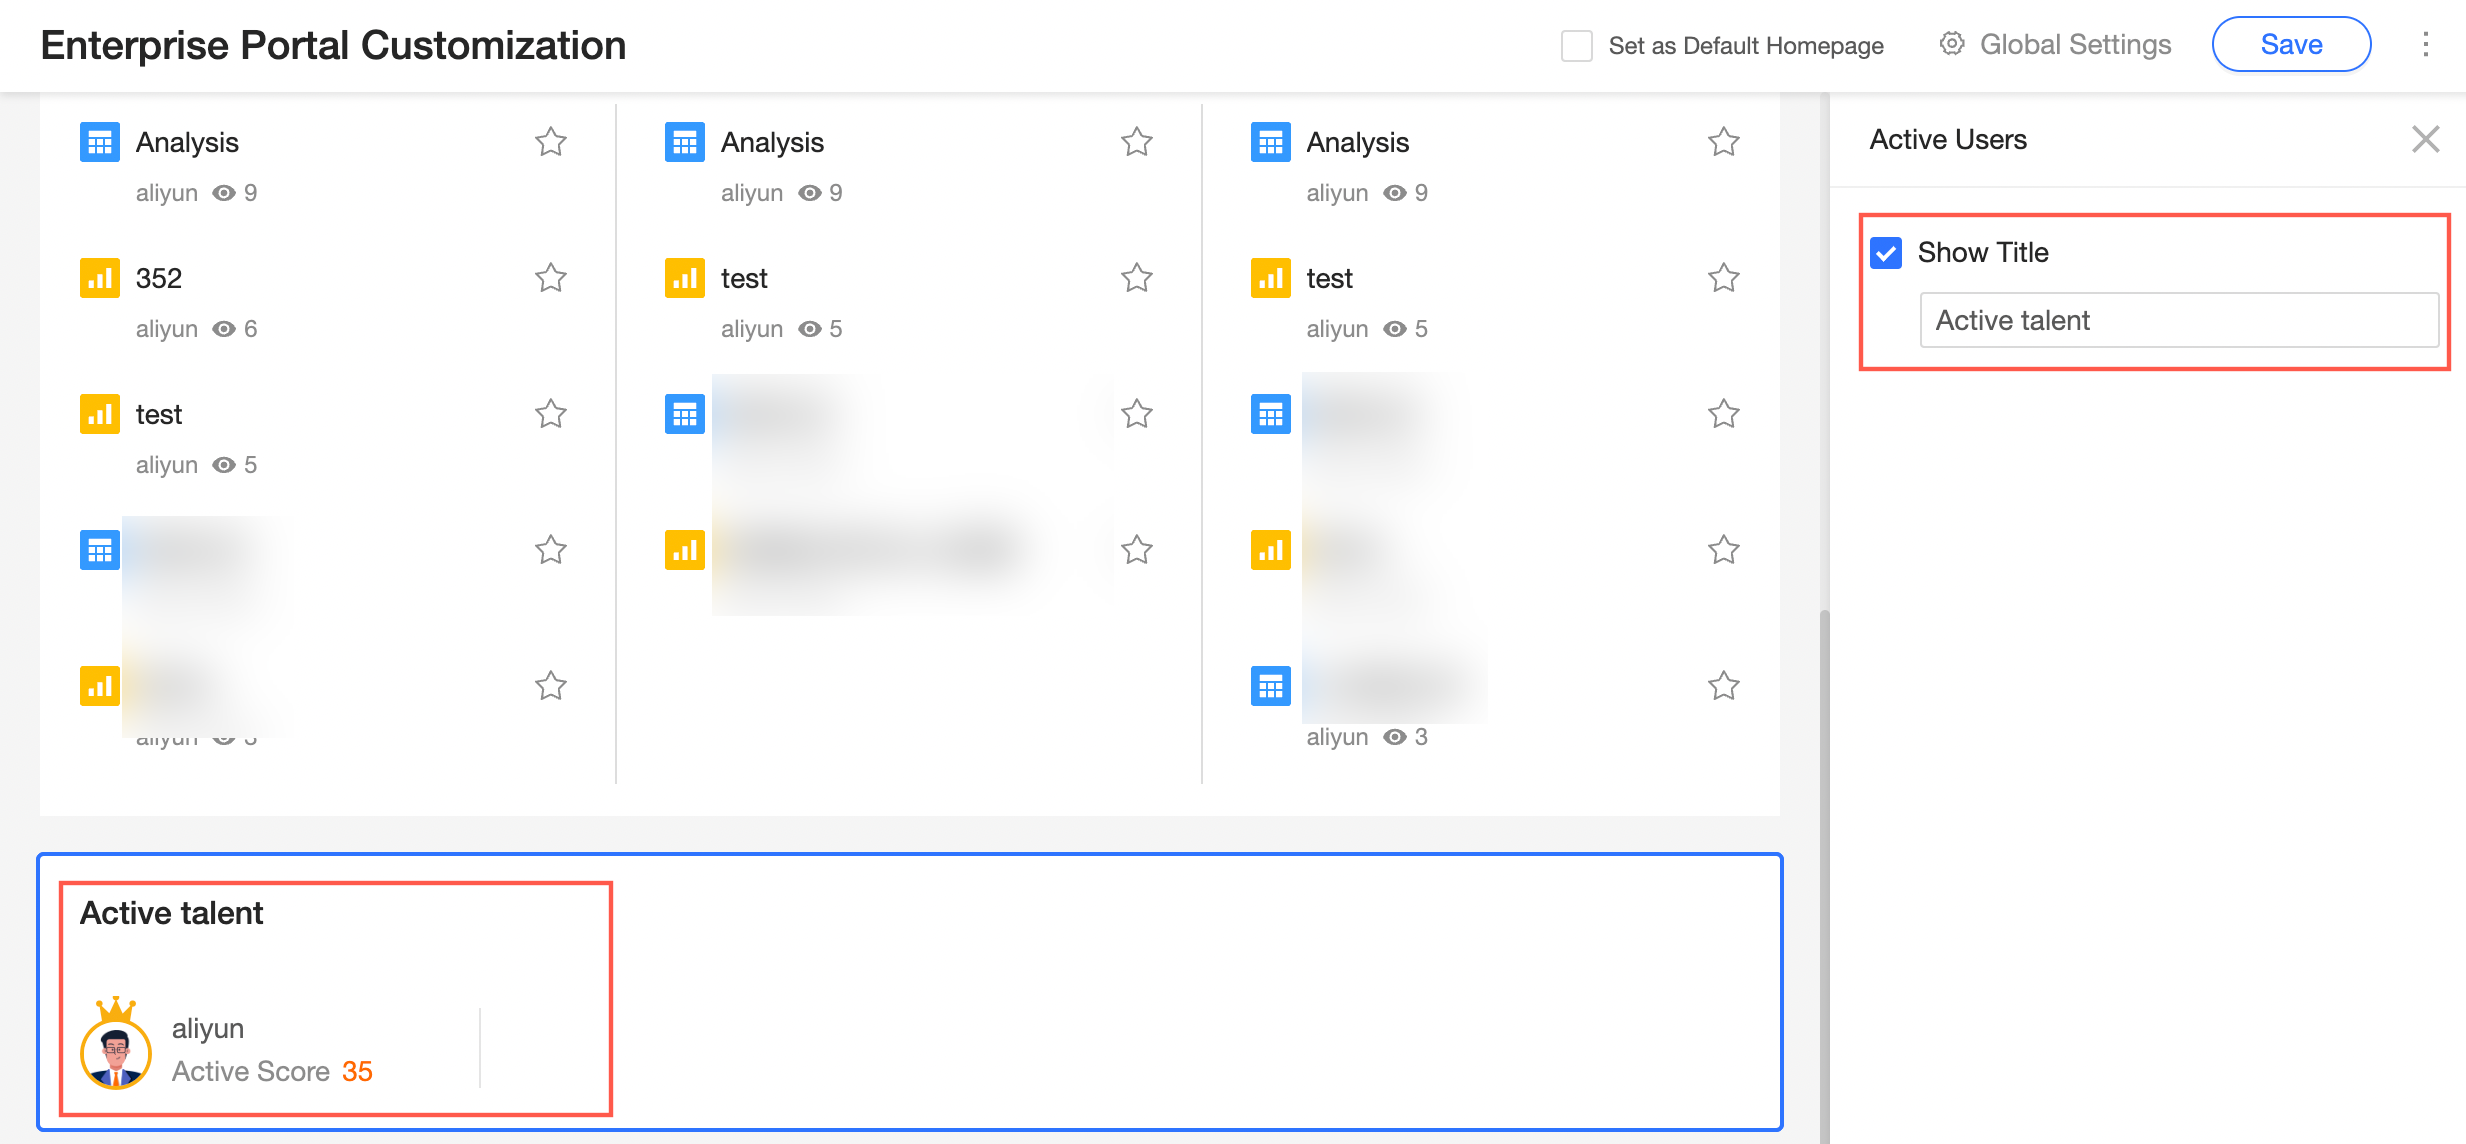
Active Users: Displays the top 10 users ranked by activity score.
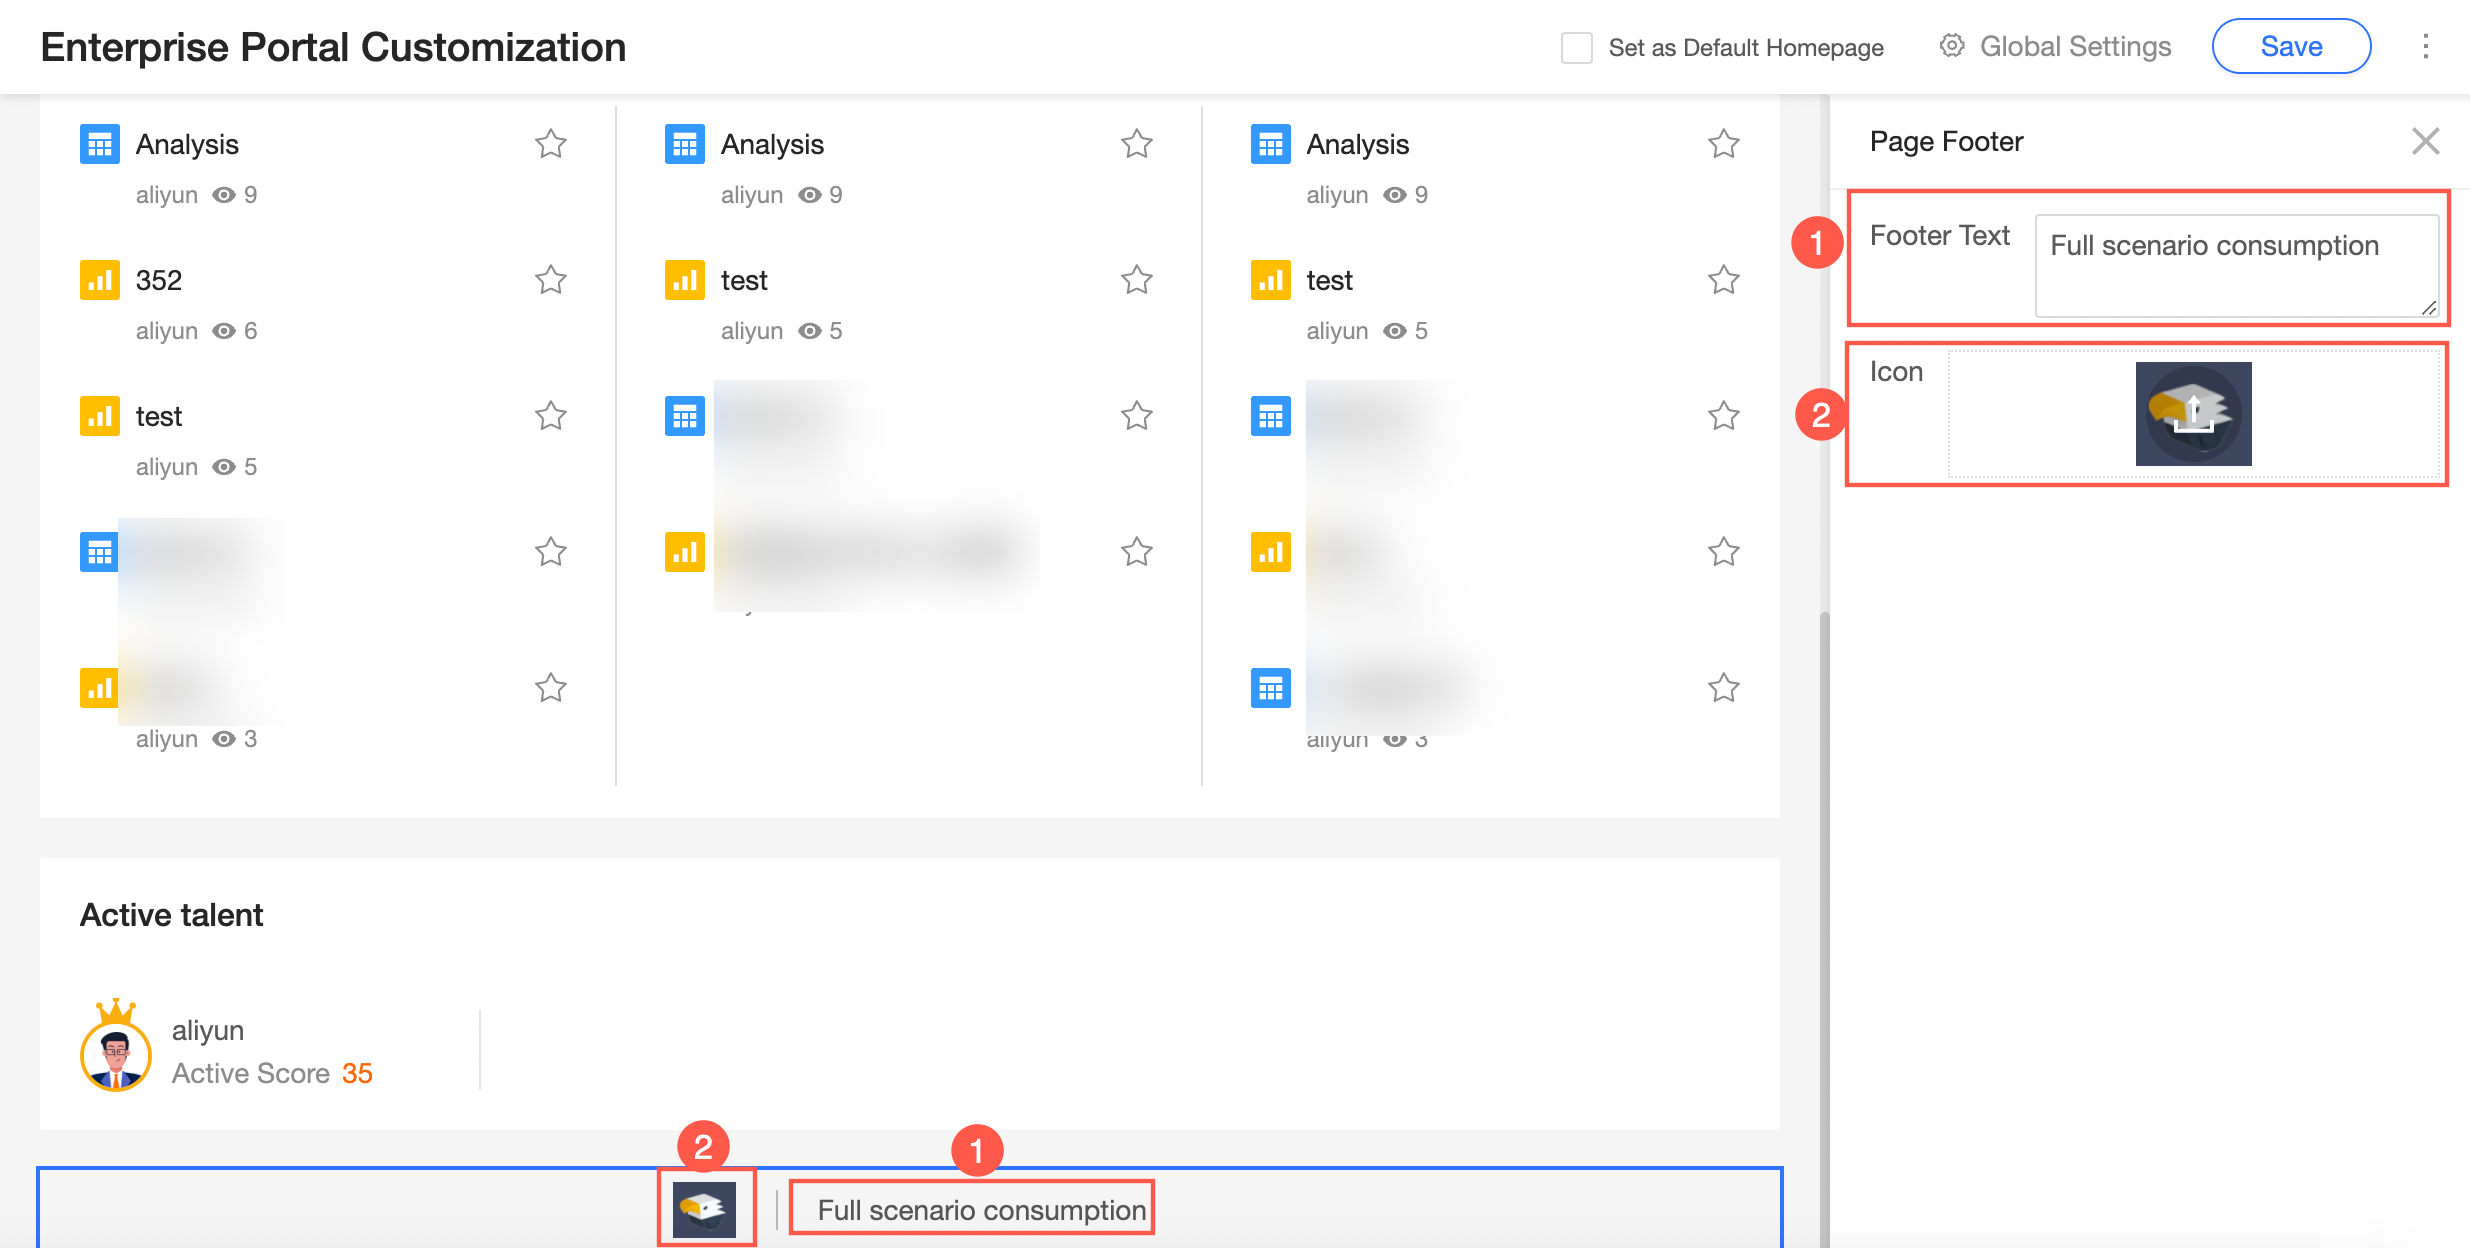
Page Footer: Allows you to add an image logo (②) and footer text (①).
Click Save to finish customizing the enterprise portal.
Customize by Embedding a Page
On the right side of the PC Enterprise Portal Customization page, click the Embed Page tab.
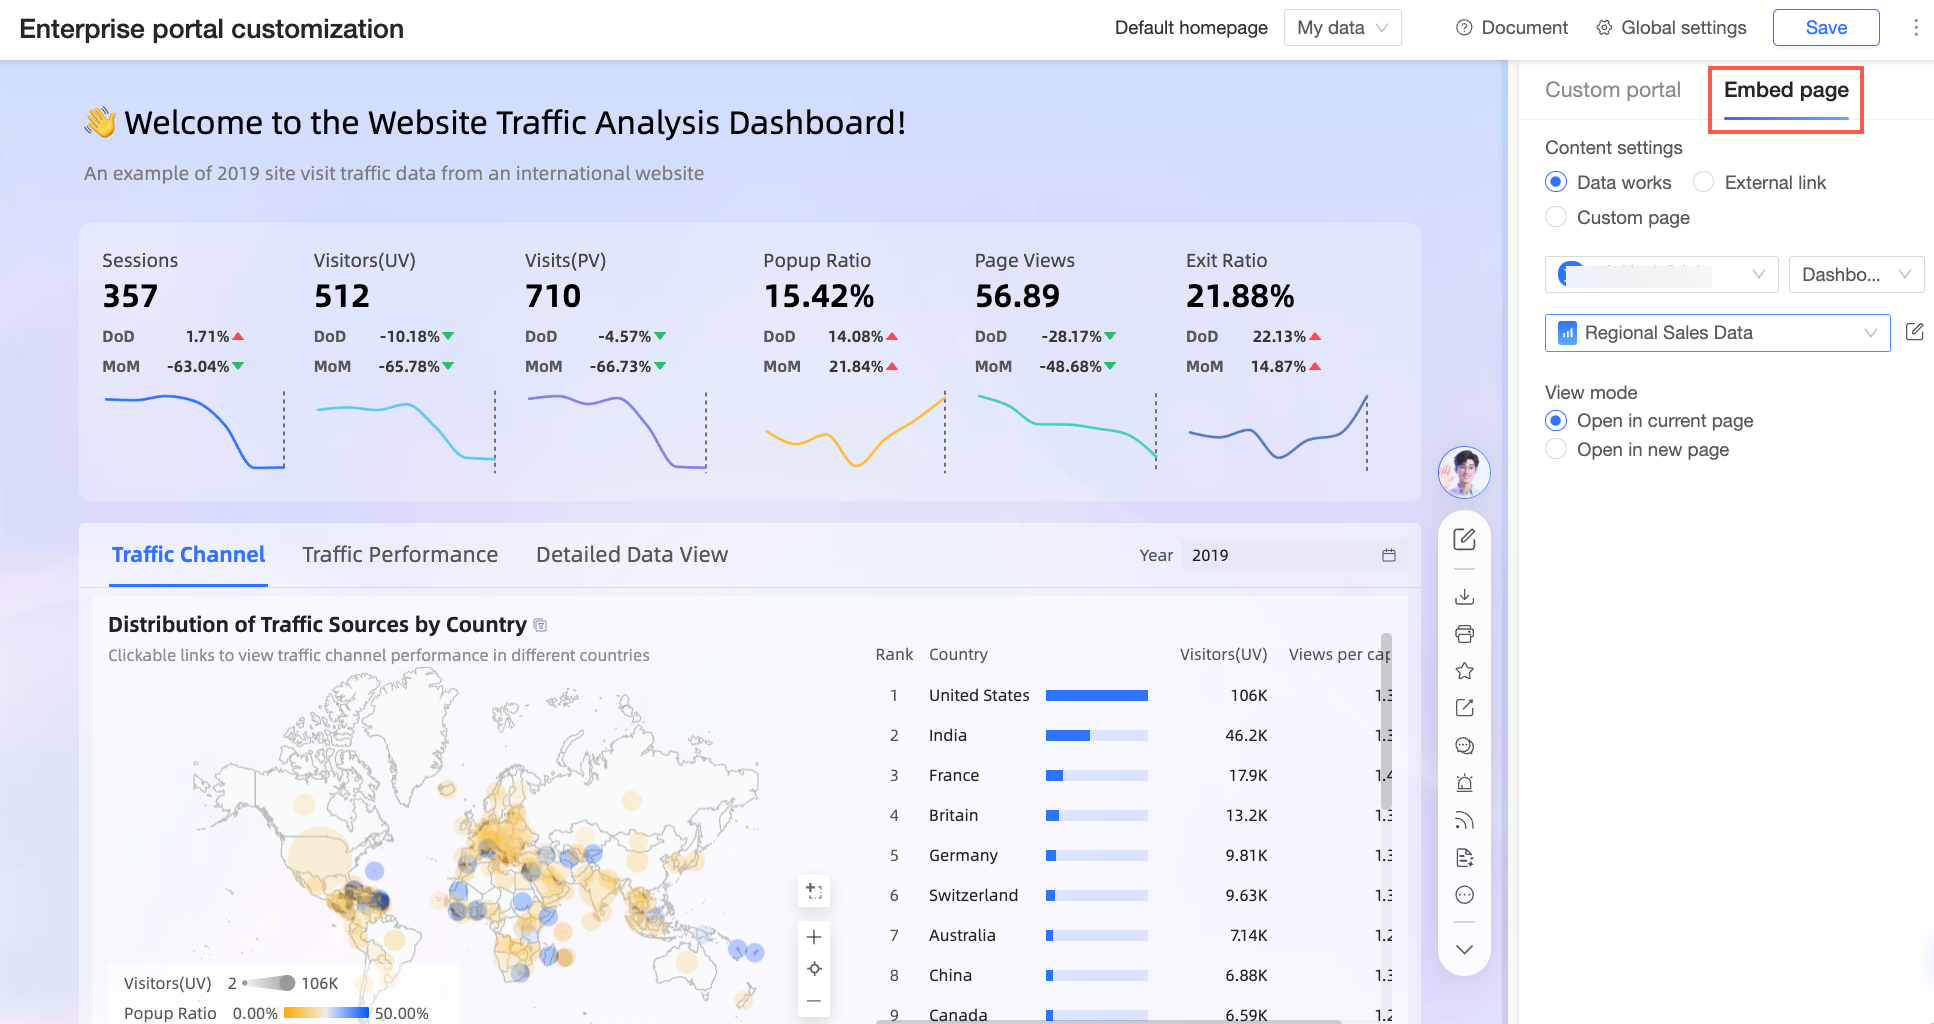
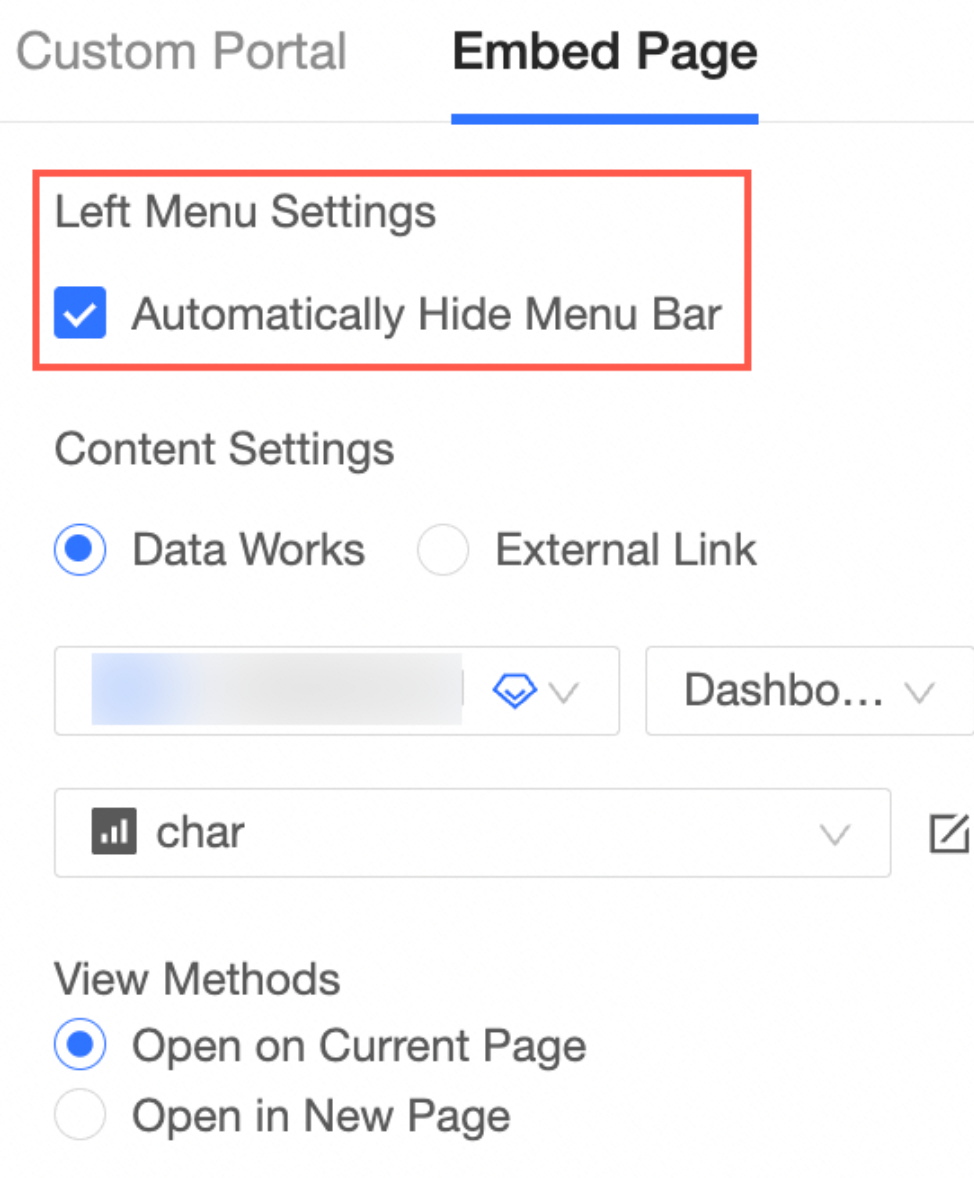
In the Left-side Menu Settings section, specify whether to collapse the menu by default.
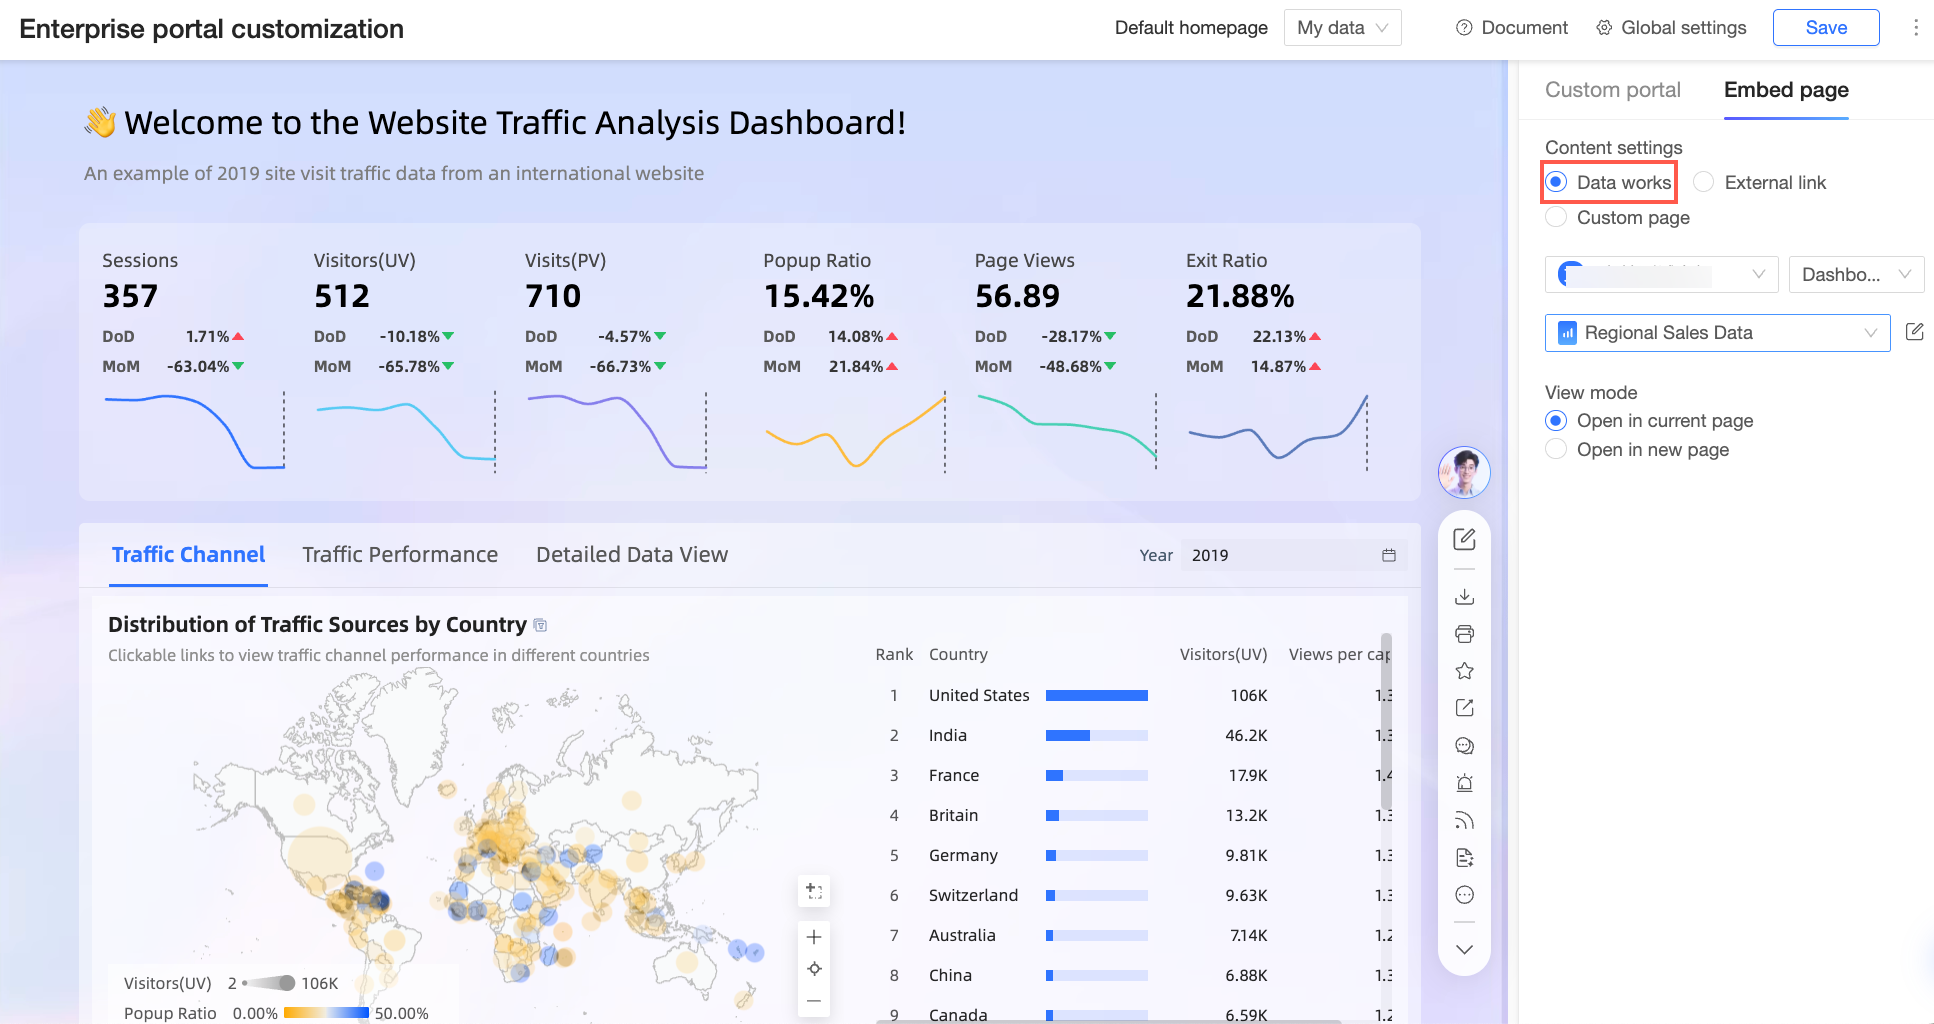
In the Content Settings section, select an embedding method and configure the content to display.
Embedding method
Description
Quick BI Works
Embeds Quick BI Works created in a workspace of the current organization.
Click Quick BI Works, then specify the workspace, work type, and the specific work to embed. You also need to set how the content is opened.
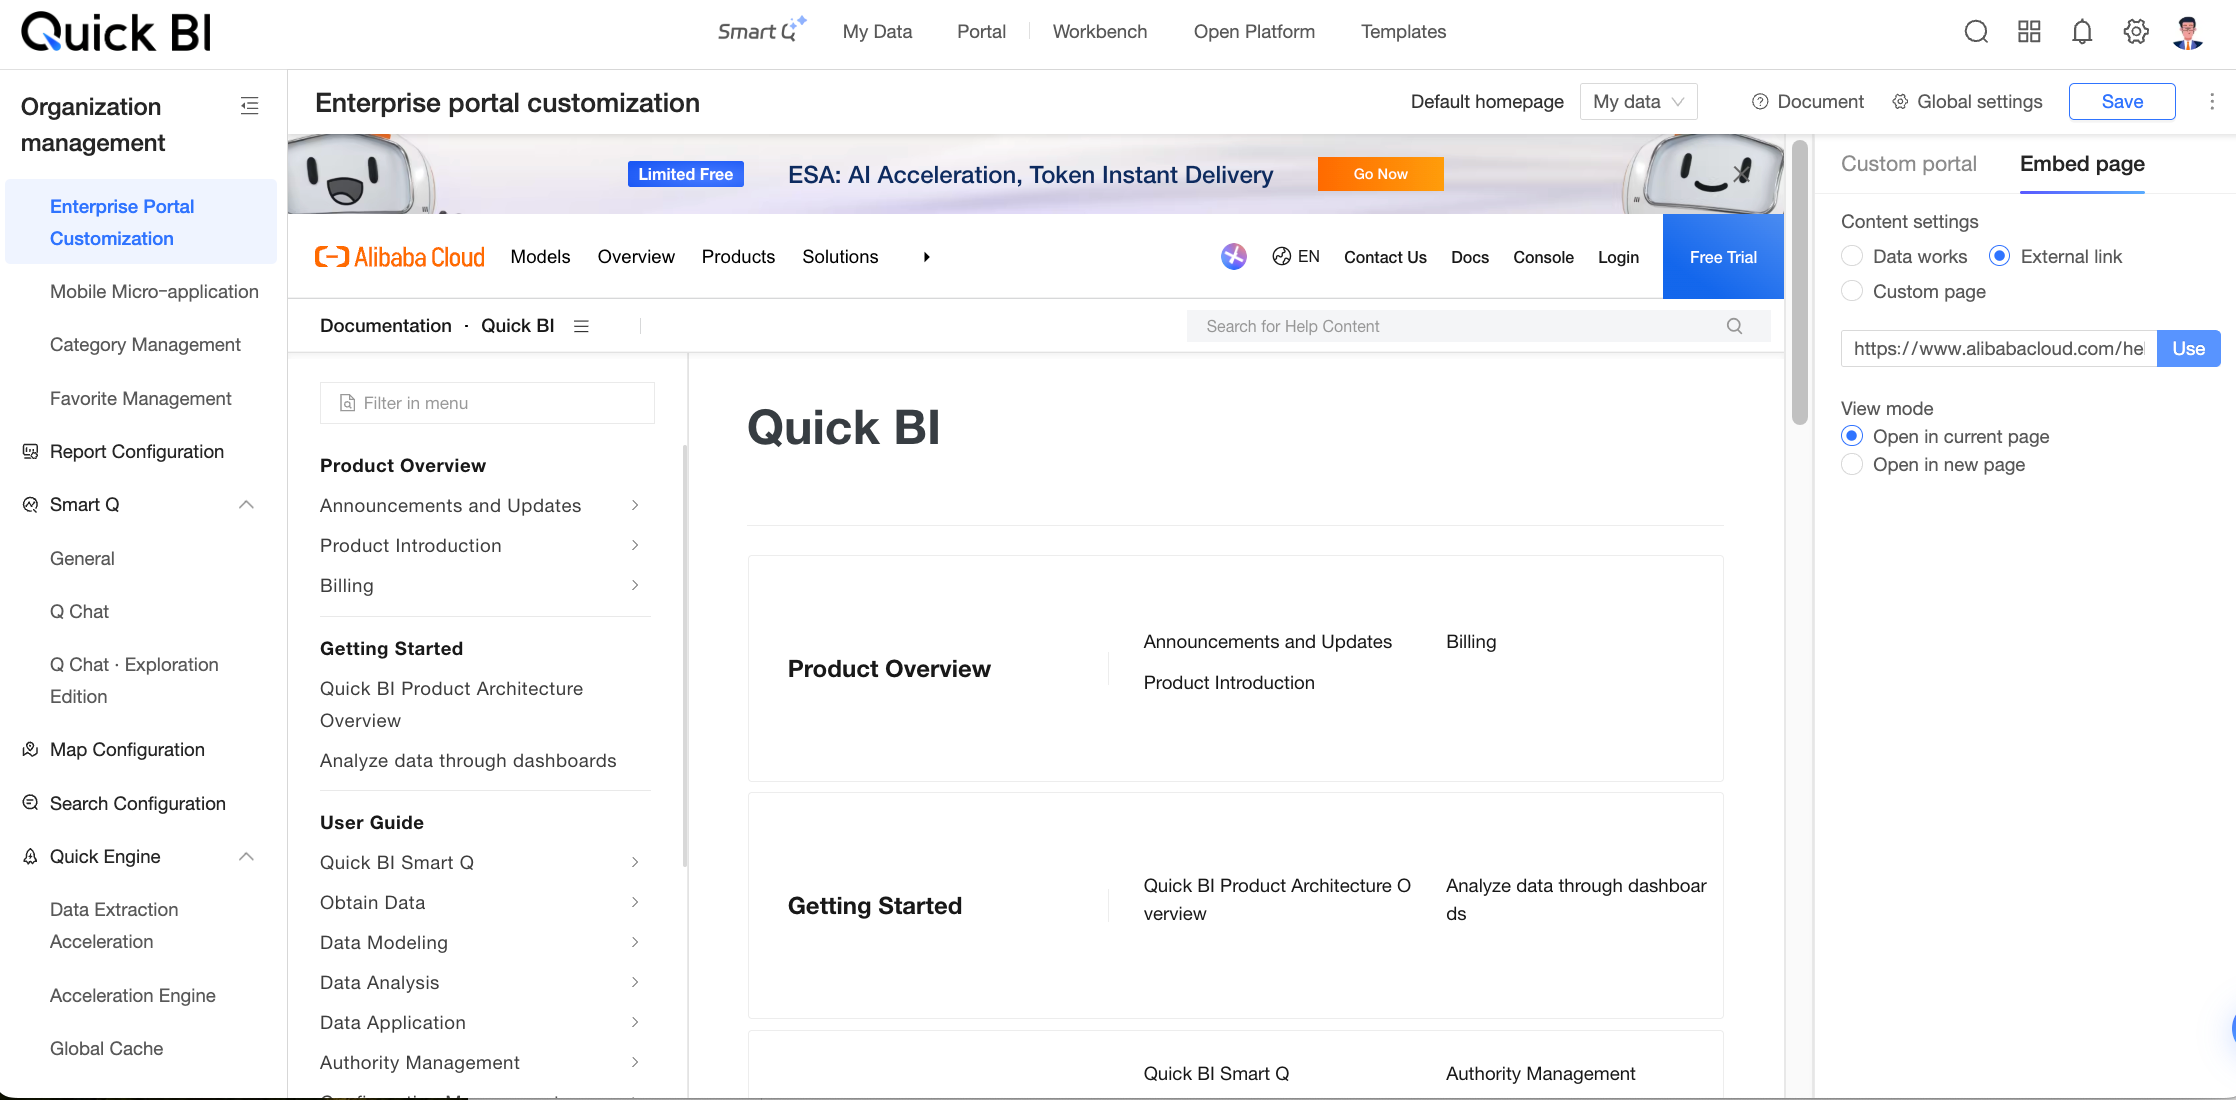
external link
Embeds content from other websites or platforms by using an external URL.
After entering the URL, click the Use button to preview the embedded content on the left. You can also set how the content is opened, with the options Open in current page and Open in new window.
custom page
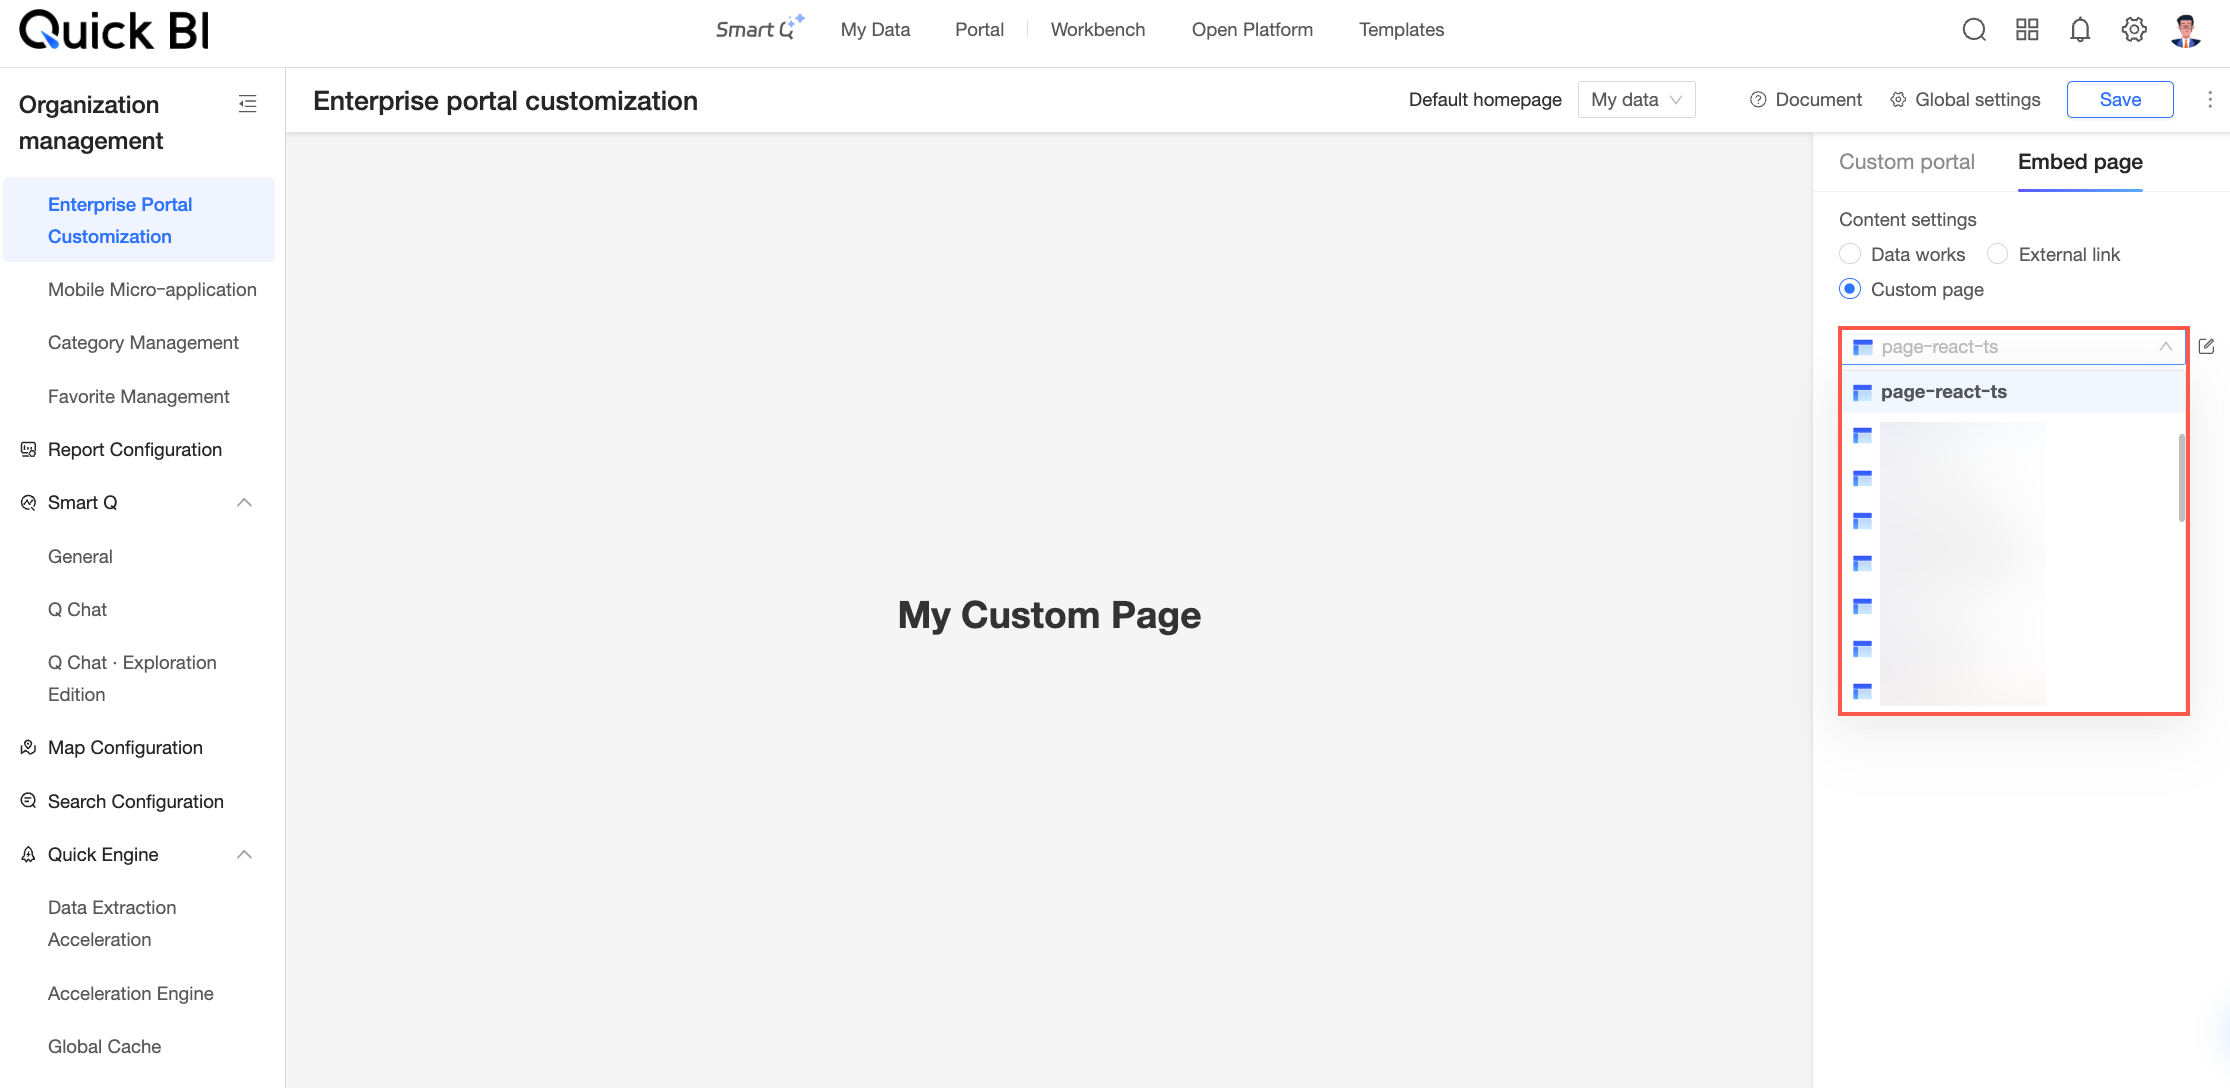
Embeds a custom page developed in Quick BI for the current organization.
Click Custom Page, and then select the custom page to embed from the dropdown list.
 Note
NoteA custom page can only be set to Open in current page.
Click Save to finish customizing the enterprise portal.
Homepage Settings
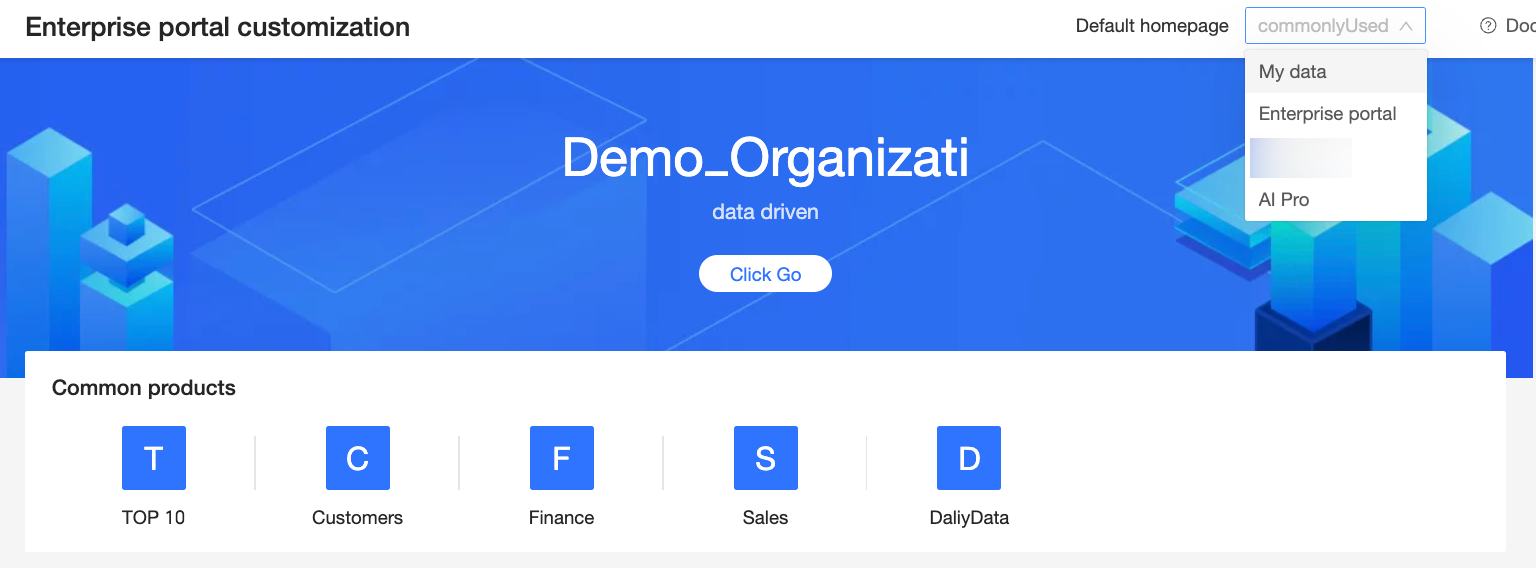
Quick BI allows you to set a personalized homepage for each user, so they see relevant reports upon login. You can set the default homepage to My Dashboard, enterprise portal, or AIPro.
You must purchase the AIPro edition to set AIPro as the default homepage.
This edition is currently available in the China (Hong Kong), Singapore, Malaysia, Indonesia, Japan, US, and Germany regions. It will be rolled out to other regions soon.
The following sections describe how to configure the My Dashboard homepage.
Entry Points
Entry point 1: In My Dashboard -> My Favorites, find the work that you want to set as the homepage, click the  icon, and select Set as Homepage.

Entry point 2: In Workbench -> dashboard, click the  icon to the right of a work's name to go to its preview page. Then, click Set as Homepage as shown in the figure.
The Set as Homepage button is only available for works in your favorites. To set a work as your homepage, first add it to My Favorites.
Supported work types include: dashboard, spreadsheet, BI portal, and Data Entry.
Result
After you set the homepage, you can view your new homepage under My Dashboard -> Homepage.
Cancel Homepage Setting
Canceling the homepage setting removes the Homepage menu.
Hover over Homepage and click the
 icon on the right to cancel the homepage setting.
In My Dashboard -> My Favorites, find the work that is set as the homepage, click the
 icon, and select Cancel Homepage Setting.
Configuration Example
After the configuration is complete, on the PC Enterprise Portal Customization page, you can click Copy Portal URL to share the portal with others or click Go to Enterprise Portal to view the customized portal.
Different roles see different content on the homepage:
Standard users: Can access and view the enterprise portal.
Administrators: Can access, view, and edit the enterprise portal.

Precautions
The Banner module supports a maximum of three banners.