Create marketing campaigns, including primary campaigns and sub-campaigns. For definitions, see Marketing Campaign Overview.
The creator must be an administrator or a custom role that has the User Insights-Marketing Campaign-Create Campaign permission.
You can create marketing campaigns from two entry points:
-
Create a campaign from the upper-right corner of the page with full configuration options.
-
Create a campaign from the campaign calendar with simplified configuration options.
Create a new campaign from the top right corner of the page
Procedure
-
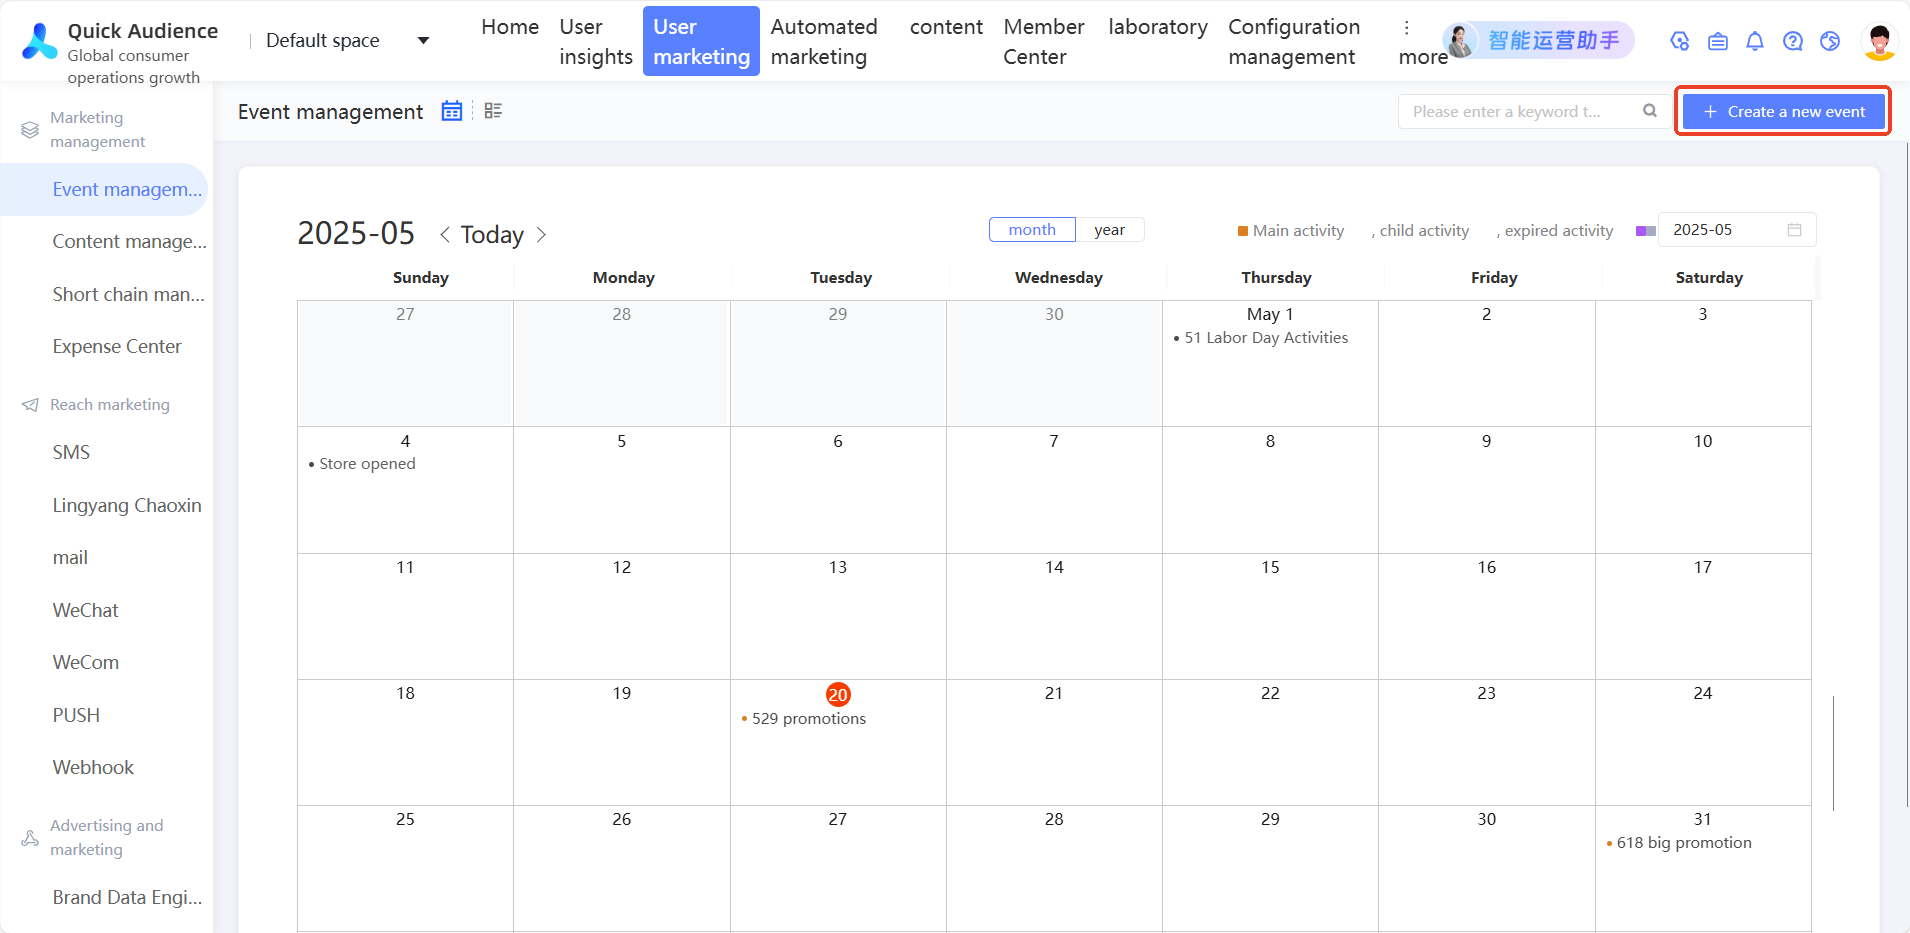
Choose Workspace> User Marketing > Marketing Management > Campaign Management to go to the campaign management page.
-
Click New campaign in the upper-right corner.
-
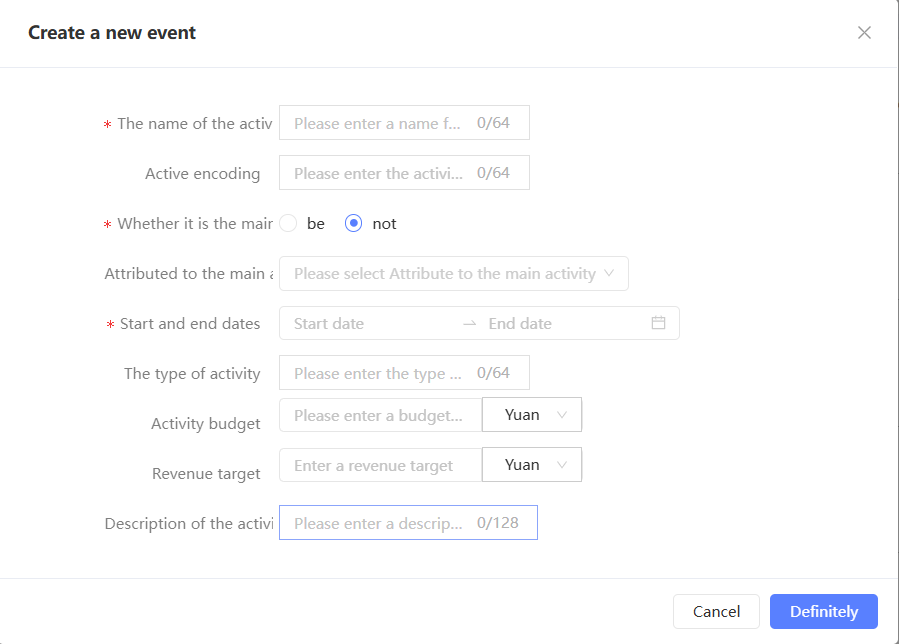
In the dialog box that appears, configure the parameters, as shown in the following table.
|
Item |
Example value |
|
campaign |
Enter a name for the campaign. |
|
campaign code |
Enter the campaign code. |
|
Whether the primary campaign |
Specify whether to create a primary campaign:
|
|
Attribution to main campaign |
If you select No for Primary campaign, a child campaign is created and the Belongs to Primary campaign field appears. You can perform the following operations:
|
|
Start and End Dates |
Select the start and end time of the campaign. Note
The start and end time of the sub-campaign must be within the start and end time of the primary campaign. |
|
campaign Type |
Enter or select an campaign type from the drop-down box, for example, Festival, Offline, or Mega Event. |
|
campaign Description |
Enter a description of the campaign. |
|
campaign budget |
Enter the campaign budget. The default unit is Yuan. You can switch to USD, GBP, EUR, or HKD. |
|
Revenue Target |
Enter a revenue target. The default unit is RMB. You can switch to USD, GBP, EUR, or HKD. |
 icon appears on the right. Click the icon to deselect.
-
Click OK.
Quickly create marketing campaigns from the event calendar
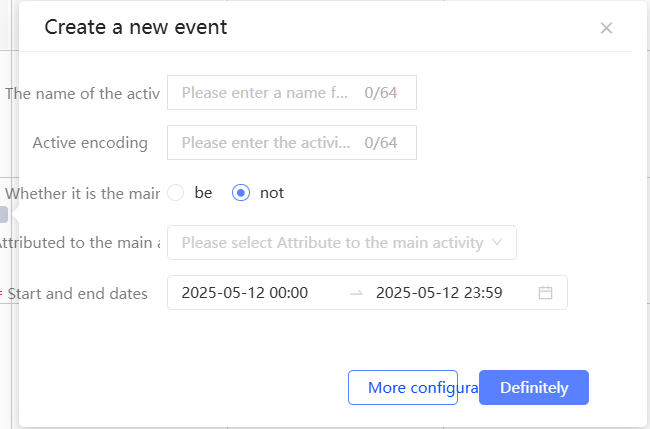
When you create a campaign from the campaign calendar, only simplified configuration items are required: campaign name, campaign code, primary campaign designation, parent campaign association, and start and end dates. The selected calendar date is used as the default start and end date, which you can change.
Procedure
-
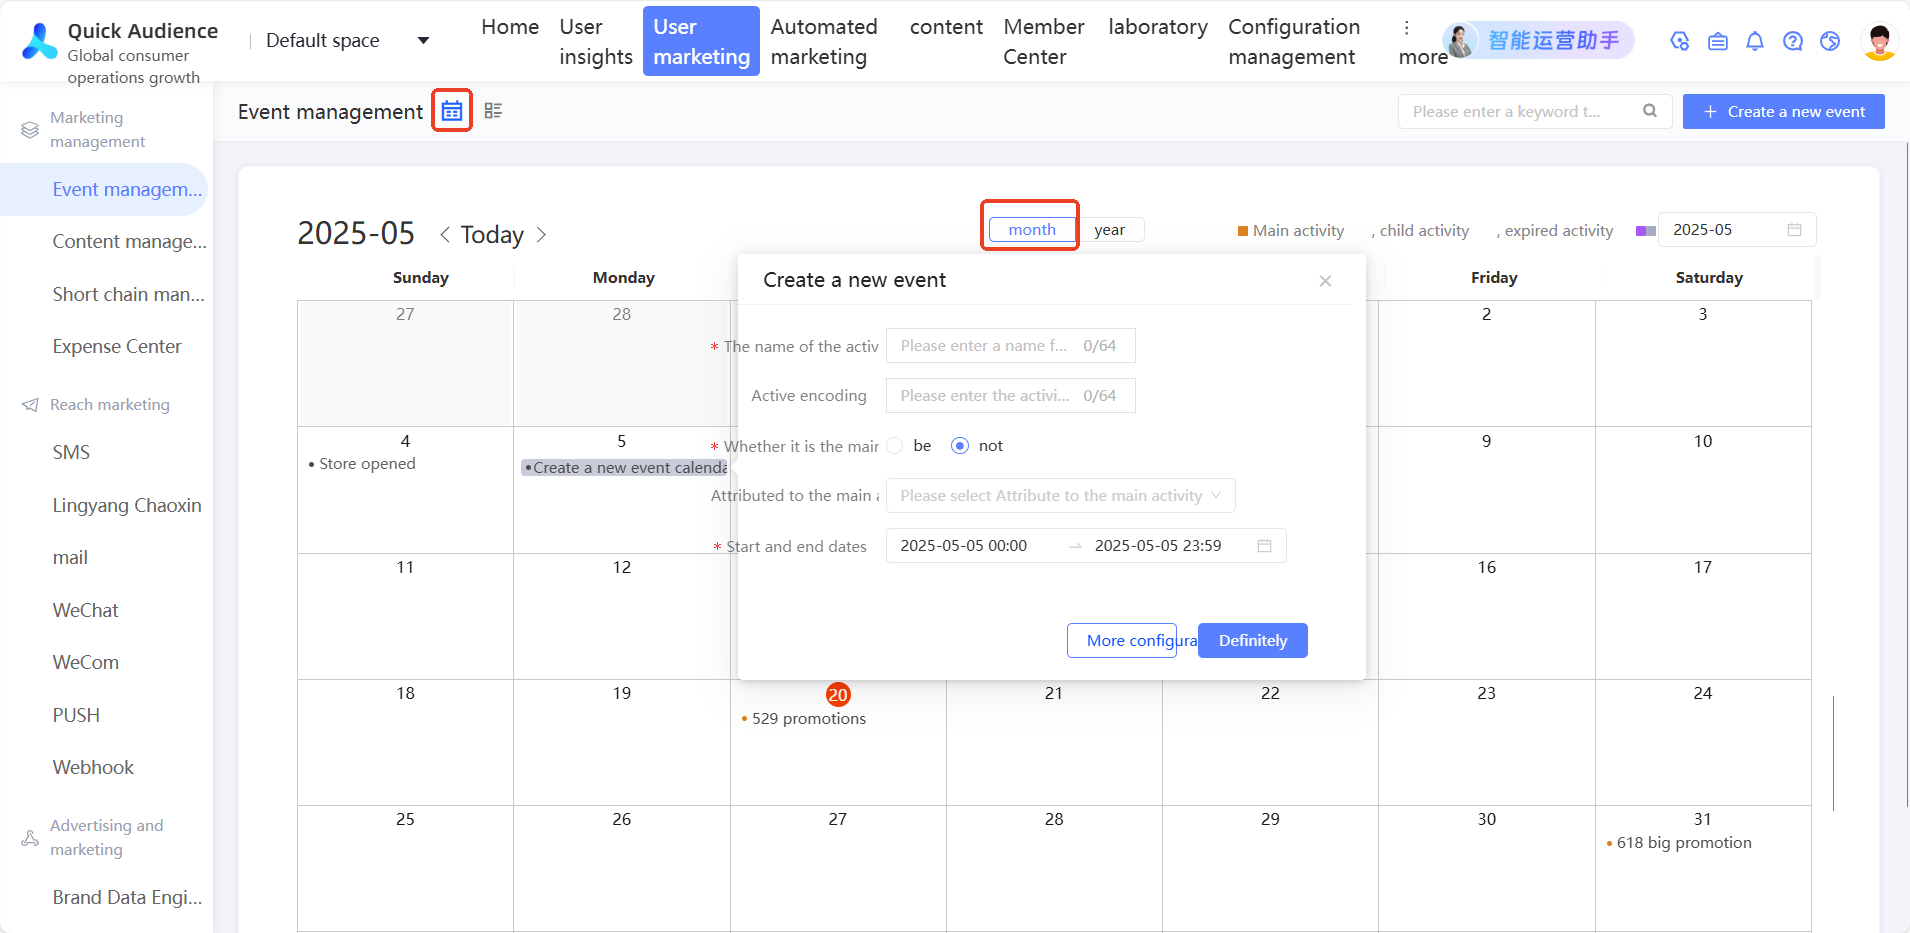
In the left-side navigation pane, choose User Marketing > Marketing Management > Campaign Management.
-
Select the
 icon to enter the calendar of events, and then select Month or Year to enter the monthly or annual calendar, as shown in the following figure.
-
On the monthly or annual calendar, click the required time grid to pop up the configuration window, as shown in the following figure. This time grid will be used as the default start and end dates.
-
In the dialog box that appears, configure the parameters. For more information about the parameters, see the preceding table.
-
Optional. To configure the parameters in the preceding table, click More. The pop-up window displays the complete configuration items.
-
Click OK.