This topic describes how to migrate data from an ApsaraDB RDS for MySQL Enterprise Edition instance to a PolarDB-X 2.0 Standard Edition instance.
Prechecks
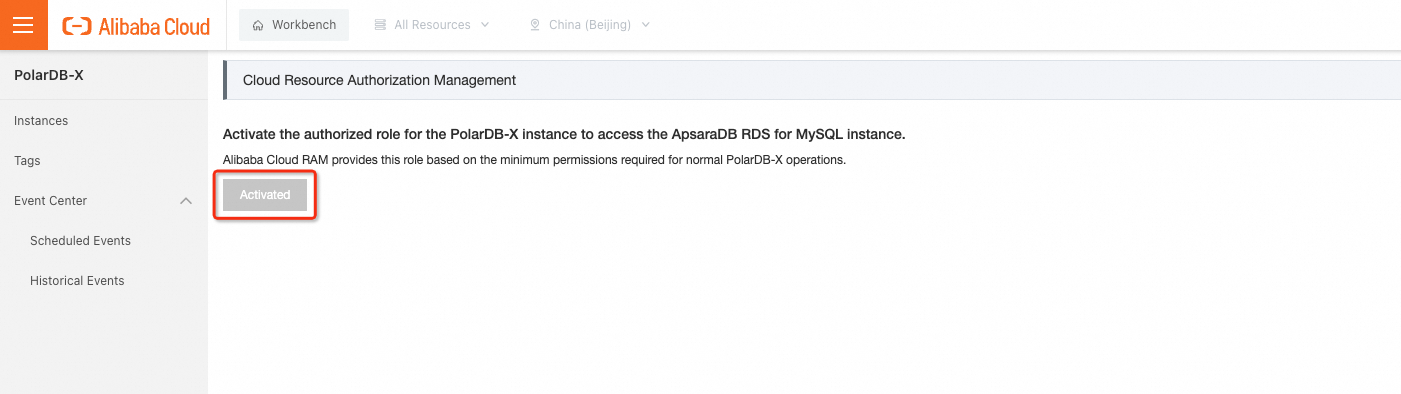
Precheck whether the PolarDB-X 2.0 service-linked role is created
Perform the following operations to check whether the PolarDB-X 2.0 service-linked role is created.
Go to the Cloud Resource Authorization Management page.
Click Activate Authorization. The Cloud Resource Access Authorization page appears.
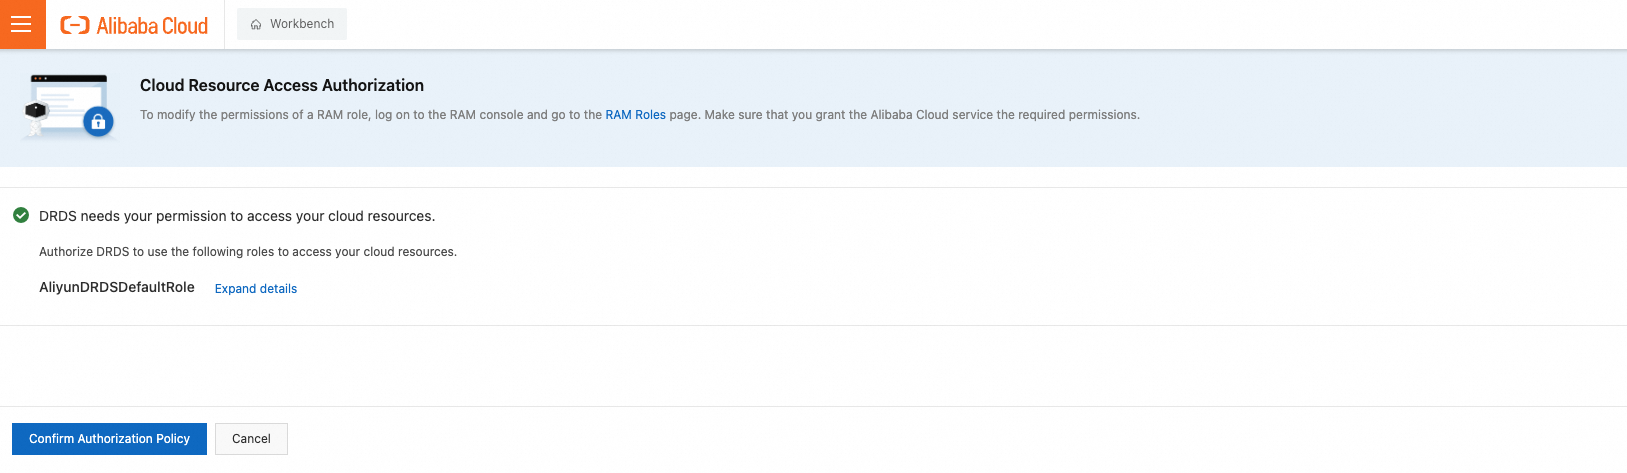
Click Confirm Authorization Policy. The Cloud Resource Authorization Management page appears. If Activated is displayed, the permissions are granted.
Precheck whether DTS is granted the permissions to access cloud resources
Check whether DTS is granted the permissions to access cloud resources. For more information, see View the authorization result.
Precheck whether redundant system accounts are removed from the source instance
To prevent the system accounts of the destination PolarDB-X 2.0 Standard Edition instance from being overwritten during migration, we recommend that you remove redundant root and aliyun_root accounts from the source ApsaraDB RDS for MySQL Enterprise Edition instance.
The following table lists the correct system account name for each version of ApsaraDB RDS for MySQL.
MySQL version | Correct system account name |
MySQL 5.6 | root |
MySQL 5.7 | aliyun_root |
MySQL 8.0 | aliyun_root |
Apart from the corresponding system account for each version mentioned in the preceding table, all other system accounts must be removed.
These accounts can be either created by users or automatically created by the system during version upgrades. Specific accounts may not be visible in the console in certain scenarios.
The following example shows how to remove redundant system accounts from an ApsaraDB RDS for MySQL 5.6 Enterprise Edition instance:
Use a privileged account to connect to the instance.
Find all root and aliyun_root system accounts.
SELECT * FROM mysql.user WHERE user IN ('root', 'aliyun_root');Remove redundant system accounts. The correct system account in an ApsaraDB RDS for MySQL 5.6 Enterprise Edition instance is root, so you must delete the aliyun_root account.
DELETE FROM mysql.user WHERE user = 'aliyun_root';Step 1: Migrate data from the source instance
This step creates a PolarDB-X 2.0 Standard Edition instance that contains the same data as the source ApsaraDB RDS for MySQL Enterprise Edition instance. Incremental data is synchronized from the source ApsaraDB RDS for MySQL Enterprise Edition instance to the PolarDB-X 2.0 Standard Edition instance in real time.
Log on to the PolarDB-X console.
On the Instances page, click the PolarDB-X 2.0 tab.
In the upper-right corner of the page that appears, click Create Instance.
On the PolarDB-X 2.0 Standard Edition buy page, configure the following parameters.
NoteFor more information about the parameters that are not described in the following table, see Create a PolarDB-X instance.
Parameter
Description
Region
The region where the source ApsaraDB RDS for MySQL Enterprise Edition instance is deployed.
NoteThe new PolarDB-X 2.0 Standard Edition instance is also created in this region.
Creation Method
Select Migrate from ApsaraDB RDS.
Source RDS Version
The version of the source ApsaraDB RDS for MySQL Enterprise Edition instance. You can choose MySQL 5.6, MySQL 5.7, or MySQL 8.0.
Source RDS Instance
The source ApsaraDB RDS for MySQL Enterprise Edition instance. Read-only instances are excluded.
Node Specifications
Select the specifications depending on your requirements. We recommend that you select the specifications that are equal to or higher than those of the source ApsaraDB RDS for MySQL Enterprise Edition instance. For more information about the node specifications of PolarDB-X 2.0 Standard Edition, see Instance types.
On the Confirm Order page, confirm the order information. Read and select the Terms of Service, and then click Pay.
On the Purchase page, confirm the order and the payment method, and click Purchase.
After you complete the payment, you can return to the PolarDB-X console and view the new instance on the Instances page.
NoteMake sure that you select the region where the instance is deployed. Otherwise, you cannot view the instance.
If the nodes in the instance are in the Creating state, the instance is still being created and is unavailable. The instance is available only when the instance is in the Running state.
Before the migration, the PolarDB-X 2.0 Standard Edition instance is in read-only mode and binary logging is enabled by default.
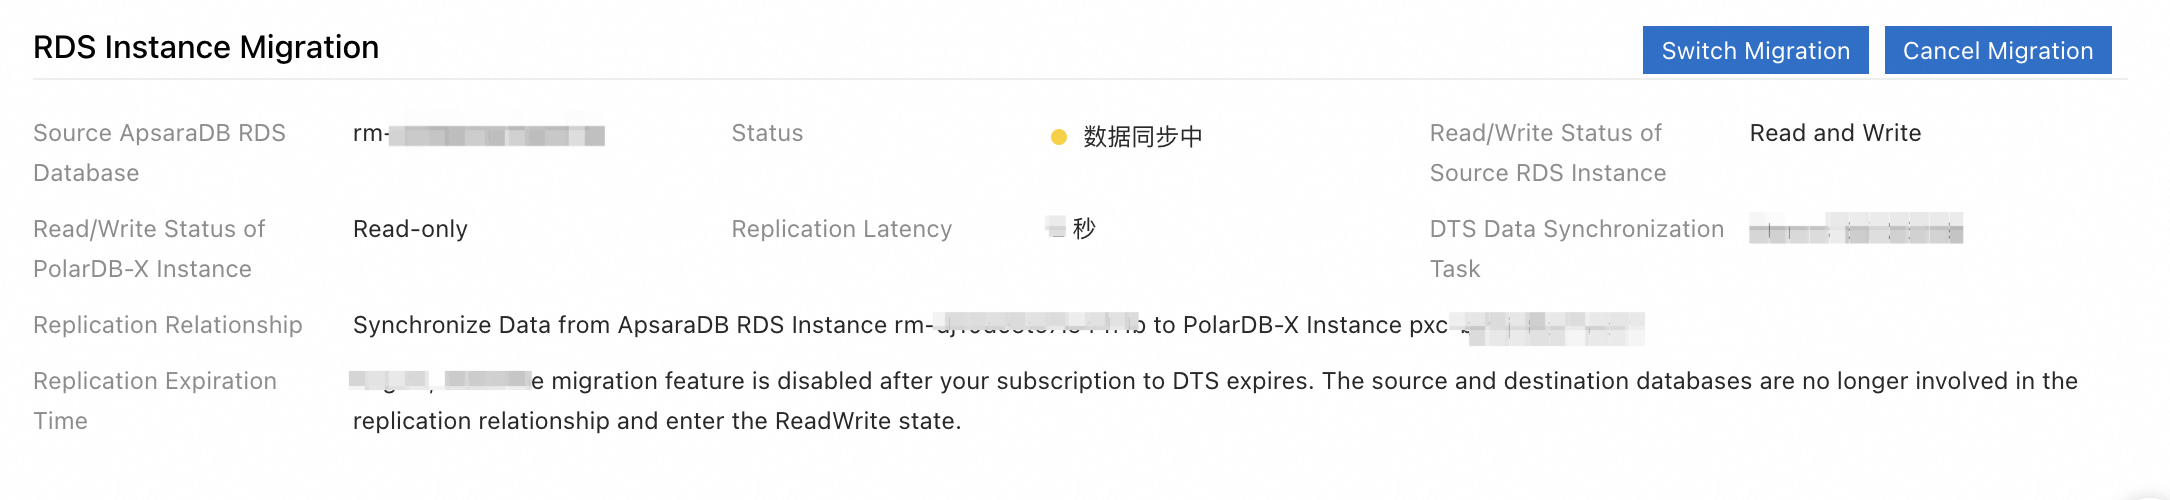
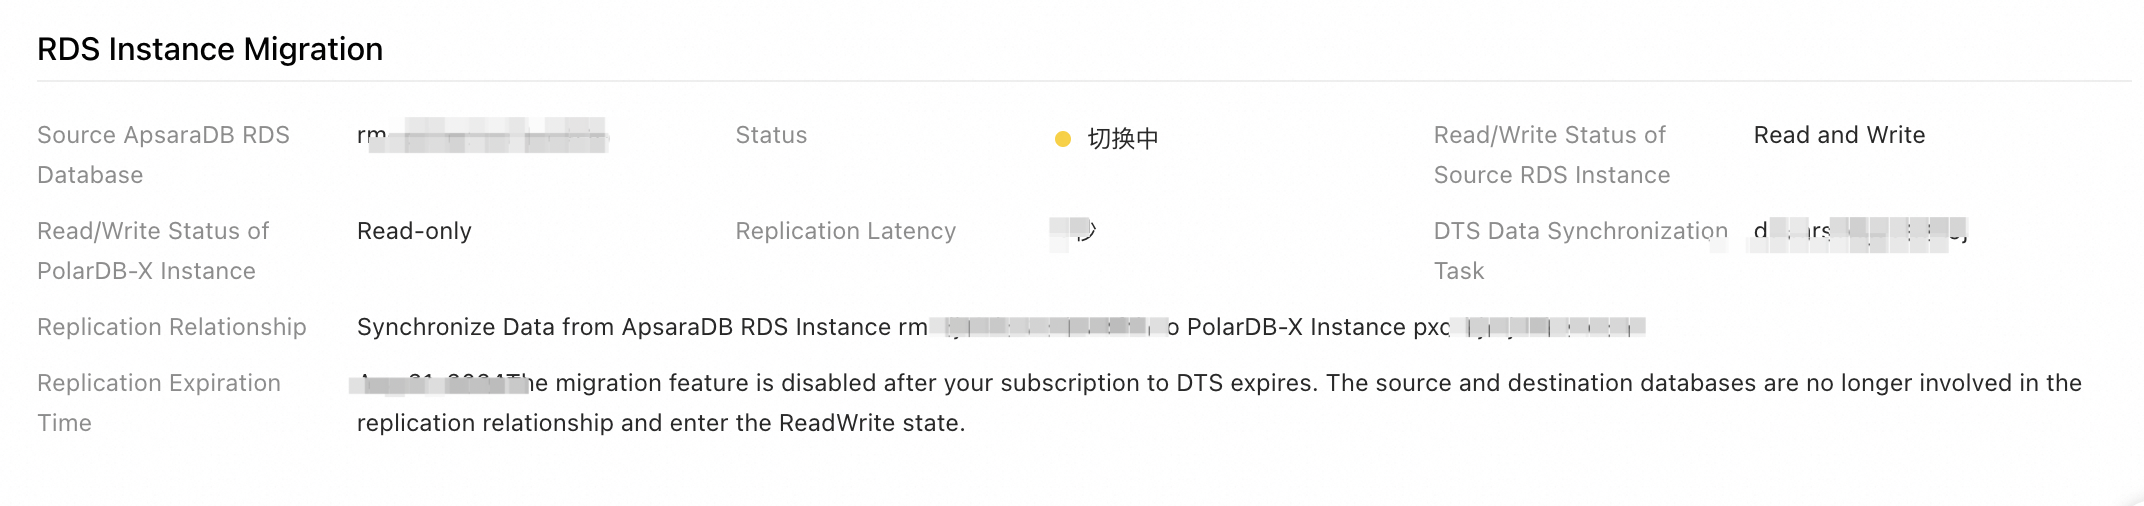
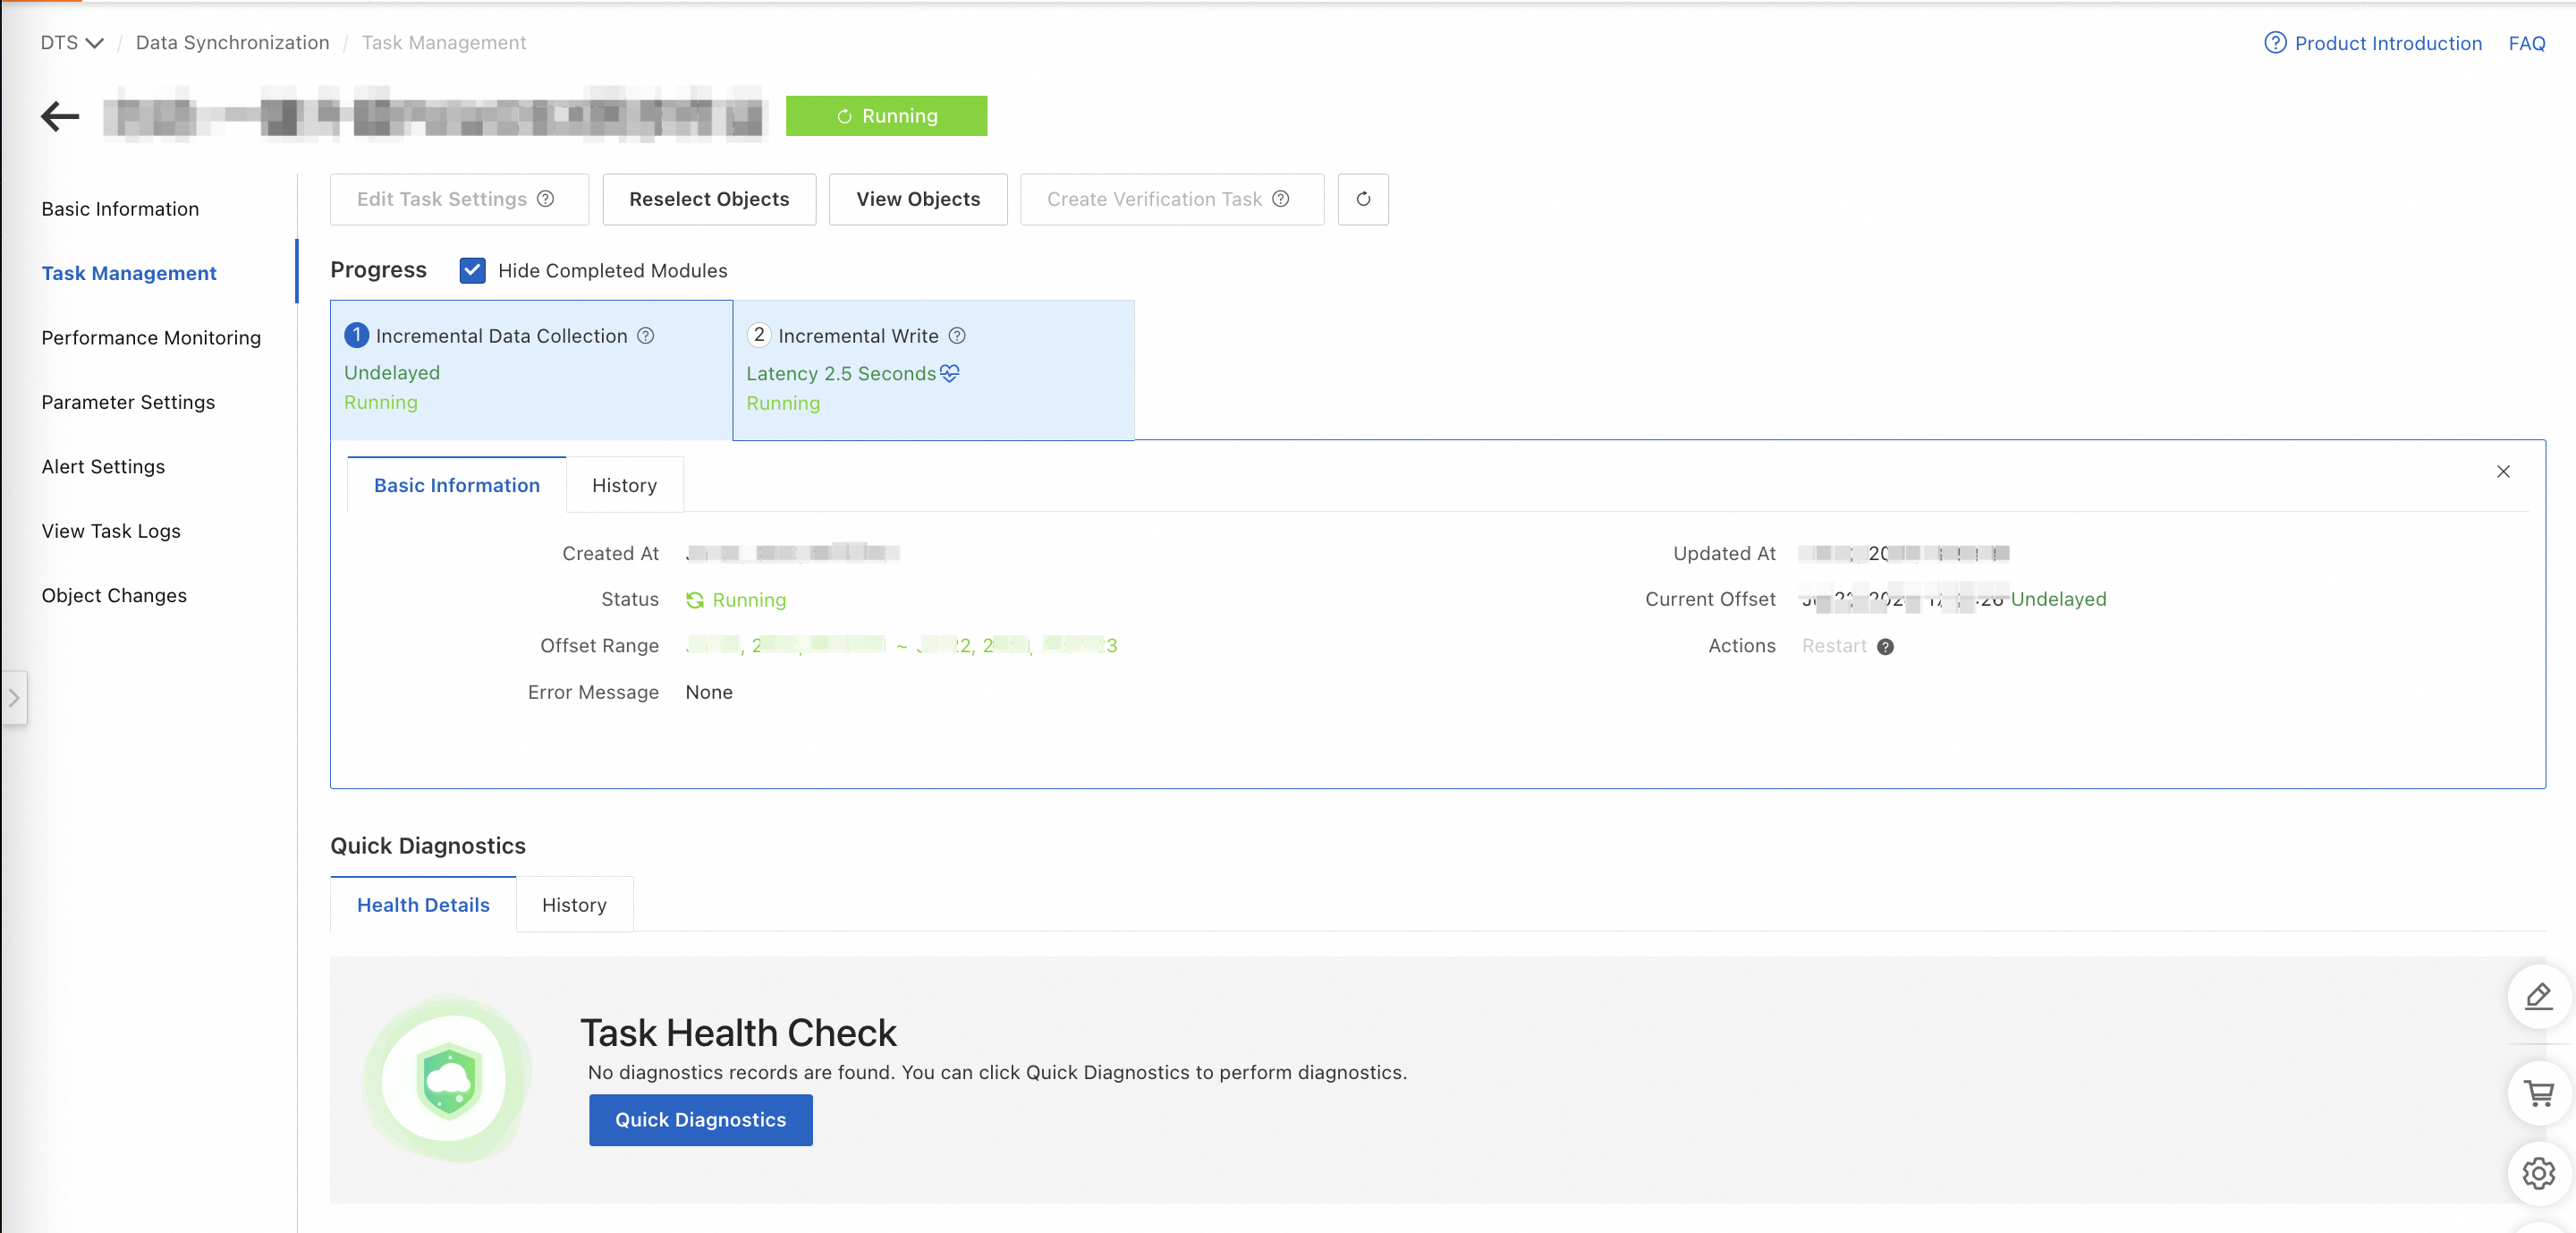
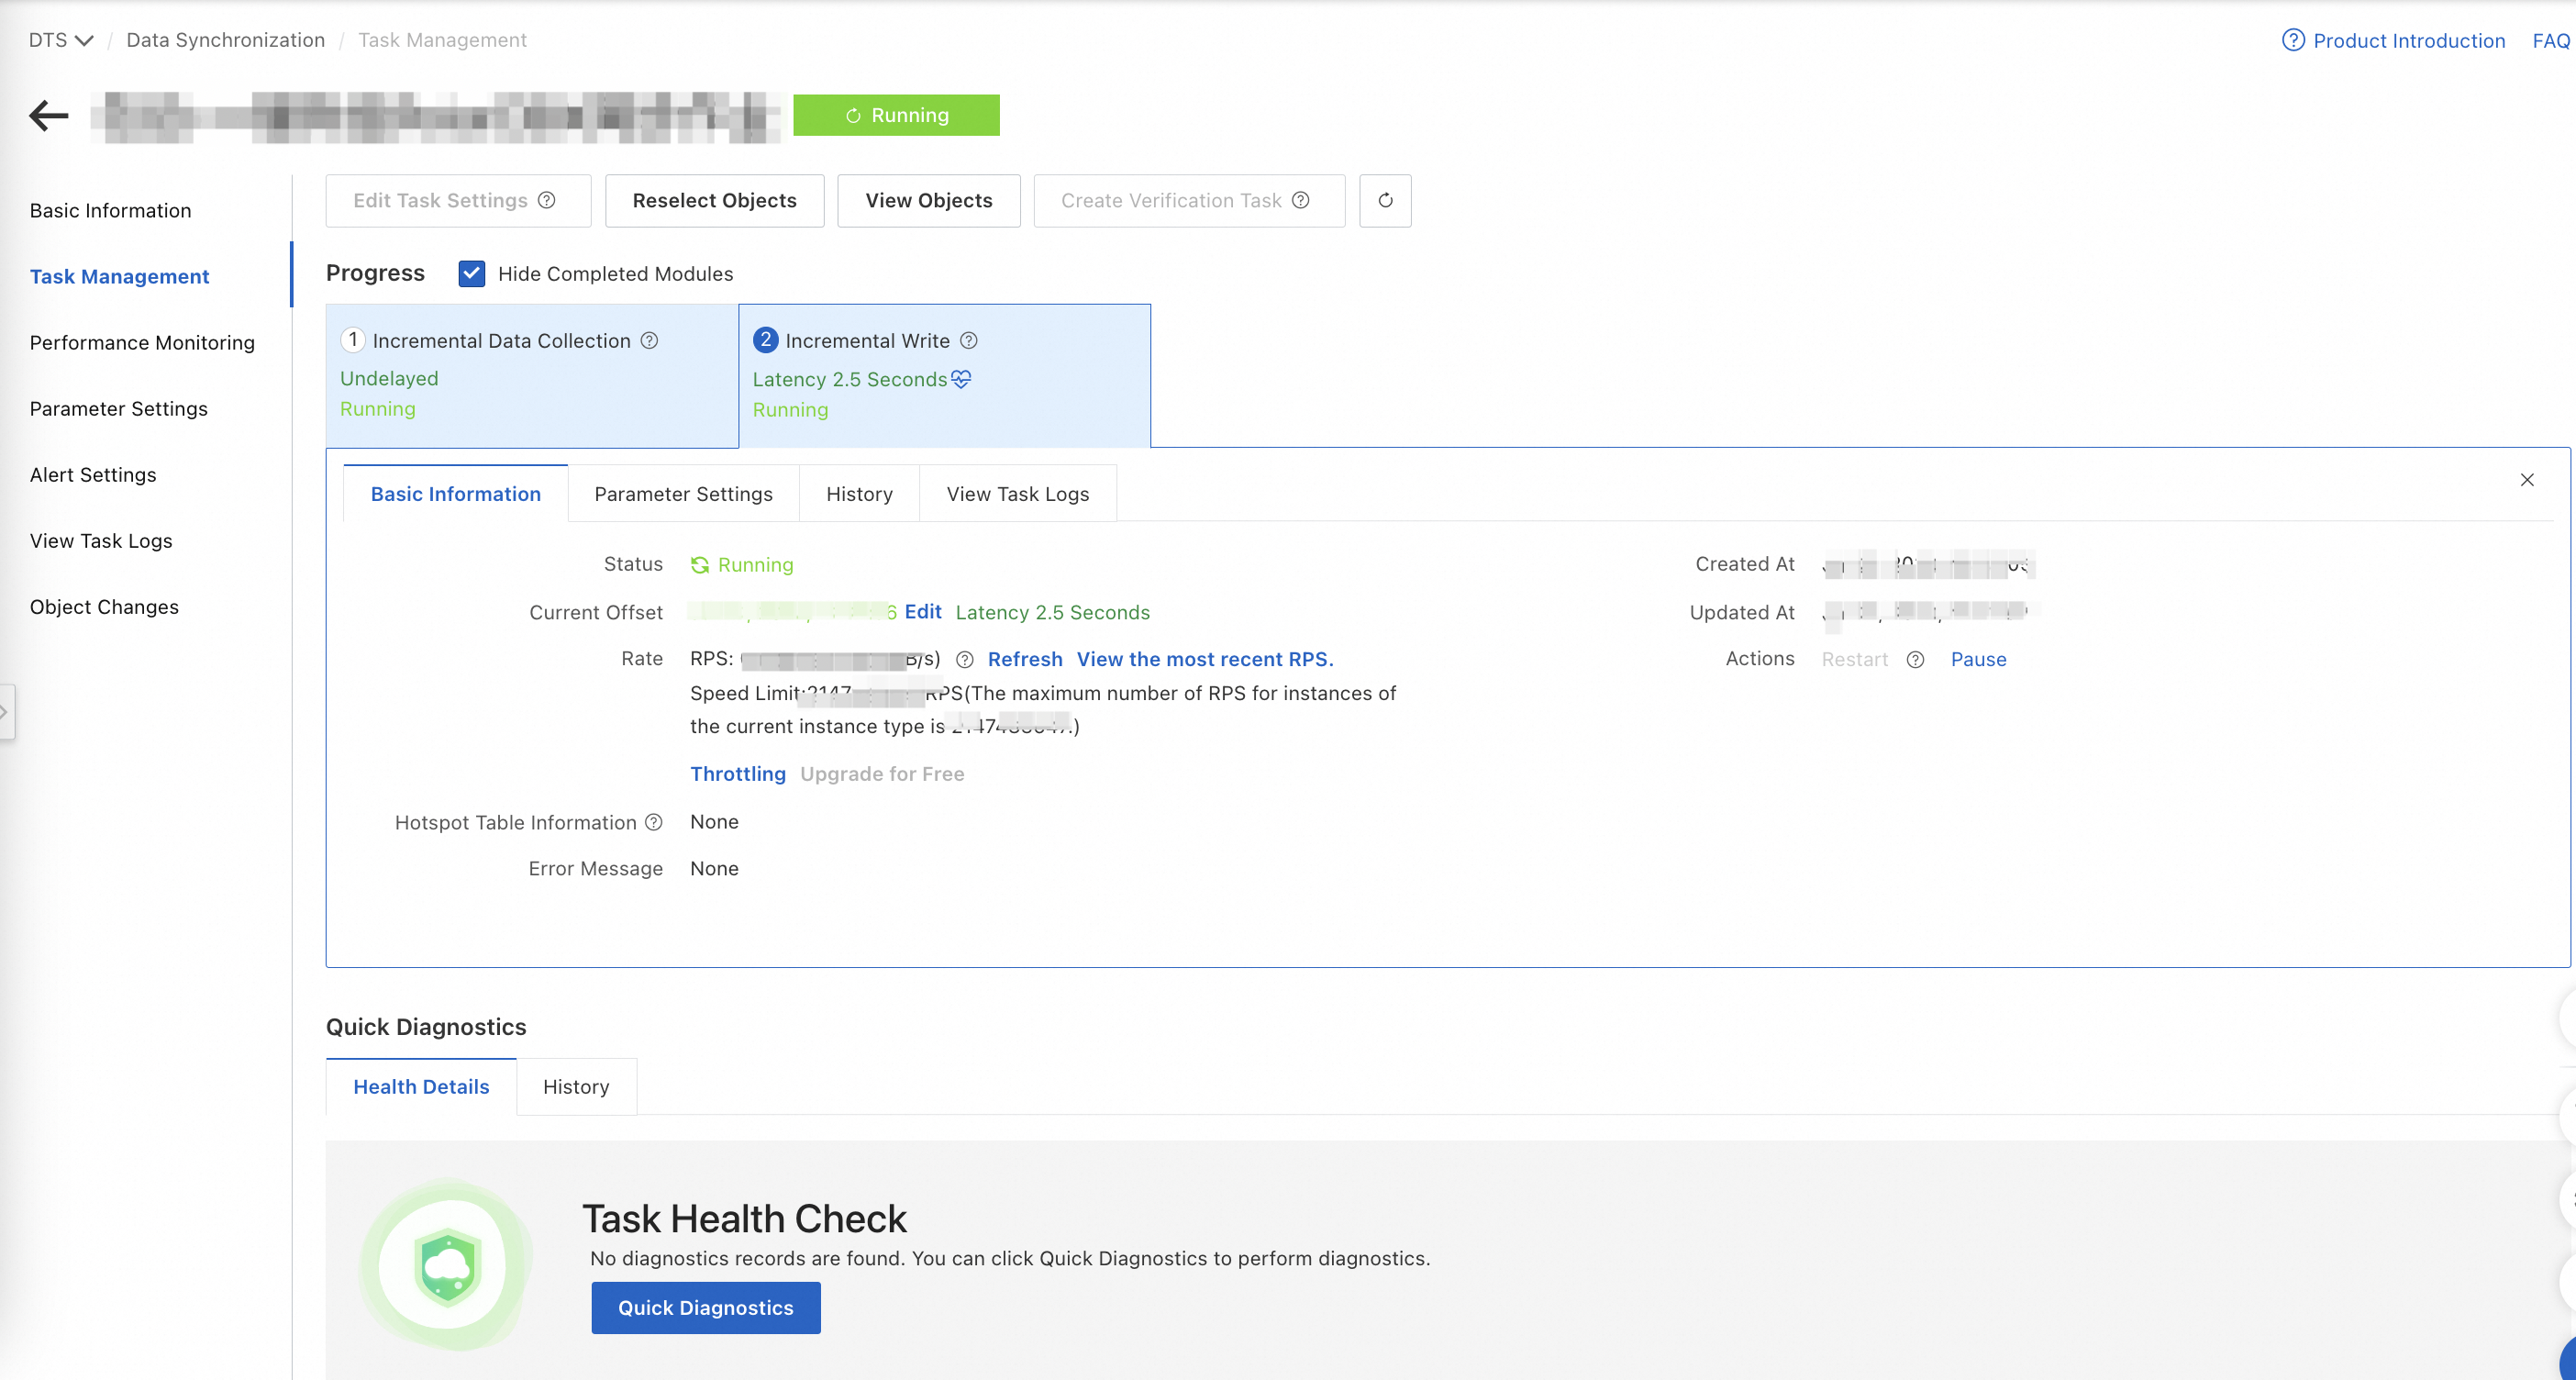
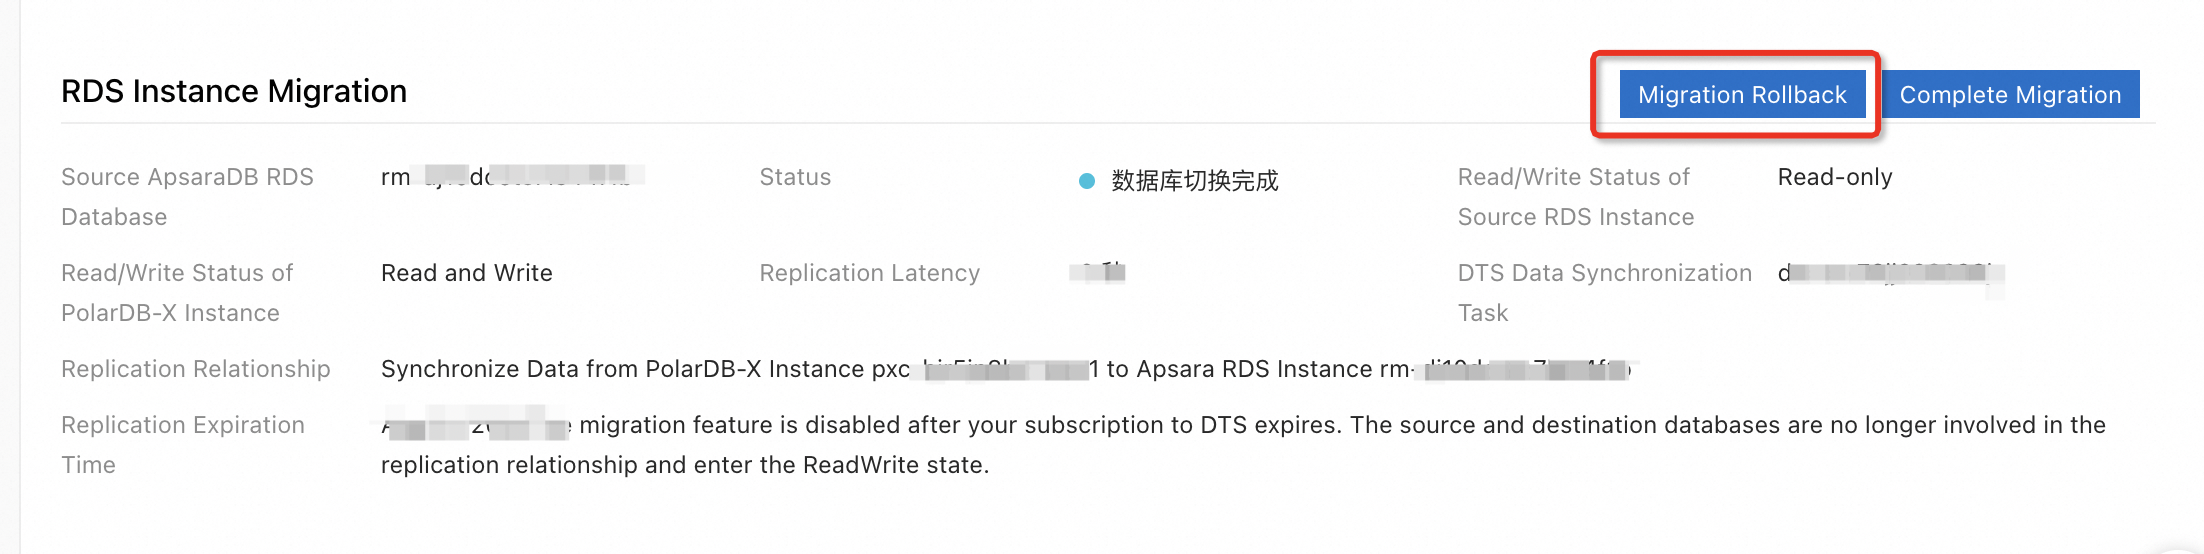
Click the instance ID to go to the Basic Information page. In the RDS Instance Migration section of the Basic Information page, check the Replication Latency value of the destination PolarDB-X 2.0 Standard Edition instance. If the value is smaller than 60 seconds, you can perform the operations in Step 2: Switch over services.
After the PolarDB-X 2.0 Standard Edition instance is created, the system starts to migrate data from the ApsaraDB RDS for MySQL Enterprise Edition instance to the PolarDB-X 2.0 Standard Edition instance. You must perform the operations in Step 2: Switch over services and Step 3: Complete the migration within 30 days after the PolarDB-X 2.0 Standard Edition instance is created. Otherwise, the migration task is automatically terminated after 30 days. After 30 days, the data synchronization link between the ApsaraDB RDS for MySQL Enterprise Edition instance and the PolarDB-X 2.0 Standard Edition instance is removed. The two instances remain in their current state and are independent of each other. You cannot continue subsequent operations to complete the migration on the existing PolarDB-X 2.0 Standard Edition instance. You must perform Step 1: Migrate data from the source instance again.
If the Status value of the ApsaraDB RDS for MySQL Enterprise Edition instance displayed in the RDS Instance Migration section is Precheck Failed after the PolarDB-X 2.0 Standard Edition instance is created, follow the instructions in the error message to troubleshoot the issue.
Step 2: Switch over services
If the Replication Latency value of the destination PolarDB-X 2.0 Standard Edition instance is smaller than 60 seconds, you can perform the switchover operation.
Log on to the PolarDB-X console.
In the top navigation bar, select the region where the instance is deployed.
On the Instances page, click the PolarDB-X 2.0 tab.
Find the instance from which you want to detach the data disk and click the instance ID.
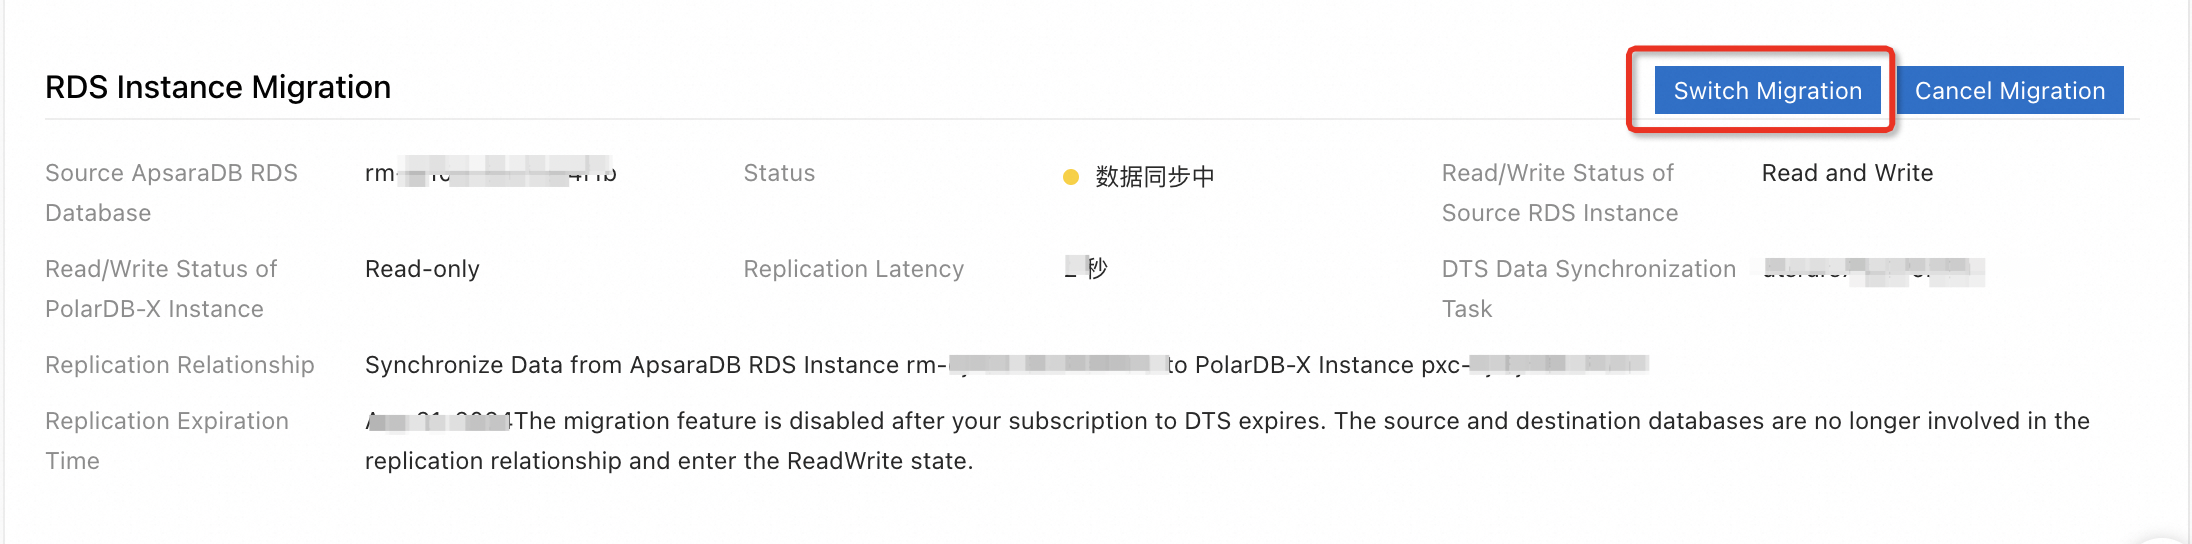
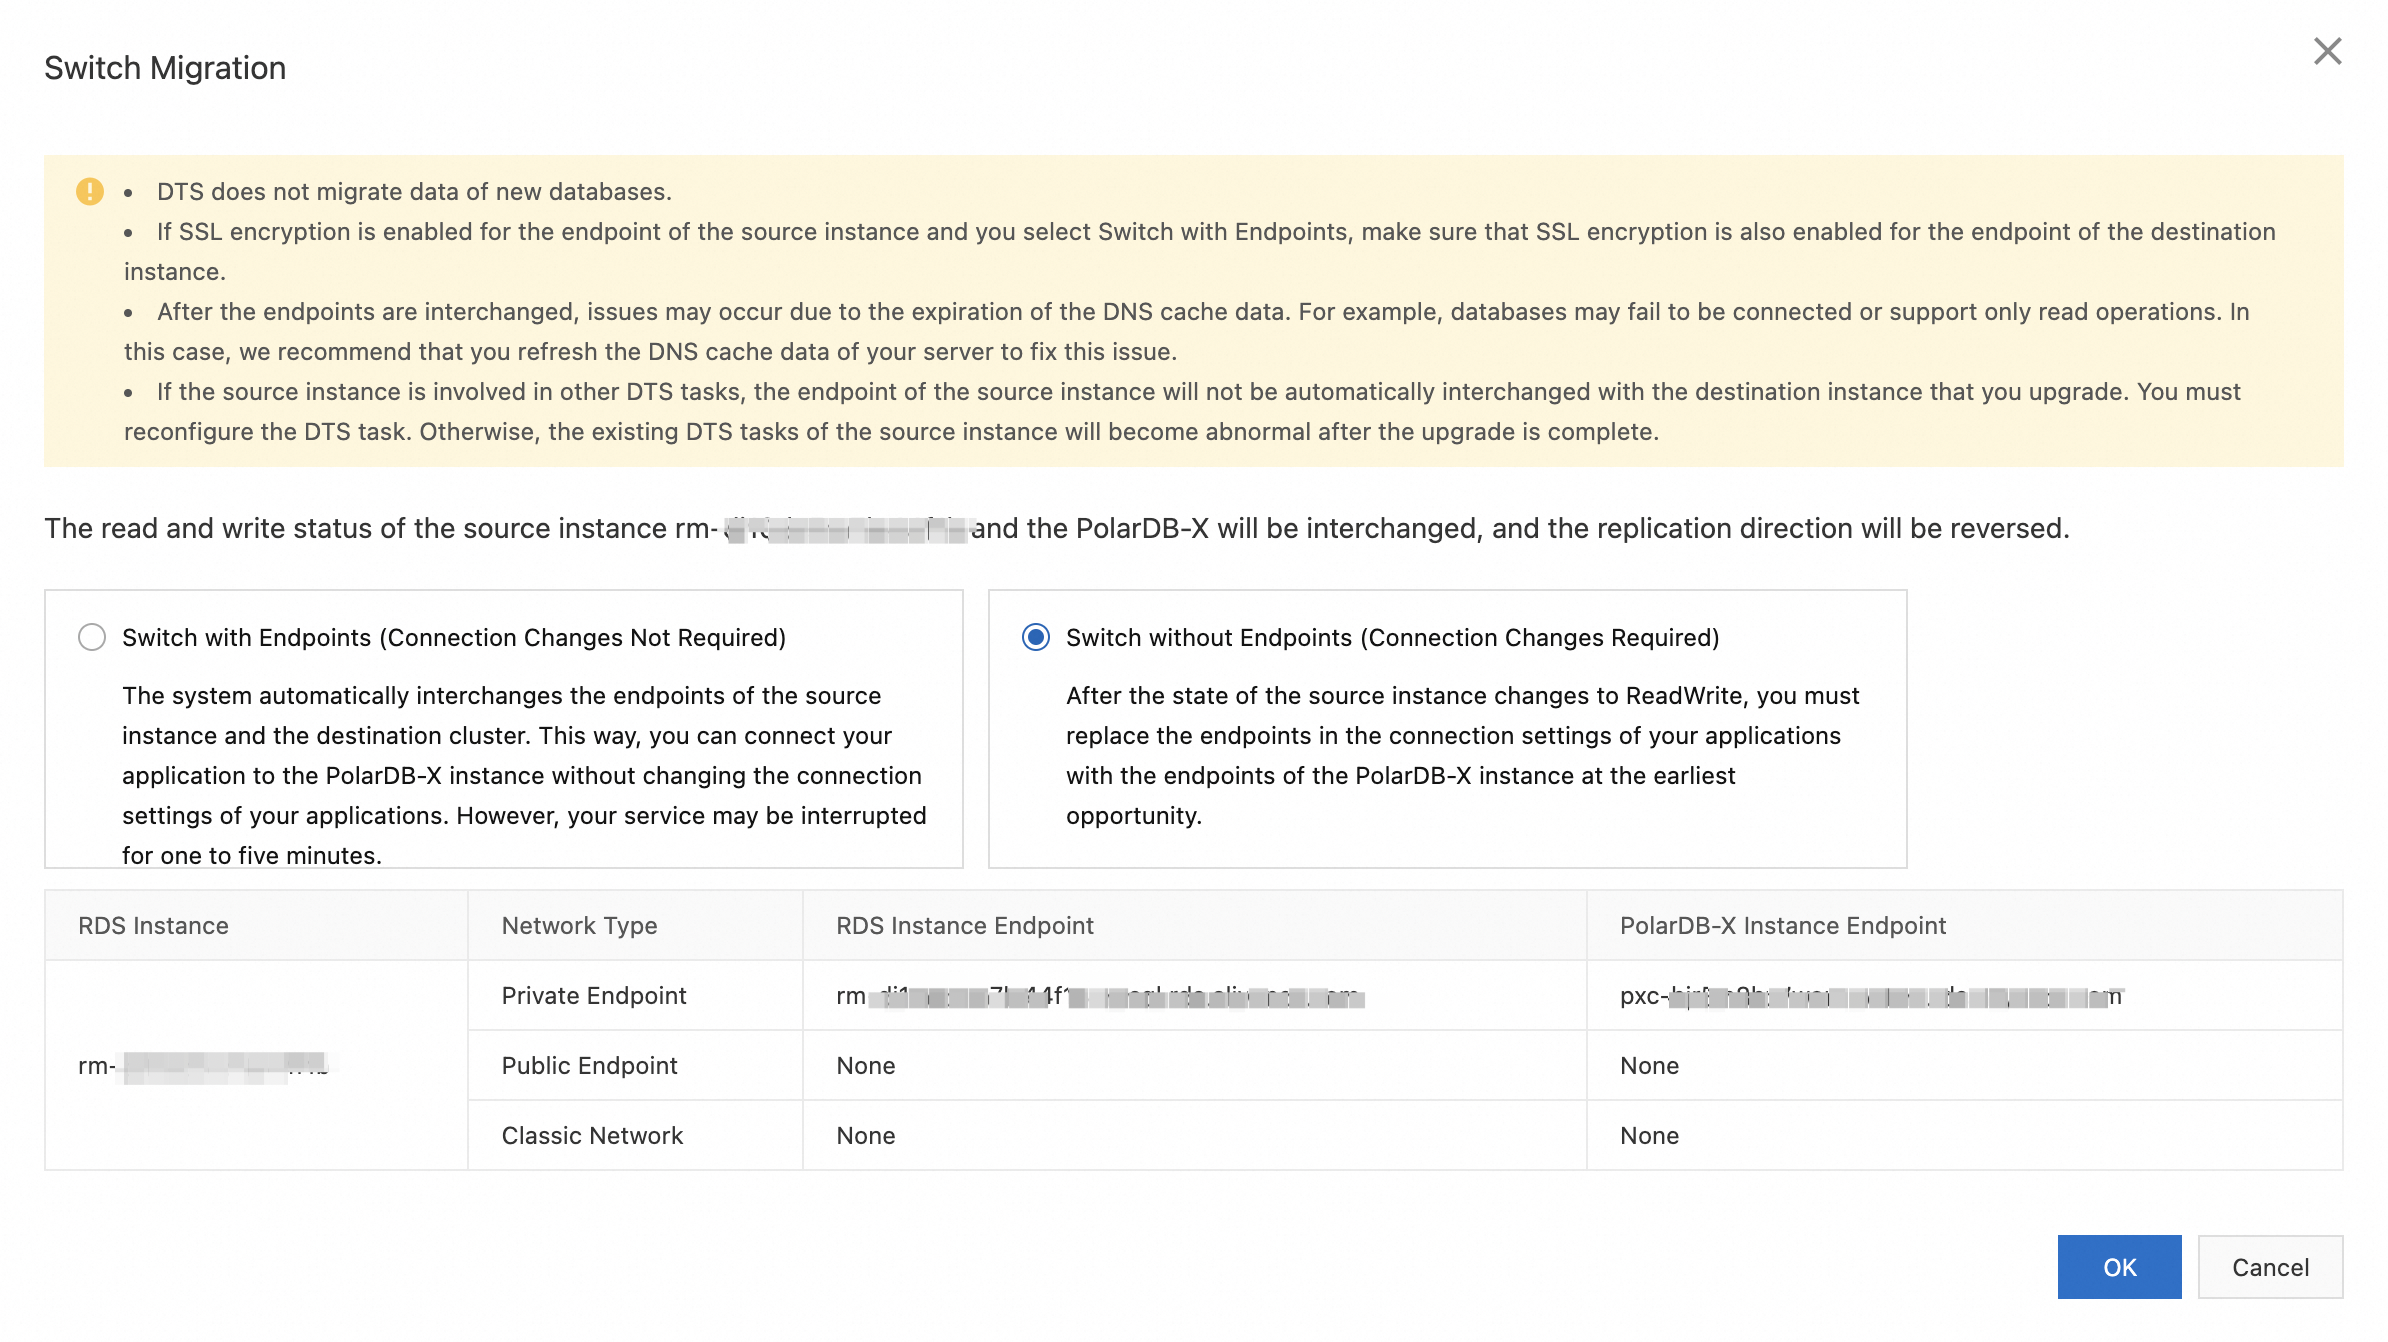
In the RDS Instance Migration section of the Basic Information page, click Switch Migration.
 Note
NoteIn most cases, less than 5 minutes are required for the system to compete the switchover.
The following operations are performed in Step 2: Switch over services:
The read/write states of the source ApsaraDB RDS for MySQL Enterprise Edition instance and the PolarDB-X 2.0 Standard Edition instance are interchanged. The read/write state of the source ApsaraDB RDS for MySQL Enterprise Edition instance is changed to Read-only, and the read/write state of the PolarDB-X 2.0 Standard Edition instance is changed to Read and Write. This can avoid data inconsistency, prevent write conflicts, and provide sufficient security conditions for endpoint interchange.
The replication direction is also changed. In this case, incremental data is synchronized from the PolarDB-X 2.0 Standard Edition instance to the ApsaraDB RDS for MySQL Enterprise Edition instance.
In the Start Switchover dialog box, select Switch with Endpoints (Connection Changes Not Required) or Switch without Endpoints (Connection Changes Required).
If you select Switch with Endpoints (Connection Changes Not Required), the system interchanges the endpoints between the ApsaraDB RDS for MySQL Enterprise Edition instance and the PolarDB-X 2.0 Standard Edition instance. You do not need to modify the configurations of your application to connect to the PolarDB-X 2.0 Standard Edition instance.
ImportantBefore you select Switch with Endpoints (Connection Changes Not Required), make sure that you read Switchover with endpoints.

If you select Switch without Endpoints (Connection Changes Required), you must modify the configurations of your application to connect to the PolarDB-X 2.0 Standard Edition instance.
ImportantAfter the switchover operation is complete, modify the database endpoint in your application at the earliest opportunity to avoid long-term connection interruptions.
Click OK. The instance is in the Switching state.
Wait until the switchover operation is complete.
NoteIf you select Switch without Endpoints (Connection Changes Required) and when the value of Read/Write Status of the PolarDB-X 2.0 Standard Edition instance becomes Read and Write, change the database endpoint in your application to the endpoint of the PolarDB-X 2.0 Standard Edition instance at the earliest opportunity.
If data errors occur after the migration is complete, you can roll back the migration. This allows you to restore the database and data to the original state before the migration is performed. For more information, see (Optional) Roll back the migration.
Step 3: Complete the migration
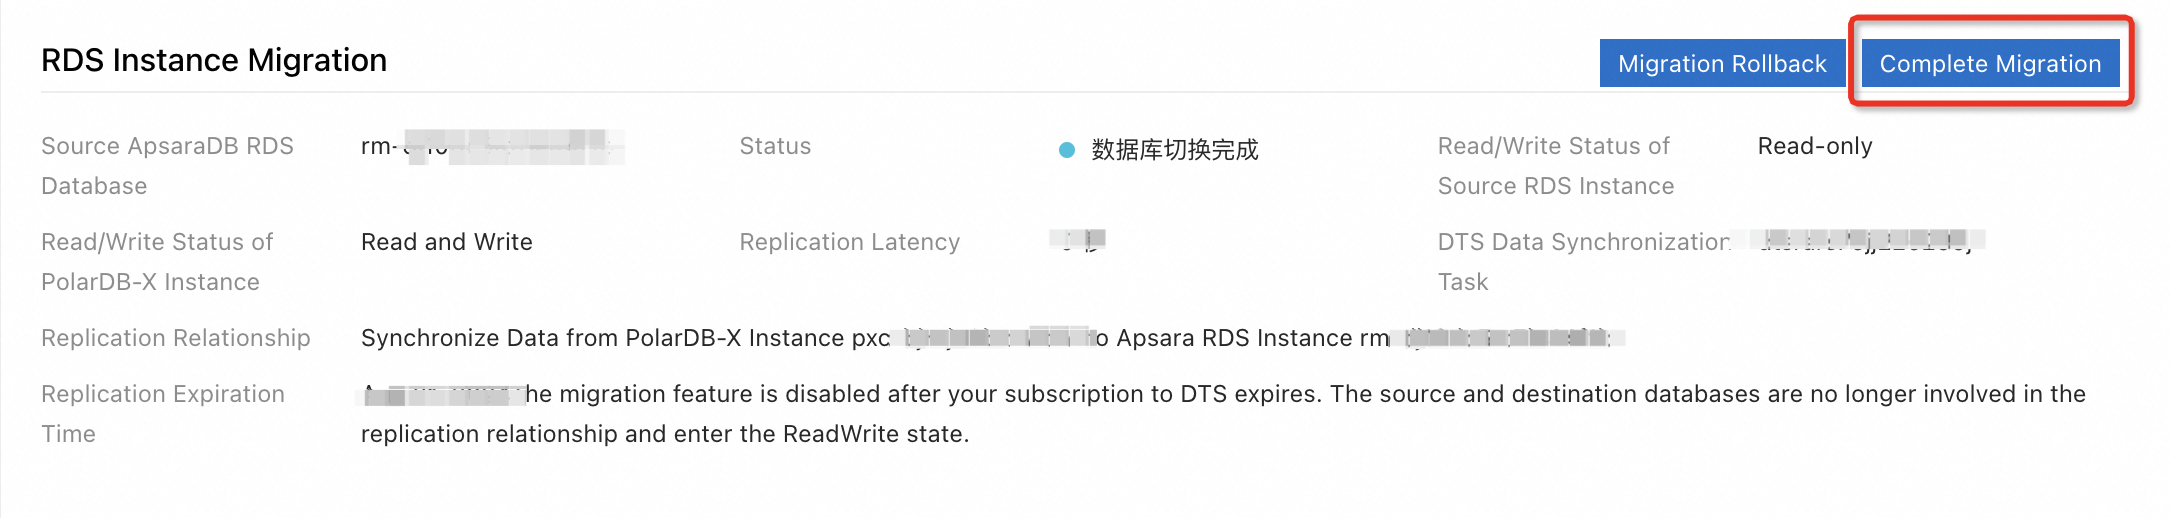
Before you complete the migration by clicking Complete Migration, make sure that data migration is complete and that the synchronization task is no longer used. After you complete the migration, the system deletes the data synchronization task.
After you complete the migration, the system stops synchronizing data between the ApsaraDB RDS for MySQL Enterprise Edition instance and the PolarDB-X 2.0 Standard Edition instance, and the (Optional) Roll back the migration feature becomes unavailable. Before you complete the migration, we recommend that you test the PolarDB-X 2.0 Standard Edition instance to confirm that the instance runs normally.
Log on to the PolarDB-X console.
In the top navigation bar, select the region where the instance is deployed.
On the Instances page, click the PolarDB-X 2.0 tab.
Find the instance from which you want to detach the data disk and click the instance ID.
In the RDS Instance Migration section of the Basic Information page, click Complete Migration. In the dialog box that appears, click OK.
 Note
NoteAfter you click OK, the system stops data synchronization within approximately 2 minutes. During this process, the migration status is Disable Synchronization. Wait until the migration is complete.
We recommend that you retain the source ApsaraDB RDS for MySQL Enterprise Edition instance for one to two weeks after you complete the migration. Check the overall performance of the PolarDB-X 2.0 Standard Edition instance, including compatibility, stability, and data consistency. Then, release the source instance.
(Optional) View the details of a data synchronization task
If you encounter a migration error such as a precheck failure or exceptions such as high replication latency during the migration, you can go to the details page of the data synchronization task for more information about the task.
Log on to the PolarDB-X console.
In the top navigation bar, select the region where the instance is deployed.
On the Instances page, click the PolarDB-X 2.0 tab.
Find the instance from which you want to detach the data disk and click the instance ID.
In the RDS Migration section of the Basic Information page, click the task name in DTS Data Synchronization Tasks to go to the data synchronization task list in the DTS console.
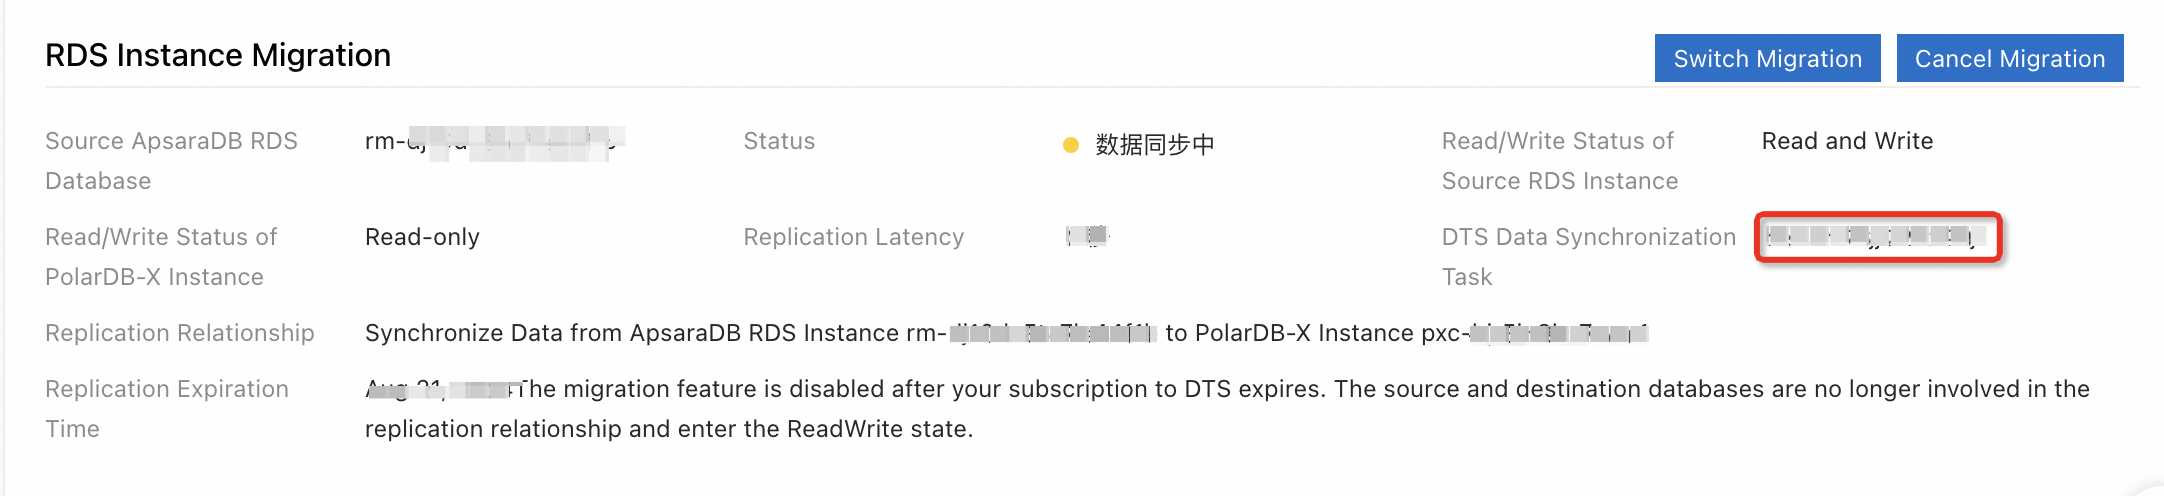
Find the data synchronization task. You can view precheck failure details, data synchronization task details, and data synchronization task logs.
(Optional) Roll back the migration
If data errors occur before the migration is complete, you can roll back the migration. This allows you to restore the database and data to the original state before the data migration. After the rollback, the read/write state of the source ApsaraDB RDS for MySQL Enterprise Edition instance is changed to Read and Write, and the read/write state of the PolarDB-X 2.0 Standard Edition instance is changed to Read Only. The system synchronizes data from the ApsaraDB RDS for MySQL Enterprise Edition instance to the PolarDB-X 2.0 Standard Edition instance.
Log on to the PolarDB-X console.
In the top navigation bar, select the region where the instance is deployed.
On the Instances page, click the PolarDB-X 2.0 tab.
Find the instance from which you want to detach the data disk and click the instance ID.
In the RDS Instance Migration section of the Basic Information page, click Migration Rollback.
In the Start Switchback dialog box, select Switch Back with Endpoints (Connection Changes Not Required) or Switch Back without Endpoints (Connection Changes Required).
If you select Switch Back with Endpoints (Connection Changes Not Required), the system interchanges the endpoints between the ApsaraDB RDS for MySQL Enterprise Edition instance and the PolarDB-X 2.0 Standard Edition instance. You do not need to modify the configurations of your application to connect to the ApsaraDB RDS for MySQL Enterprise Edition instance.
If you select Switch Back without Endpoints (Connection Changes Required), you must modify the configurations of your application to connect to the ApsaraDB RDS for MySQL Enterprise Edition instance.
Click OK. The read/write state of the source ApsaraDB RDS for MySQL Enterprise Edition instance is changed to Read and Write, and the read/write state of the PolarDB-X 2.0 Standard Edition instance is changed to Read Only. The system synchronizes data from the ApsaraDB RDS for MySQL Enterprise Edition instance to the PolarDB-X 2.0 Standard Edition instance.
Wait until the rollback operation is complete.
NoteIf you select Switch Back without Endpoints (Connection Changes Required) and when the value of Read/Write Status of the source ApsaraDB RDS for MySQL Enterprise Edition instance becomes Read and Write, change the database endpoint in your application to the endpoint of the ApsaraDB RDS for MySQL Enterprise Edition instance at the earliest opportunity.