Accidental deletion or corruption of specific tables — without affecting the rest of your cluster — is a common recovery scenario. The database and table restoration feature lets you restore only the databases or tables you specify to an earlier point in time, rather than rolling back the entire cluster.
This feature creates new databases or tables in your cluster. It does not overwrite or delete any existing data. After restoration, the recovered data appears under new names (by default, with a _backup suffix). Merge or copy the data back to your original tables as needed.
How it works
Restoration reads from a level-1 backup and applies log data up to the point in time you specify. The process runs in the background and does not interrupt cluster access, though CPU utilization and IOPS may increase during the operation.
All restored objects are created under new names. For example, backup data from db1 can be restored into db2. If you leave the destination name blank, the system appends _backup to the original name — for example, test becomes test_backup.
Limitations
| Limitation | Details |
|---|---|
| Table count (clusters without read-only nodes) | Cannot use this feature if the cluster does not have read-only nodes and contains more than 50,000 tables |
| Table count (clusters with more than 50,000 tables, including system tables) | Feature is in canary release — contact us to enable it |
| Unsupported object types | In-Memory Column Indexes (IMCIs), triggers, and foreign keys cannot be restored |
| Batch size | When restoring part of a database, up to 100 tables can be restored at a time; selecting an entire database restores all its tables |
To query the number of tables in your cluster, run the following SQL statements:
Count all tables (including system tables):
SELECT COUNT(*) FROM information_schema.tables;Count system tables only:
SELECT COUNT(*) FROM pg_class WHERE oid < 16384 AND relkind = 'r';If your cluster does not support database and table restoration, perform a full restoration to a new cluster first, then migrate the relevant data back. See Full restoration method 1: Restore data to a specific point in time or Full restoration method 2: Restore data from a backup set (snapshot).
Before you begin
Before you begin, ensure that you have:
A PolarDB cluster with level-1 backups enabled
Access to the PolarDB console
The names of the databases and tables to restore
Failure conditions: The restoration task fails if:
The destination database or table name already exists in the cluster.
Between backup generation and restoration, the source table was deleted, or a database or table with the same destination name was created in the cluster.
If you are unsure which tables to select, perform a full cluster restoration instead and migrate the data back. See Full restoration method 1 or Full restoration method 2.
Restore databases or tables to a point in time
Log on to the PolarDB console. In the left-side navigation pane, click Clusters. In the upper-left corner, select the region of the cluster. Click the cluster ID to go to its Basic Information page.
In the left-side navigation pane, choose Settings and Management > Backup and Restoration.
On the Backup and Restoration page, click Restore Databases/Tables.
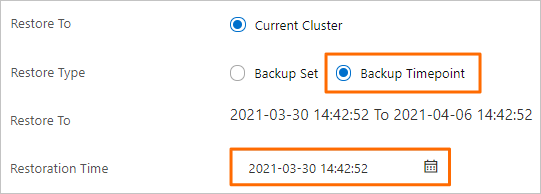
In the dialog box that appears, set Restoration Type to Point in Time, then set Restoration Time to the target point in time.
The Restoration Time must fall within the range shown by the Restore To parameter. The available range depends on the Log Retention Period (Days) setting, which defaults to seven days. The full backup set closest to the specified time must contain the tables you want to restore.
In the Databases and Tables to Restore section, select the target database on the left, then select the tables to restore on the right.
If you select a database without selecting any tables, all tables in that database are restored. Restoring a large number of tables at the same time takes significantly longer; for large-scale recovery, use a full restoration to a new cluster instead. If you leave the destination name blank, the system names the restored object by appending
_backupto the original name — for example,testbecomestest_backup.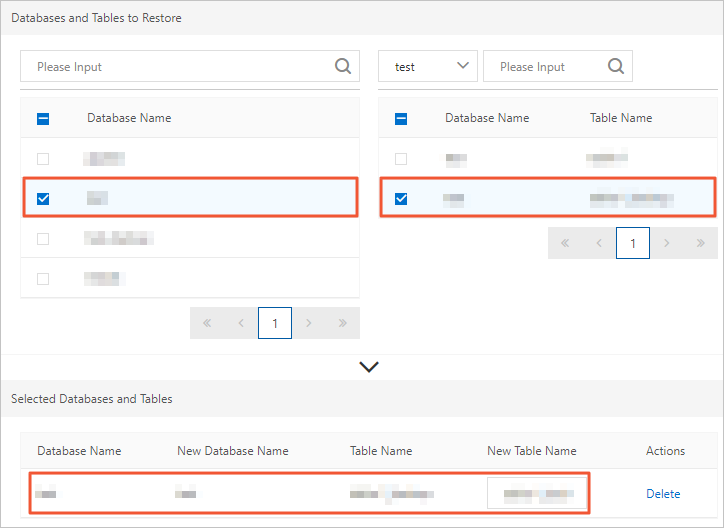
Click OK. The cluster enters the Restoring from Backup state. Cluster access remains available, but CPU usage and IOPS may be elevated during restoration.
After restoration
After restoration completes, the recovered databases or tables appear under their new names in the cluster. Complete the following steps:
Verify data integrity: Query the restored tables to confirm the data is complete and accurate before making any changes to production tables.
Merge data back: Copy or migrate the recovered rows from the restored tables (for example,
orders_backup) into your original tables as needed.Update application references: If you renamed the restored databases or tables for use in production, update your connection strings or application configurations accordingly.
Clean up: Once the data has been merged and verified, drop the temporary restored tables to free up storage space.
API reference
| API | Description |
|---|---|
| DescribeMetaList | Queries the metadata of the databases or tables to restore |
| RestoreTable | Restores databases or tables in a PolarDB cluster |