Integrate a ComfyUI service deployed on PAI-EAS into Dify to automate complex creative workflows and build end-to-end text-to-multimedia generation pipelines.
Solution overview
This solution uses Dify as an application orchestrator to call a ComfyUI inference service deployed on PAI-EAS. ComfyUI inference tasks run asynchronously. Full call flow:
-
Submit a task: Dify sends a POST request to the EAS service. The request body contains a JSON description of the ComfyUI workflow. After receiving the task, EAS returns a unique
prompt_id. -
Poll for status: Dify uses the
prompt_idfrom the previous step to send repeated GET requests and check task status. EAS returns whether the task is complete, successful, or failed. -
Fetch the result: After confirming the task succeeded, Dify sends another GET request to retrieve the final result. The result includes filenames of generated files stored in OSS. Dify appends each filename to the OSS domain name to form a publicly accessible link and displays it to the user.
A complete workflow example:

Step 1: Deploy Dify (optional)
Skip this section if you already have a Dify environment. This topic uses Compute Nest to deploy Dify Community Edition Basic Edition as an example.
-
Go to Dify Community Edition service details page on Compute Nest. Click Deploy Now.
-
Select your configuration. For basic demos, choose the Basic Edition template. Set the Instance Type to
ecs.u1-c1m2.xlarge. Set a password for the instance and select a zone. -
Click Next: Confirm Order. On the next page, click Create Now.
-
After deployment completes, click Details. On the Overview tab, find the Dify access URL in the Get Started section. Create an account and log in to start building Dify applications.

Step 2: Deploy Wanxiang ComfyUI
-
Go to ModelGallery. In the search box, enter Wanxiang 2.1-Text-to-Video-1.3B. Click the model card to open its details page.
-
Click Deploy in the upper-right corner. On the configuration page, set the following options. Keep other settings at their defaults.
-
Deployment Method: Select .
-
Service Configuration: In the JSON editor, set the
storage.oss.pathparameter to your OSS path—for example,oss://examplebucket/wan. This path serves as the ComfyUI working directory for storing generated content. For more information about OSS operations, see OSS Console Quick Start.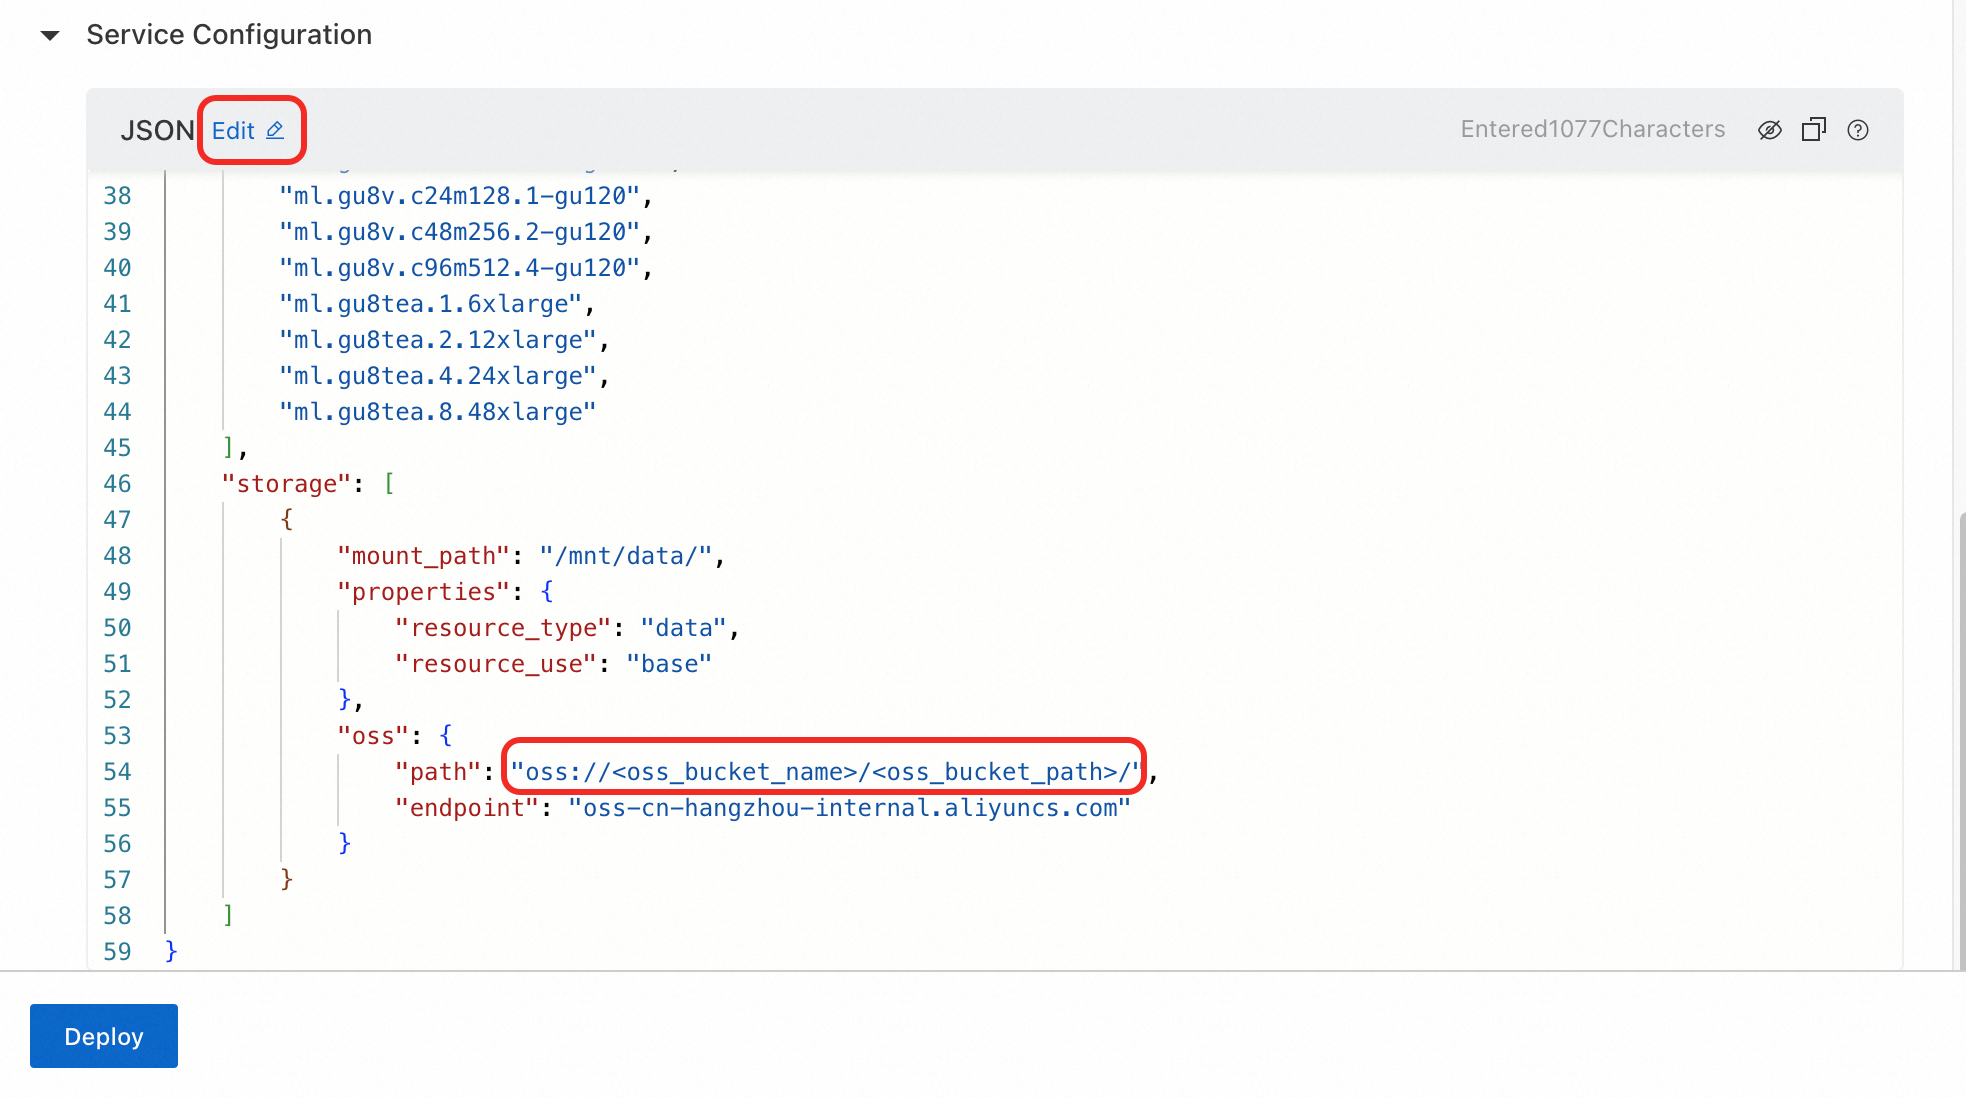
-
-
Click Deploy. Wait about three minutes. When the service status changes to Running, deployment succeeds.
-
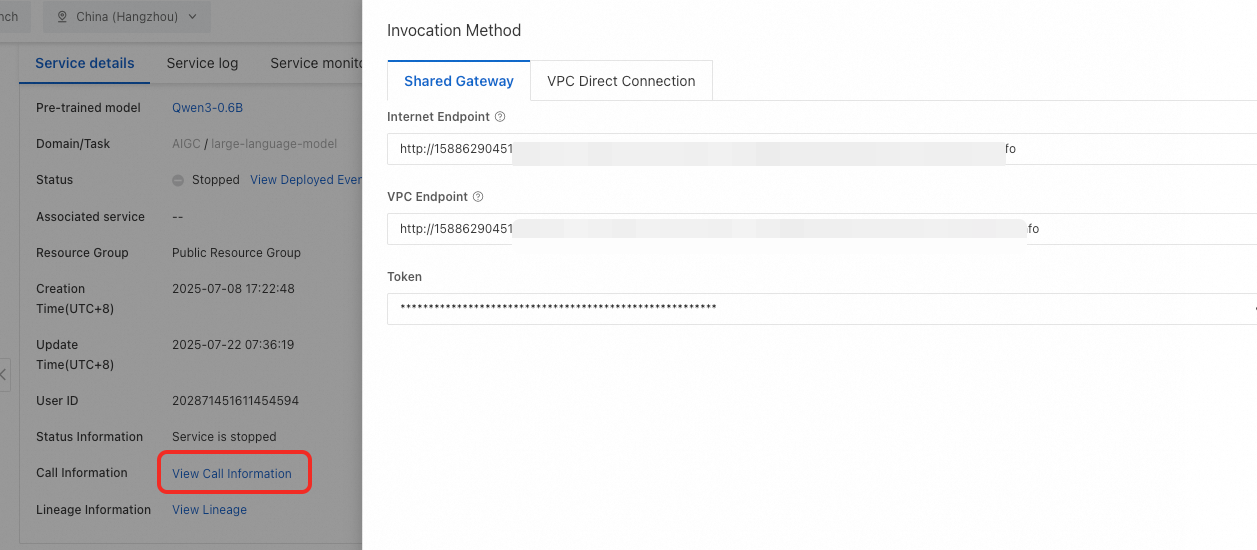
On the Service Details page, click View Endpoint Information. Copy the Internet endpoint and token for the EAS service. Use them to call the service from Dify.
Step 3: Create a Dify application
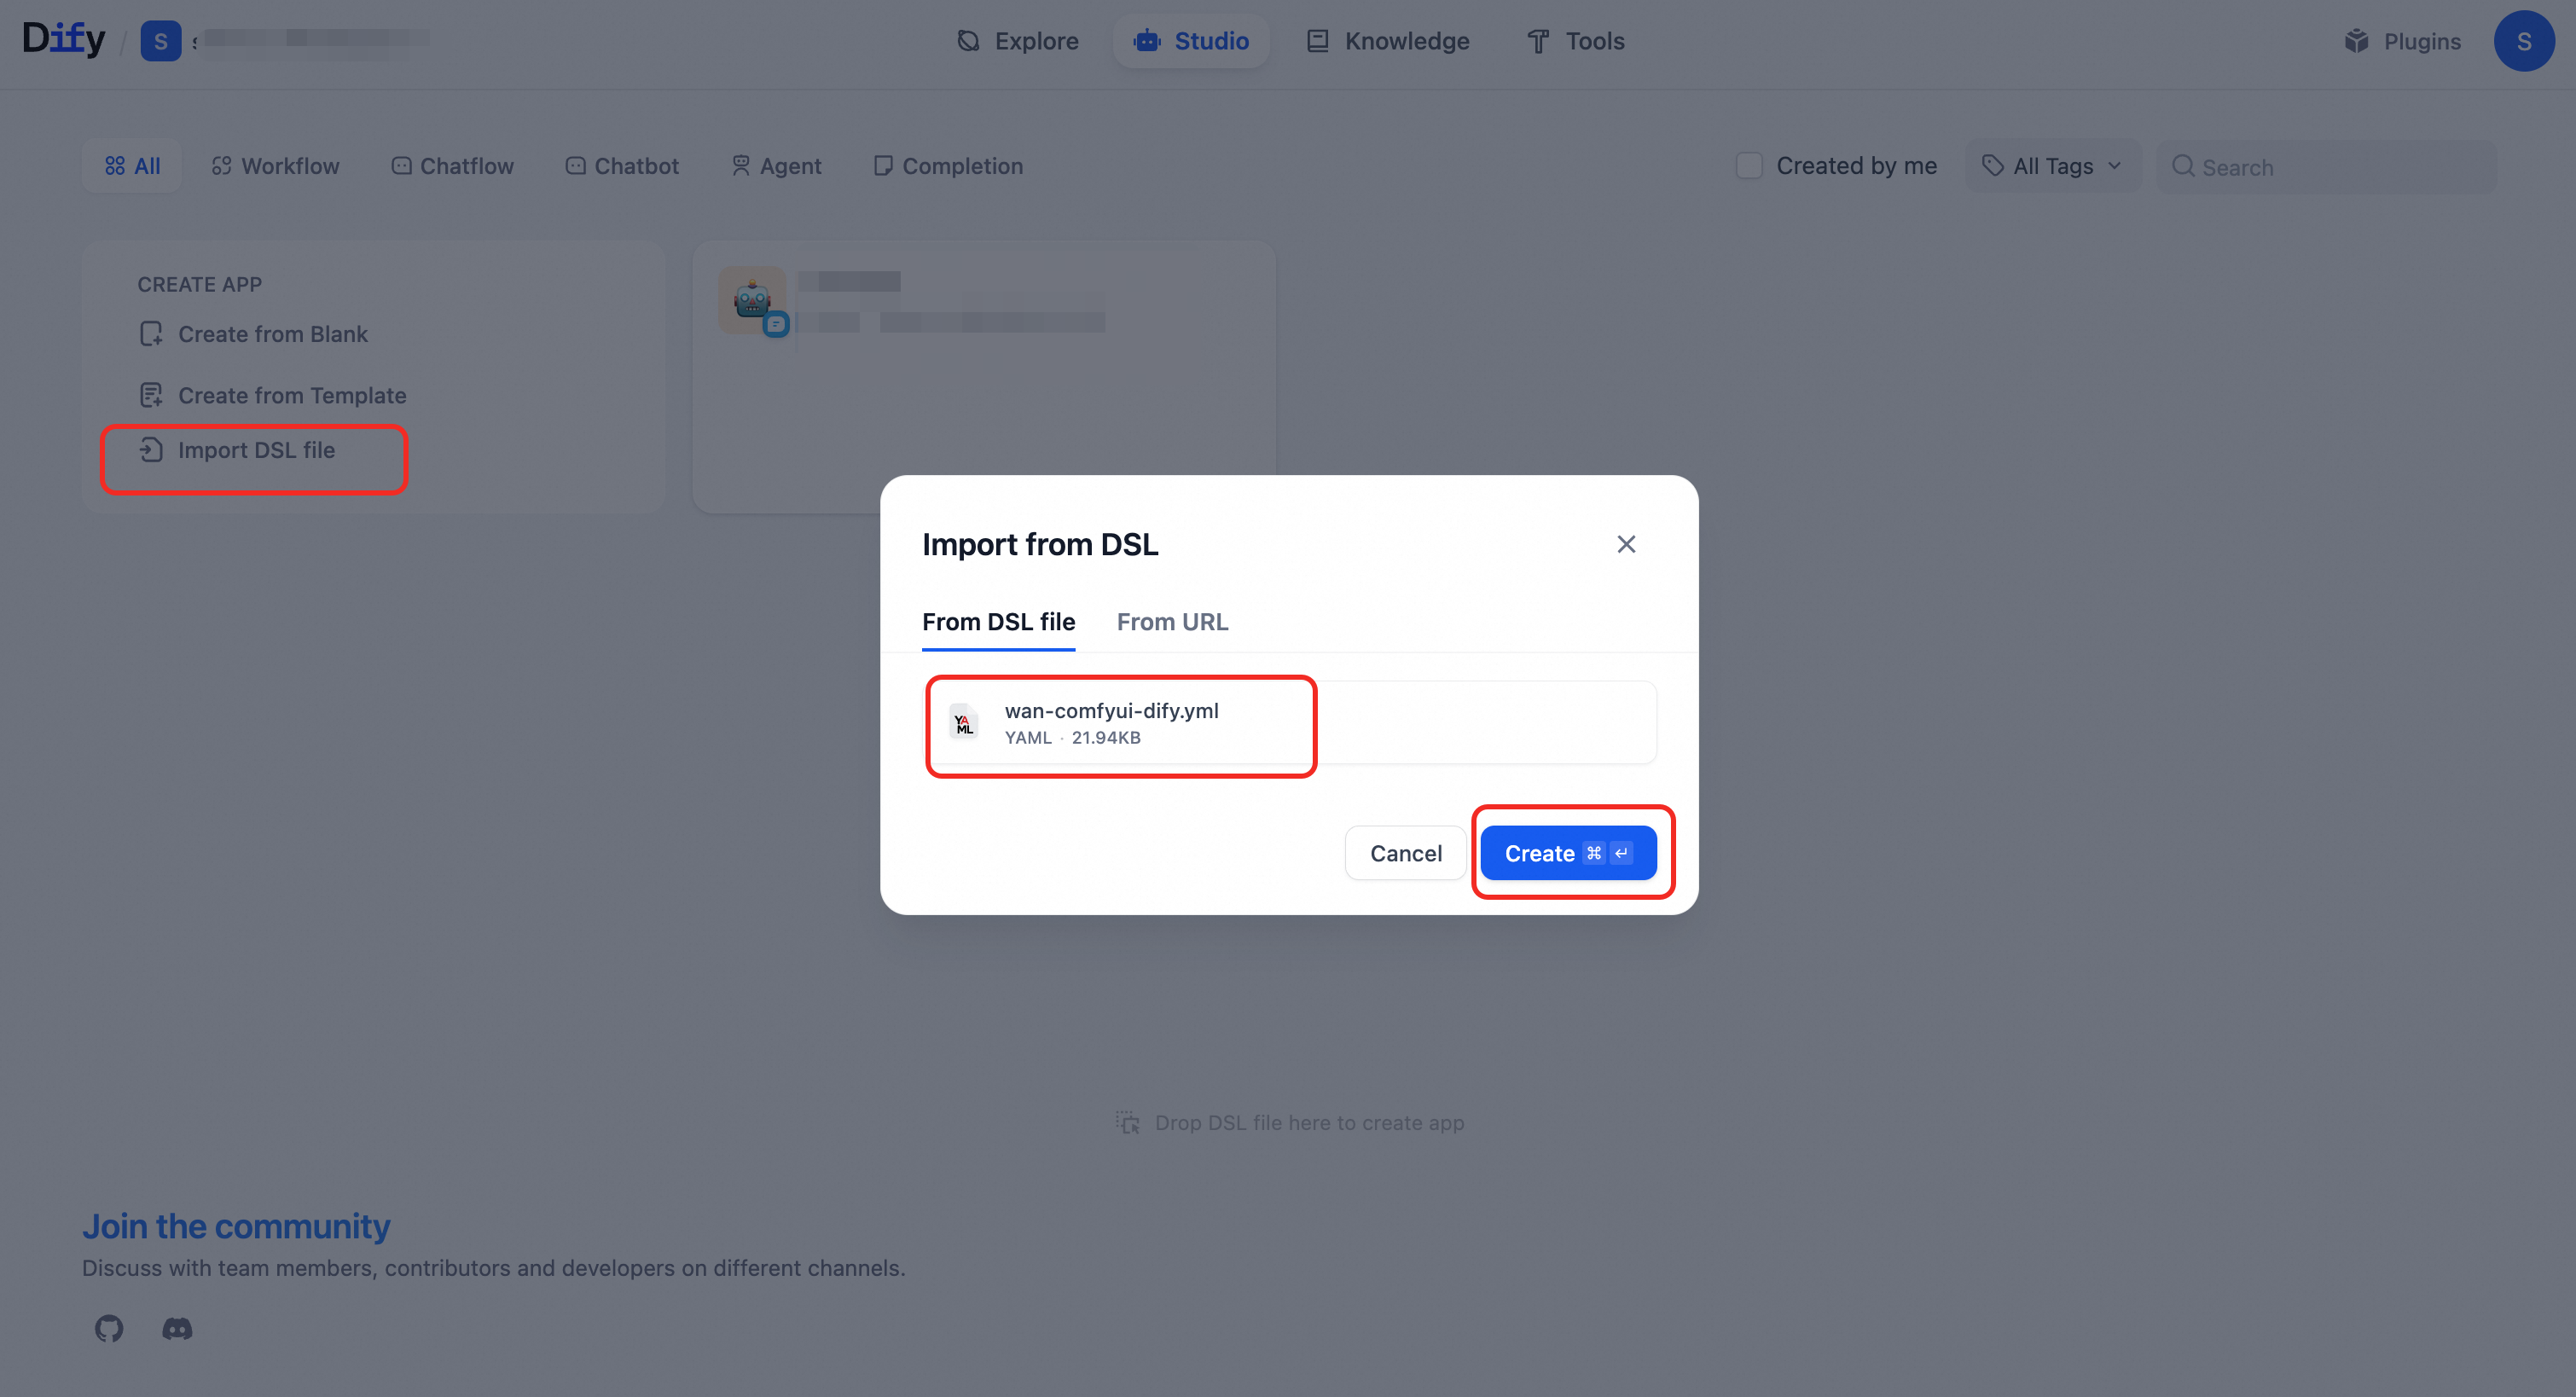
In Dify, import the sample DSL file wan-comfyui-dify.yml. This topic uses it to explain key node configurations for calling ComfyUI.
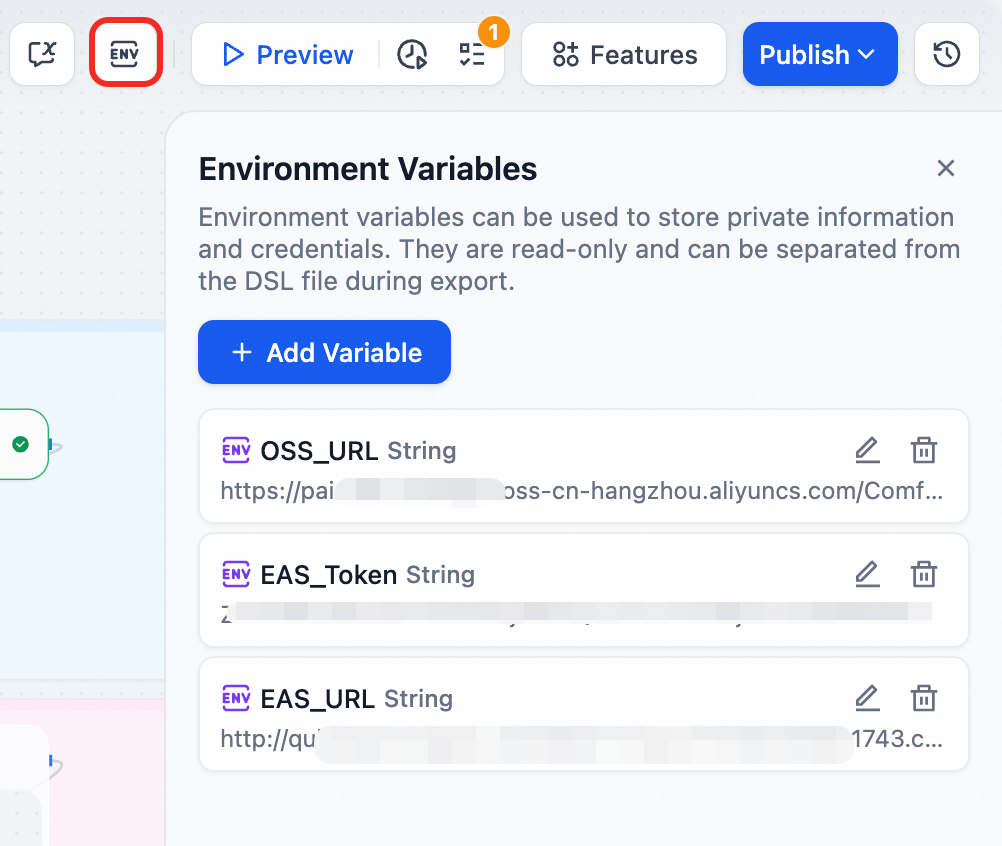
Set environment variables
-
OSS_URL: Public access path for generated files. In this topic, the ComfyUI working directory is
oss://examplebucket/wan. Set this variable tohttps://examplebucket.oss-cn-hangzhou.aliyuncs.com/wan/output. Here,oss-cn-hangzhou.aliyuncs.comis the public OSS endpoint for the China (Hangzhou) region. For endpoints in other regions, see Regions and Endpoints. -
EAS_Token: Service token obtained in Step 2.
-
EAS_URL: Internet endpoint obtained in Step 2.
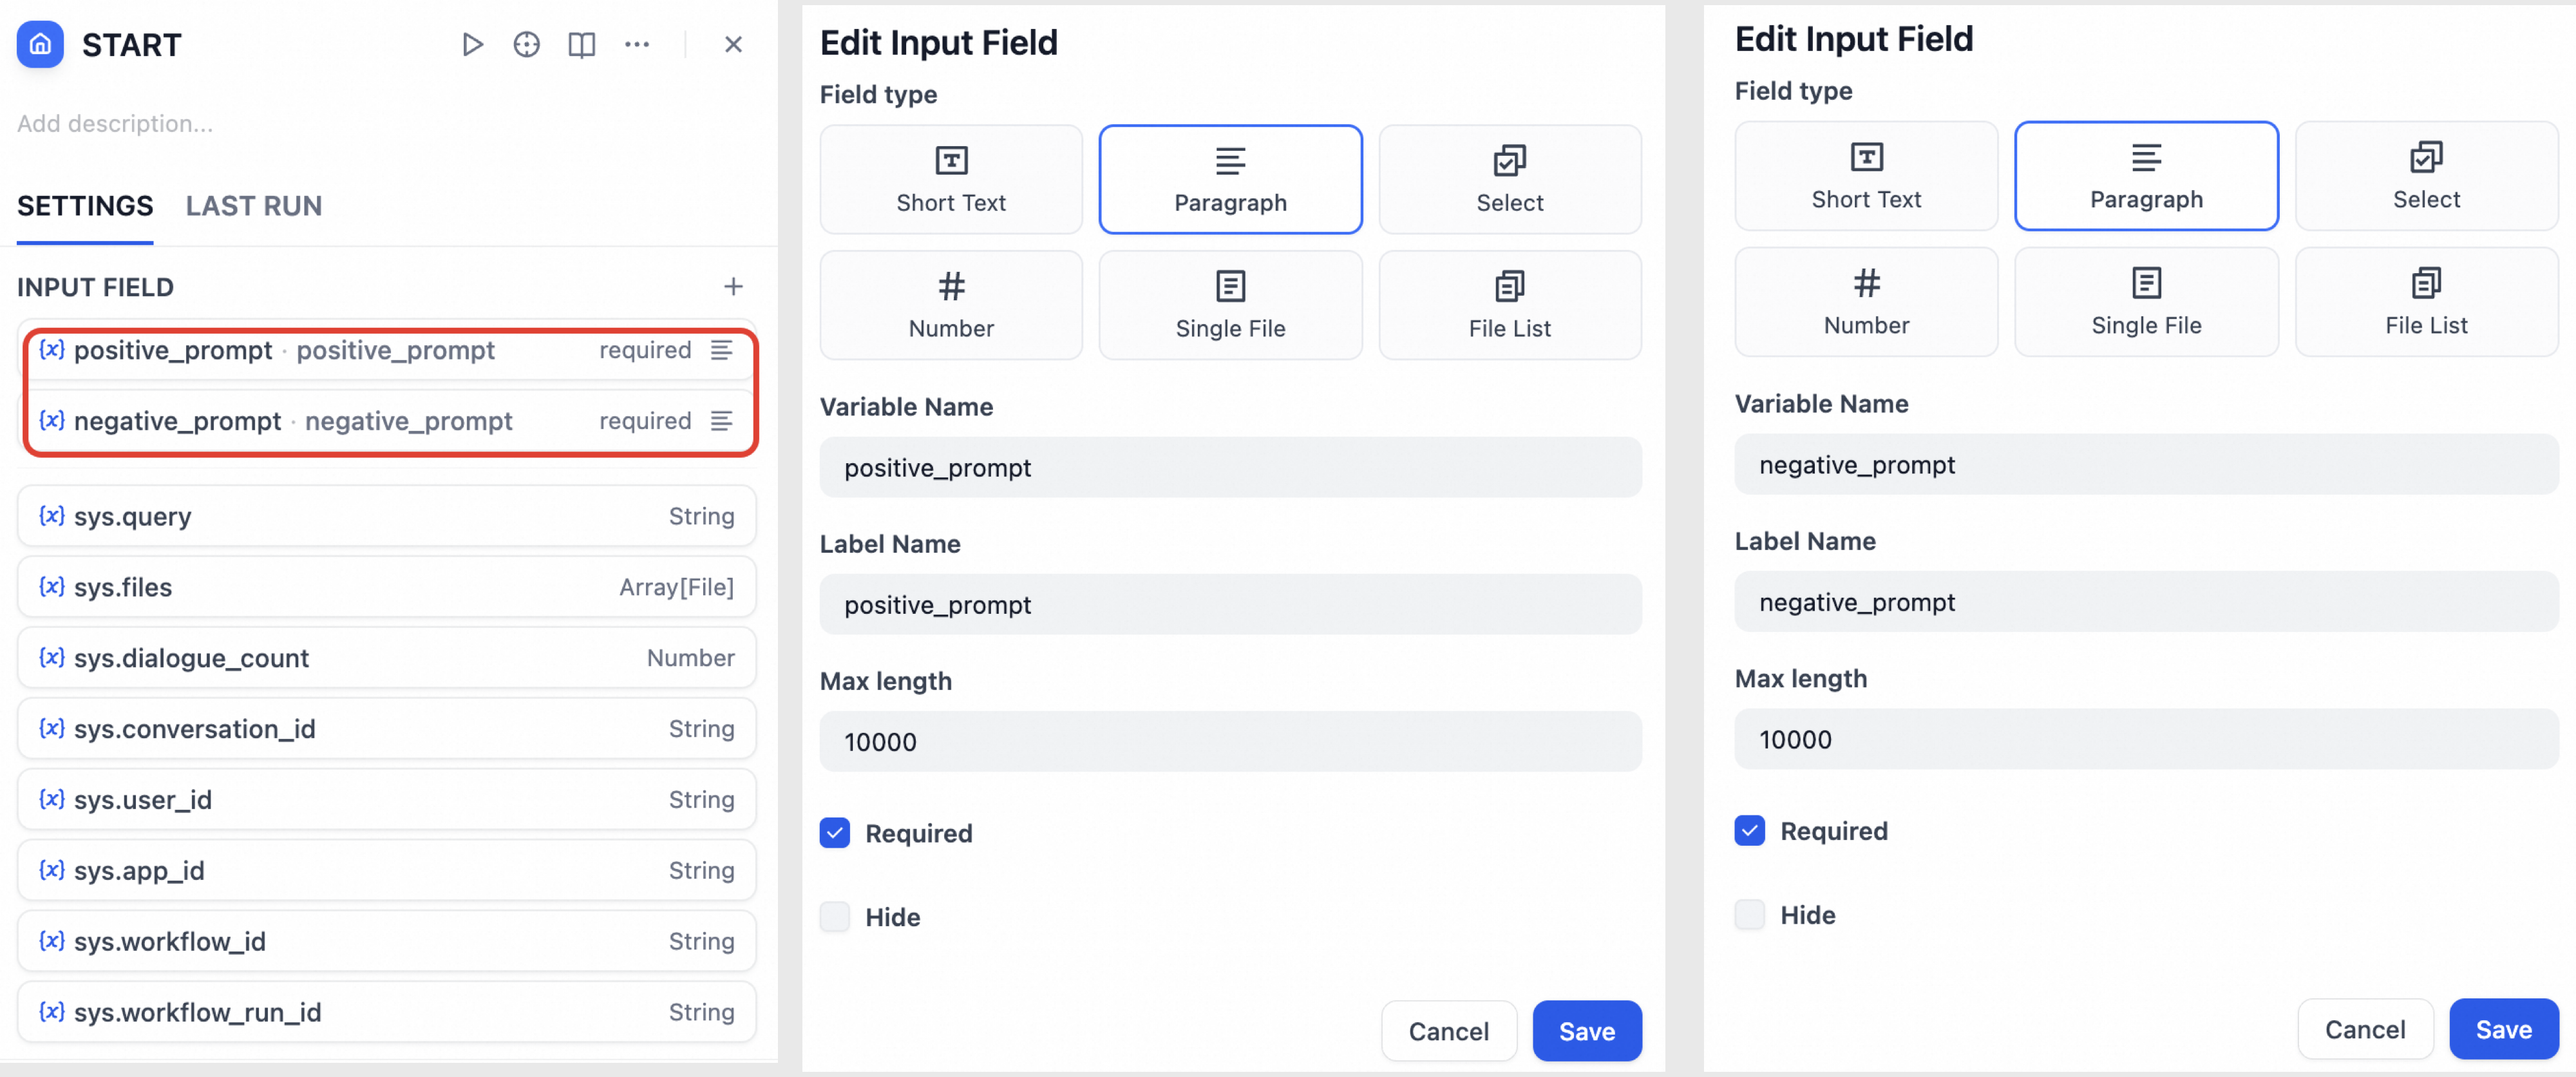
Configure input variables for the start node
Set dynamic parameters such as positive and negative prompts as variables. Users can provide values for these variables each time they run the application.
Configure the POST request to get the prompt ID
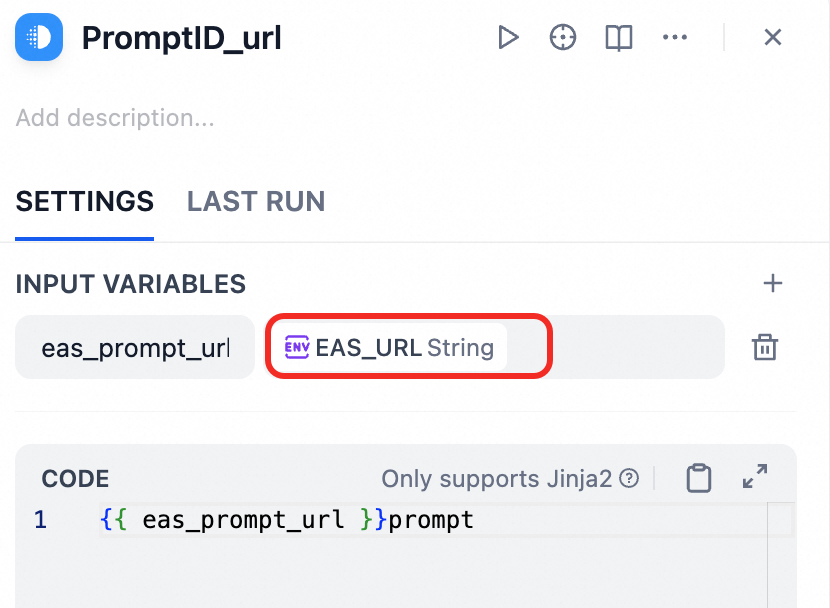
Set the request URL
Append /prompt to the EAS_URL to form the POST request URL.
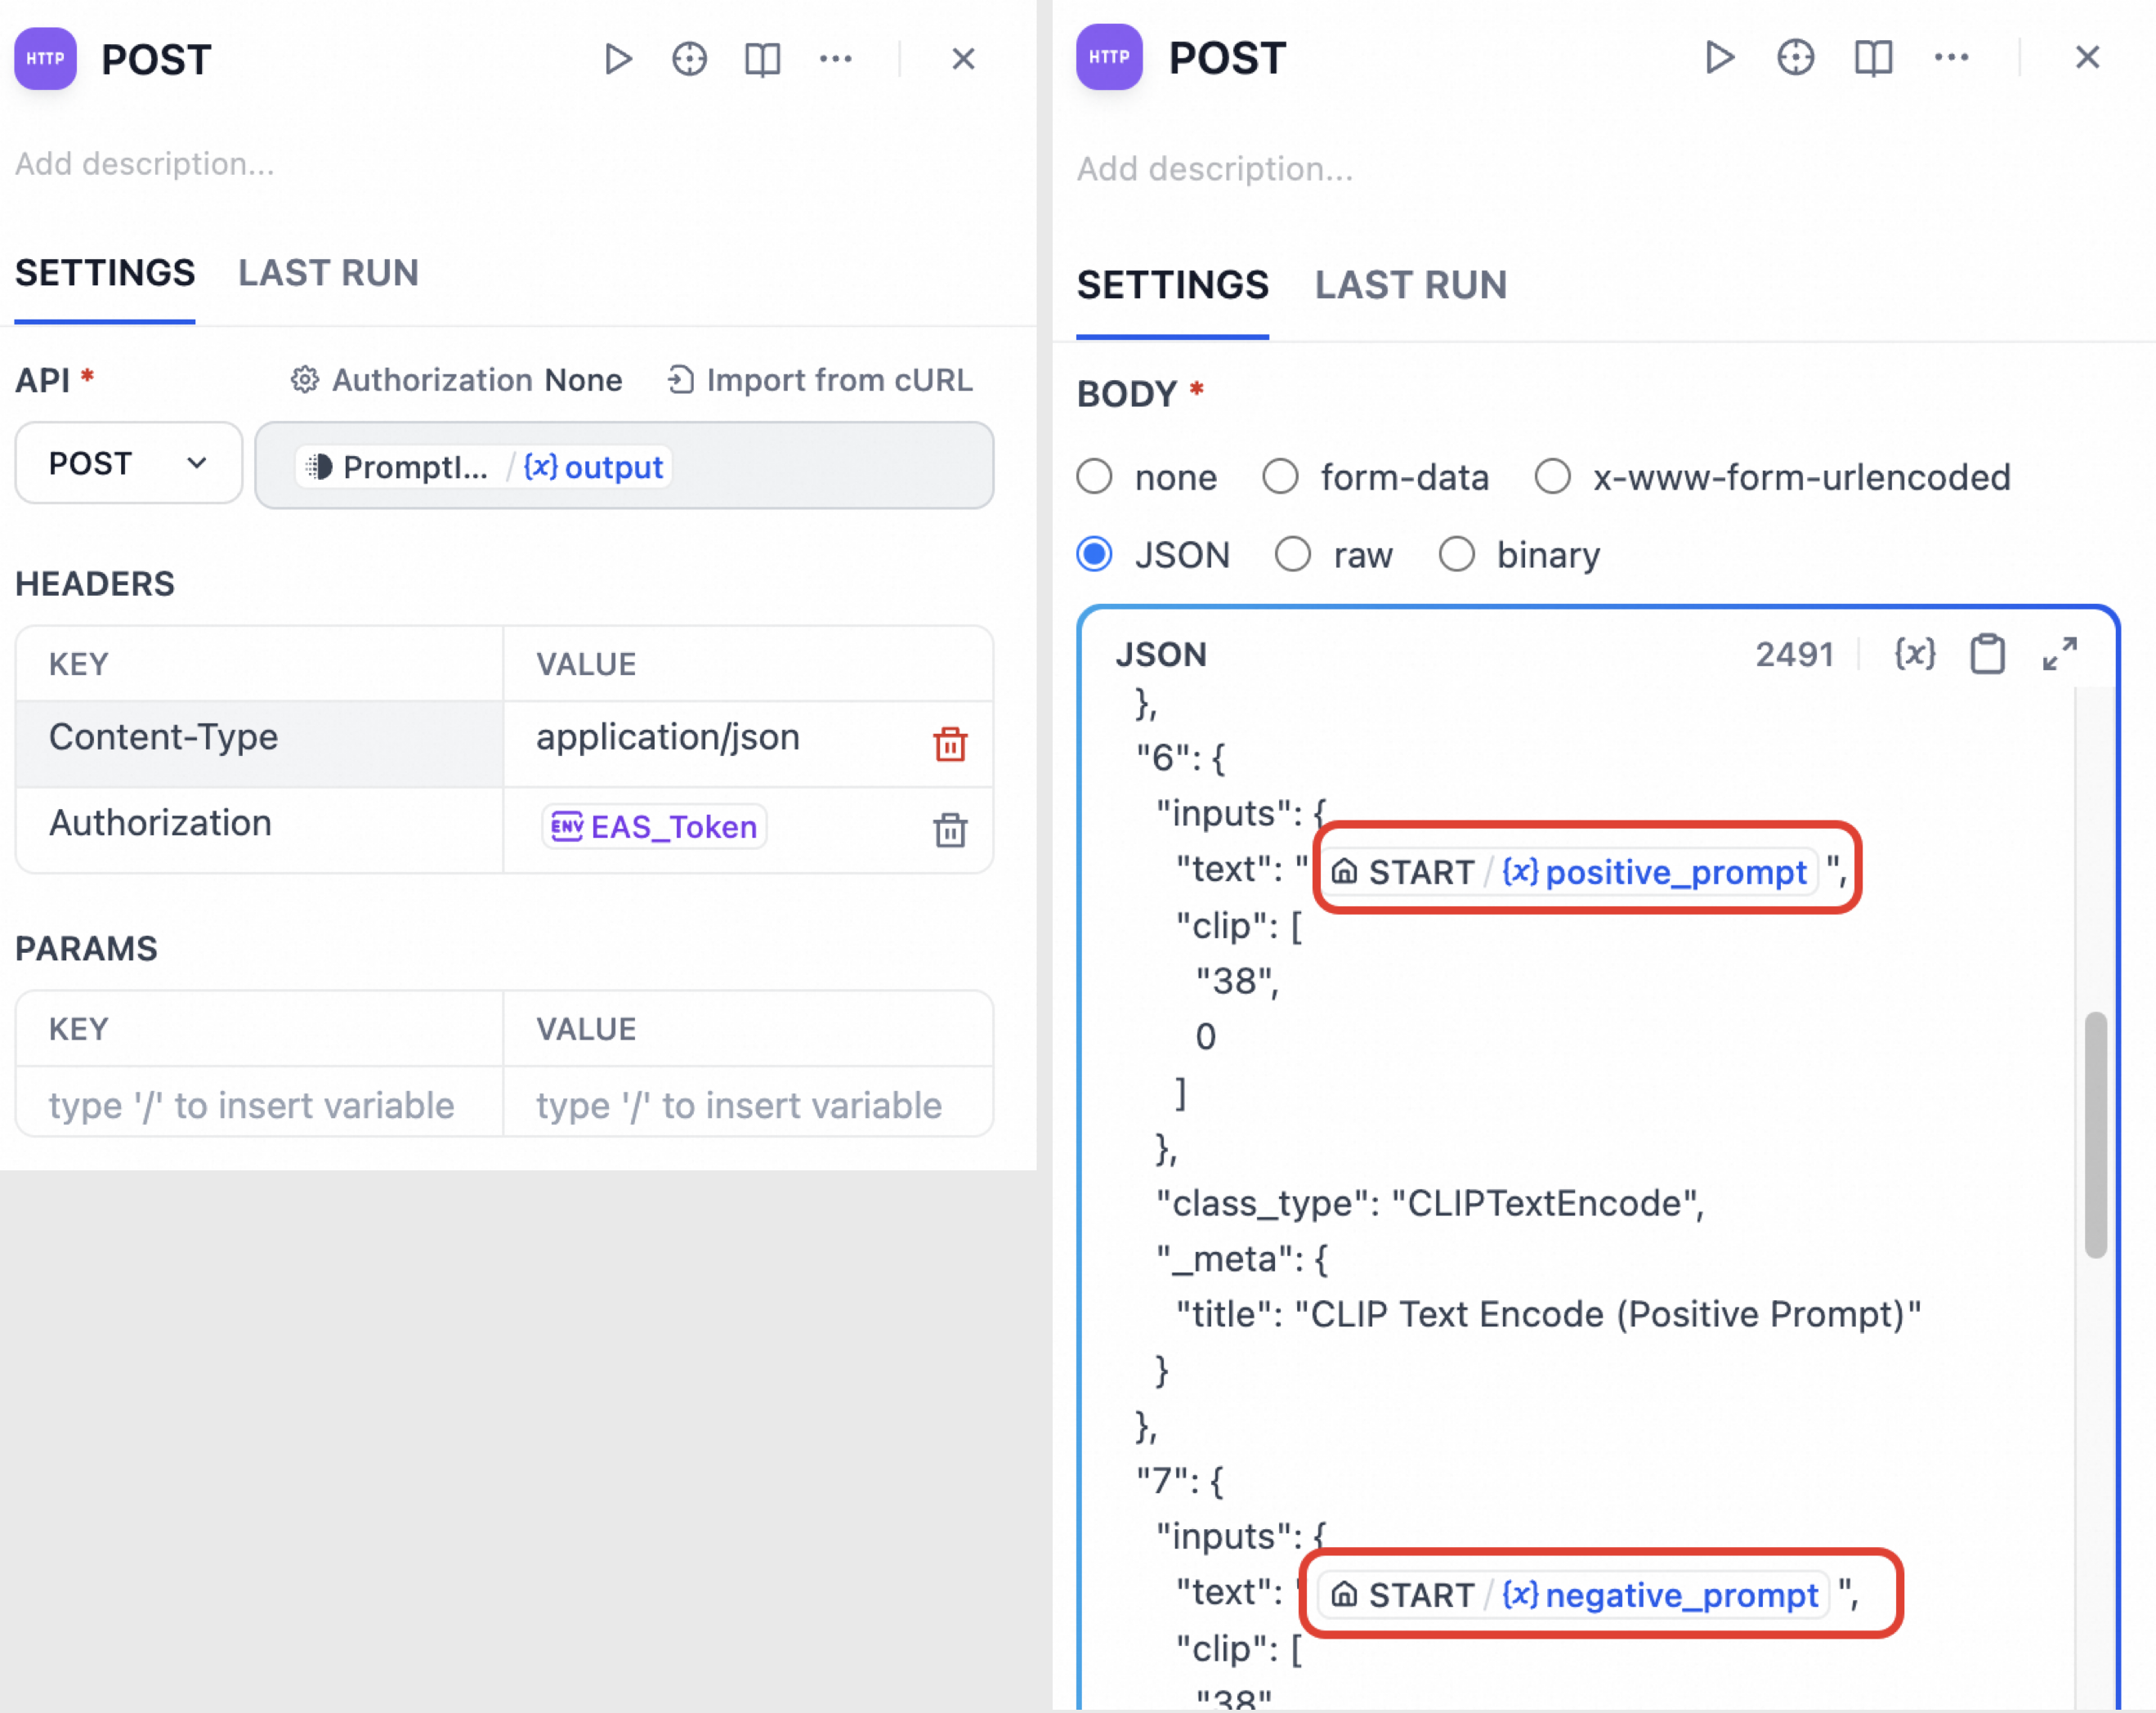
Build and send the POST request
Configure the URL, headers, and body. The body is the exported ComfyUI workflow JSON (for how to create and export it, see Using the Web UI). Replace dynamic parameters—such as prompts and seed values—with Dify variables.
Extract the prompt ID
Extract the prompt_id from the response. Use it later to poll for results.
def main(arg: str) -> dict:
    data = json.loads(arg)
    return {"result": data["prompt_id"]}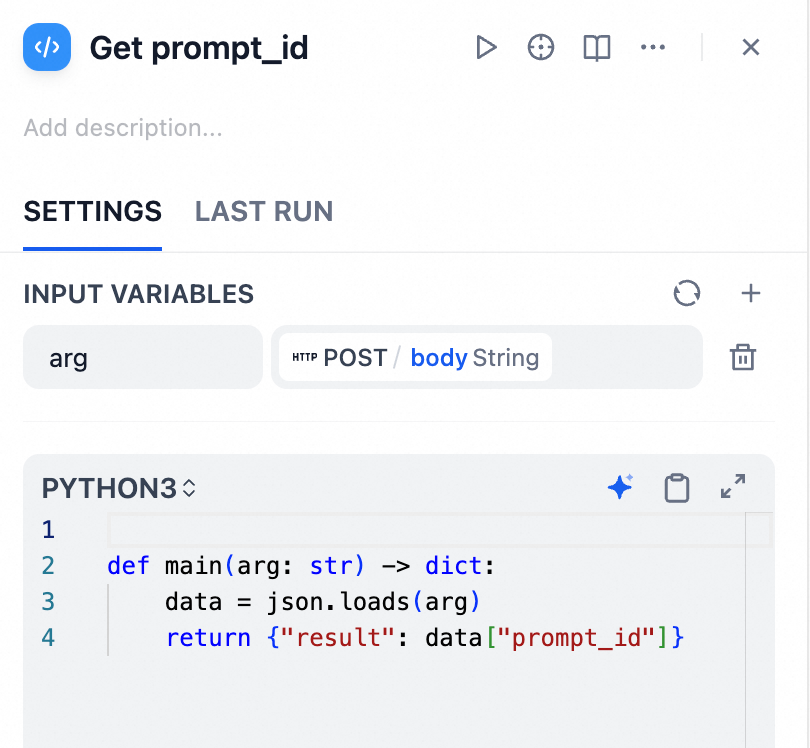
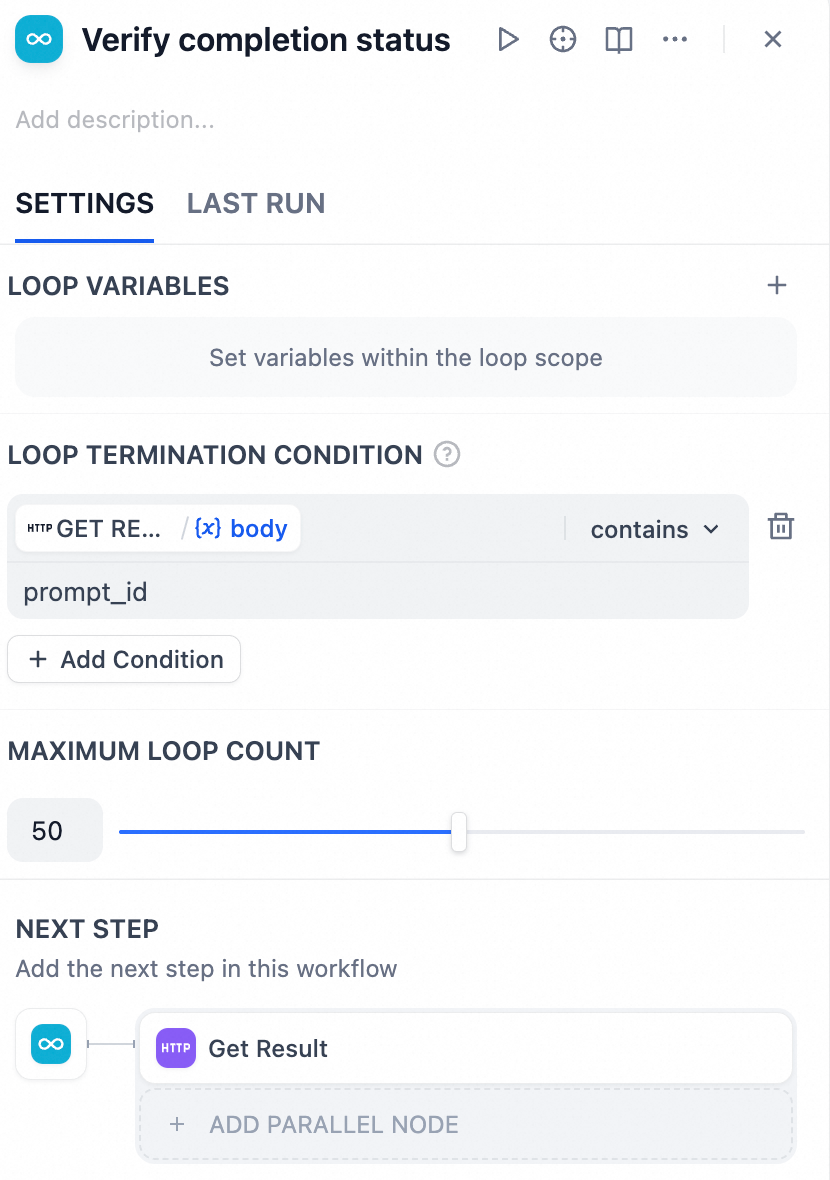
Configure polling logic to fetch inference results
Use the prompt_id to send repeated GET requests and check task status.
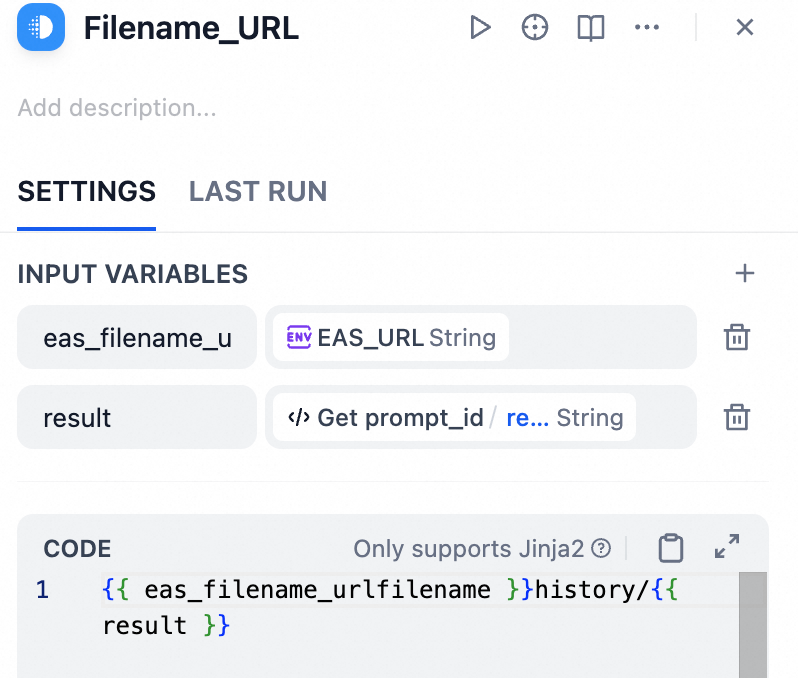
Set the request URL
Append history/<prompt_id> to the EAS_URL to form the GET request URL. Replace <prompt_id> with the value from the previous step.
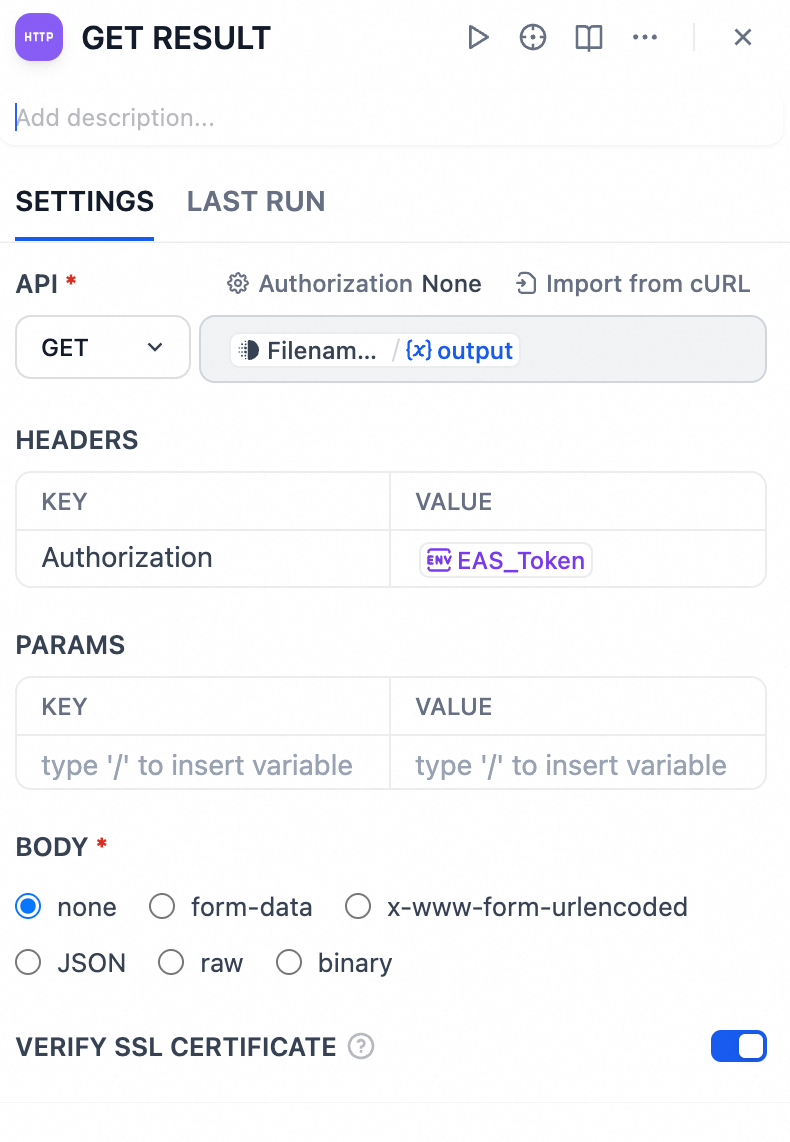
Send the GET request using the prompt_id
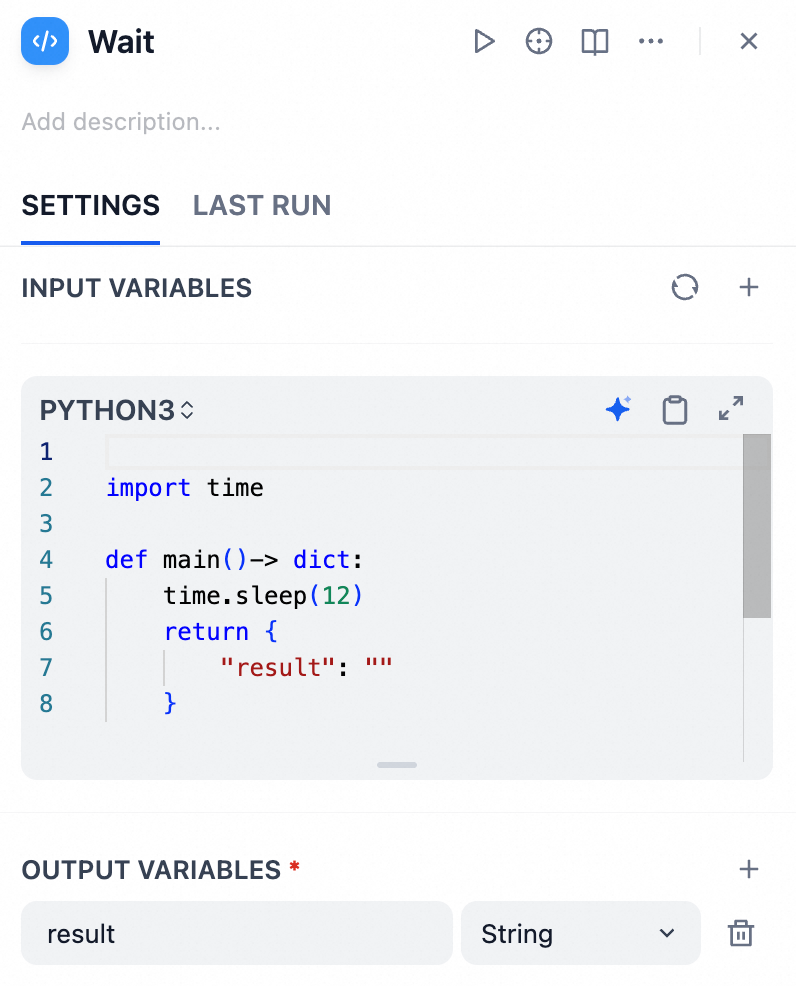
Add a delay
Add a code node between each polling attempt to run time.sleep(12) or similar. This avoids sending requests too frequently.
import time

def main()-> dict:
    time.sleep(12)
    return {
        "result": ""
    }
Check if execution finished
The presence of a prompt_id in the response indicates inference has completed.
Assemble the file URL and display the result
After the task finishes, extract the filename from the final polling response. Append it to the OSS_URL environment variable to form a publicly accessible link. Display it in the Dify “End” node.
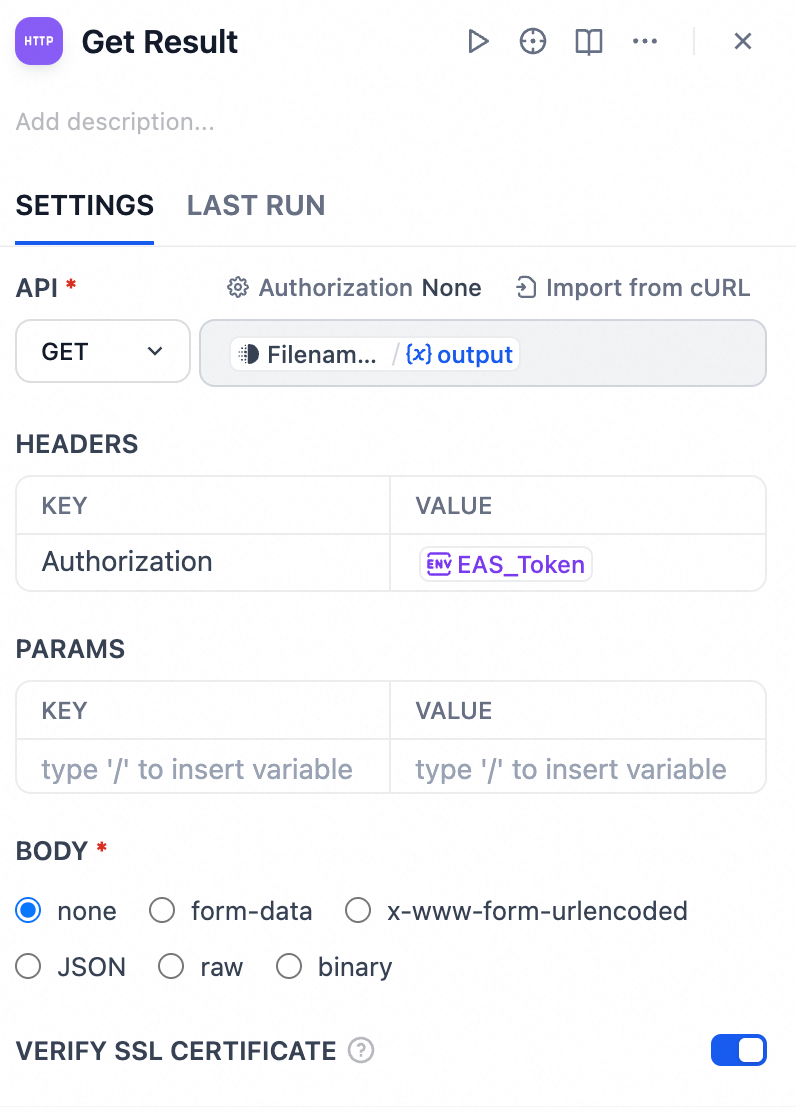
Fetch the inference result
Configure this node the same way as the node in Send the GET request using the prompt_id.
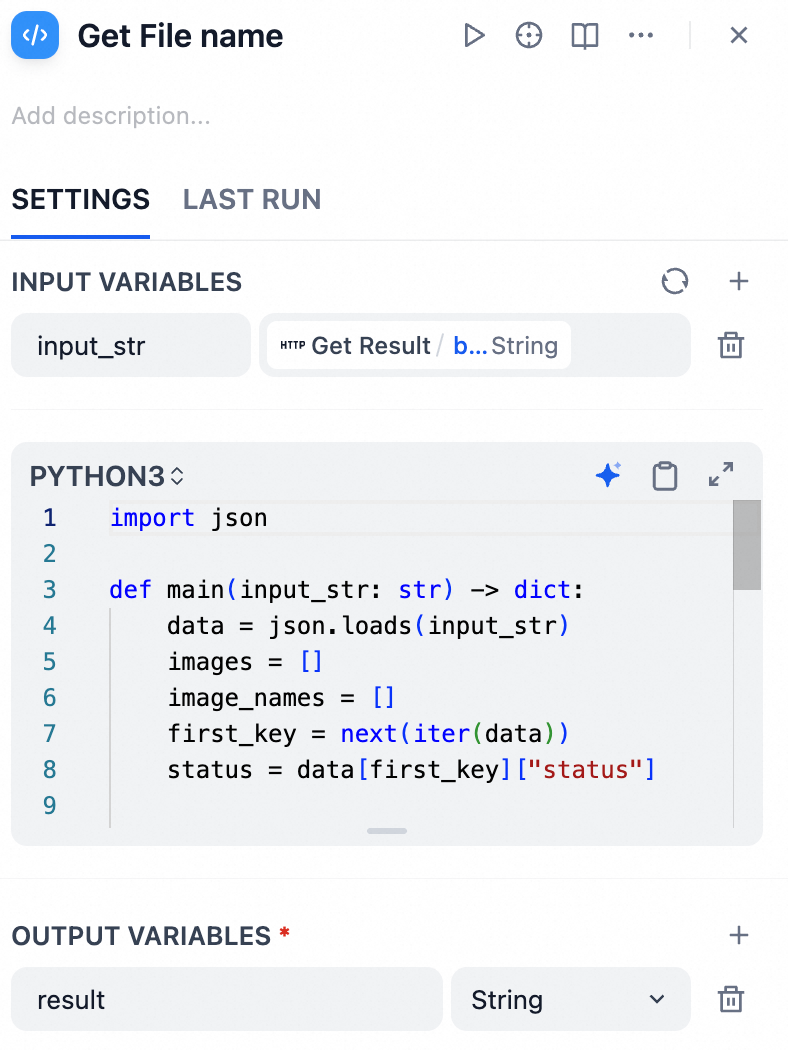
Extract the filename
import json

def main(input_str: str) -> dict:
    data = json.loads(input_str)
    images = []
    image_names = []
    first_key = next(iter(data))
    status = data[first_key]["status"]

    if status["completed"] and status["status_str"] == "success":
        images = data[first_key]["outputs"]["28"]["images"]

    for img in images:
        image_names.append(img["filename"])

    # Convert list to string
    image_names_str = ",".join(image_names)

    return {
        "result": image_names_str,
    }
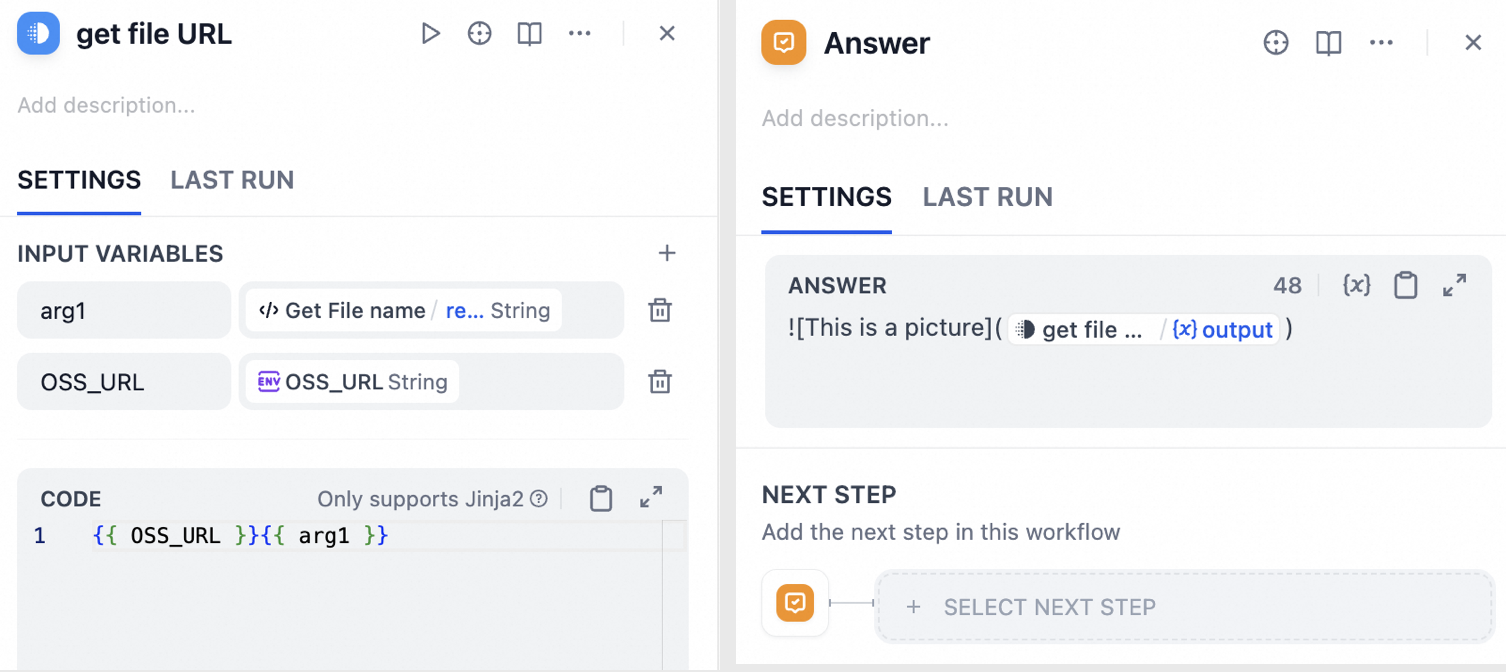
Assemble the public file URL
Append the filename to the OSS_URL to form a publicly accessible link. Display it in the Dify application result.
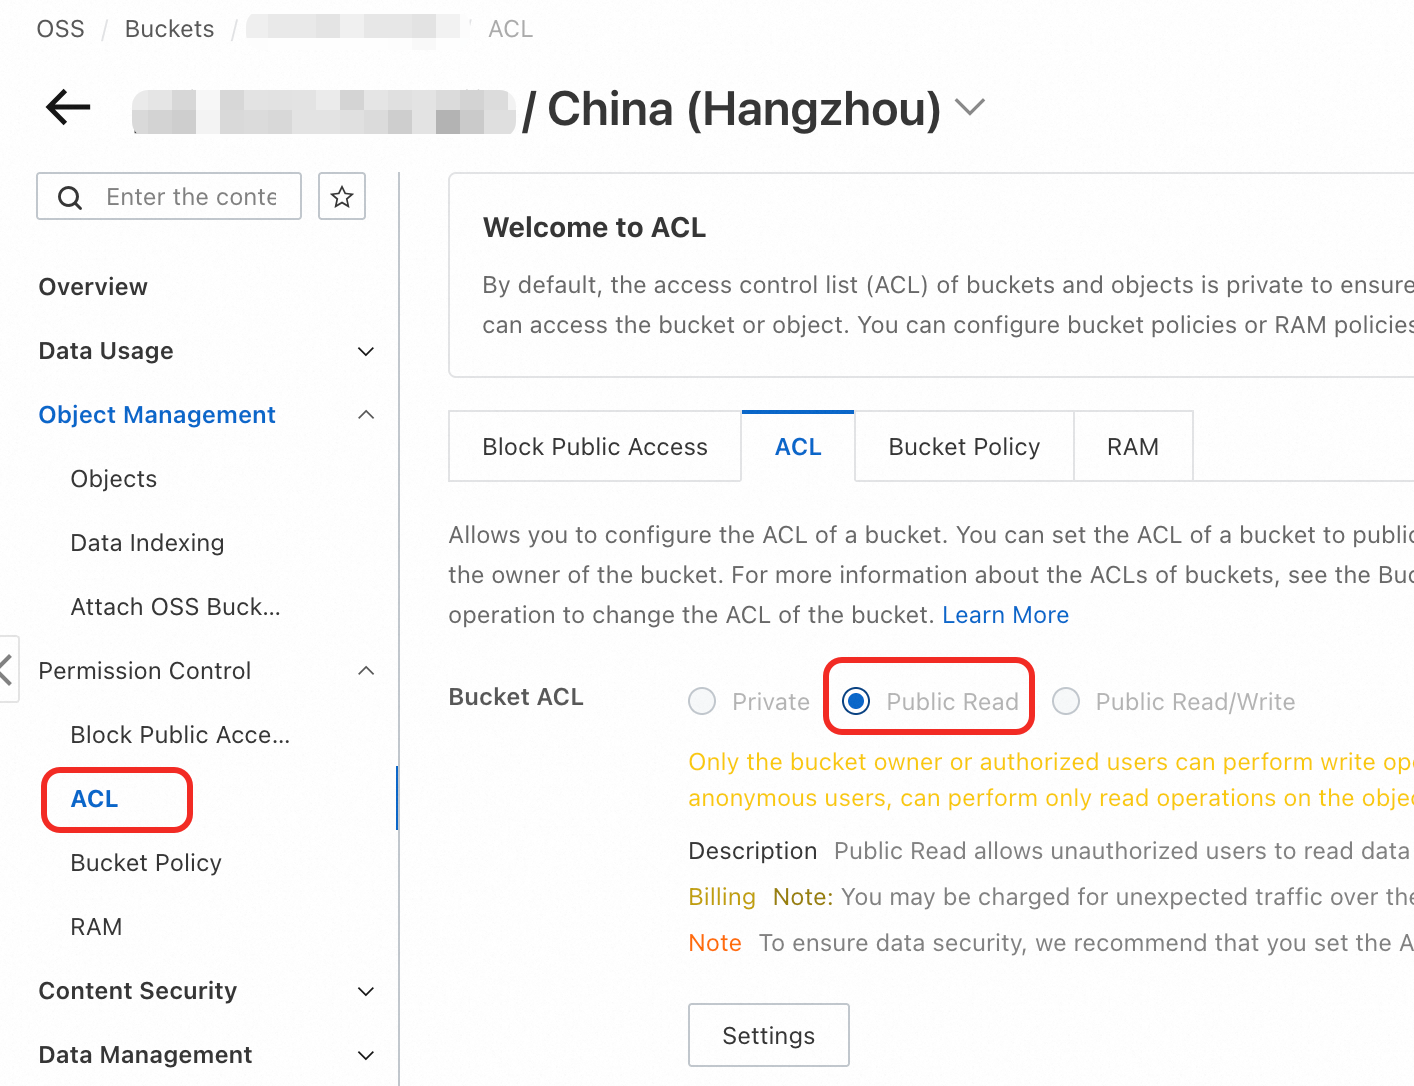
Ensure the OSS bucket is set to public-read permission. For details, see Bucket ACL.
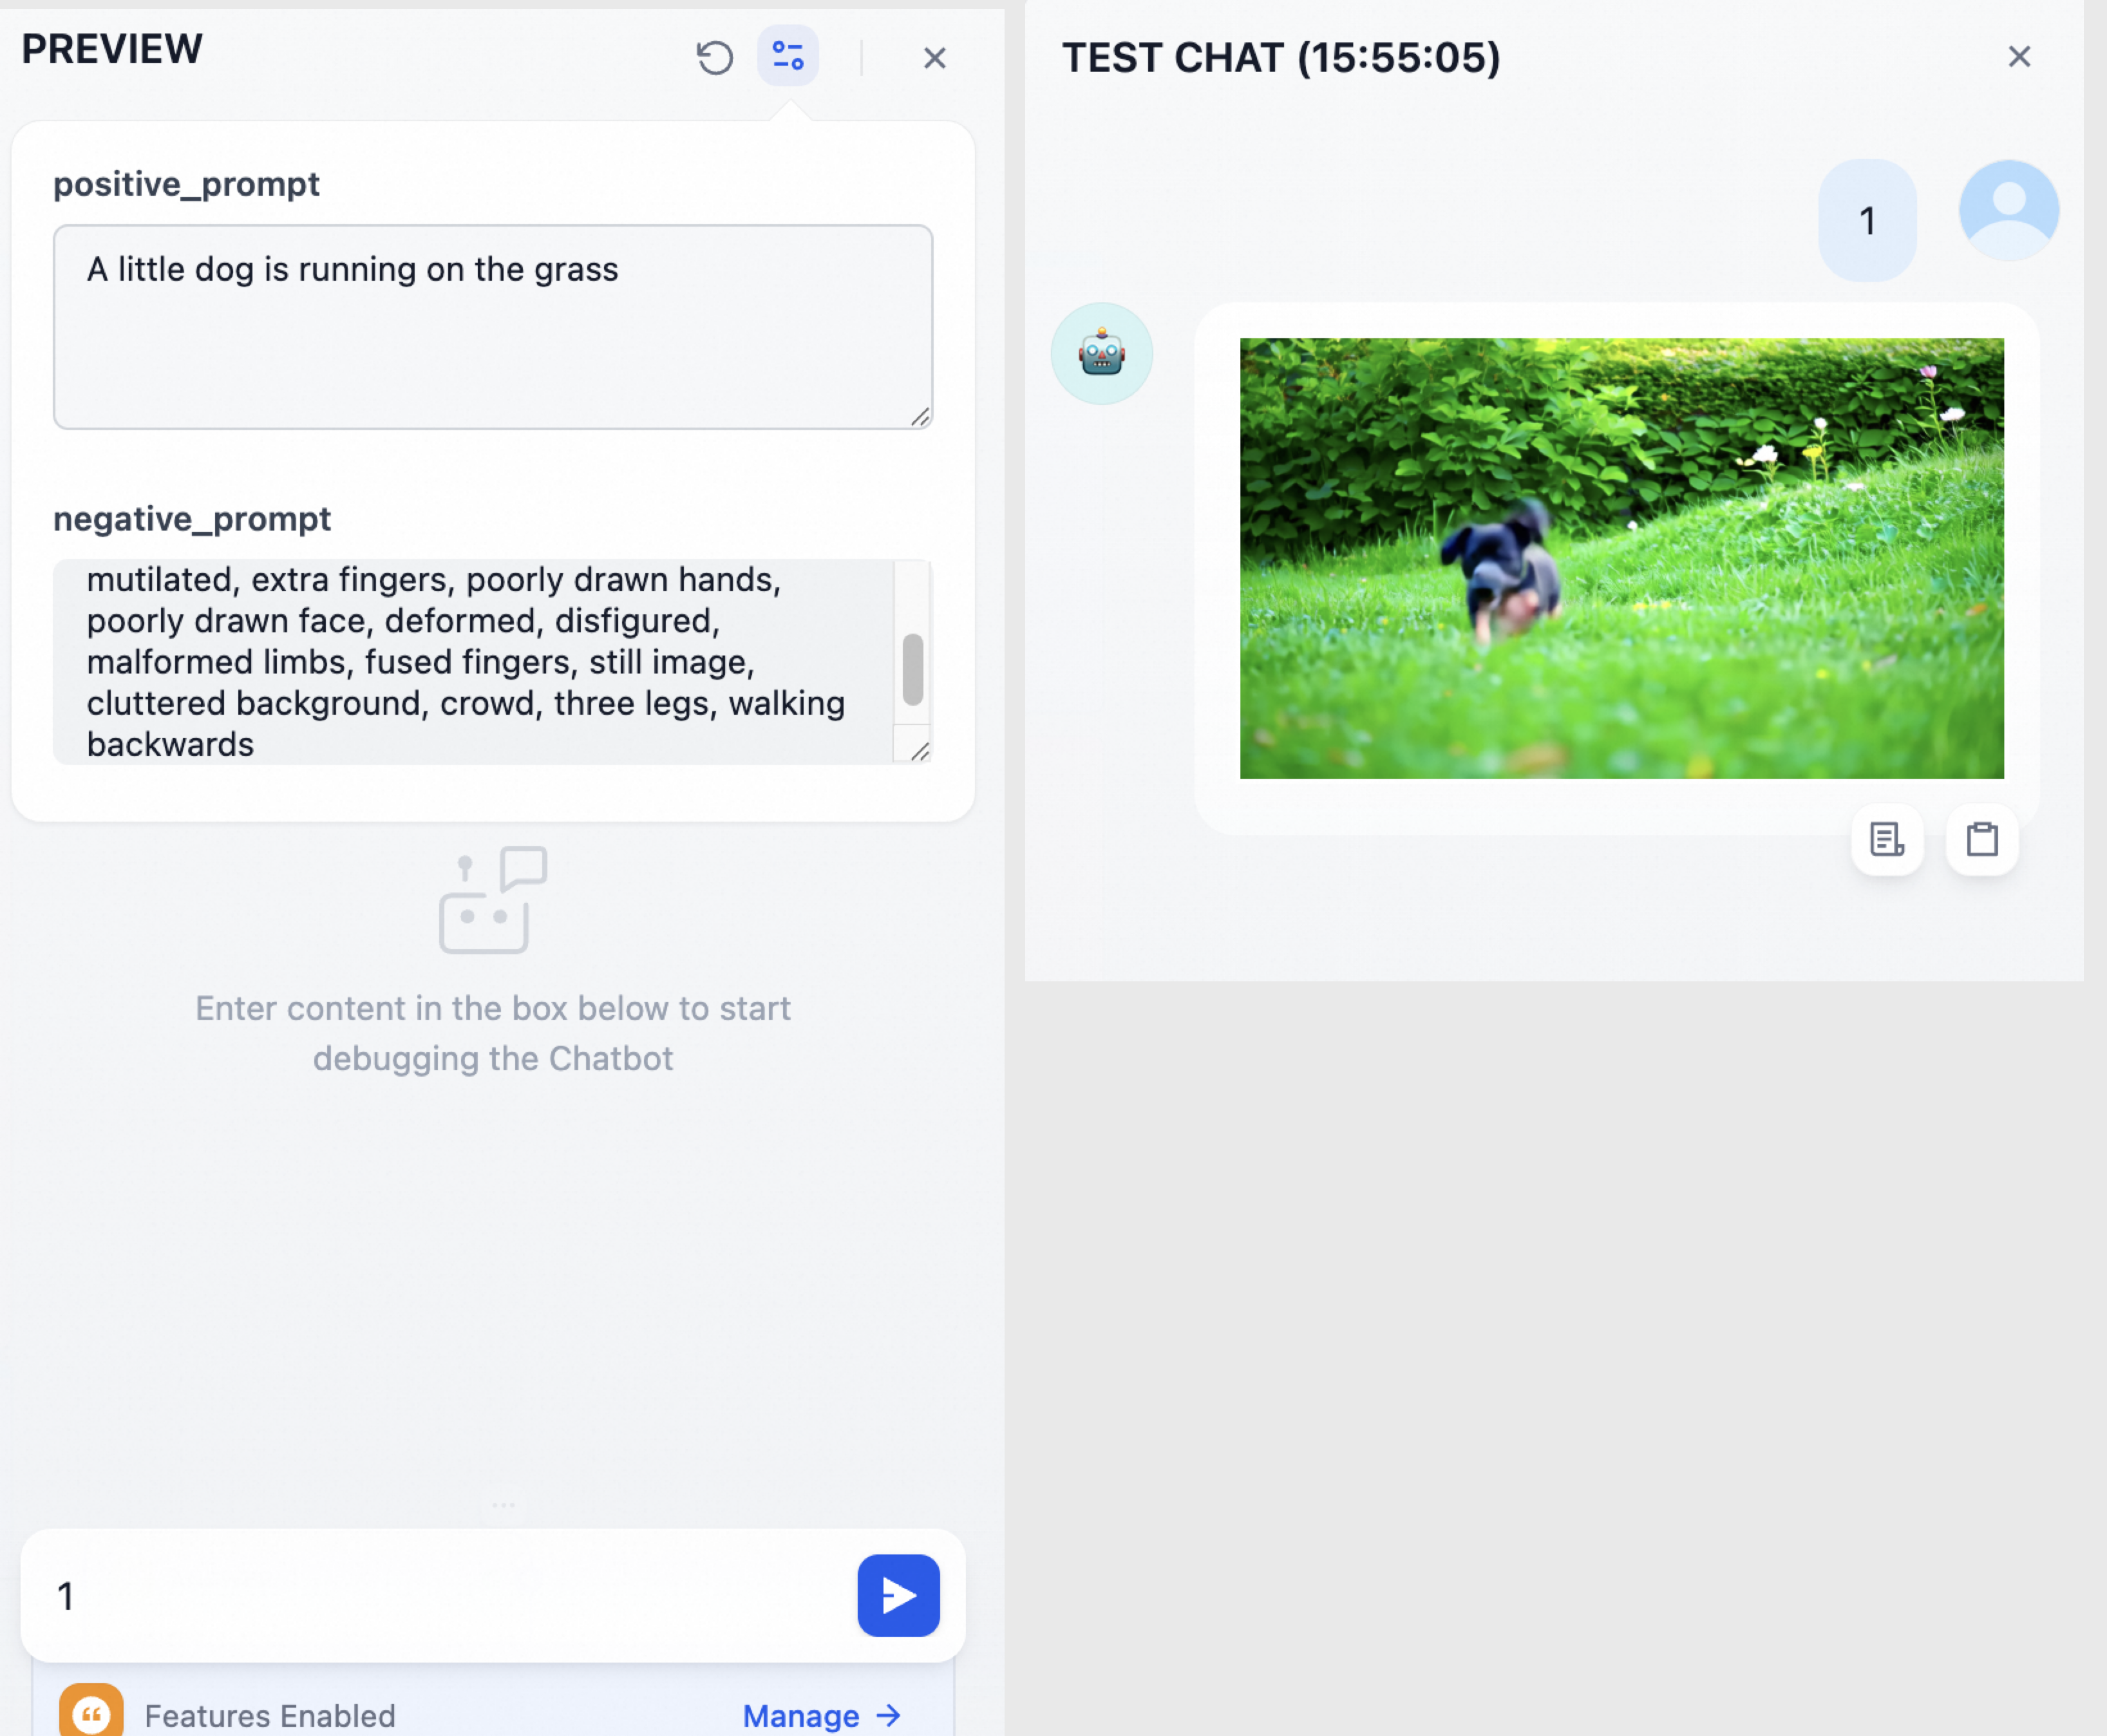
Step 4: Test the application
In Dify, click Preview in the upper-right corner. Enter positive and negative prompts. In the dialog box, enter 1 (the workflow doesn't use this field, so any value works). Click Send and wait for the video to generate.
Production best practices
-
Security: Setting your OSS bucket to public-read in production poses a security risk. Restrict access to specific IP addresses or VPCs instead. For details, see Bucket Policy.
-
Stability and cost: Choose a polling interval carefully. Too short an interval increases API calls and server load—and may incur unnecessary costs. Too long an interval increases user wait time. Adjust based on average task duration.
FAQ
-
Why can’t I access the generated image or video link?
Check the following:
-
OSS bucket is set to public-read permission.
-
OSS_URL environment variable in Dify is correct—especially that the OSS domain name matches the region where the bucket resides.
-
-
Why does the workflow hang at the polling step?
This usually indicates the EAS service failed to complete the task. Log in to the PAI console and check real-time logs for the EAS service to identify any runtime errors.