Train object detection models using YOLOX, FCOS, YOLOv5, and YOLOv7 to identify and locate entities in images.
Prerequisites
Before you begin, ensure that you have:
Activated OSS. See Activate OSS.
Authorized Machine Learning Studio to access OSS. See Grant required permissions to use Machine Learning Designer.
Limitations
Available only in Designer.
Only the DLC engine is supported.
Parameters
Input
| Input port | Type | Upstream component | Required |
|---|---|---|---|
| Training data | OSS | Read OSS data | No — if not connected, configure Annotation file path for training set on the Field settings tab |
| Validation data | OSS | Read OSS data | No — if not connected, configure Annotation file path for validation set on the Field settings tab |
| Class list file | OSS | Read OSS data | No — if not connected, configure Class list file OSS path on the Field settings tab |
Configuration
Field settings tab
| Parameter | Required | Default | Description |
|---|---|---|---|
| Model type | Yes | YOLOX | Model architecture for training. Valid values: FCOS, YOLOX, YOLOv5, YOLOv7. |
| Data format | Yes | DetSourcePAI | Annotation format for your dataset. DetSourcePAI uses .manifest files (produced by PAI iTAG); COCO uses .json files (standard COCO annotation format). YOLOv5 and YOLOv7 support DetSourcePAI only. |
| Annotation file path for training set | No | None | Path to the training annotation file. Use a .manifest file for DetSourcePAI or a .json file for COCO. If training data is connected through the input port, leave this blank — the input port takes precedence. |
| Annotation file path for validation set | No | None | Path to the validation annotation file. Use a .manifest file for DetSourcePAI or a .json file for COCO. If validation data is connected through the input port, leave this blank — the input port takes precedence. |
| Training data OSS path | Yes (COCO only) | None | Path to training images in COCO format. Appears only when Data format is set to COCO. |
| Validation data OSS path | Yes (COCO only) | None | Path to evaluation images in COCO format. Appears only when Data format is set to COCO. |
| Class list file OSS path | No | None | Path to a label list file with a .txt extension. If a class list file is connected through the input port, leave this blank — the input port takes precedence. |
| Pre-trained model OSS path | No | None | OSS path to a custom pre-trained model. If not specified, PAI uses a default pre-trained model. |
| OSS directory for training | No | None | OSS directory where the trained model is saved. Example: examplebucket.oss-cn-shanghai-internal.aliyuncs.com/test/ckpt/. If left blank, the default workspace path is used. |
Parameters tab
| Parameter | Required | Default | Description |
|---|---|---|---|
| YOLOX model structure | Yes (YOLOX only) | yolox-s | Architecture variant for YOLOX. Valid values: yolox-s, yolox-m, yolox-l, yolox-x. |
| Number of classes | Yes | 20 | Number of object classes in your dataset. |
| Image scale | Yes | 320 320 | Image dimensions after resizing (height width). Example: 320 320. |
| Optimizer | Yes (YOLOX only) | momentum | Optimizer for model training. Valid values: momentum, adam. |
| Initial learning rate | Yes | 0.01 | Learning rate at the start of training. |
| Training batch size | Yes | 8 | Number of samples per training iteration. |
| Validation batch size | Yes | 8 | Number of samples per evaluation iteration. |
| Number of epochs | Yes | 20 | Total training epochs. For YOLOX, this value must exceed the sum of Warmup epochs and Last no augmented lr epochs. |
| Log loss frequency | No | 200 | Frequency (in batches) for logging the training loss. |
| Validation frequency | No | 2 | Validation interval in epochs. A value of 2 runs validation every two epochs. |
| Warmup epochs | No | 5 | Applies to YOLOX only. Number of warm-up epochs at the start of training. |
| Last no augmented lr epochs | No | 5 | Applies to YOLOX only. Number of final epochs run without data augmentation. |
| Export model format | Yes | raw | Format of the exported model. JIT is not supported for YOLOv5 and YOLOv7. Valid values: raw, jit, onnx. |
| Checkpoint saving frequency | No | 1 | Frequency (in epochs) for saving model checkpoints. A value of 1 saves a checkpoint after every epoch. |
Tuning tab
| Parameter | Required | Default | Description |
|---|---|---|---|
| GPU machine type | Yes | 4 | GPU instance type for training. A GPU instance is required. |
| Enable FP16 | No | false | Enables FP16 half-precision training to reduce memory usage and speed up training on supported GPUs. |
| Execution mode | Yes | Distributed DLC | Distributed training on DLC. Only distributed mode is supported. |
Output
| Output port | Type | Downstream component |
|---|---|---|
| Output model | SavedModel format, stored at the OSS path specified in OSS directory for training on the Field settings tab | image prediction |
Build an object detection pipeline
Build an end-to-end object detection pipeline using FCOS, YOLOX, YOLOv5, or YOLOv7.
Step 1: Label your images
Use the iTAG module in PAI to label your training images.
Create a dataset and a labeling job. See Create a dataset: for data labeling and Create a labeling job.
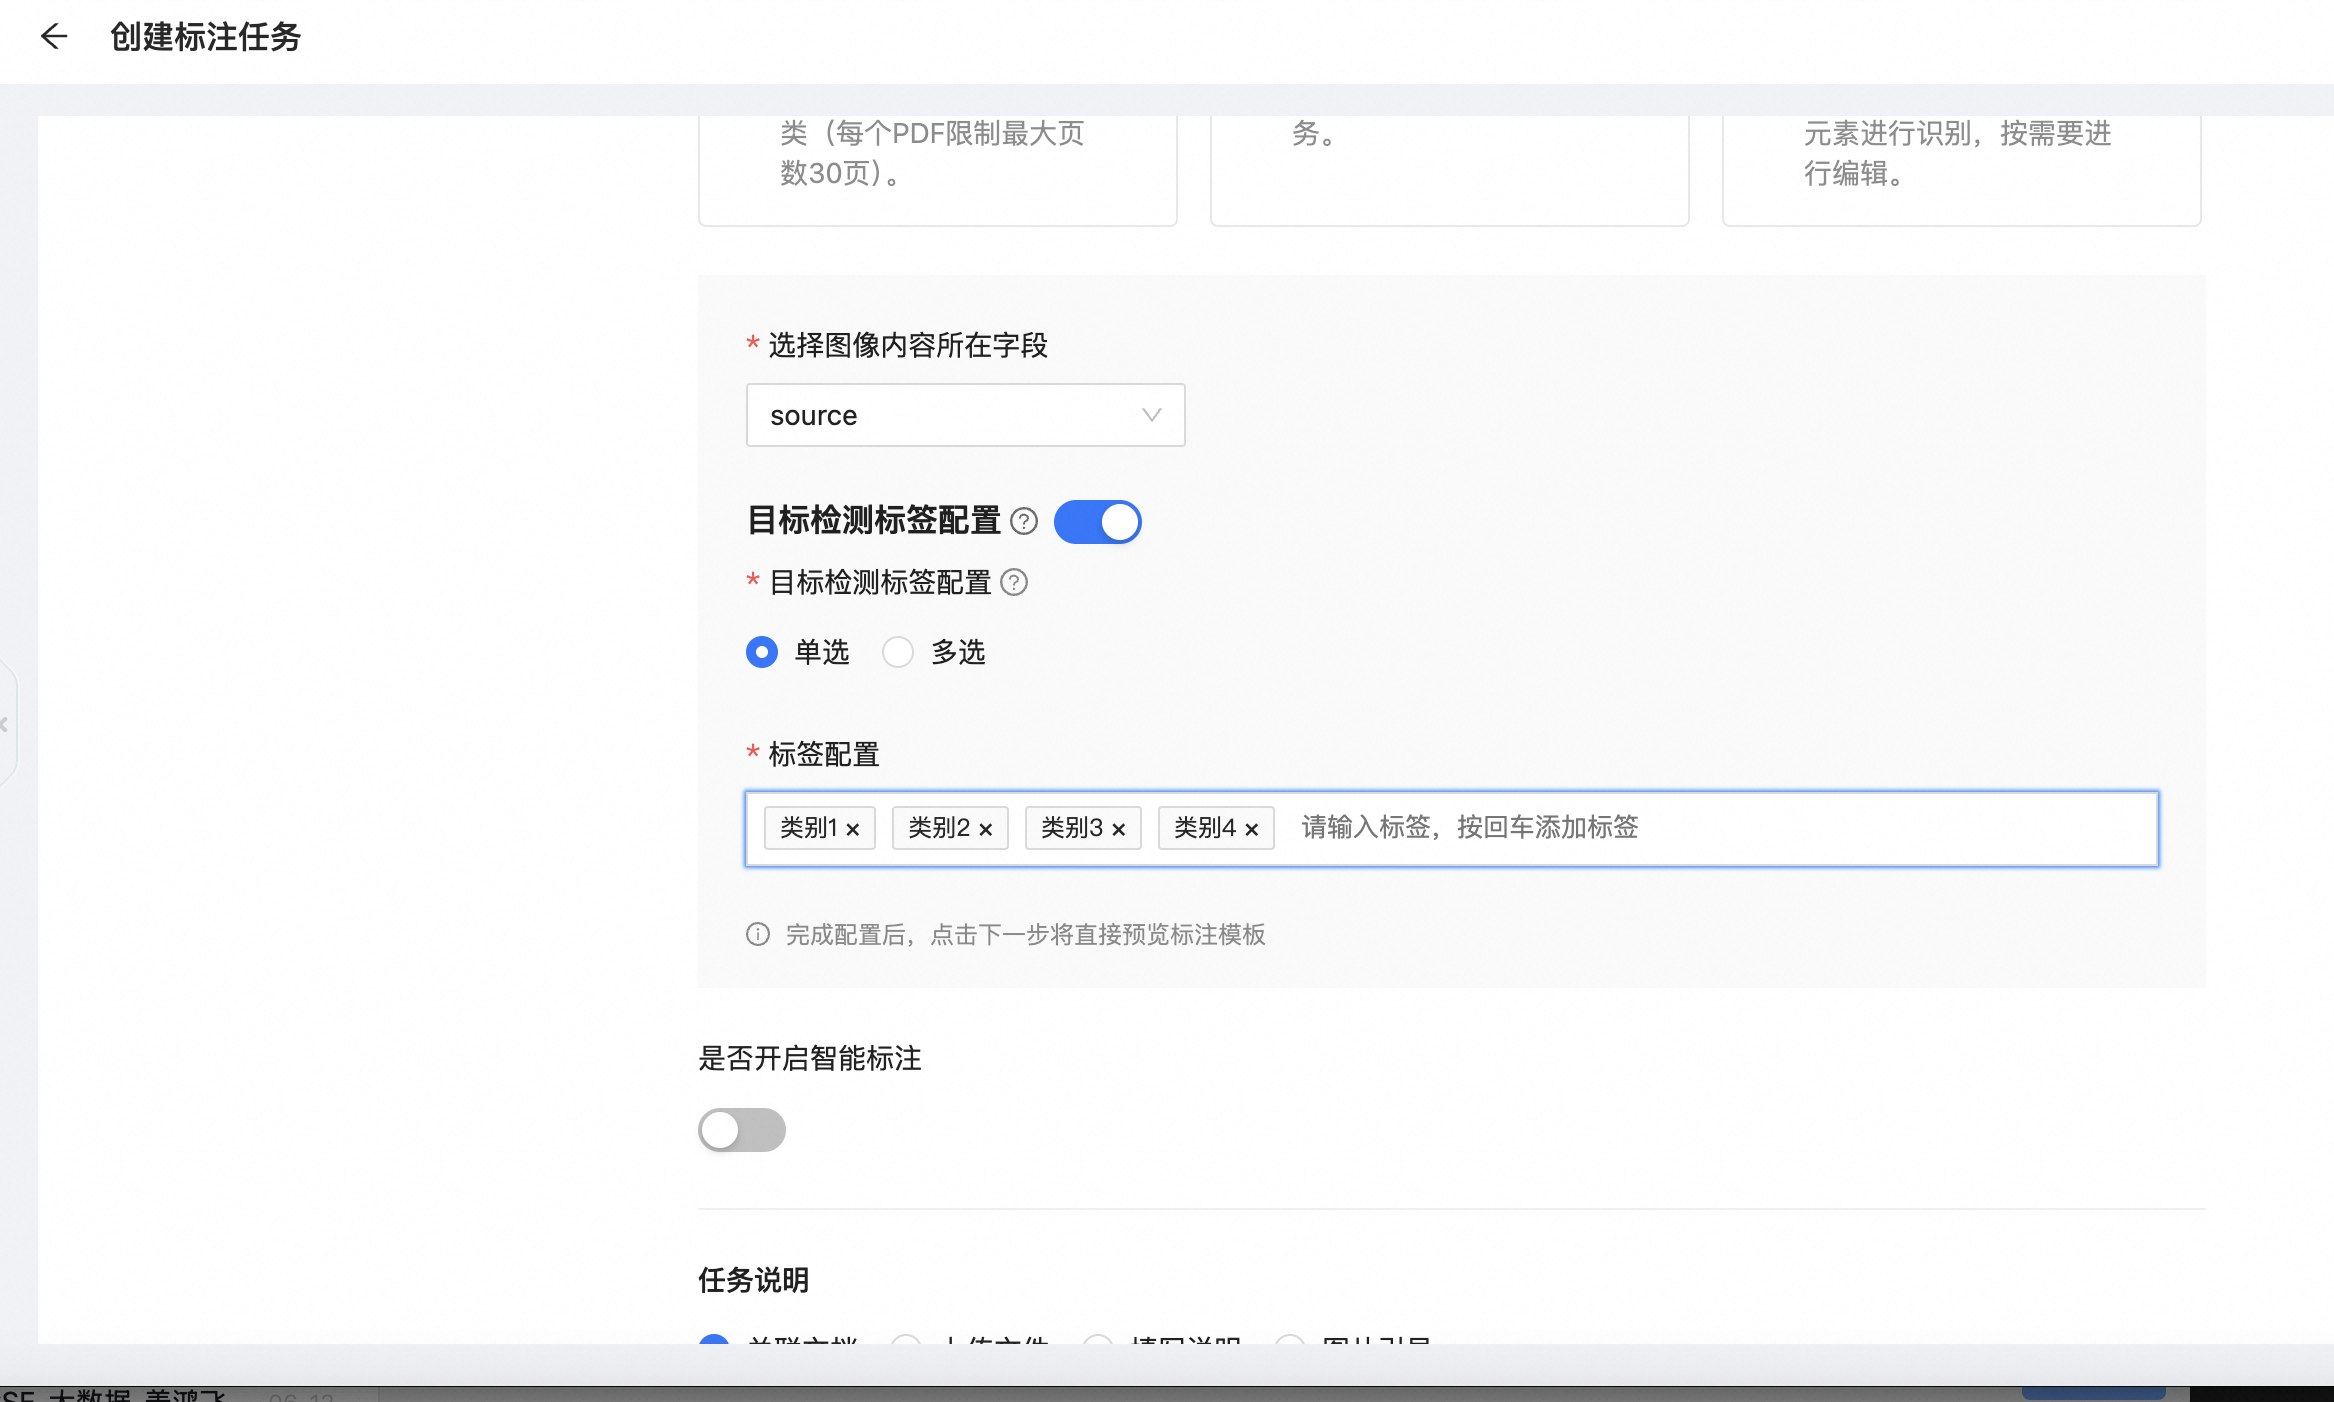
When creating the labeling job, select the General Template template under Object Detection.

Under Object Detection Label Configuration, select Single-label. In the Label Configuration section, enter all your label names.
After labeling is complete, export the results in manifest format to OSS.

Step 2: Read the labeled data
Add a Read OSS data component to the pipeline. Set OSS Data Path to the OSS path of the exported manifest file. For example: oss://examplebucket.oss-cn-shanghai.aliyuncs.com/ev_demo/xxx.manifest.
Step 3: Configure the training component
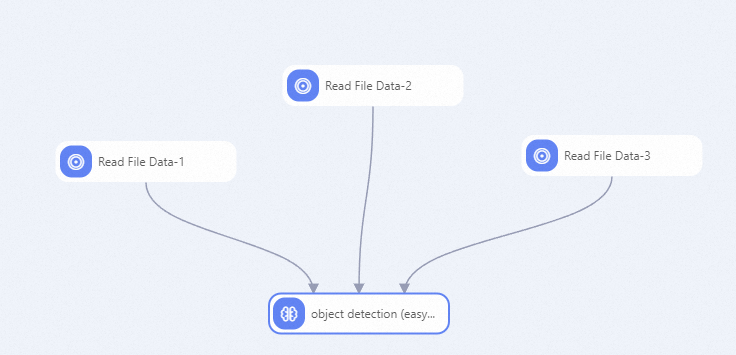
Connect the Training data and Validation data input ports of the Object detection (easycv) component to the Read OSS data component, then configure the parameters as described in Configuration.
Step 4: Run inference (FCOS and YOLOX)
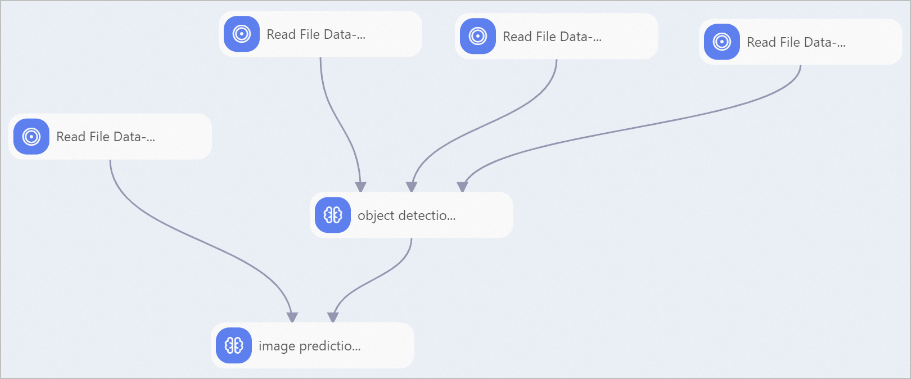
For FCOS and YOLOX models, add an image prediction component downstream to run offline inference. See image prediction.
What's next
Connect an image prediction component downstream to run predictions on new images and evaluate model performance after training. See image prediction.
Browse all available algorithm components in Designer. See Designer component reference.
For an overview of Designer, see Designer overview.