OSS-HDFS is a cloud-native storage service for data lakes. It provides unified metadata management and is fully compatible with the HDFS API, while also offering comprehensive POSIX support. This makes it ideal for data lake workloads in big data and AI. This topic describes how to use Hadoop to access OSS-HDFS by using JindoSDK.
Prerequisites
You have enabled OSS-HDFS for a bucket and are authorized to access it. For more information, see Enable OSS-HDFS.
Overview
You can use OSS-HDFS with your existing Hadoop and Spark big data applications without any modifications. After a simple configuration, you can manage and access data just as you would with a native HDFS, while also leveraging the benefits of OSS, including virtually unlimited capacity, elastic scalability, and enhanced security, reliability, and availability.
As the foundation for cloud-native data lakes, OSS-HDFS can manage exabytes of data and billions of files while delivering terabyte-level throughput. It fully integrates with the big data storage ecosystem. In addition to a flat namespace typical of object storage, OSS-HDFS provides a hierarchical namespace that allows you to organize Objects into a directory structure. The service automatically handles conversions between namespaces using its unified metadata management. Unlike the active-standby redundancy of a traditional HDFS NameNode, OSS-HDFS uses a multi-node, active-active redundancy mechanism for metadata management, providing superior data resiliency. Hadoop users can access data as efficiently as on a local HDFS without data replication or conversion, which significantly improves job performance and reduces maintenance costs.
For more information about the use cases, service characteristics, and features of OSS-HDFS, see What is OSS-HDFS?
Step 1: Create a VPC and add an ECS instance
-
Create a VPC to allow access to OSS-HDFS over the internal network.
-
Log on to the VPC console.
-
On the VPC page, click Create VPC.
Ensure the VPC is in the same region as the bucket where you enabled OSS-HDFS. For more information about how to create a VPC, see Create a VPC and a vSwitch.
-
-
Add an ECS instance.
-
Click the ID of the VPC that you created, and then click the Resource Management tab.
-
In the Cloud Resources section, click the
 icon next to ECS.
 -
On the Instances page, create an ECS instance.
When you create an ECS instance, make sure that it is in the same region as the VPC that you created. For more information about how to create an ECS instance, see Create an instance.
-
Step 2: Set up a Hadoop runtime environment
-
Install the Java environment.
-
For the ECS instance you created, click Connect in the Actions column.
For more information about how to establish a remote connection to an ECS instance, see Connection methods.
-
Check the Java Development Kit (JDK) version.
java -version -
Optional:Uninstall the JDK if its version is earlier than 1.8.0.
rpm -qa | grep java | xargs rpm -e --nodeps -
Install Java.
sudo yum install java-1.8.0-openjdk* -y -
Run the following command to open the profile configuration file.
vim /etc/profile -
Add environment variables.
If you receive a "path does not exist" error, navigate to the /usr/lib/jvm/ directory to find the java-1.8.0-openjdk file.
export JAVA_HOME=/usr/lib/jvm/java-1.8.0-openjdk export CLASSPATH=.:$JAVA_HOME/lib/dt.jar:$JAVA_HOME/lib/tools.jar:$JAVA_HOME/jre/lib/rt.jar export PATH=$PATH:$JAVA_HOME/bin -
Apply the environment variables.
source /etc/profile
-
-
Enable the SSH service.
-
Install the SSH service.
sudo yum install -y openssh-clients openssh-server -
Enable and start the SSH service.
systemctl enable sshd && systemctl start sshd -
Generate an SSH key and add it to the list of authorized keys.
ssh-keygen -t rsa -P '' -f ~/.ssh/id_rsa
cat ~/.ssh/id_rsa.pub >> ~/.ssh/authorized_keys
chmod 0600 ~/.ssh/authorized_keys
-
-
Install Hadoop.
-
Download the Hadoop installation package.
This example uses Hadoop 3.4.0. If you use a different version, replace the package name accordingly. To find Hadoop installation packages, see the Apache Hadoop releases page.
wget https://downloads.apache.org/hadoop/common/hadoop-3.4.0/hadoop-3.4.0.tar.gz -
Extract the installation package.
tar xzf hadoop-3.4.0.tar.gz -
Move the package to a common location.
mv hadoop-3.4.0 /usr/local/hadoop -
Configure environment variables.
-
Configure the Hadoop environment variables.
vim /etc/profile export HADOOP_HOME=/usr/local/hadoop export PATH=$HADOOP_HOME/bin:$PATH source /etc/profile -
Update HADOOP_HOME in the Hadoop configuration file.
cd $HADOOP_HOME vim etc/hadoop/hadoop-env.sh -
Replace ${JAVA_HOME} with the actual path.
export JAVA_HOME=/usr/lib/jvm/java-1.8.0-openjdk
-
-
Optional:If the directory does not exist, run the following command to apply the new environment variables.
cd $HADOOP_HOME/etc/hadoop -
Update the core-site.xml and hdfs-site.xml configuration files.
-
Update the core-site.xml file with the following properties.
<configuration> <!-- Specify the address of the NameNode in HDFS. --> <property> <name>fs.defaultFS</name> <!-- Replace the value with your hostname or localhost. --> <value>hdfs://localhost:9000</value> </property> <!-- Change the temporary directory of Hadoop to a custom directory. --> <property> <name>hadoop.tmp.dir</name> <!-- As the admin user, grant permissions to the directory by running sudo chown -R admin:admin /opt/module/hadoop-3.4.0 --> <value>/opt/module/hadoop-3.4.0/data/tmp</value> </property> </configuration> -
Update the hdfs-site.xml file with the following property.
<configuration>
  <!-- Specify the number of HDFS replicas. -->
  <property>
      <name>dfs.replication</name>
      <value>1</value>
  </property>
</configuration>
-
-
Format the NameNode.
hdfs namenode -format -
Start HDFS.
Starting HDFS involves starting the NameNode, DataNode, and Secondary NameNode.
-
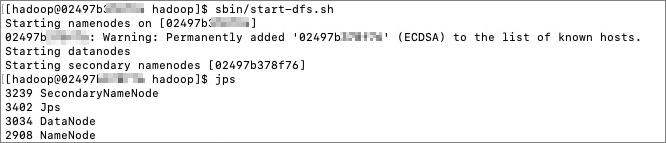
Start the HDFS daemon processes:
cd /usr/local/hadoop/ sbin/start-dfs.sh -
Check the running Java processes.
jpsThe following result is returned:
The HDFS daemon processes are now running. You can access the HDFS web UI at http://{ip}:9870 to view detailed information.
-
-
-
Verify the Hadoop installation.
Run the hadoop version command. If the version information is returned, the installation is successful.
Step 3: Configure JindoSDK to access OSS-HDFS
-
Download the JindoSDK JAR package.
-
Change to the target directory.
cd /usr/lib/ -
Download the latest version of the JindoSDK JAR package. For download links, see GitHub.
-
Extract the JindoSDK JAR package.
tar zxvf jindosdk-x.x.x-linux.tar.gzNotex.x.x indicates the version number of the JindoSDK JAR package.
-
-
Configure environment variables.
-
Edit the profile configuration file.
vim /etc/profile -
Set the JINDOSDK_HOME environment variable.
export JINDOSDK_HOME=/usr/lib/jindosdk-x.x.x-linux -
Configure HADOOP_CLASSPATH.
export HADOOP_CLASSPATH=$HADOOP_CLASSPATH:${JINDOSDK_HOME}/lib/* -
Run the following command to apply the new configuration.
. /etc/profile
-
-
Configure the JindoSDK implementation class and AccessKey.
-
Add the JindoSDK implementation class to Hadoop's core-site.xml file.
<configuration> <property> <name>fs.AbstractFileSystem.oss.impl</name> <value>com.aliyun.jindodata.oss.JindoOSS</value> </property> <property> <name>fs.oss.impl</name> <value>com.aliyun.jindodata.oss.JindoOssFileSystem</value> </property> </configuration> -
Add the AccessKey ID and AccessKey secret for your OSS-HDFS-enabled bucket to the core-site.xml file.
<configuration>
    <property>
        <name>fs.oss.accessKeyId</name>
        <value>xxx</value>
    </property>

    <property>
        <name>fs.oss.accessKeySecret</name>
        <value>xxx</value>
    </property>
</configuration>
-
-
Configure the OSS-HDFS endpoint.
You must configure an endpoint to access OSS-HDFS. The recommended URI format is
oss://<Bucket>.<Endpoint>/<Object>, for example,oss://examplebucket.cn-shanghai.oss-dls.aliyuncs.com/exampleobject.txt. After configuration, JindoSDK uses the endpoint in the access path to call the appropriate OSS-HDFS API.You can also configure the OSS-HDFS endpoint by using other methods. For more information, see Other methods to configure an endpoint.
Step 4: Access OSS-HDFS
-
Create a directory
hdfs dfs -mkdir oss://examplebucket.cn-hangzhou.oss-dls.aliyuncs.com/dir/ -
Upload an object
hdfs dfs -put /root/workspace/examplefile.txt oss://examplebucket.cn-hangzhou.oss-dls.aliyuncs.com/examplefile.txt -
View directory information
hdfs dfs -ls oss://examplebucket.cn-hangzhou.oss-dls.aliyuncs.com/dir/ -
View object information
hdfs dfs -ls oss://examplebucket.cn-hangzhou.oss-dls.aliyuncs.com/examplefile.txt -
View object content
ImportantThis command prints the object content as plain text. If the content is encoded, use the HDFS Java API to read the object and then decode it.
hdfs dfs -cat oss://examplebucket.cn-hangzhou.oss-dls.aliyuncs.com/examplefile.txt -
Copy a directory or an object
hdfs dfs -cp oss://examplebucket.cn-hangzhou.oss-dls.aliyuncs.com/subdir1/ oss://examplebucket.cn-hangzhou.oss-dls.aliyuncs.com/subdir2/subdir1/ -
Move a directory or an object
hdfs dfs -mv oss://examplebucket.cn-hangzhou.oss-dls.aliyuncs.com/srcdir/ oss://examplebucket.cn-hangzhou.oss-dls.aliyuncs.com/destdir/ -
Download an object
hdfs dfs -get oss://examplebucket.cn-hangzhou.oss-dls.aliyuncs.com/exampleobject.txt /tmp/ -
Delete a directory or an object
hdfs dfs -rm oss://examplebucket.cn-hangzhou.oss-dls.aliyuncs.com/destfolder/