When training deep learning models, data loading from remote storage often becomes the bottleneck before the GPU reaches its compute limit. The OSS accelerator is a read cache layer for Object Storage Service (OSS) buckets that reduces per-file latency and sustains high throughput even with a small number of data loader workers. In performance tests on ImageNet ILSVRC data with a single Tesla T4, the accelerator cut average training time per epoch by 40% to 400% compared to standard OSS access.
This guide shows how to fine-tune a pretrained ResNet-18 model on ImageNet ILSVRC datasets using an OSS accelerator on a GPU-accelerated instance.
The OSS accelerator is in public preview in the following regions: China (Hangzhou), China (Shanghai), China (Beijing), China (Ulanqab), China (Shenzhen), and Singapore. All resources in this guide must be in the same supported region.
When to use this
The OSS accelerator is well-suited when:
Datasets are too large to download to local disk before training starts
Training jobs read the same objects repeatedly across multiple epochs
Data loading is the bottleneck, not GPU compute
The accelerator is less effective when datasets are small enough to fit on local disk (a one-time download removes the need for caching) or when workloads are write-intensive (the accelerator optimizes reads, not writes).
How it works
The training workflow consists of three tasks:
Create a GPU-accelerated instance on Elastic GPU Service (EGS).
Create an OSS bucket in the same region, upload datasets to it, and enable an OSS accelerator for the bucket.
Train the model, loading datasets through the accelerated endpoint.
During training, OSS Connector for AI/ML (osstorchconnector) intercepts dataset reads and routes them through the accelerator's cache. The first read for each object fetches from OSS and populates the cache. Subsequent reads — including repeated epoch passes — are served from cache. Checkpoints are written directly to the bucket using the internal endpoint, bypassing the read cache.

Acceleration performance
The following table shows training time per epoch with and without the OSS accelerator. Tests used a 4 vCPU + 15 GB memory + 1 x Tesla T4 instance with ImageNet ILSVRC data (1,280,000 training images, 50,000 validation images).
These results are for reference. Actual performance varies with dataset size, hardware, model complexity, and hyperparameter settings.
With the accelerator, training time per epoch is nearly constant regardless of worker count. Without it, fewer workers cause a significant slowdown because each worker blocks waiting for OSS responses. The accelerator's prefetch concurrency absorbs this wait.
| Batch size | Workers | Without OSS accelerator (min/epoch) | With OSS accelerator (min/epoch) |
|---|---|---|---|
| 64 | 6 | 63.18 | 34.70 |
| 64 | 4 | 54.96 | 34.68 |
| 64 | 2 | 146.05 | 34.66 |
| 32 | 6 | 82.19 | 37.11 |
| 32 | 4 | 108.33 | 37.13 |
| 32 | 2 | 137.87 | 37.30 |
| 16 | 6 | 68.93 | 41.58 |
| 16 | 4 | 132.97 | 41.69 |
| 16 | 2 | 206.32 | 41.69 |
Prerequisites
Before you begin, make sure you have:
An Alibaba Cloud account with permissions to create Elastic Compute Service (ECS) instances and OSS buckets
A RAM (Resource Access Management) user with an AccessKey ID and AccessKey secret — see Create an AccessKey pair
Sufficient quota to create a GPU-accelerated instance in a supported region
Task 1: Create a GPU-accelerated instance
This task creates a GPU-accelerated instance running Ubuntu 22.04 with CUDA 12.4.1 auto-installed.
Create a GPU-accelerated instance
Go to the ECS instance buy page.
Click the Custom Launch tab.
Configure the instance. For detailed parameter descriptions, see Parameter descriptions. Key settings for this guide:
Region: Select a supported region. This guide uses China (Hangzhou).
Instance type:
ecs.gn6i-c4g1.xlarge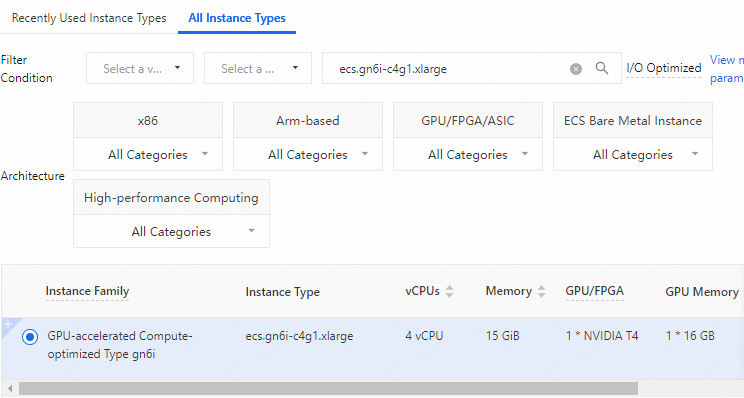
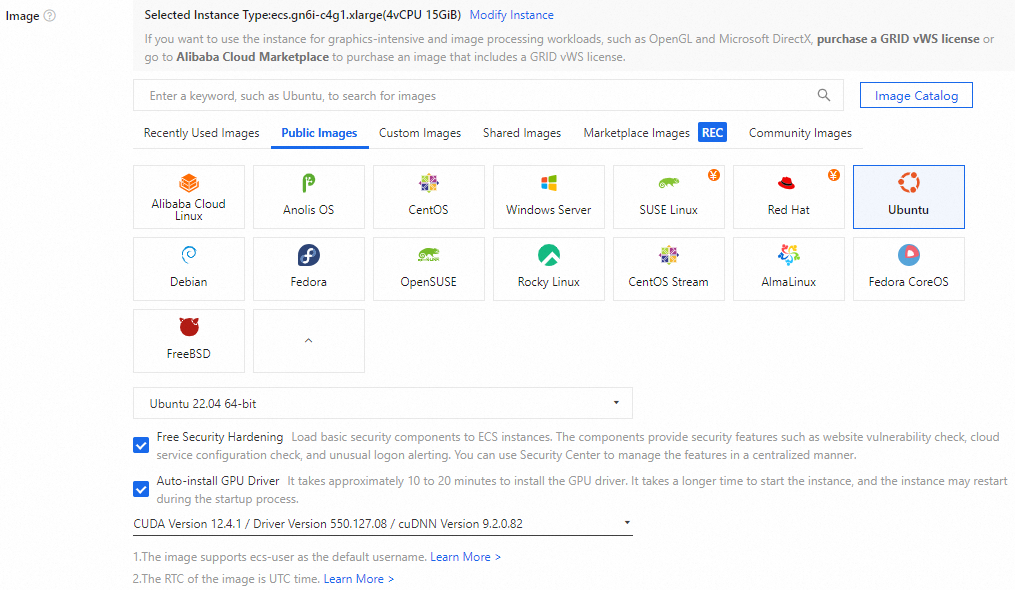
Image: Ubuntu 22.04. Select Auto-install GPU Driver and set the CUDA version to 12.4.1. CUDA installs automatically when the instance starts.
Complete the creation.
Connect to the instance
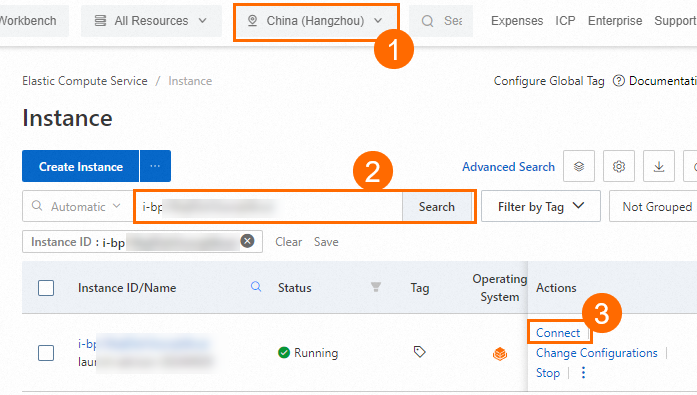
On the Instances page in the ECS console, find the instance by region and ID, then click Connect in the Actions column.
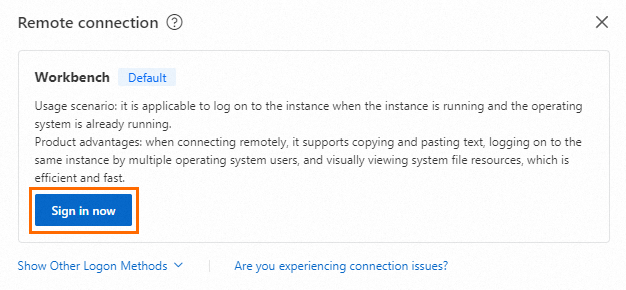
In the Remote connection dialog, click Sign in now in the Workbench section.
In the Instance Login dialog, set the authentication method to match what you chose when creating the instance. For a key pair, select SSH Key Authentication and upload or paste the private key file.
The private key file (
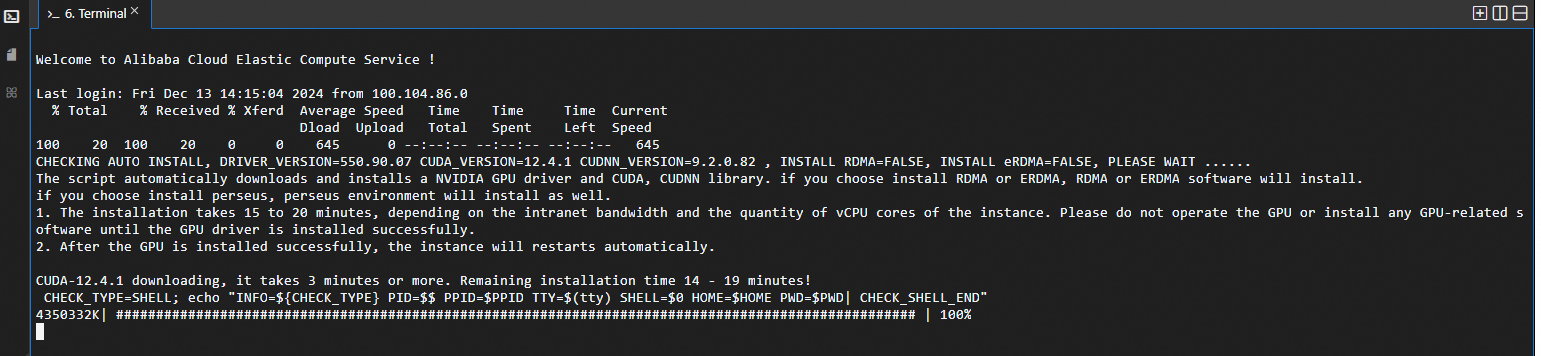
.pem) was downloaded to your computer automatically when you created the key pair. Check your browser's download history to find it.After login, wait for CUDA to finish installing automatically.
Task 2: Create an OSS bucket and an OSS accelerator
Create the bucket in the same region as the GPU-accelerated instance. When the instance and bucket share a region and you access the bucket through the internal endpoint, no traffic fees are incurred.
Create a bucket and record the internal endpoint
Create the bucket in the same region as the GPU-accelerated instance. This guide uses China (Hangzhou).
On the Buckets page of the OSS console, click Create Bucket.
Follow the on-screen instructions to complete the bucket creation.
Go to the Overview page of the bucket. In the Port section, record the Access from ECS over the VPC (virtual private cloud) (internal network) endpoint. This endpoint is used to upload datasets and save checkpoints during training.

Create an OSS accelerator
On the Buckets page, click the bucket name. In the left navigation tree, choose Bucket Settings > OSS Accelerator.
Click Create Accelerator. In the Create Accelerator panel, set the capacity (this guide uses 500 GB), then click Next.
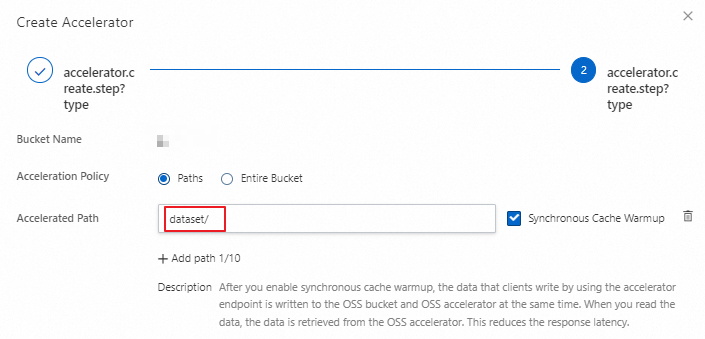
Set Acceleration Policy to Paths and add the dataset directory in the bucket to the accelerated paths. Click OK and follow the on-screen instructions to complete the creation.
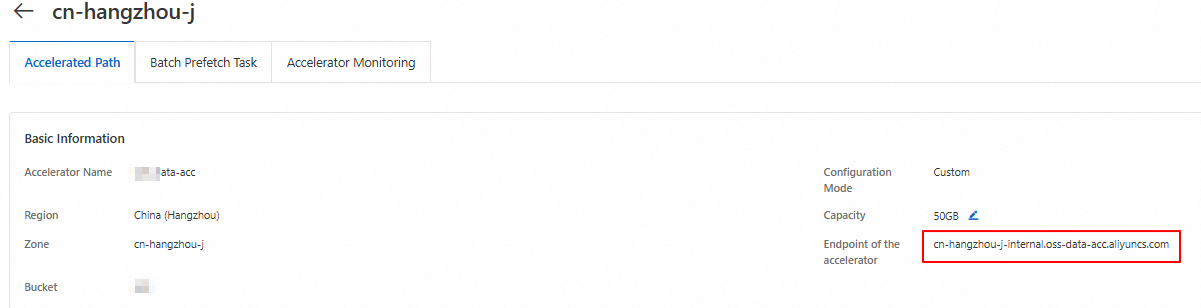
Record the accelerated endpoint. This endpoint is used to download datasets from the cache during training.
Task 3: Train the model
This task covers environment setup, dataset upload, and model training with the OSS accelerator.
For the complete sample code, download demo.tar.gz.
All subsequent steps must run as the root user. Switch to root before proceeding.
Set up the environment
Install conda and create a Python environment
Install conda:
curl -L https://repo.anaconda.com/miniconda/Miniconda3-latest-Linux-x86_64.sh -o /tmp/miniconda.sh && bash /tmp/miniconda.sh -b -p /opt/conda/ && rm /tmp/miniconda.sh && /opt/conda/bin/conda clean -tipy && export PATH=/opt/conda/bin:$PATH && conda init bash && source ~/.bashrc && conda update condaCreate an environment configuration file:
vim environment.yamlAdd the following content and save the file:
   name: py312
   channels:
     - defaults
     - conda-forge
     - pytorch
   dependencies:
     - python=3.12
     - pytorch>=2.5.0
     - torchvision
     - torchaudio
     - transformers
     - torchdata
     - oss2
Create the conda environment:
conda env create -f environment.yamlActivate the environment:
ImportantRun all subsequent steps in the activated conda environment.
conda activate py312
Configure credentials
Set the AccessKey ID and AccessKey secret as environment variables. Replace <ACCESS_KEY_ID> and <ACCESS_KEY_SECRET> with the credentials of the RAM user you want to use.
export OSS_ACCESS_KEY_ID=<ACCESS_KEY_ID>
export OSS_ACCESS_KEY_SECRET=<ACCESS_KEY_SECRET>
Install and configure OSS Connector for AI/ML
Install the connector:
pip install osstorchconnectorCreate the credentials file:
mkdir -p /root/.alibabacloud && touch /root/.alibabacloud/credentialsOpen the credentials file and add your AccessKey credentials:
vim /root/.alibabacloud/credentials{ "AccessKeyId": "LTAI************************", "AccessKeySecret": "At32************************" }Replace the placeholder values with your actual AccessKey ID and AccessKey secret. For more information, see Configure OSS Connector for AI/ML.
Make the credentials file read-only:
chmod 400 /root/.alibabacloud/credentialsCreate the connector configuration file:
mkdir -p /etc/oss-connector/ && touch /etc/oss-connector/config.jsonOpen the configuration file and add the following content. The default values work for most image classification workloads:
vim /etc/oss-connector/config.json{ "logLevel": 1, "logPath": "/var/log/oss-connector/connector.log", "auditPath": "/var/log/oss-connector/audit.log", "datasetConfig": { "prefetchConcurrency": 24, "prefetchWorker": 2 }, "checkpointConfig": { "prefetchConcurrency": 24, "prefetchWorker": 4, "uploadConcurrency": 64 } }
Upload datasets
The training data used in this guide is a subset of the ImageNet ILSVRC dataset.
Download the training and validation sets to the instance:
   wget https://help-static-aliyun-doc.aliyuncs.com/file-manage-files/zh-CN/20241216/jsnenr/n04487081.tar
   wget https://help-static-aliyun-doc.aliyuncs.com/file-manage-files/zh-CN/20241218/dxrciv/n10148035.tar
   wget https://help-static-aliyun-doc.aliyuncs.com/file-manage-files/zh-CN/20241216/senwji/val.tar
Extract and organize the datasets:
   tar -zxvf n10148035.tar && tar -zxvf n04487081.tar && tar -zxvf val.tar
   mkdir dataset && mkdir ./dataset/train && mkdir ./dataset/val
   mv n04487081 ./dataset/train/ && mv n10148035 ./dataset/train/ && mv IL*.JPEG ./dataset/val/
Run the upload script to send the datasets to the bucket:
python3 upload_dataset.pyThe script (
upload_dataset.py) transforms each image into a tensor and uploads it to the bucket using the internal endpoint. Replace<YourBucketName>with your actual bucket name before running.# upload_dataset.py from torchvision import transforms from PIL import Image import oss2 import os from oss2.credentials import EnvironmentVariableCredentialsProvider # Internal endpoint for the China (Hangzhou) region OSS_ENDPOINT = "oss-cn-hangzhou-internal.aliyuncs.com" OSS_BUCKET_NAME = "<YourBucketName>" BUCKET_REGION = "cn-hangzhou" # Prefix for dataset objects in the bucket OSS_URI_BASE = "dataset/imagenet/ILSVRC/Data" def to_tensor(img_path): IMG_DIM_224 = 224 compose = transforms.Compose([ transforms.RandomResizedCrop(IMG_DIM_224), transforms.RandomHorizontalFlip(), transforms.ToTensor(), transforms.Normalize([0.485, 0.456, 0.406], [0.229, 0.224, 0.225]) ]) img = Image.open(img_path).convert('RGB') img_tensor = compose(img) numpy_data = img_tensor.numpy() binary_data = numpy_data.tobytes() return binary_data def list_dir(directory): for root, _, files in os.walk(directory): rel_root = os.path.relpath(root, start=directory) for file in files: rel_filepath = os.path.join(rel_root, file) if rel_root != '.' else file yield rel_filepath # Local dataset root. Structure must match: # ./dataset/train/{class_id}/{image}.JPEG # ./dataset/val/ILSVRC2012_val_*.JPEG IMG_DIR_BASE = "./dataset" bucket_api = oss2.Bucket(oss2.ProviderAuthV4(EnvironmentVariableCredentialsProvider()), OSS_ENDPOINT, OSS_BUCKET_NAME, region=BUCKET_REGION) for phase in ["val", "train"]: IMG_DIR = "%s/%s" % (IMG_DIR_BASE, phase) for _, img_relative_path in enumerate(list_dir(IMG_DIR)): img_bin_name = img_relative_path.replace(".JPEG", ".pt") object_key = "%s/%s/%s" % (OSS_URI_BASE, phase, img_bin_name) bucket_api.put_object(object_key, to_tensor("%s/%s" % (IMG_DIR, img_relative_path)))Download the label files used for dataset mapping:
   wget https://help-static-aliyun-doc.aliyuncs.com/file-manage-files/zh-CN/20241220/izpskr/imagenet_class_index.json
   wget https://help-static-aliyun-doc.aliyuncs.com/file-manage-files/zh-CN/20241220/lfilrp/ILSVRC2012_val_labels.json
Start model training
The training uses four Python modules. All examples use the accelerated endpoint to load datasets and the internal endpoint to save checkpoints.
oss_dataloader.py — loads ImageNet datasets from the accelerator cache and creates PyTorch data loaders.
pre_trained_model.py — initializes a pretrained ResNet-18 model on the GPU.
resnet_train.py — trains the model for a given number of epochs and saves the best checkpoint to OSS.
main.py — the entry point that wires everything together and starts training.
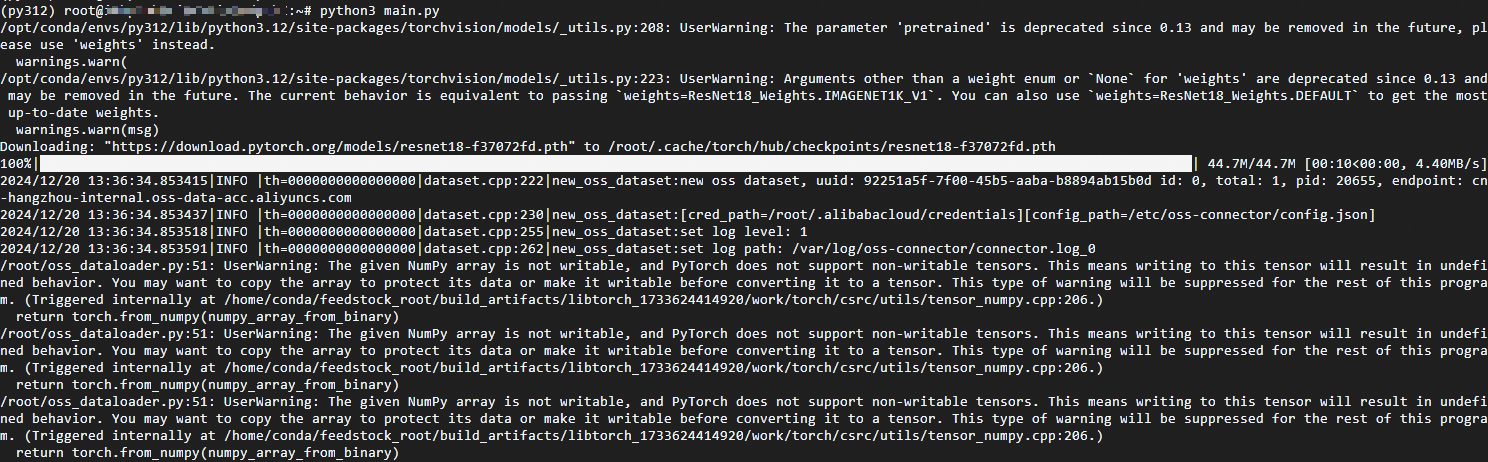
Start training:
python3 main.pyTraining output appears as each epoch completes:
Verify the result
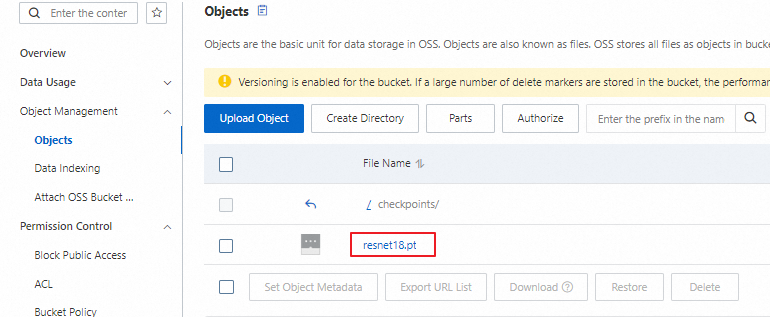
On the Buckets page, click Object Management > Objects and confirm that the checkpoints/resnet18.pt object exists. Its presence confirms that training completed at least one epoch and that the best checkpoint was uploaded successfully.
What's next
Configure OSS Connector for AI/ML — tune prefetch concurrency and worker settings for your workload
Create an AccessKey pair — manage RAM user credentials