Install and use the Alibaba Cloud API Toolkit extension in Visual Studio Code (VS Code).
Install Alibaba Cloud API Toolkit
Prerequisites
VS Code is installed.
You can install Alibaba Cloud API Toolkit in two ways.
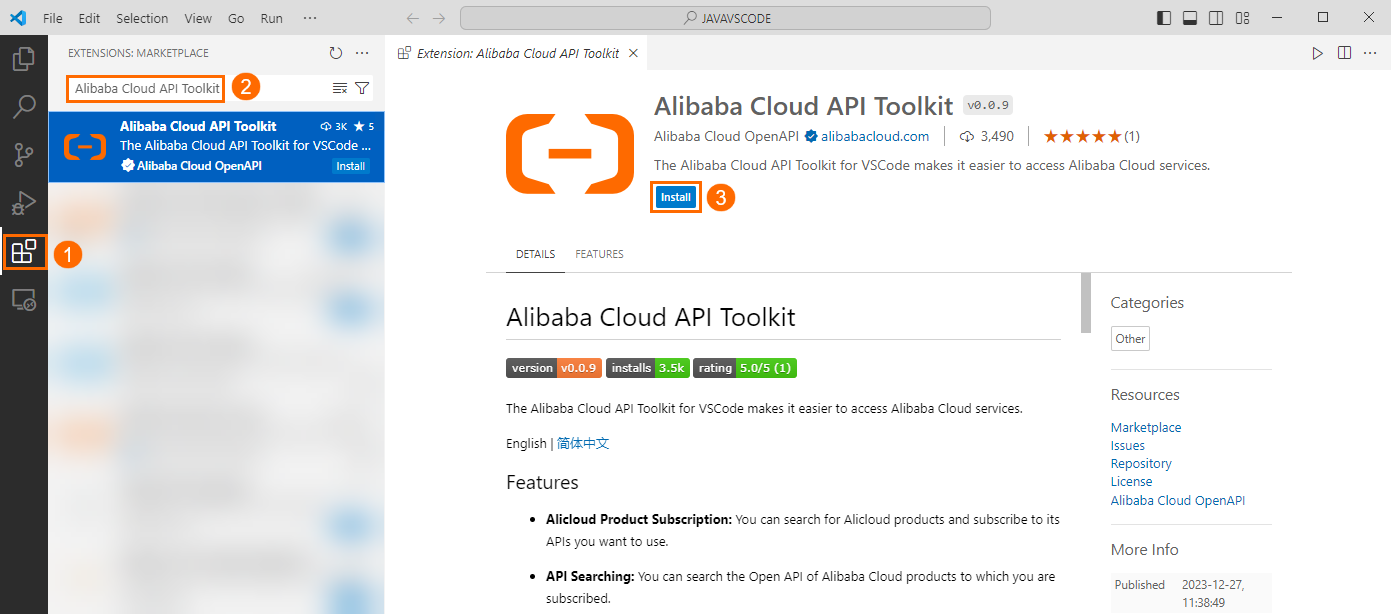
Method 1: Install from the Extensions view
-
In the VS Code Activity Bar, click the
 icon.
icon. -
Search for Alibaba Cloud API Toolkit and click Install.
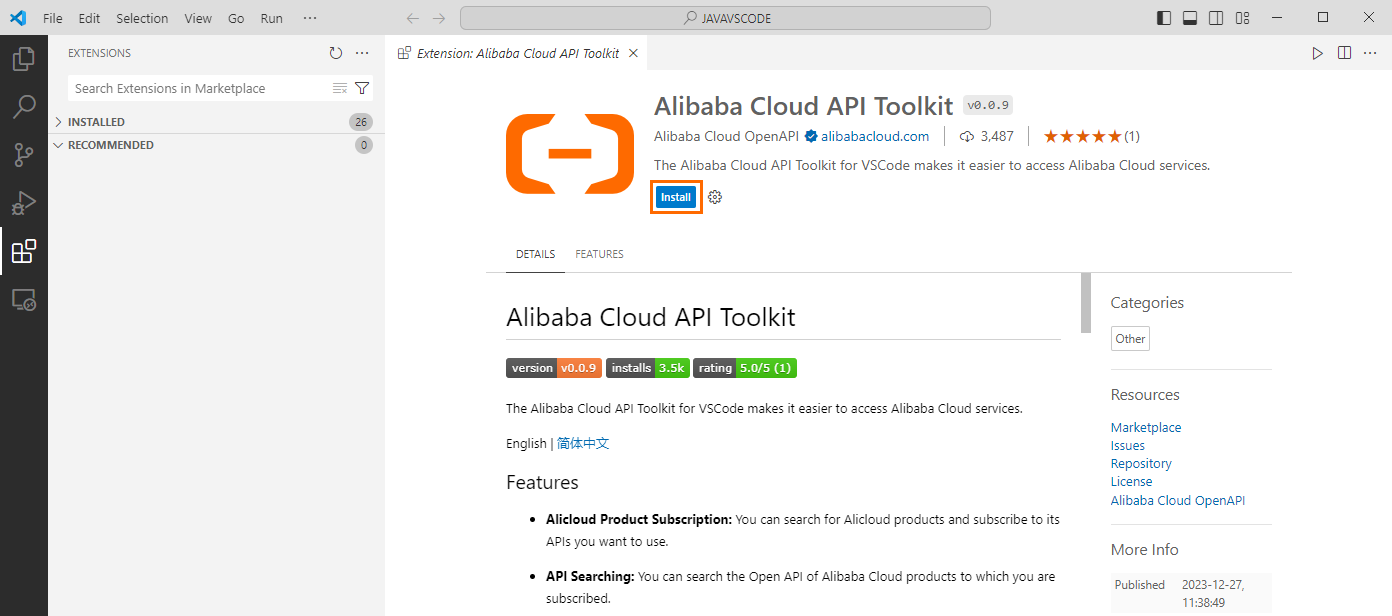
Method 2: Install from VS Code Marketplace
-
Visit the Alibaba Cloud API Toolkit page in VS Code Marketplace and click Install. VS Code opens with the extension page.
-
Click Install on the extension page in VS Code.
Verify the installation
After installation, the Alibaba Cloud icon appears in the Activity Bar.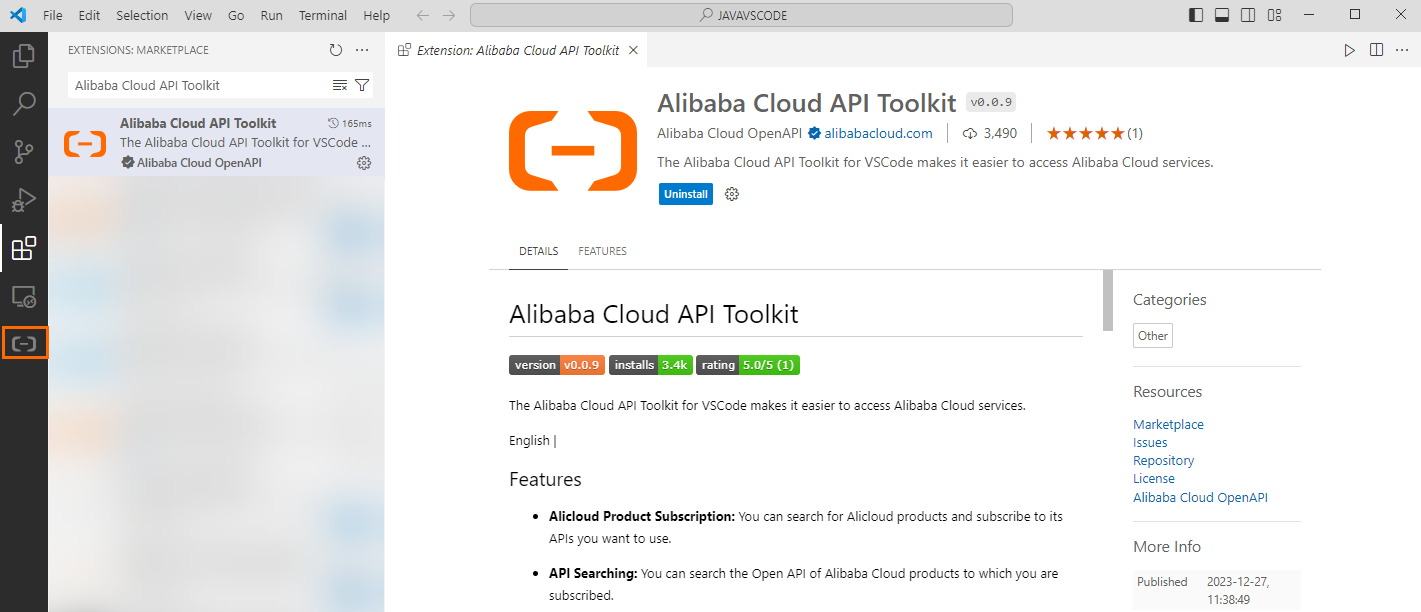
Configure credentials
Configure an AccessKey pair before you call API operations. AccessKey pairs are the only credential type supported by this extension.
Add or modify credentials
-
Install the Alibaba Cloud CLI Tools extension.
-
Visit the Alibaba Cloud CLI Tools page in VS Code Marketplace and click Install.
-
In the message that appears, click Open.
-
Click Install on the extension page in VS Code.
-
After installation, the Alibaba Cloud icon appears in the Activity Bar.
NoteYou can also directly install Alibaba Cloud CLI Tools in VS Code. For more information, see Use the Alibaba Cloud CLI extension for VS Code.
-
-
Configure the identity and credential.
-
In VS Code, choose .
-
Run
aliyun configureand follow the prompts. Use an existing AccessKey pair orcreate a new one.ImportantThe AccessKey secret is displayed only at creation time and cannot be retrieved later. Store it in a secure location.
-
Press Enter after each prompt. If Saving profile[xxx] ...Done. is returned, the profile is saved. If !!! Configure Failed please configure again !!! is returned, the parameter format or values are invalid and credential verification failed. The profile is still saved.
$ aliyun configure Configuring profile 'default' ... Aliyun Access Key ID [None]: <Your AccessKey ID> Aliyun Access Key Secret [None]: <Your AccessKey Secret> Default Region Id [None]: cn-hangzhou Default output format [json]: json Default Language [zh]: zhImportantAn Alibaba Cloud account has full permissions on all resources. A leaked AccessKey pair exposes your resources to significant risks. Use the AccessKey pair of a RAM user instead.
-
View and switch user identities
-
Click the Alibaba Cloud icon in the lower-left status bar. The configured profiles appear in the search box.
-
Click a profile name to switch identities.
Features
Alibaba Cloud API Toolkit lets you search API operations, debug APIs, and generate SDK sample code directly in VS Code.
Subscribe to services
Subscribe to Alibaba Cloud services and select API versions. The extension recommends versions and requires no configuration file. Press Ctrl+Cmd+K (Ctrl+Win+K in Windows) to search and subscribe.
API search
Search subscribed APIs and view their references. Press Ctrl+Cmd+L (Ctrl+Win+L in Windows) to search APIs or insert code snippets.
API reference preview
Click an API operation to view its reference in a new tab, including usage notes, request parameters, response parameters, and error codes.
API debugging
-
Debug API operations after credential verification.
-
Configure parameters and view debugging results.
-
View API responses directly in VS Code.
Use sample code
Install the SDK of the Alibaba Cloud service before you use sample code.
Install the SDK of an Alibaba Cloud service
-
Go to SDK Center, select a service, set SDK Version to V2.0 and the All languages parameter to TypeScript. This example uses ECS.
npm install --save @alicloud/ecs20140526@4.1.8 -
Run the install command in the terminal.
Generate SDK sample code
-
View SDK sample code
Generate SDK sample code for different programming languages. View the generated code or save it as a new file in VS Code.
-
Insert code snippets
Insert SDK code snippets for Java, Java (async), TypeScript, Python, Go, PHP, and C#.
-
Method 1: Type a subscribed API operation name in the editor to search for its code snippet.
-
Method 2: Press
Ctrl+Cmd+L(Ctrl+Win+Lin Windows) to search for an API operation and insert a code snippet.
-
Complete and run the code
-
Complete the code
-
Modify the endpoint.
Log on to OpenAPI Explorer, hover over Cloud Products and select a service. View the supported endpoints on the Regions tab.
-
Specify request parameters. For more information, see the API reference preview section of this topic.
-
Optional. Add logging.
-
Save the code.
import OpenApi, * as $OpenApi from '@alicloud/openapi-client';
import Ecs20140526, * as $Ecs20140526 from '@alicloud/ecs20140526';
export default class DescribeRegion {
    static async main(args: string[]): Promise<void> {
        let config = new $OpenApi.Config({
            // Make sure that the ALIBABA_CLOUD_ACCESS_KEY_ID and ALIBABA_CLOUD_ACCESS_KEY_SECRET environment variables are configured in the code runtime environment.
            accessKeyId: process.env['ALIBABA_CLOUD_ACCESS_KEY_ID'],
            accessKeySecret: process.env['ALIBABA_CLOUD_ACCESS_KEY_SECRET'],
            // Specify an endpoint. For more information, see endpoints at https://api.aliyun.com/product/Ecs.
            endpoint: `ecs.cn-hangzhou.aliyuncs.com`,
        });
        let client = new Ecs20140526(config);
        let describeRegionsRequest = new $Ecs20140526.DescribeRegionsRequest({});
        let response = await client.describeRegions(describeRegionsRequest);
        console.log(response.body?.regions?.region);
    }
}
-
-
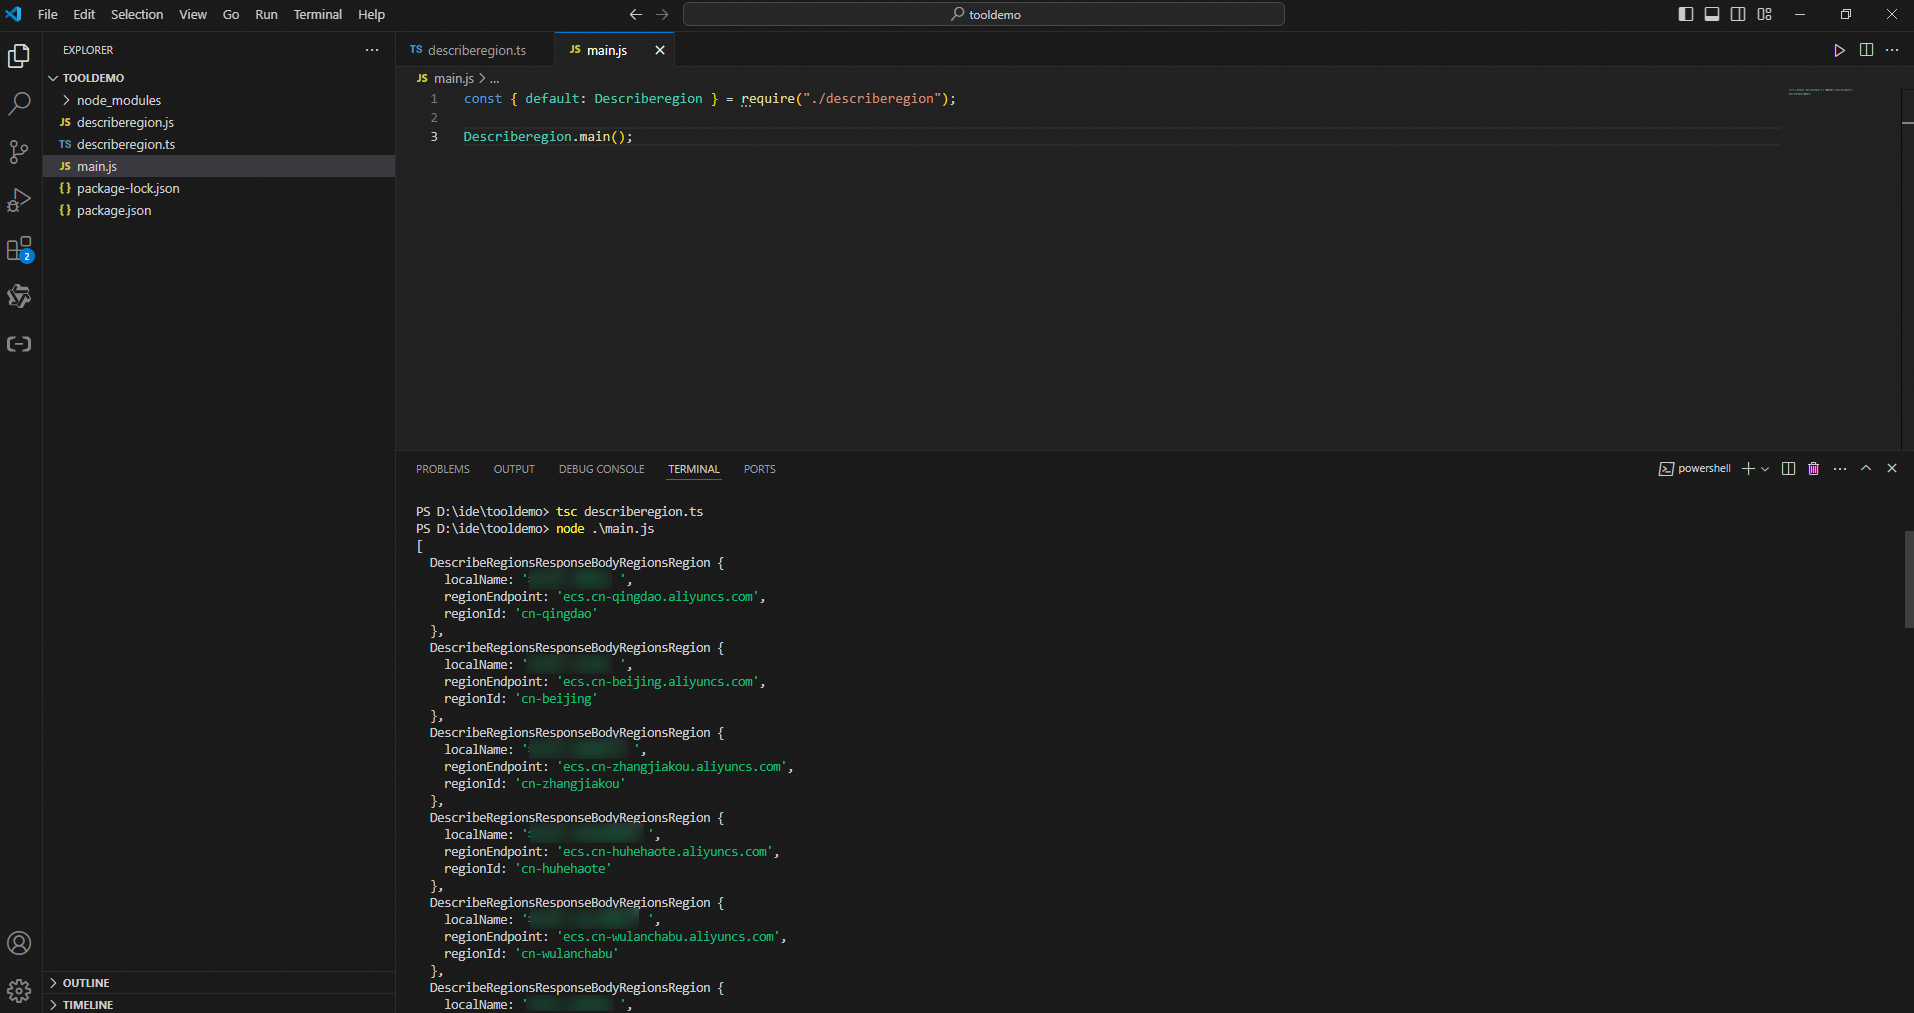
Run the code
-
Compile the TypeScript file into JavaScript:
tsc client.ts # client.ts is the file name. -
Create a main.js file with the following code:
const { default: Describeregion } = require("./describeregion"); Describeregion.main(); -
Run the sample code:
node .\main.js -
If the following result is returned, the call is successful.
-
Feedback
Submit questions or feedback on the GitHub repository.