Operating system versions that no longer receive technical support pose significant security risks to your infrastructure. To improve the security and stability of your Elastic Compute Service (ECS) instances, you should upgrade instances that run outdated operating system versions to later, supported versions.
This topic describes how to use CloudOps Orchestration Service (OOS) to efficiently upgrade the operating system of multiple ECS instances at a time by replacing their system disks.
How it works
OOS provides a batch operation feature that lets you replace the system disks of multiple ECS instances in a single task. When you create a batch operation task, you select a target image that contains the new operating system version. OOS then replaces the system disk of each selected instance with a new disk created from that image, effectively upgrading the operating system across all selected instances.
Prerequisites
Before you begin, make sure that the following requirements are met:
No unpaid orders exist for the ECS instances whose system disks you want to replace.
You have backed up all important data on the system disks of the target ECS instances.
During the upgrade process, only the user data of data disks is retained, whereas all the user data of system disks is cleared.
You cannot replace the Windows operating system that runs on an ECS instance with the Linux operating system, and vice versa.
ECS instances may be restarted when a specific template is executed.
If the replacement image is a paid image, you are charged for the image. For more information, see Images.
Procedure
Log on to the CloudOps Orchestration Service console. In the left-side navigation pane, choose Automated Task > Common O&M Tasks. On the page that appears, click Batch Instance Operations. Then, click Create.

On the Create Task Batch Instance Operations page, configure the following parameters:
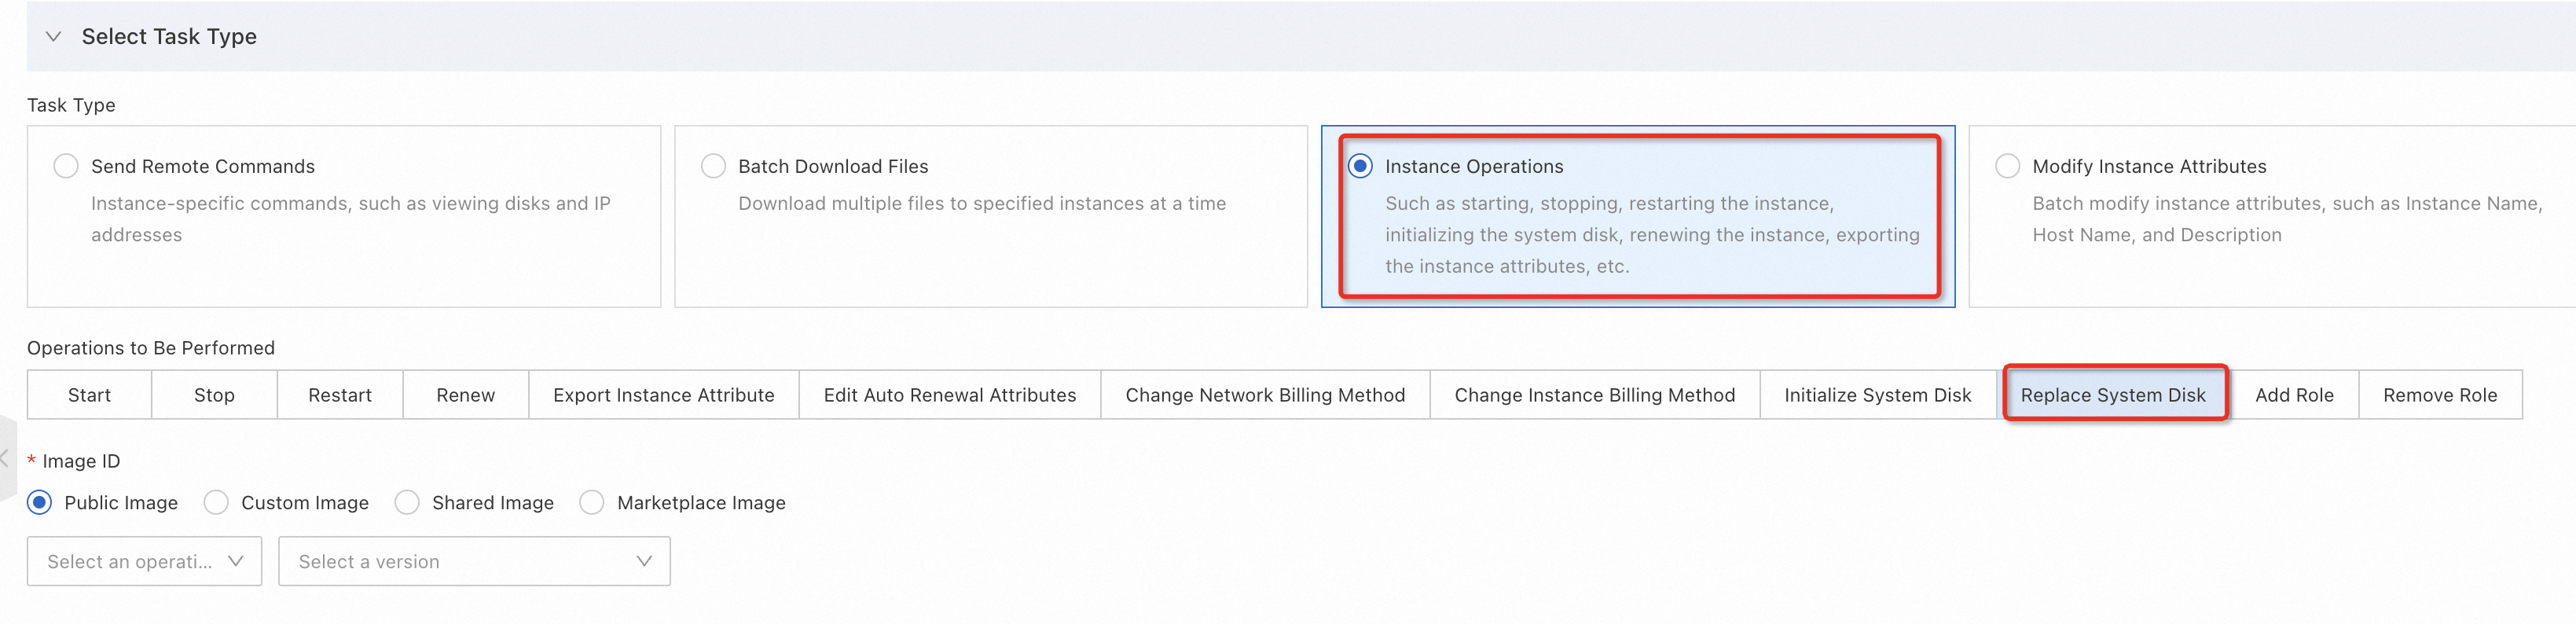
Set the Task Type parameter to Instance Operations.
Set the Operations to Be Performed parameter to Replace System Disk.
Select an image that contains the operating system version to which you want to upgrade.
In the Select Instances section, select the ECS instances that you want to manage.

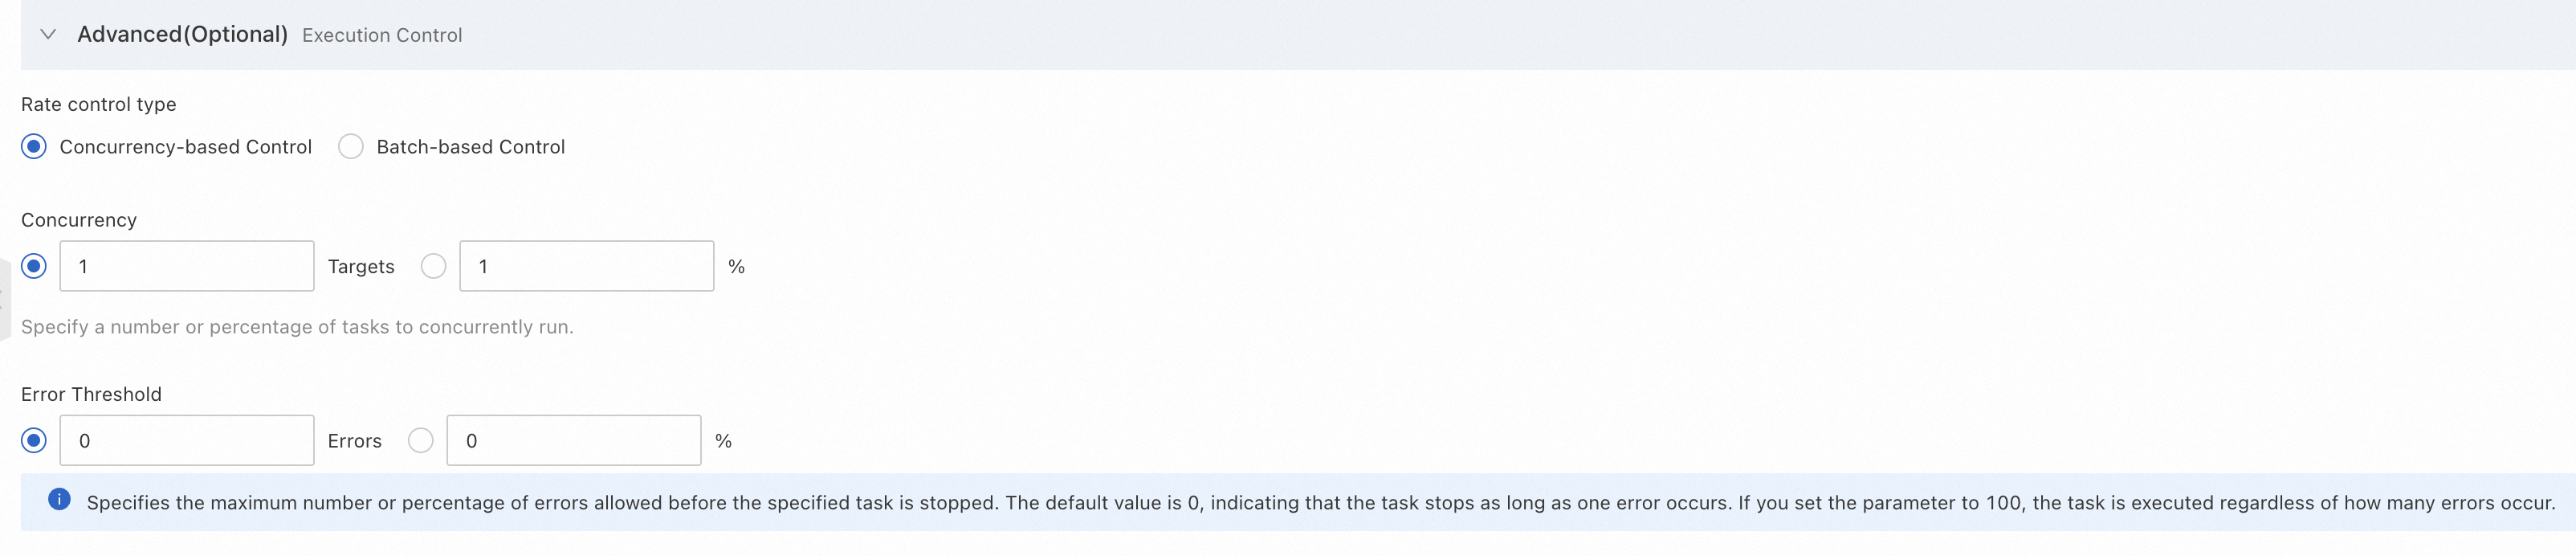
Configure the advanced options. In this example, the default values are used. Click Create.
In the Execution Steps and Results section, view the execution progress.
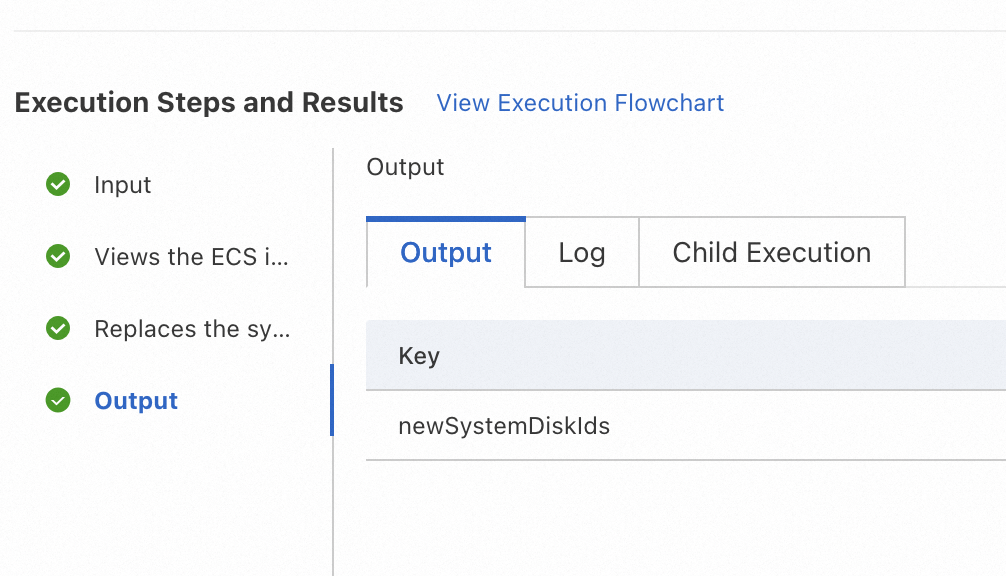 After the task is complete, verify that the operating system has been successfully upgraded on each ECS instance.
What's next
After you upgrade the operating system of your ECS instances, consider the following actions:
Verify application compatibility: Log on to each upgraded ECS instance to confirm that your applications and services run correctly on the new operating system version.
Reconfigure system settings: Because system disk data is cleared during the upgrade, reconfigure any custom system-level settings that your workloads require.
Update security policies: Review and update your security group rules and firewall configurations to align with the requirements of the new operating system version.
Set up monitoring: Confirm that your monitoring and alerting configurations are working correctly on the upgraded instances.