If you want to repair the Linux system disk of an Elastic Compute Service (ECS) instance that has an exception, you can use the one-click repair feature provided by CloudOps Orchestration Service (OOS).
Prerequisites
A Resource Access Management (RAM) user is created and attached to the AliyunOOSFullAccess, AliyunROSFullAccess, AliyunECSFullAccess, and AliyunVPCFullAccess policies. For more information, see Create a RAM user and Policy overview.
Usage notes
Scenarios
In certain cases, the Linux operating system of an ECS instance may fail to be started. If this exception occurs, the ECS instance may appear in the Running state in the ECS console, but the applications deployed in the instance are inaccessible. The network of the instance can neither be pinged nor connected to by using the workbench or SSH. If you connect to the instance by using Virtual Network Computing (VNC) in the ECS console, you may see one of the following error messages:
unexpected inconsistency;RUN fsck MANUALLYGive root password for maintenance (or type CTRL-D to continue)Enter 'help' for a list of built-in commands. (initramfs)
The possible causes include but are not limited to the following ones:
The instance is forcibly shut down or restarted.
The instance suddenly breaks down, resulting in inconsistent file system data.
You have detached a data disk, but have not removed the attachment information from the /etc/fstab file.
The /etc/fstab file is missing or damaged.
The initrd file is damaged.
The file system is damaged due to other reasons.
Solution overview
The self-rescue solution in this topic uses an OOS template that has been tested by Alibaba Cloud. This is an automated solution for one-click repair. The OOS template involves the following steps:
Create an image backup for the instance to be repaired.
Detach the system disk from the instance, and attach the system disk to a temporary instance.
Check and repair the system disk on the temporary instance.
After the system disk is repaired, reattach the system disk to the original instance and try to restart the instance.
Release the temporary instance.
Supported operating systems
CentOS: 7.2 64-bit, 7.3 64-bit, 7.4 64-bit, 7.5 64-bit, 7.6 64-bit, 7.7 64-bit, and 8.0 64-bit
Debian: 8.9 64-bit, 8.11 64-bit, 9.8 64-bit, 9.9 64-bit, and 9.11 64-bit
openSUSE: 42.3 64-bit and 15.1 64-bit
SUSE Linux Enterprise Server: 12 SP4 64-bit and 12 SP2 64-bit
Alibaba Cloud Linux: 2.1903 64-bit
Ubuntu: 18.04 64-bit
Linux startup failures may be caused by many reasons. It is not guaranteed that the self-rescue solution can repair all instances that fail to be started. During the repair, a temporary instance is created and certain fees are incurred. The fee is generally less than USD 0.2. The self-rescue solution requires modifications to the fstab and initrd files of the system. Before modification, an image backup is automatically created for the instance to be repaired. This way, you can restore data later by using the image backup. You are charged for the image backup. For more information, see Snapshots. After the instance is repaired, you can delete the image backup to reduce costs.
Procedure
Log on to the CloudOps Orchestration Service console.
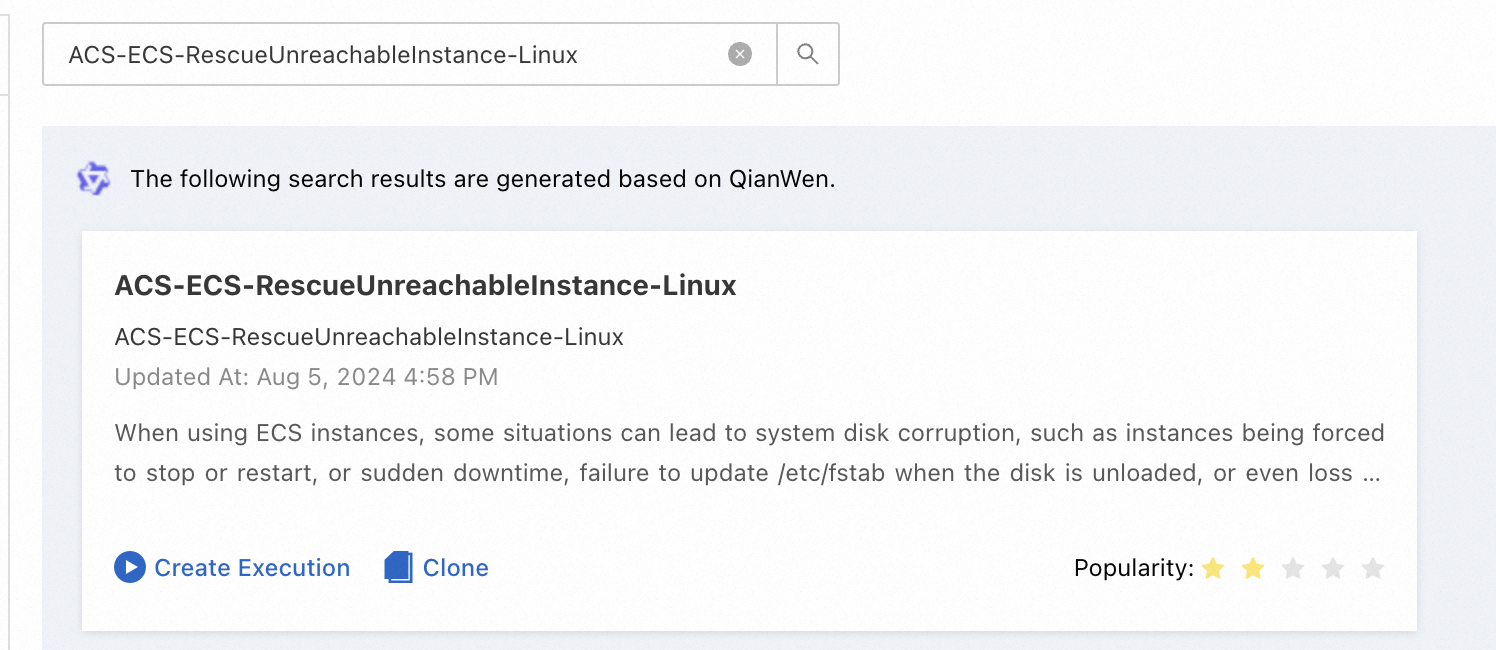
In the left-side navigation pane, choose . On the Public Template page, search for the ACS-ECS-RescueUnreachableInstance-Linux template.

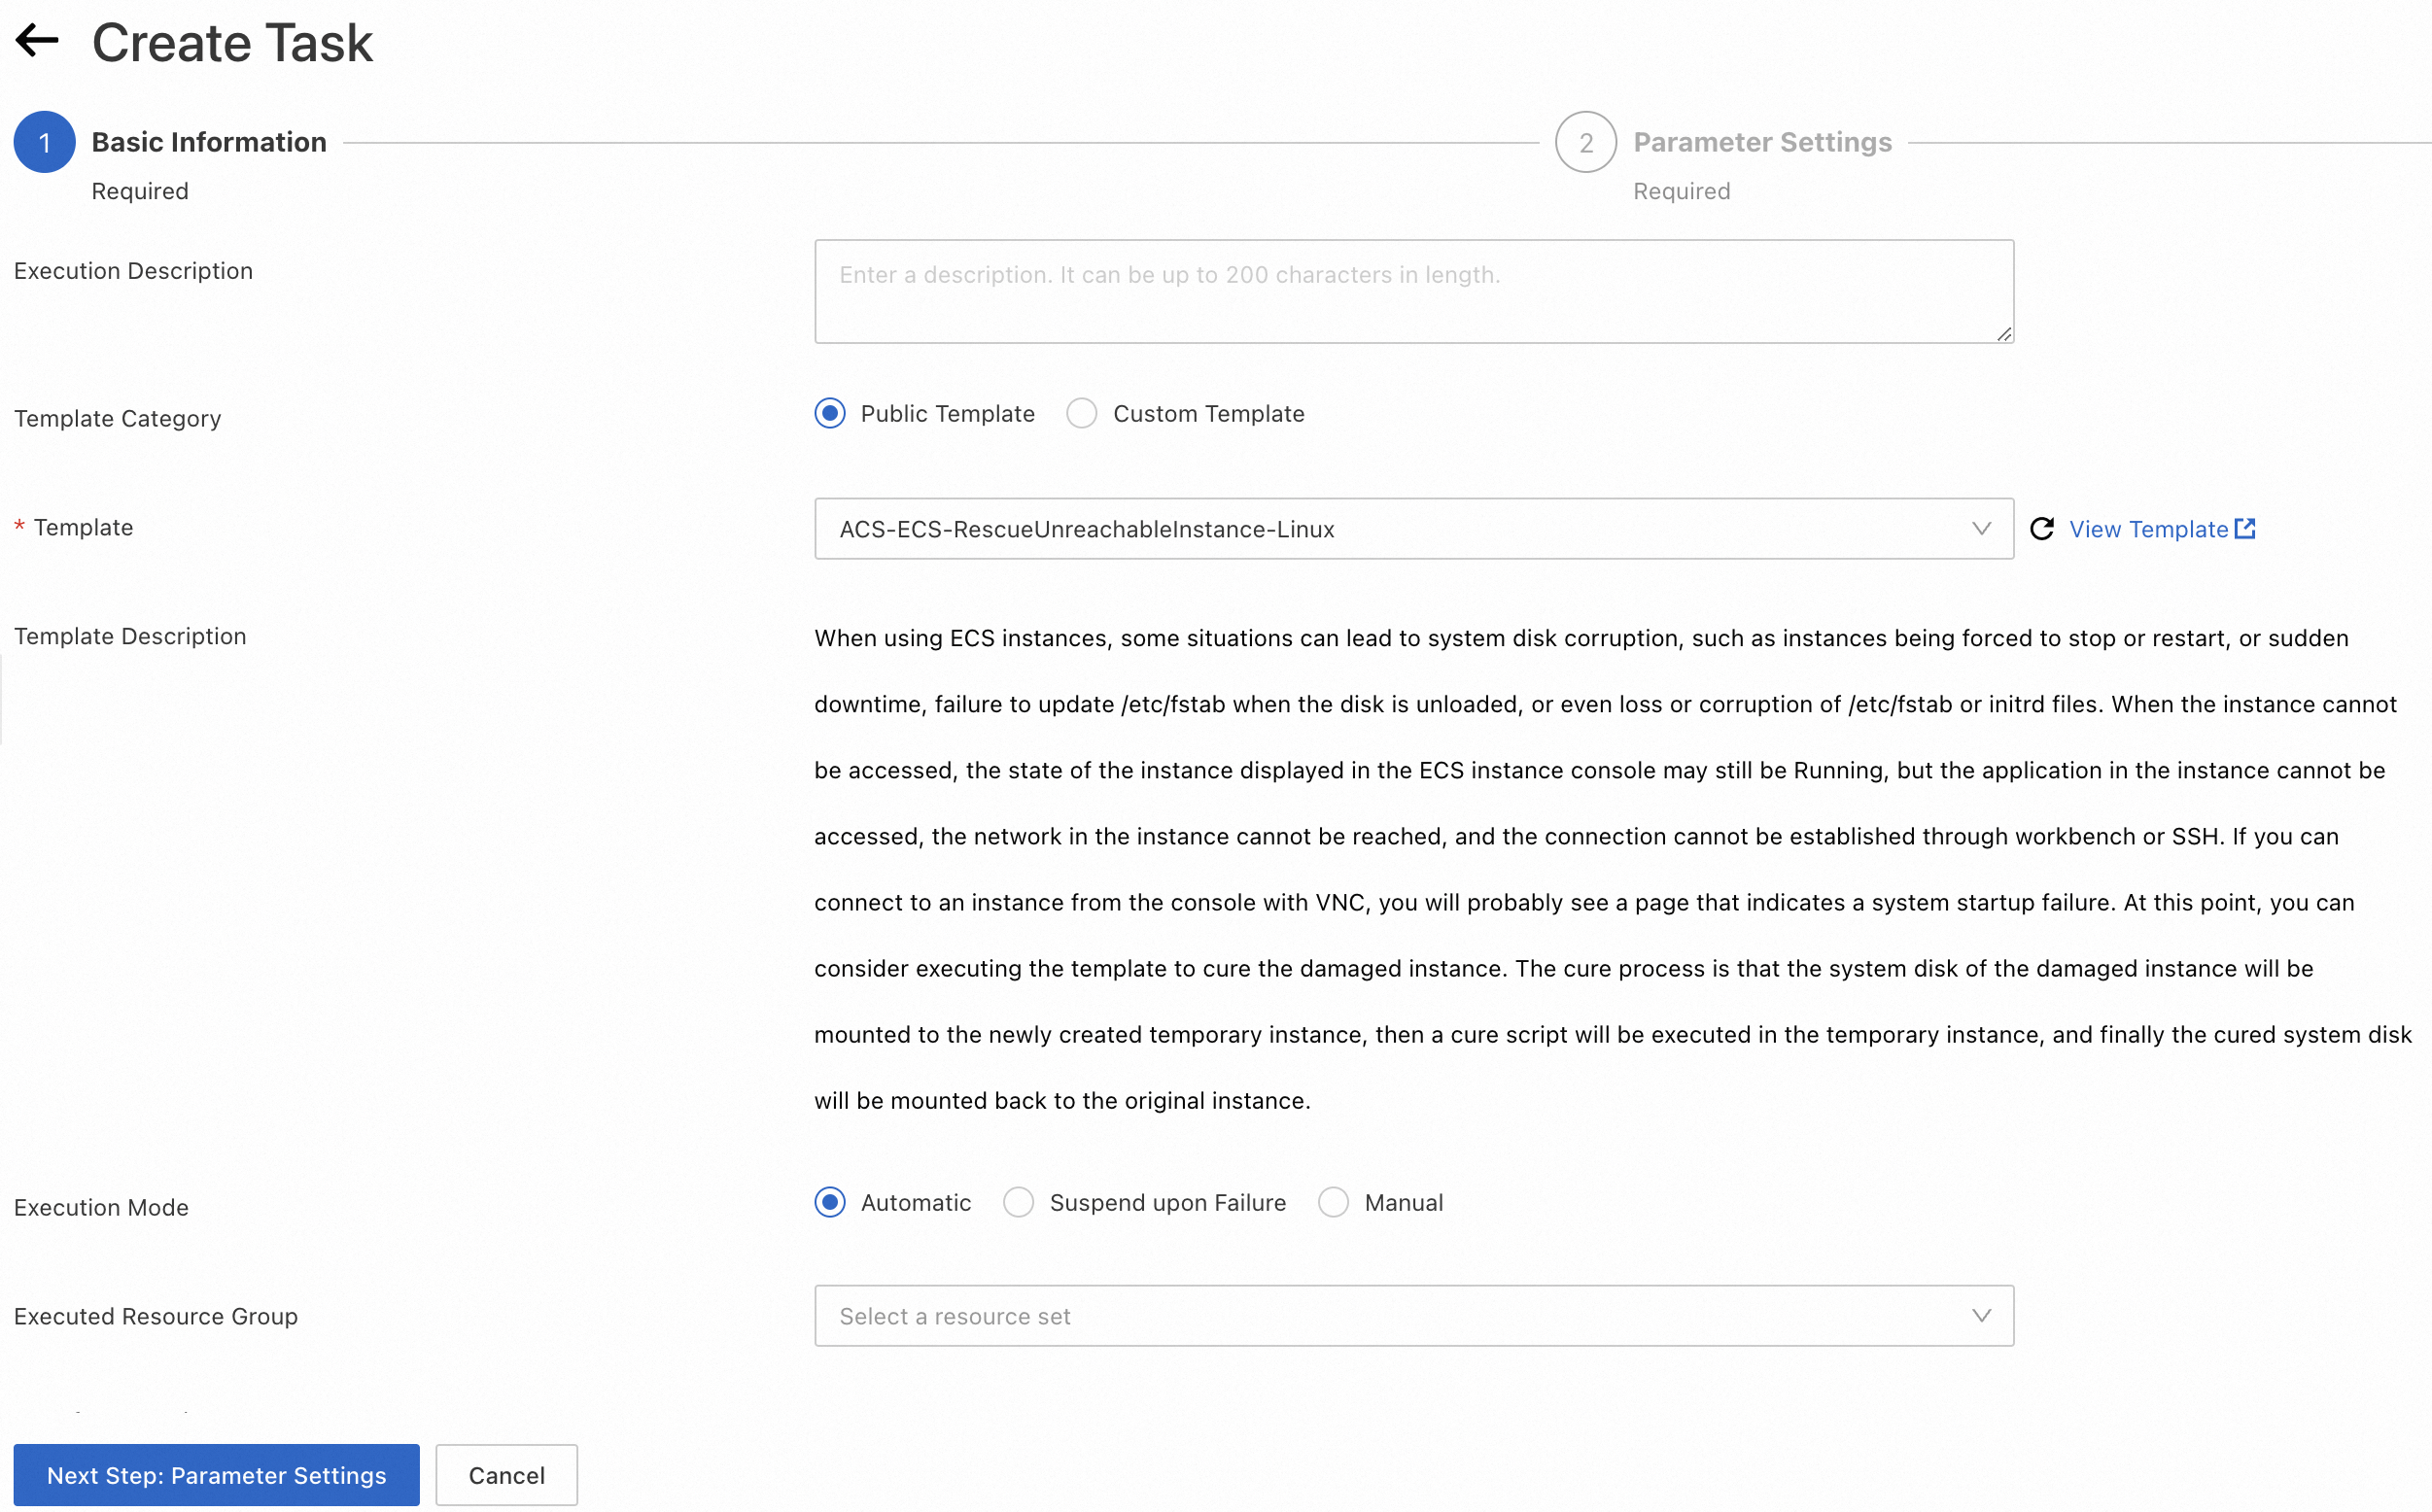
Click Create Execution.
On the Create Task page, click Next Step: Parameter Settings.

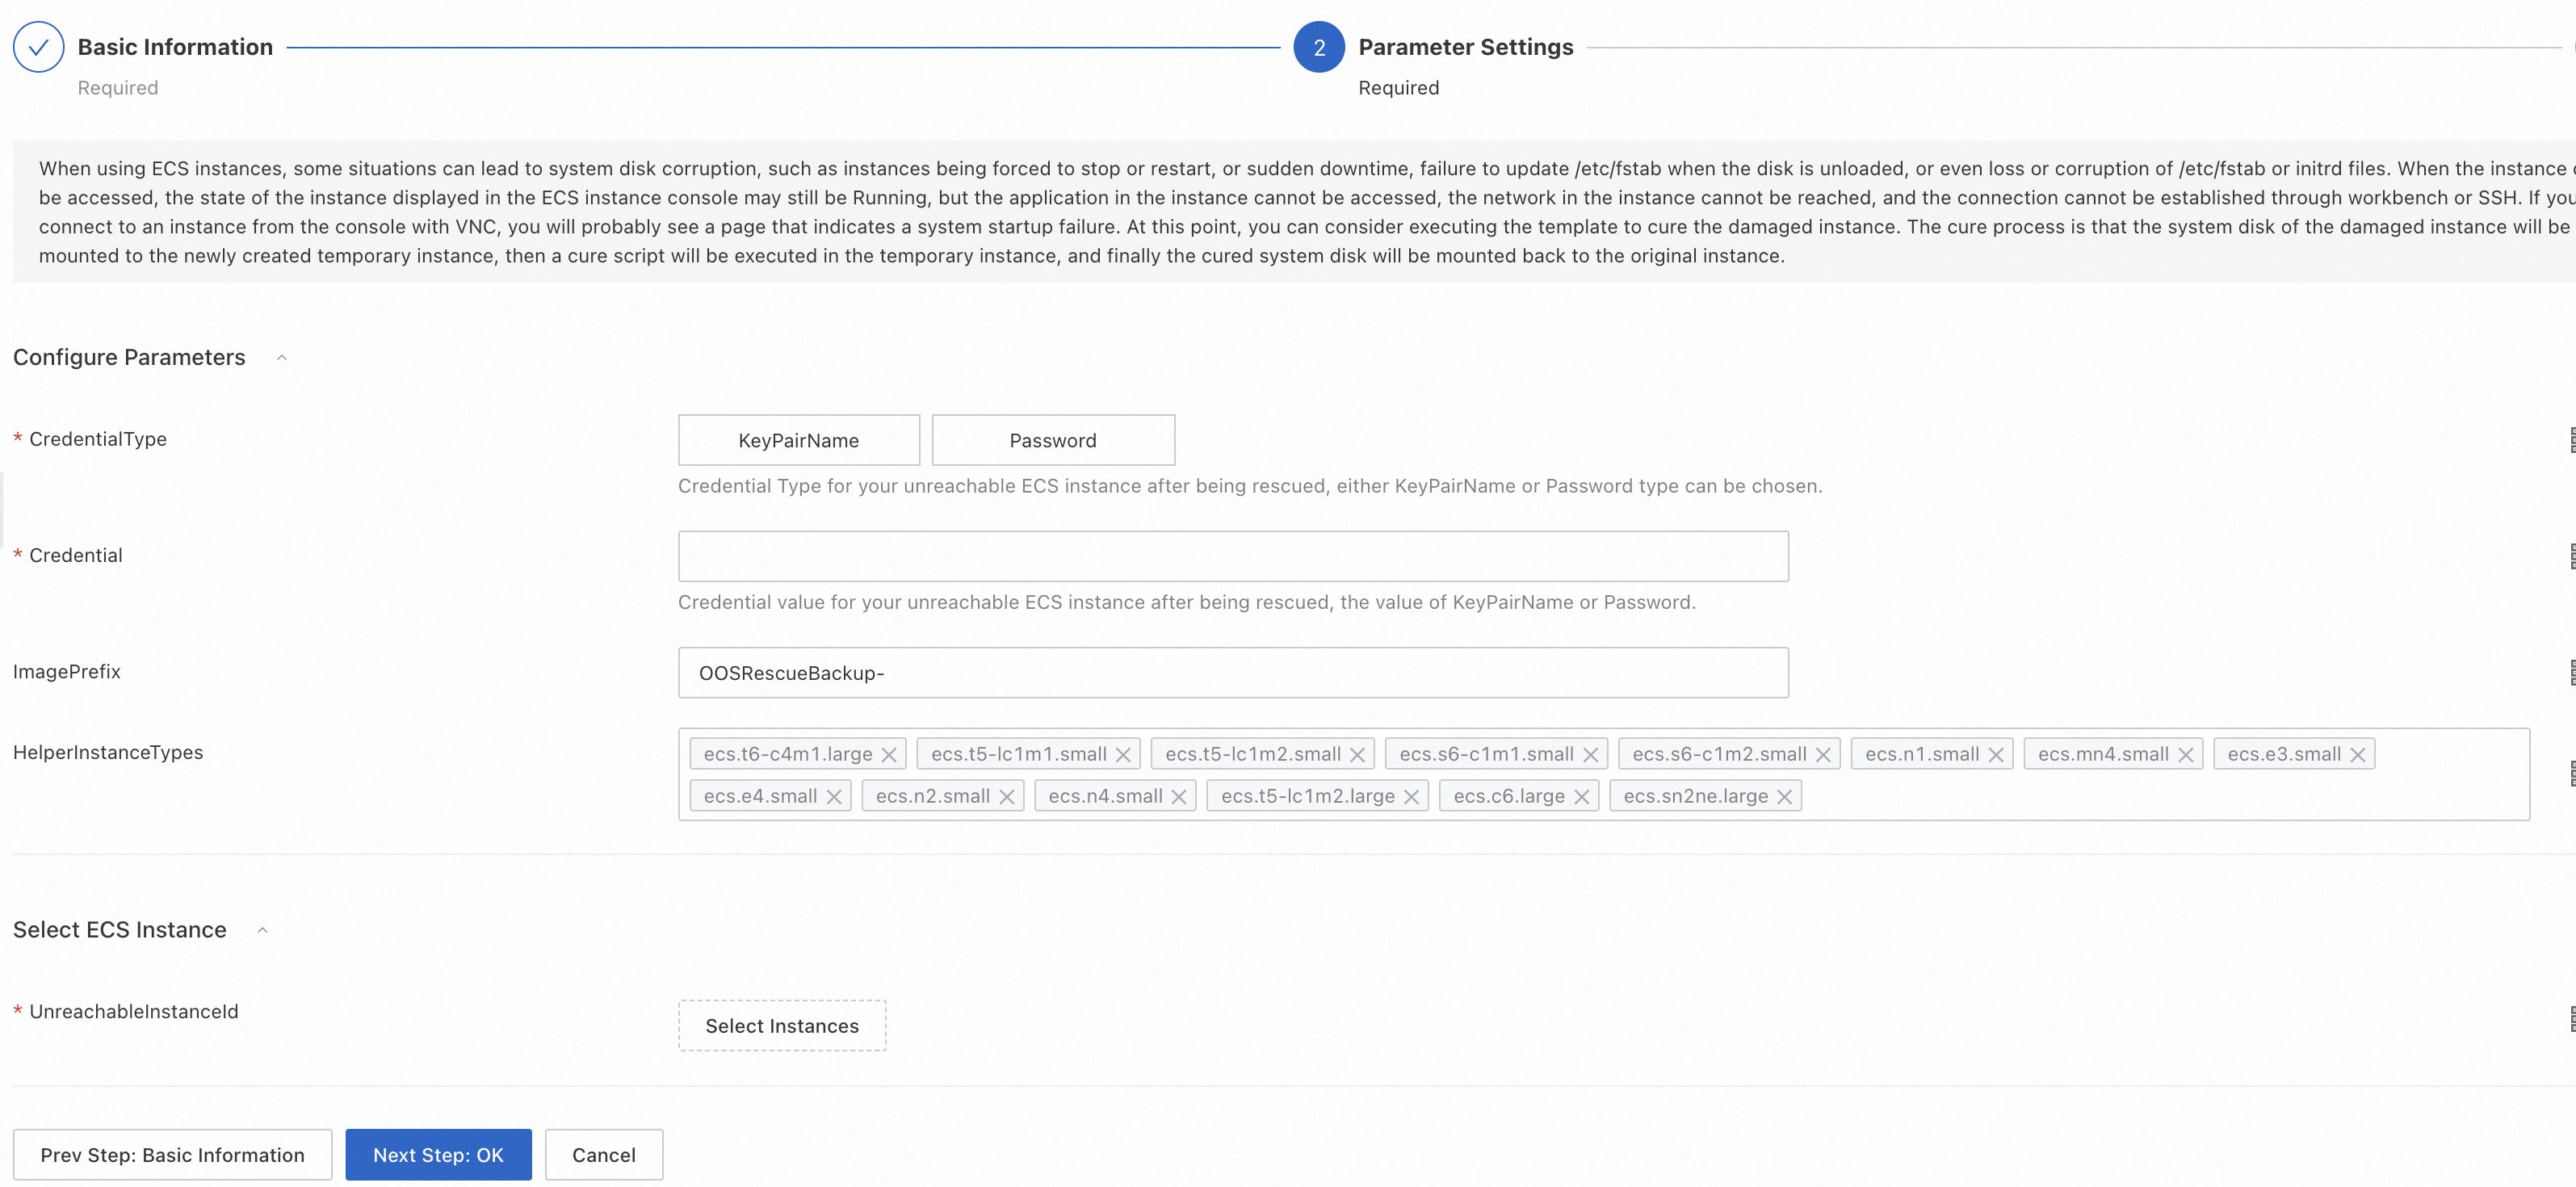
In the Parameter Settings step, set the following parameters:
UnreachableInstanceId: required. The ID of the instance whose system disk is to be repaired.
CredentialType: required. The type of the authentication credential that is used to reattach the repaired system disk to the original instance. You can set this parameter to KeyPairName or Password.
Credential: required. The authentication credential. If you set the CredentialType parameter to KeyPairName, specify the name of a key pair. If you set the CredentialType parameter to Password, specify a password.
ImagePrefix: optional. The prefix for the name of the image backup. The default prefix is OOSRescueBackup-.
HelperInstanceTypes: optional. The type of the temporary instance to be created. By default, the instance type with the lowest unit price is selected from the provided instance types.
OOSAssumeRole: Select Use Existing Permissions of Current Account.

Click Next Step: OK. In the OK step, click Create.

You can view the execution status of the OOS template on the execution details page and view the execution status of the repair script by using the rtCommandOutput parameter. The execution takes about 5 to 10 minutes. If the template is successfully executed, the instance has been repaired and is in the Running state.
(Optional) Attach the system disk and repair the instance
Implementation logic
Repair the /etc/fstab file
Check whether the /etc/fstab file exists. If the /etc/fstab file exists, back up the file.
Repair the /etc/fstab file. If the /etc/fstab file does not exist or fails to be parsed, create the default /etc/fstab file.
If the nofail parameter is not set, set it to prevent startup failures.
If the fsck command is enabled, disable it.
Update the ramdisk file
Check whether the ramdisk file exists in /boot. If the ramdisk file exists, back up the file.
Rebuild the ramdisk file.