Use CloudOps Orchestration Service (OOS) to schedule automatic backups of Tair (Redis® OSS-Compatible) instance data to an Object Storage Service (OSS) bucket — with cross-region support, multi-instance batching, and permanent retention.
Prerequisites
Before you begin, verify that all of the following conditions are met:
Function Compute is activated. For more information, see Quickly create a function.
The OSS bucket you want to back up data to already exists.
You have the permissions required to create RAM roles and attach policies.
Background information
Tair (Redis® OSS-Compatible) provides a scheduled backup feature for disaster recovery, historical data queries, and environment cloning. For more information, see Automatic or manual backup. However, the built-in backup method has several limitations:
No permanent storage: Backup data is lost when an instance is deleted.
Manual operations required: Downloading and uploading backup files must be done manually, which is time-consuming and error-prone.
Higher O&M costs: The manual backup process consumes more time and resources.
No multi-instance or cross-region support: Built-in backup handles only one instance at a time within a single region.
Limited monitoring: No built-in alerting means backup failures go unnoticed until it's too late.
The OOS-based solution in this topic addresses all of these limitations:
Permanent storage: Backup files are uploaded to OSS, where redundant storage ensures data durability even after the source instance is deleted.
Fully automated: Once configured, backups run automatically on the schedule you define — no manual steps needed.
Multi-instance and cross-region: Back up multiple Tair instances from different regions to the same OSS bucket in a single scheduled task.
Cost-controlled: Set the backup frequency to match your business needs, and use OSS lifecycle rules to automatically delete expired backup files.
Monitoring and alerts: Use OSS and CloudMonitor to track backup status in real time and receive alert notifications when a backup task fails.
Procedure
This solution uses both Tair (Redis® OSS-Compatible) and Function Compute, both of which may incur charges. For pricing details, see Automatic or manual backup and Billing overview.
Log on to the OOS console.
In the left-side navigation pane, choose . On the Scheduled O&M page, click Create.
-
In the Set Scheduled Task section, set the Scheduled Task Type parameter.
Valid values: Execute Now, Executed Once at the Specified Time, and Executed Periodically. Select Execute Now to run the task immediately after creation. Select Executed Once at the Specified Time to run the task once at a specific point in time. Select Executed Periodically to run the task on a recurring schedule.
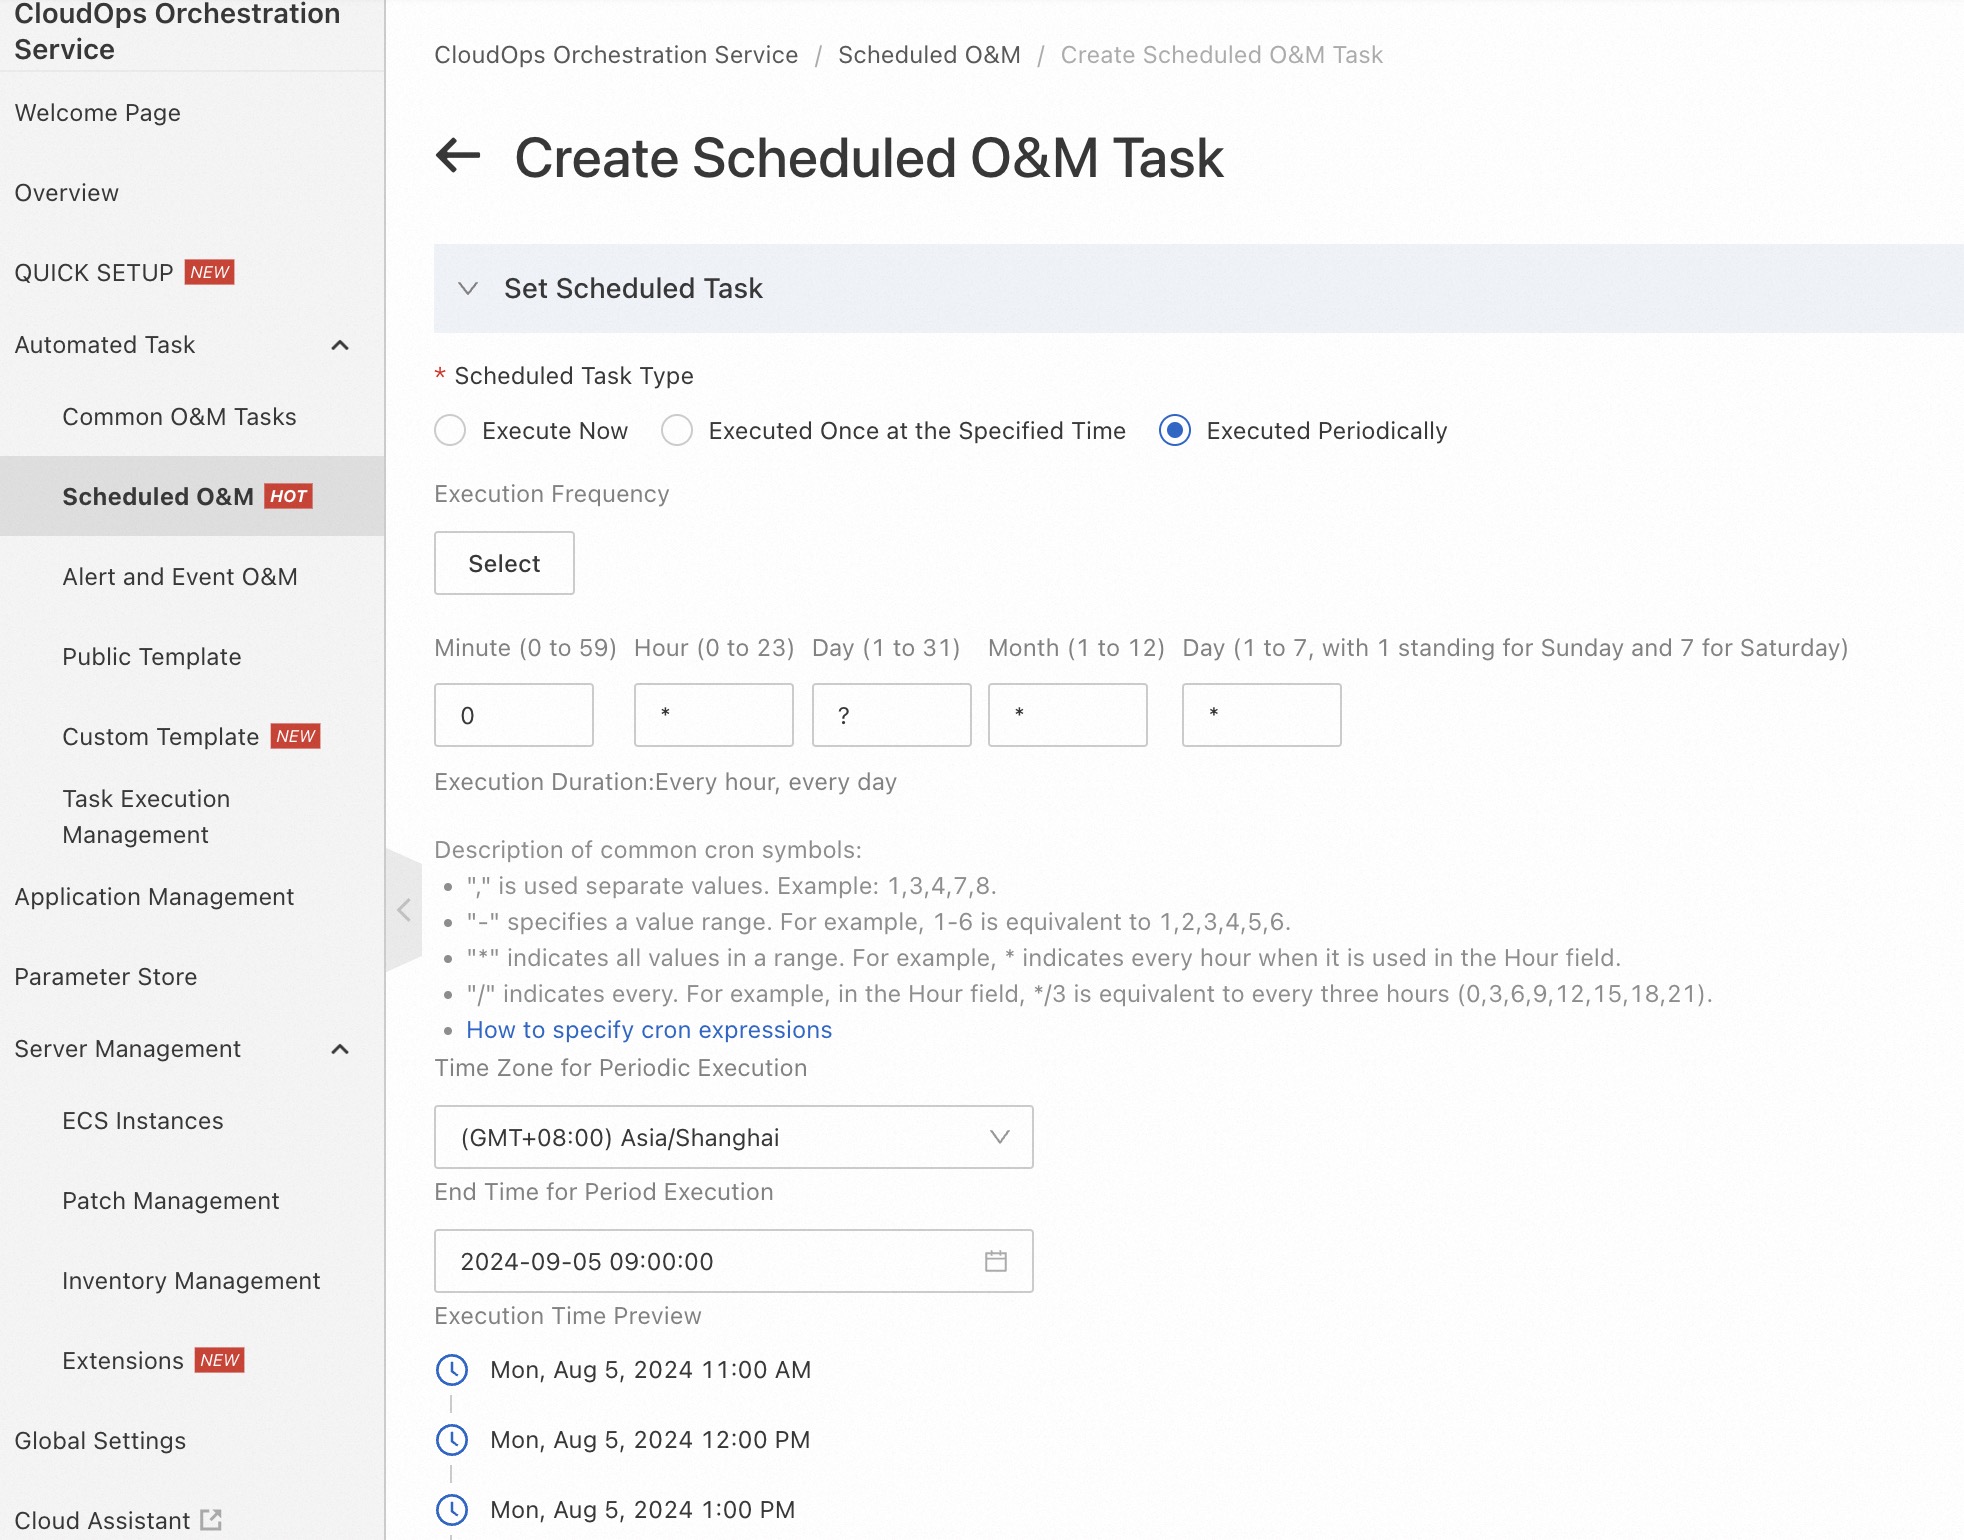
In this example, Executed Periodically is selected. You can click Select or enter a cron expression to specify the frequency. Click Select. In the Select Execution Frequency dialog box, click the Hour tab, select Hourly, and then click OK.
-
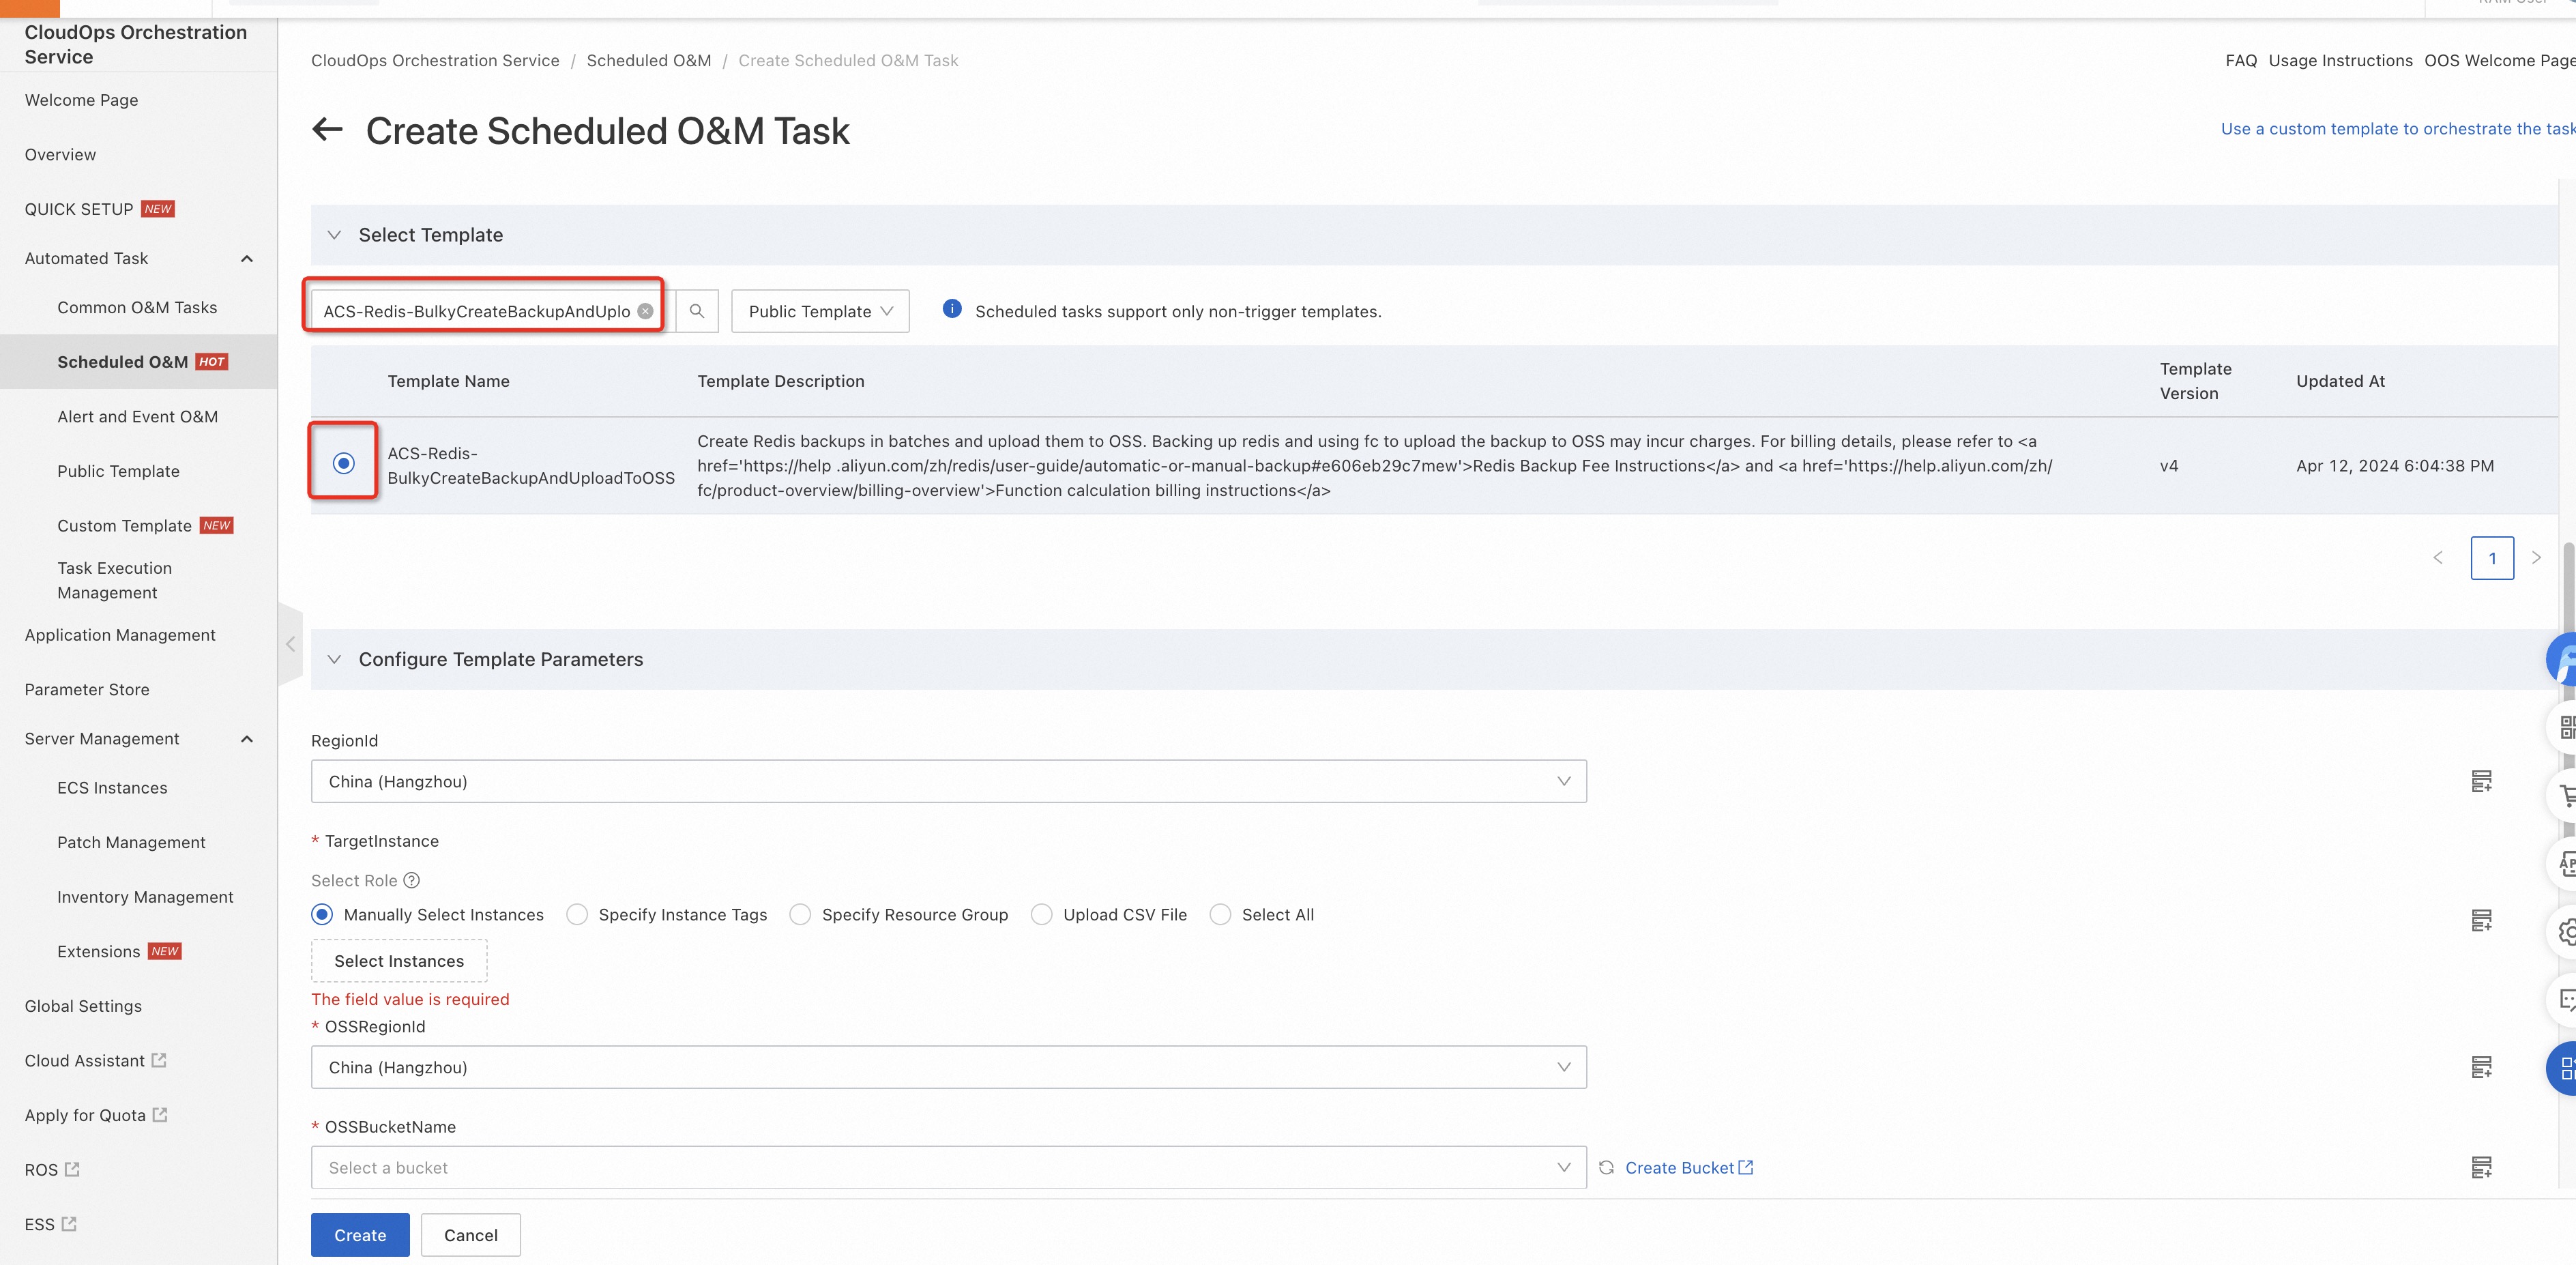
In the Select Template section, search for and select the ACS-Redis-BulkyCreateBackupAndUploadToOSS template.
-
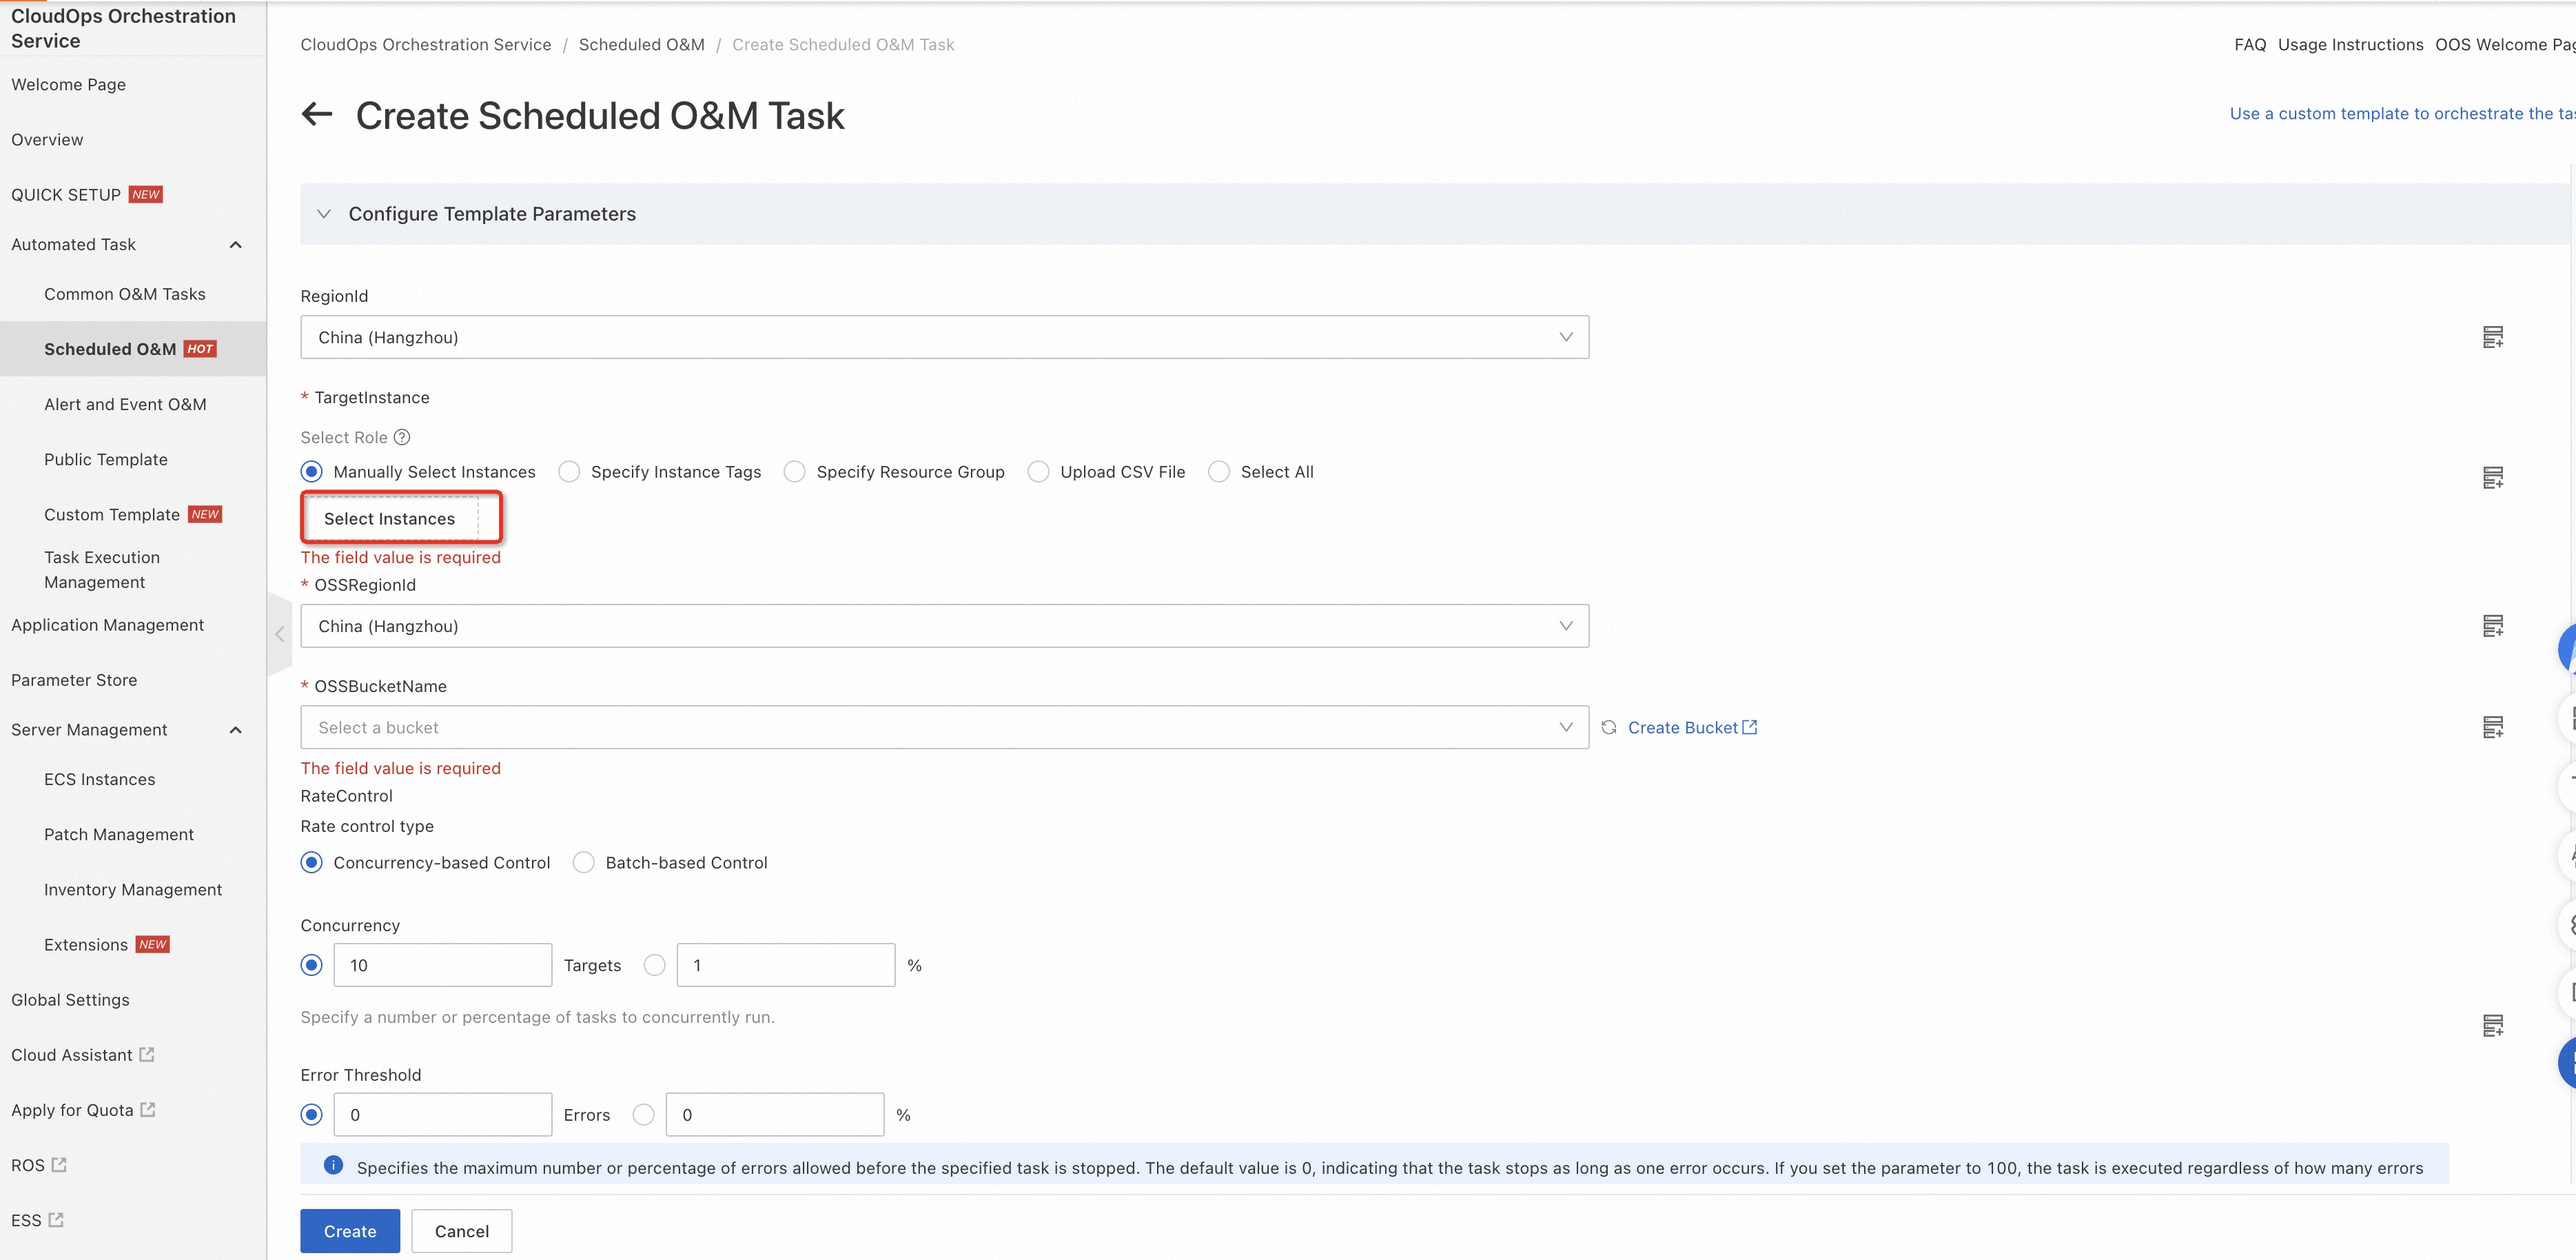
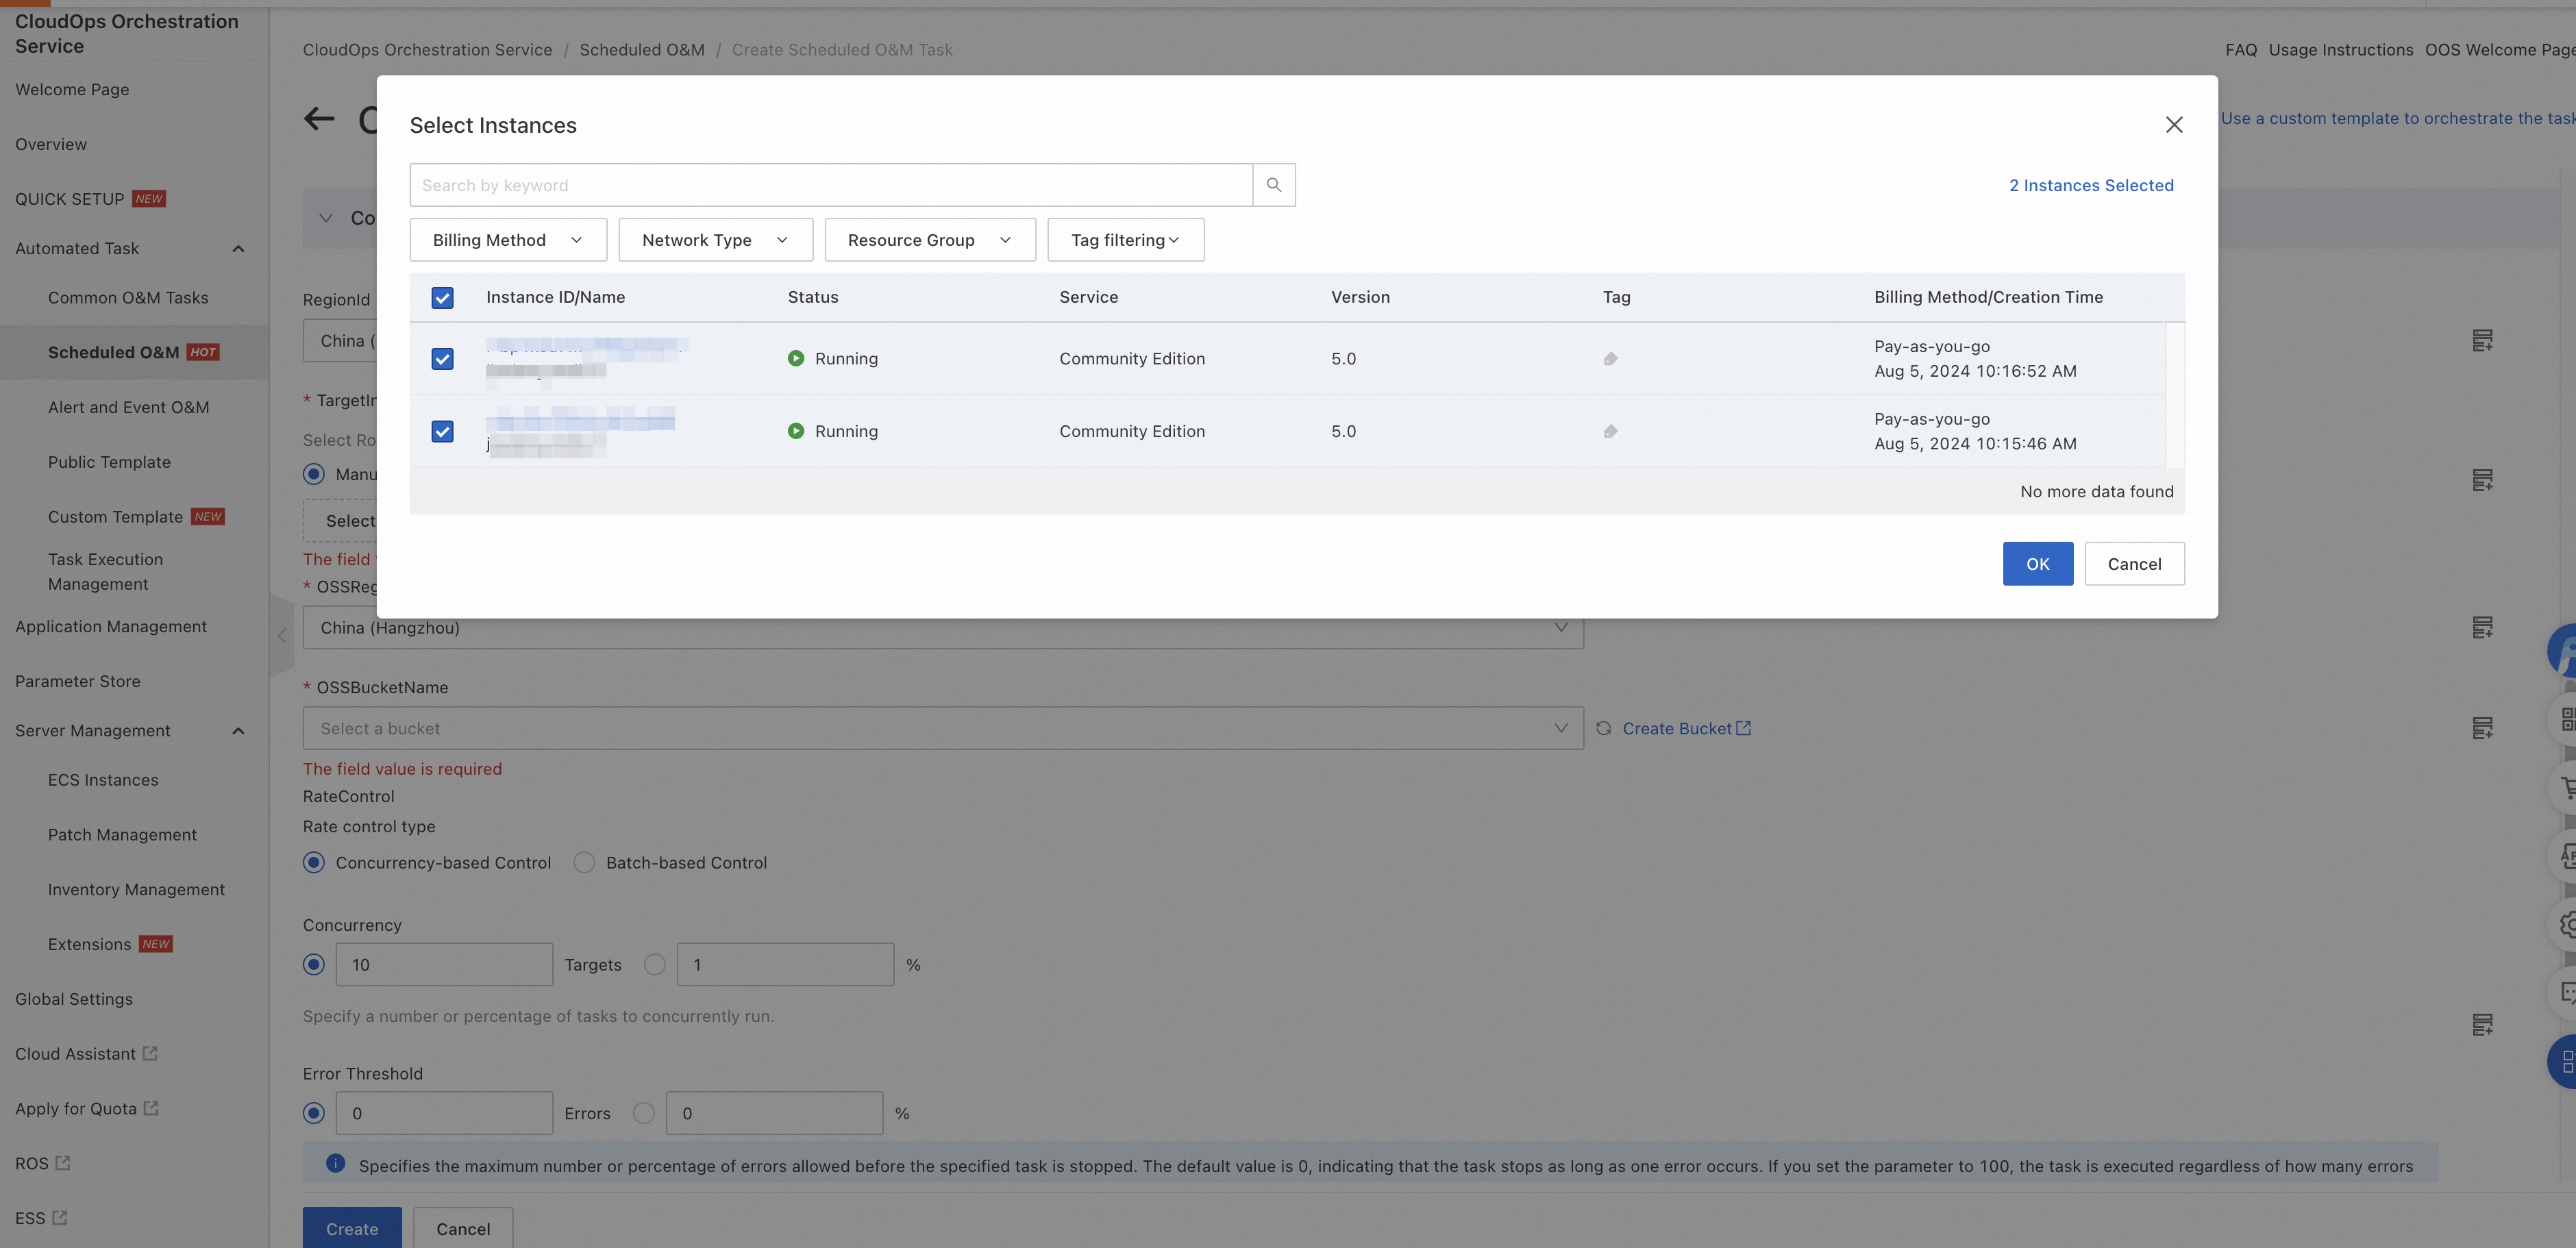
In the Configure Template Parameters section, select the region where the Tair instances reside from the RegionId drop-down list. Click Select Instances, select the instances to back up in the dialog box, and then click OK.
-
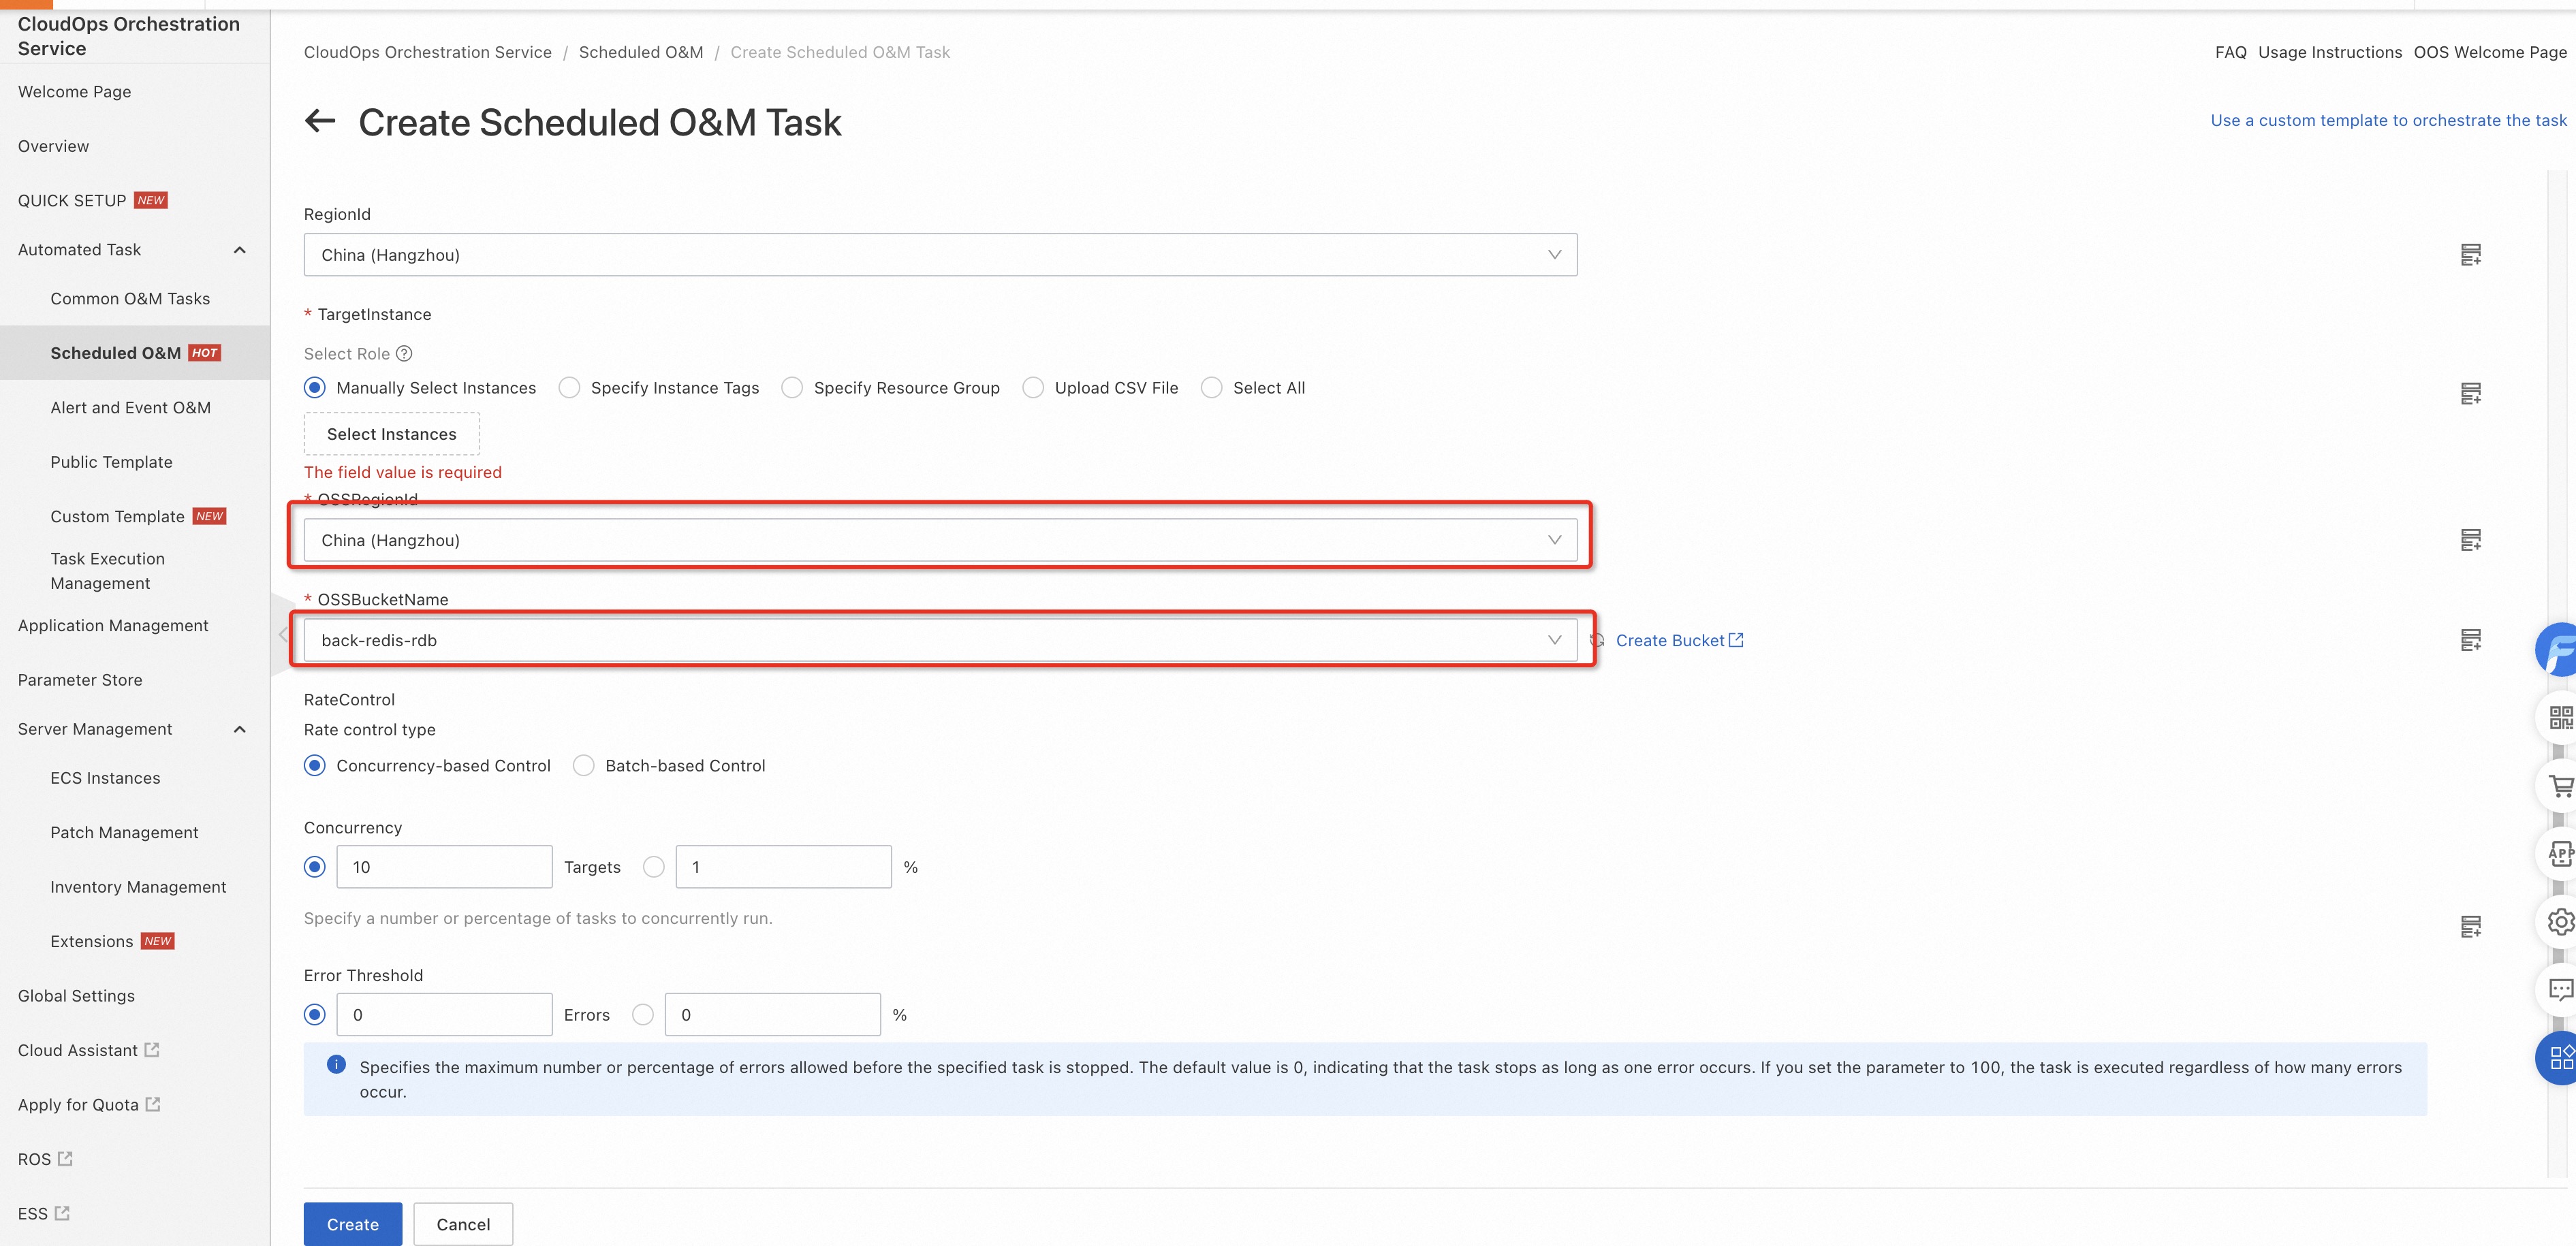
Set the OSSRegionId and OSSBucketName parameters to specify the destination OSS bucket.
-
Configure the Resource Access Management (RAM) role for the O&M task.
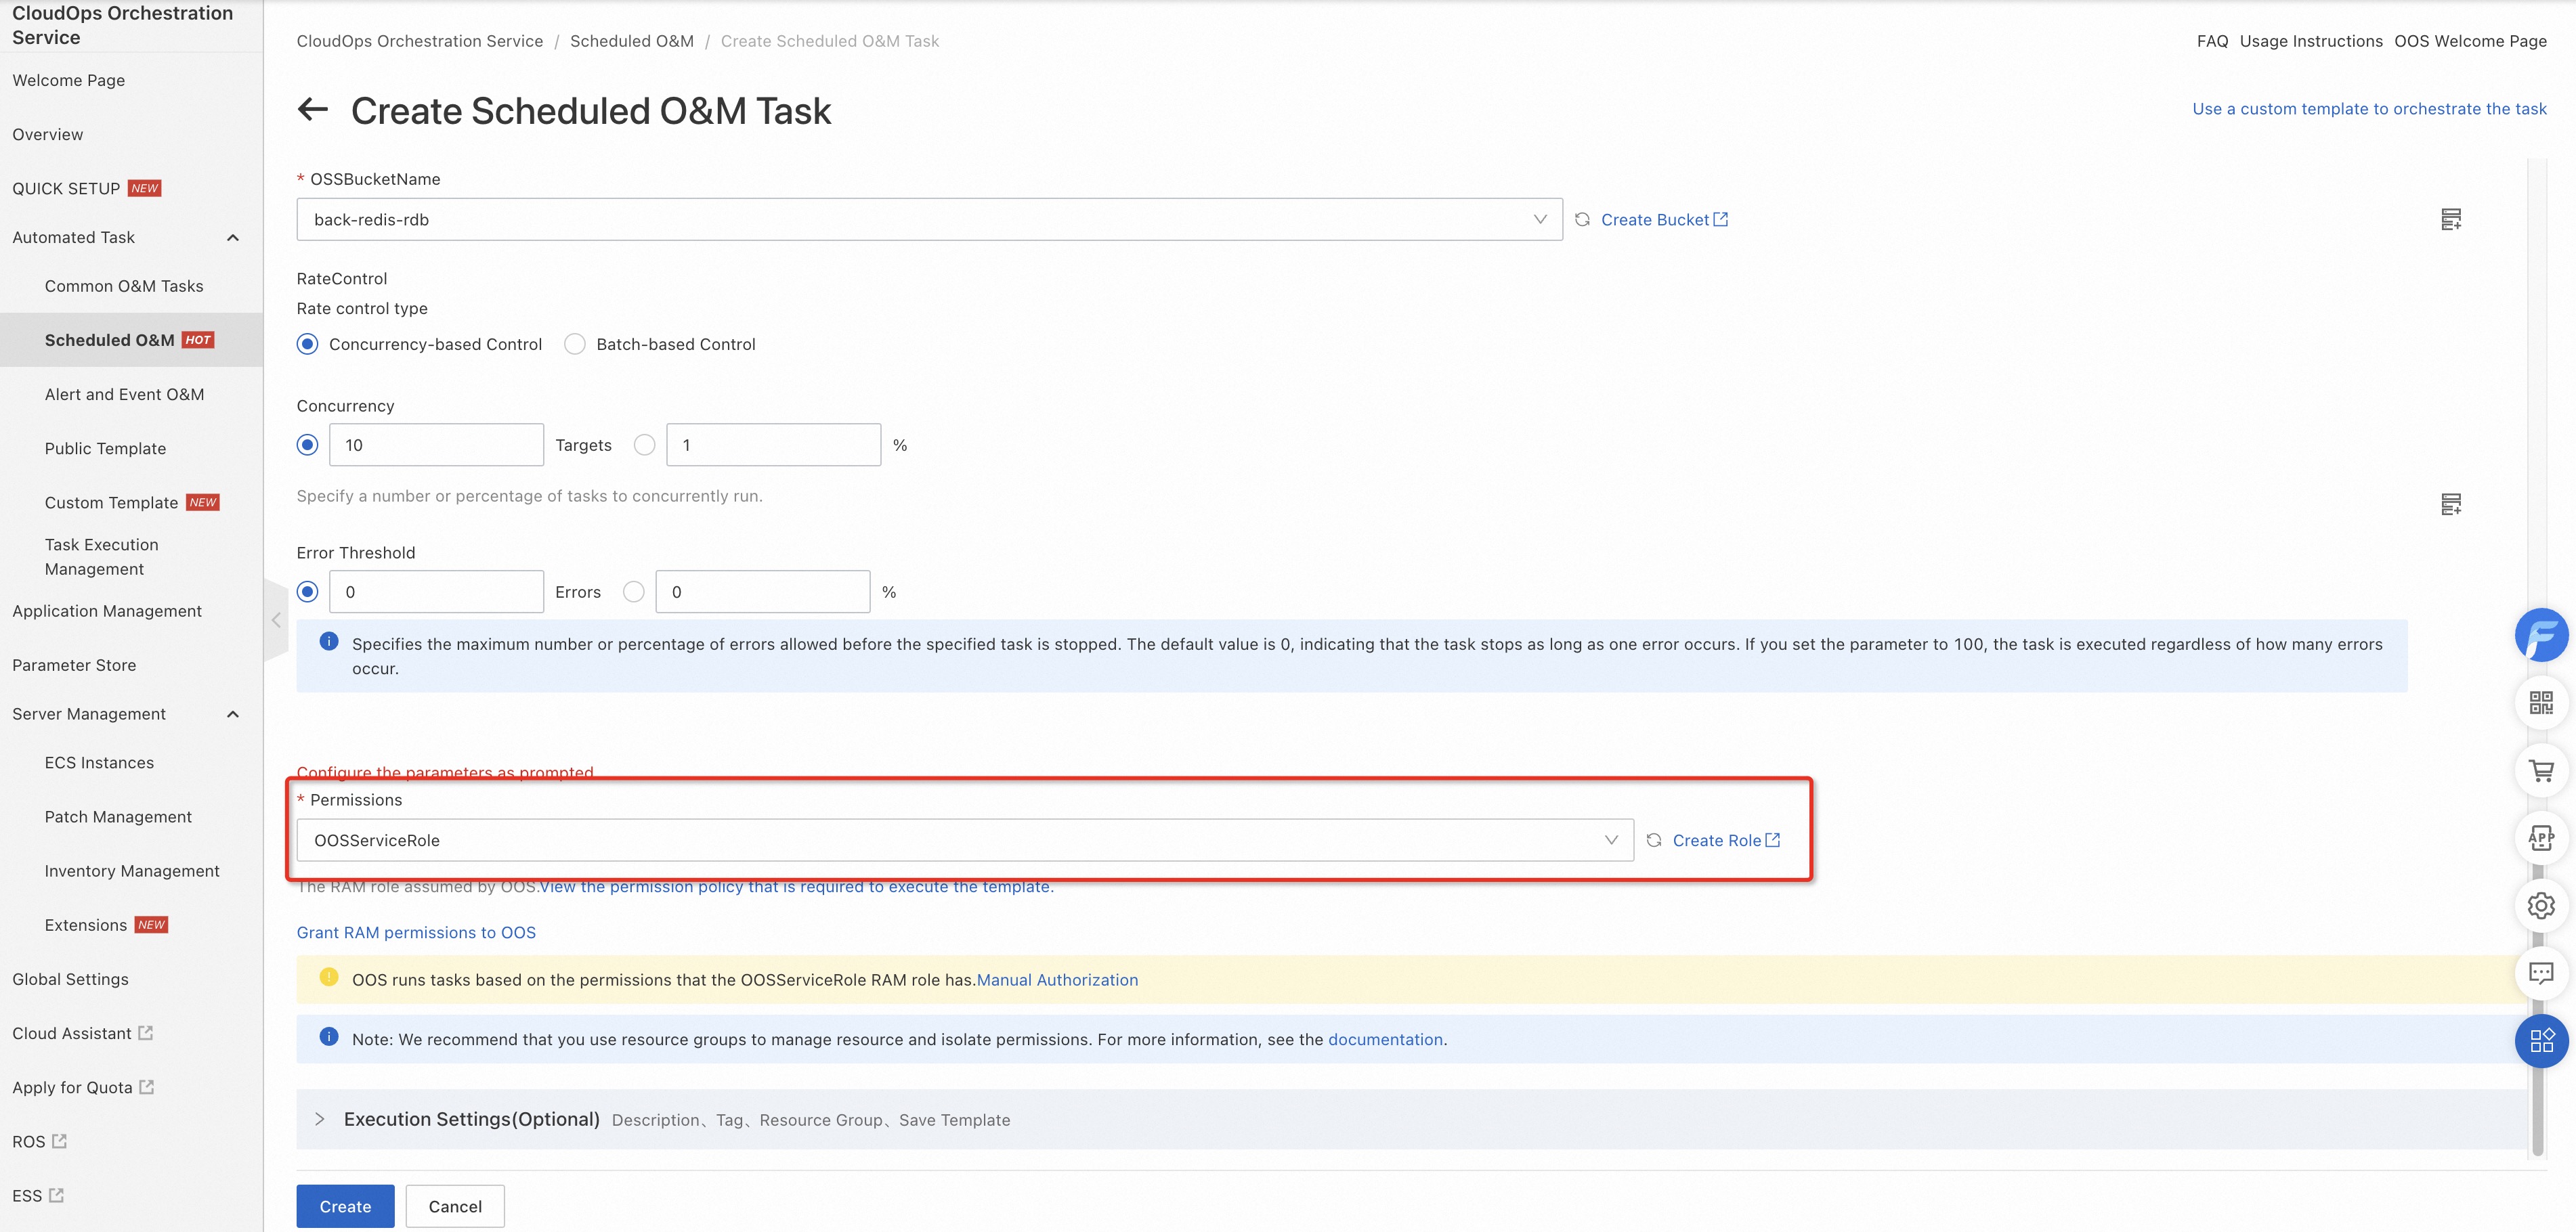
Create a RAM role for OOS and attach the following policy. For more information, see Create and authorize a RAM role for OOS.
{
    "Version": "1",
    "Statement": [
        {
            "Action": [
                "kvstore:CreateBackup",
                "kvstore:DescribeBackupTasks",
                "kvstore:DescribeBackups",
                "kvstore:DescribeInstances"
            ],
            "Resource": "*",
            "Effect": "Allow"
        },
        {
            "Action": [
                "ros:CreateStack",
                "ros:DeleteStack",
                "ros:GetStack"
            ],
            "Resource": "*",
            "Effect": "Allow"
        },
        {
            "Action": "oos:StartExecution",
            "Resource": "*",
            "Effect": "Allow"
        },
        {
            "Action": [
                "fc:CreateFunction",
                "fc:CreateService",
                "fc:DeleteFunction",
                "fc:DeleteService",
                "fc:GetFunction",
                "fc:GetService",
                "fc:InvokeFunction"
            ],
            "Resource": "*",
            "Effect": "Allow"
        },
        {
            "Condition": {
                "StringEquals": {
                    "acs:Service": "fc.aliyuncs.com"
                }
            },
            "Action": "ram:PassRole",
            "Resource": "*",
            "Effect": "Allow"
        }
    ]
}
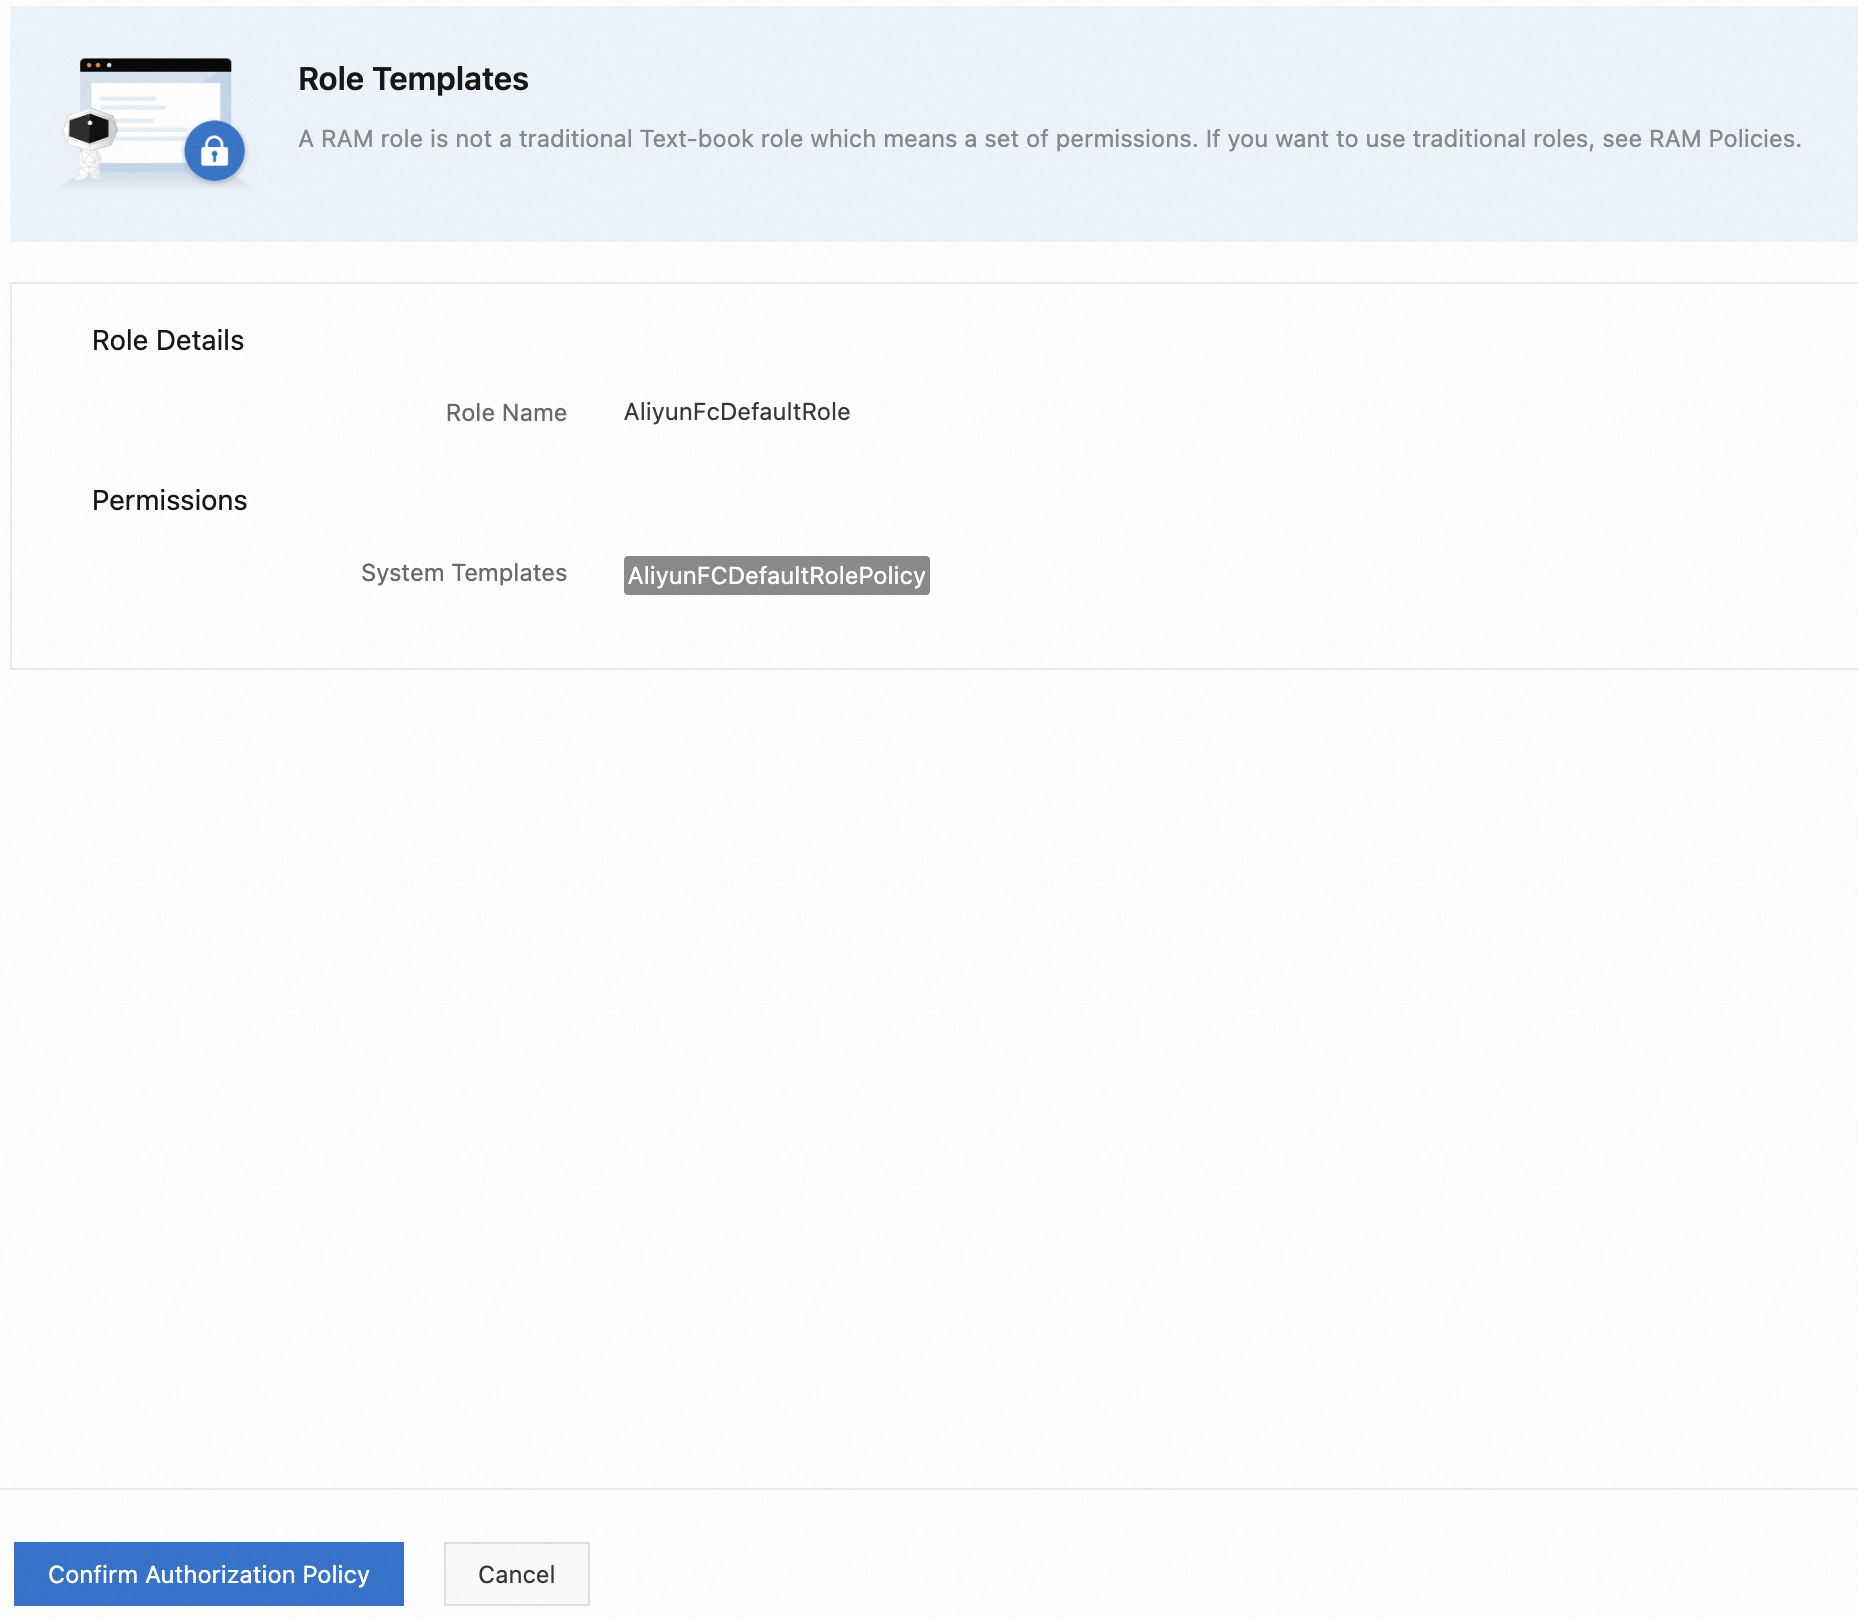
The template also uses Function Compute to download backup files and upload them to OSS. This requires the AliyunFCDefaultRole RAM role. Click Create Role to create the AliyunFCDefaultRole role in one click.
-
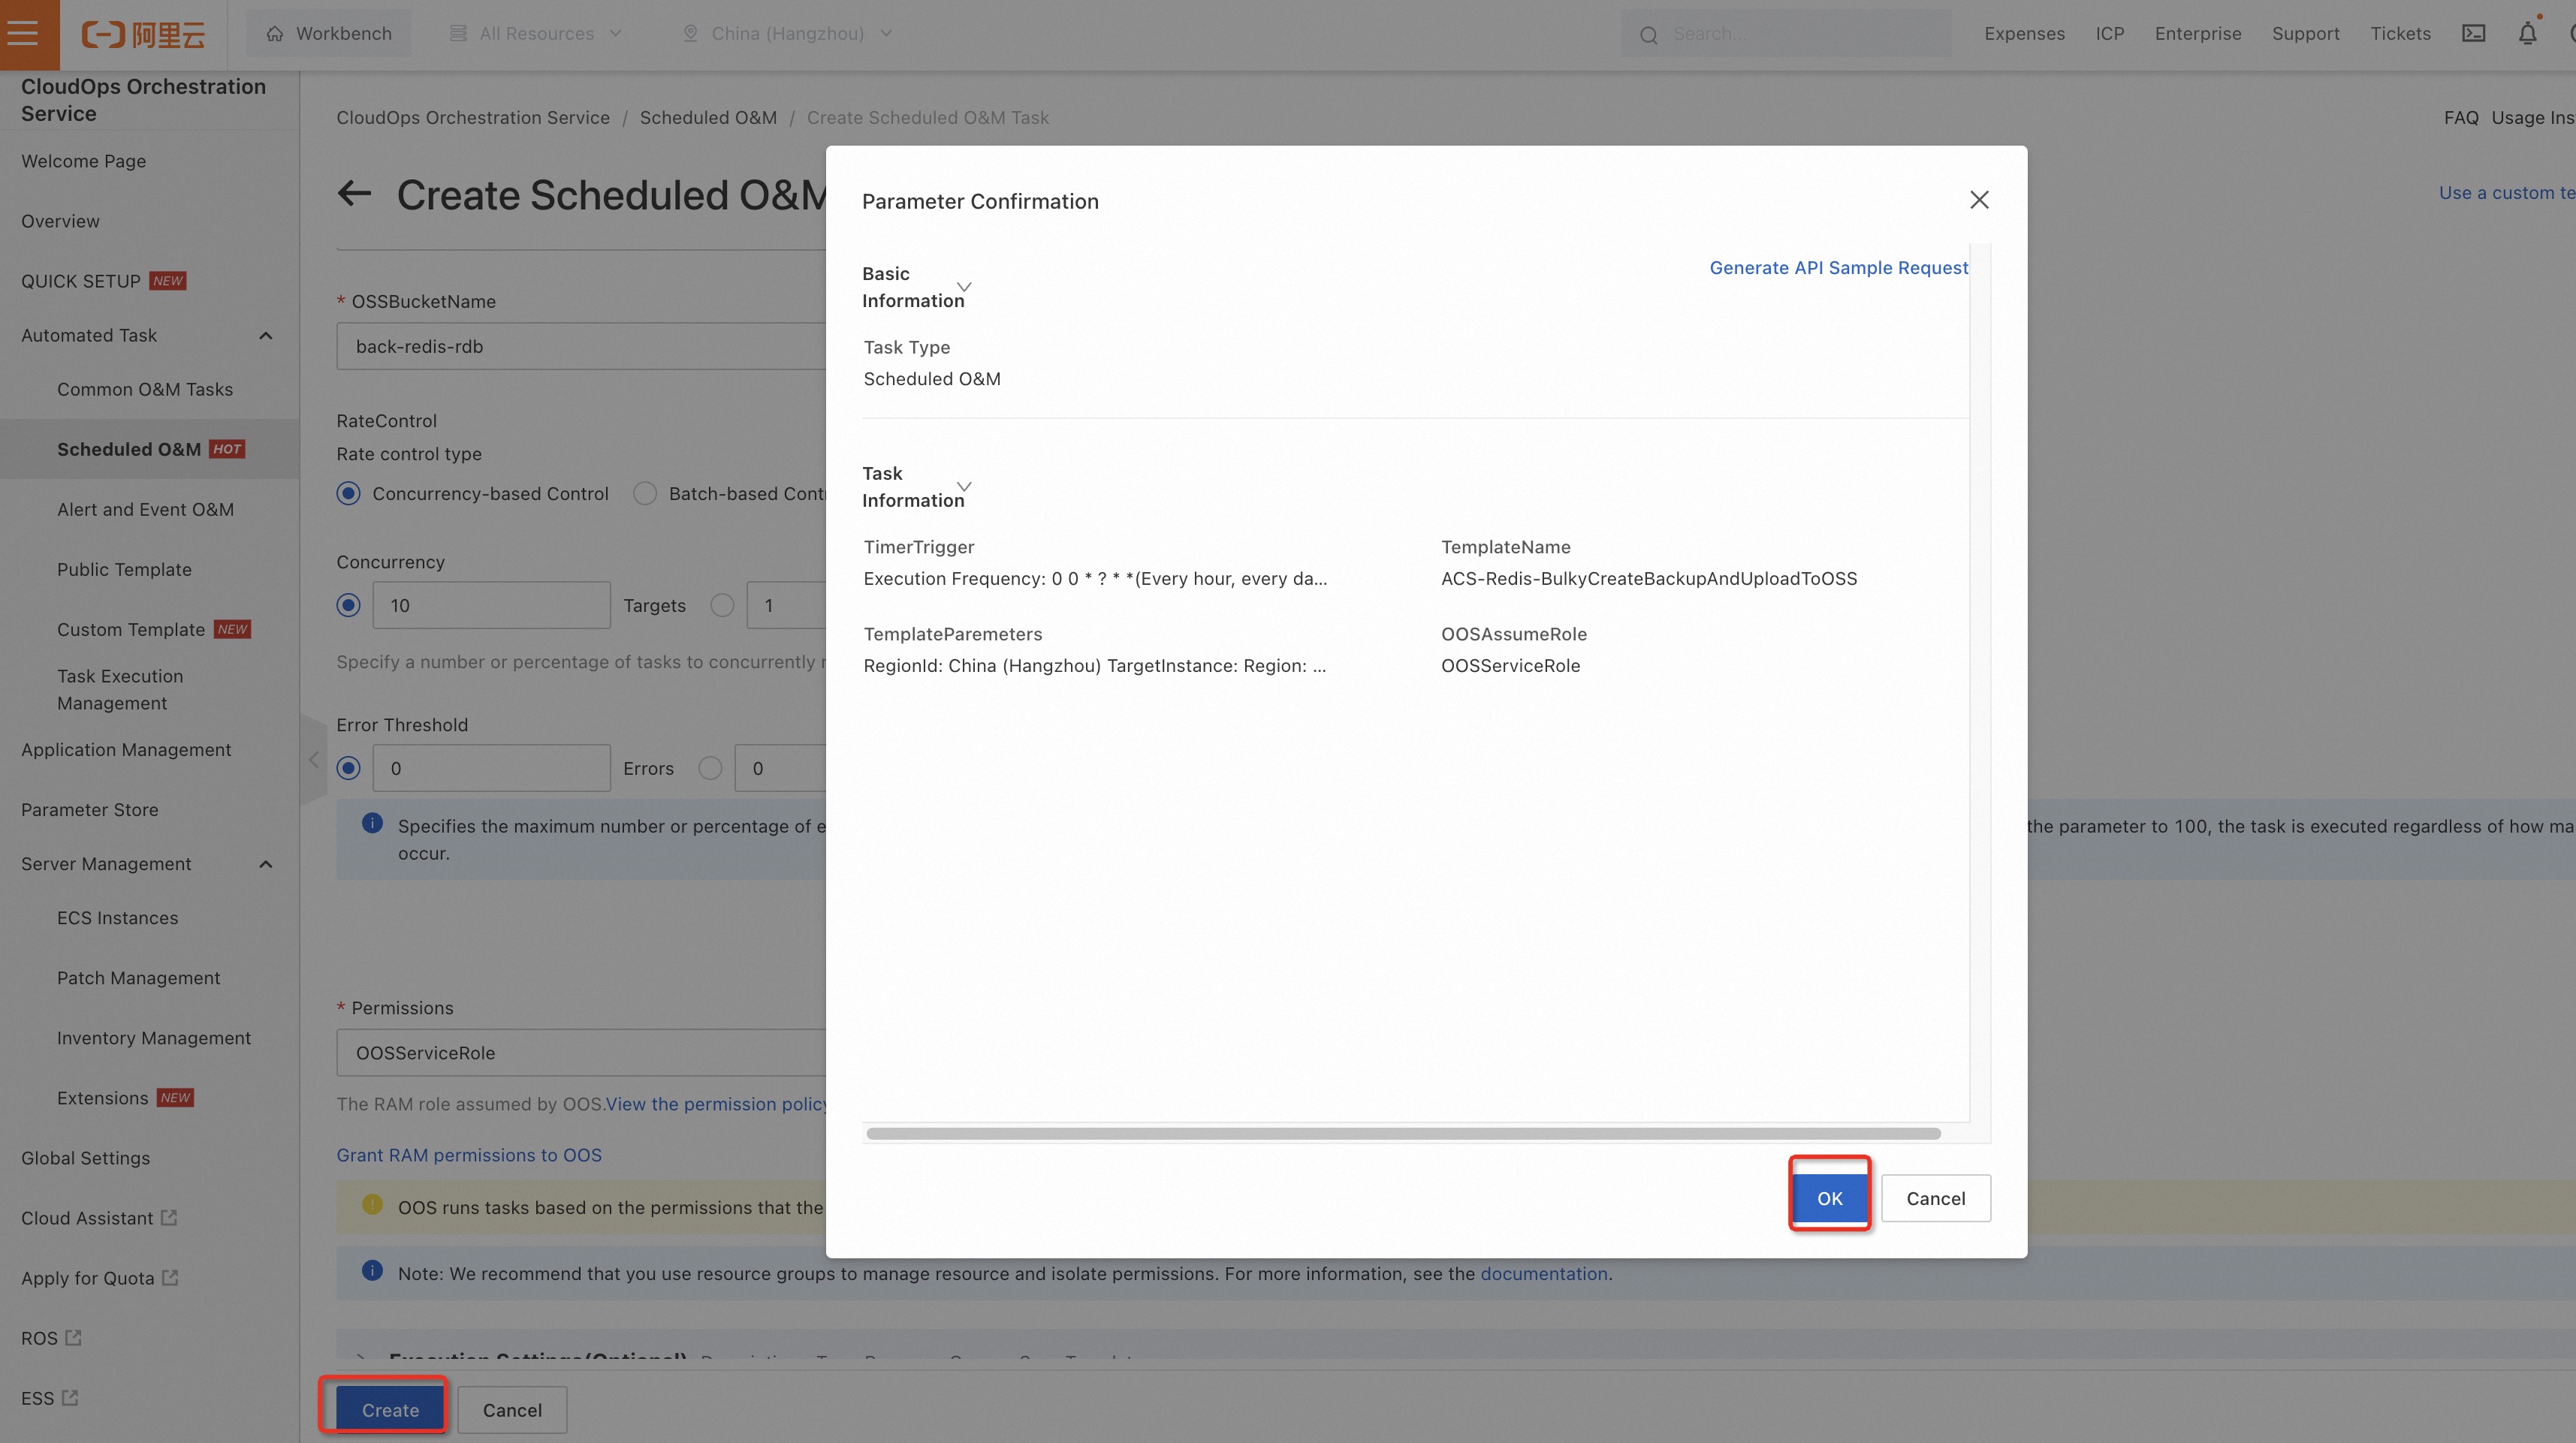
Click Create. In the Parameter Confirmation message, click OK. The O&M task is created.
-
Verify that the task ran successfully.
a. Wait for the task to trigger at its scheduled time, then check the results.
b. Alternatively, open the task details page, click Trigger in the upper-right corner, and then view the results immediately.
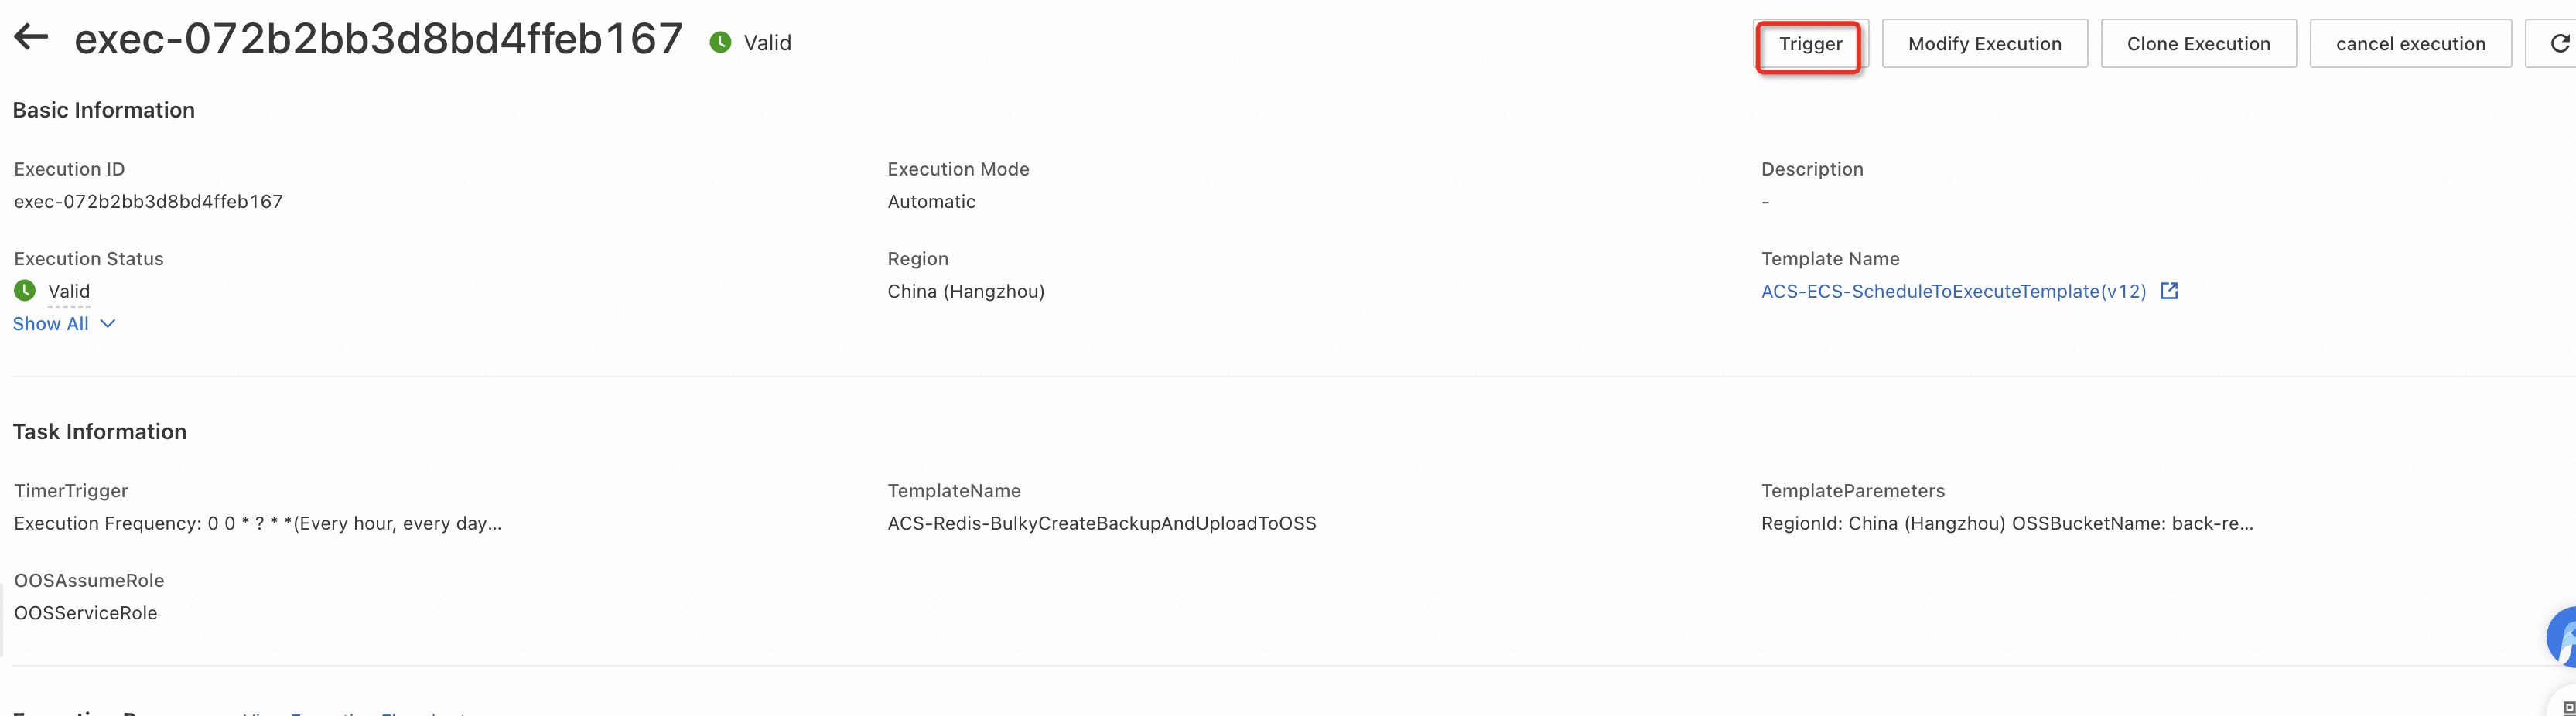
After the task is triggered, check the run logs to monitor progress.

-
View the backup files stored in OSS.
Wait for the execution to reach the Ended state, then click the execution ID.

In the Execution Steps and Results section, click the Child Execution tab. Find the child execution and click its execution ID.

On the Output tab, copy the URL in the Value column.

Open the OSS console using the copied URL to view the backup files.
Backup files follow this naming convention:
Backup_[Instance ID]/[Date in the YYYY-MM-DD format]/[OOS backup task ID]/[Backup file name].rdbNon-cluster instances produce one RDB file per backup.
Cluster instances produce one RDB file per shard. For example, a cluster with eight shards produces eight RDB files per backup.
-
Backup files are not deleted automatically. Retain or delete them based on your business requirements.

Appendix
Execution flowchart
The following figure shows the entire execution process.

The following figure shows the process of creating backup files for Tair (Redis® OSS-Compatible) instances and uploading them to OSS.
Template
The following sample code shows the content of the ACS-Redis-BulkyCreateBackupAndUploadToOSS template used in this example:
FormatVersion: OOS-2019-06-01
Description:
  en: Create Redis backups in batches and upload them to OSS. Backing up redis and using fc to upload the backup to OSS may incur charges. For billing details, please refer to <a href='https://www.alibabacloud.com/help/en/redis/user-guide/automatic-or-manual-backup'>Redis Backup Fee Instructions</a> and <a href='https://www.alibabacloud.com/help/en/functioncompute/fc-2-0/product-overview/billing-overview'>Function calculation billing instructions</a>

  name-en: ACS-Redis-BulkyCreateBackupAndUploadToOSS

Parameters:
  regionId:
    Label:
      en: RegionId

    Type: String
    AssociationProperty: RegionId
    Default: '{{ACS::RegionId}}'
  targets:
    Type: Json
    Label:
      en: TargetInstance

    AssociationProperty: Targets
    AssociationPropertyMetadata:
      ResourceType: ALIYUN::Redis::Instance
      RegionId: regionId
  OSSRegionId:
    Label:
      en: OSSRegionId

    Type: String
    AssociationProperty: RegionId
  OSSBucketName:
    Label:
      en: OSSBucketName

    Type: String
    AssociationProperty: ALIYUN::OSS::Bucket::BucketName
    AssociationPropertyMetadata:
      RegionId: ${OSSRegionId}
  rateControl:
    Label:
      en: RateControl

    Type: Json
    AssociationProperty: RateControl
    Default:
      Mode: Concurrency
      MaxErrors: 0
      Concurrency: 10
  OOSAssumeRole:
    Label:
      en: OOSAssumeRole

    Type: String
    Default: ''
RamRole: '{{ OOSAssumeRole }}'
Tasks:
  - Name: GetInstance
    Description:
      en: Get the redis instances

    Action: ACS::SelectTargets
    Properties:
      ResourceType: ALIYUN::Redis::Instance
      RegionId: '{{ regionId }}'
      Filters:
        - '{{ targets }}'
    Outputs:
      InstanceIds:
        Type: List
        ValueSelector: Instances.Instance[].InstanceId
  - Name: CreateBackupAndUploadToOSS
    Action: ACS::Redis::CreateBackupAndUploadToOSS
    Description:
      en: Create backup and upload to OSS

    Properties:
      regionId: '{{ regionId }}'
      instanceId: '{{ ACS::TaskLoopItem }}'
      OSSRegionId: '{{ OSSRegionId }}'
      OSSBucketName: '{{ OSSBucketName }}'
    Loop:
      RateControl: '{{ rateControl }}'
      Items: '{{ GetInstance.InstanceIds }}'
      Outputs:
        OSSObjectURLs:
          AggregateType: Fn::ListJoin
          AggregateField: OSSObjectURL
    Outputs:
      OSSObjectURL:
        Type: String
        ValueSelector: .OSSObjectURL + "{{ACS::ExecutionId}}/"  | split(".t0") | .[0]
Outputs:
  OSSObjectURLs:
    Type: List
    Value: '{{ CreateBackupAndUploadToOSS.OSSObjectURLs }}'
The following sample code shows the content of Action: ACS::Redis::CreateBackupAndUploadToOSS:
FormatVersion: OOS-2019-06-01
Description:
  en: Create redis backup and upload to OSS

  name-en: ACS::Redis::CreateBackupAndUploadToOSS

Parameters:
  regionId:
    Label:
      en: RegionId

    Type: String
    AssociationProperty: RegionId
  instanceId:
    Label:
      en: InstanceId

    Type: String
    AssociationProperty: ALIYUN::Redis::Instance::InstanceId
    AssociationPropertyMetadata:
      RegionId: ${regionId}
  OSSRegionId:
    Label:
      en: OSSRegionId

    Type: String
    AssociationProperty: RegionId
  OSSBucketName:
    Label:
      en: OSSBucketName

    Type: String
    AssociationProperty: ALIYUN::OSS::Bucket::BucketName
    AssociationPropertyMetadata:
      RegionId: ${OSSRegionId}
    Default: ''
Tasks:
  - Name: CreateBackup
    Action: ACS::ExecuteApi
    Description:
      en: Create backup

    Properties:
      Service: r-kvstore
      API: CreateBackup
      Parameters:
        RegionId: '{{ regionId }}'
        InstanceId: '{{ instanceId }}'
    Outputs:
      BackupJobID:
        Type: String
        ValueSelector: .BackupJobID
  - Name: WaitForBackupCreated
    Action: ACS::WaitFor
    Description:
      en: Wait for backup created

    Retries: 30
    DelayType: Exponential
    Delay: 2
    BackOff: 2
    Properties:
      Service: r-kvstore
      API: DescribeBackupTasks
      Parameters:
        RegionId: '{{ regionId }}'
        InstanceId: '{{ instanceId }}'
        BackupJobId: '{{ CreateBackup.BackupJobID }}'
      DesiredValues:
        - Finished
      NotDesiredValues: []
      StopRetryValues: []
      PropertySelector: .BackupJobs[].BackupProgressStatus
  - Name: GetBackupDownloadUrl
    Action: ACS::ExecuteApi
    Description:
      en: Get backup download url

    Properties:
      Service: r-kvstore
      API: DescribeBackups
      Parameters:
        RegionId: '{{ regionId }}'
        InstanceId: '{{ instanceId }}'
        BackupJobId: '{{ CreateBackup.BackupJobID }}'
        StartTime:
          Fn::FormatUTCTime:
            - Fn::AddHour:
                - '{{ ACS::CurrentUTCTime }}'
                - -1
            - '%Y-%m-%dT%H:%MZ'
        EndTime:
          Fn::FormatUTCTime:
            - '{{ ACS::CurrentUTCTime }}'
            - '%Y-%m-%dT%H:%MZ'
    Outputs:
      BackupDownloadURL:
        Type: List
        ValueSelector: .Backups.Backup[].BackupDownloadURL
  - Name: UploadBackupToOSS
    Action: ACS::FC::ExecuteScript
    Description:
      en: Upload backup to OSS

    Properties:
      runtime: python3.10
      handler: index.handler
      role: acs:ram::{{ACS::AccountId}}:role/AliyunFcDefaultRole
      script: |-
        import oss2
        import requests

        def handler(event, context):
          auth = oss2.StsAuth(context.credentials.access_key_id, context.credentials.access_key_secret, context.credentials.security_token)
          endpoint = 'https://oss-{{OSSRegionId}}.aliyuncs.com'
          bucket = oss2.Bucket(auth, endpoint, '{{OSSBucketName}}')
          unique_identifier = '{{ACS::TaskLoopItem}}'.split('?')[0].split('/')[-1]
          execution_id = '{{ACS::ExecutionId}}'.split('.')[0]
          input = requests.get('{{ACS::TaskLoopItem}}')
          bucket.put_object(f'Backup_{{InstanceId}}/{{ACS::CurrentDate}}/{execution_id}/{unique_identifier}', input)
    Loop:
      Items: '{{ GetBackupDownloadUrl.BackupDownloadURL }}'
      RateControl:
        Mode: Concurrency
        MaxErrors: 0
        Concurrency: 20
Outputs:
  OSSObjectURL:
    Type: String
    Value: https://oss.console.alibabacloud.com/bucket/oss-{{OSSRegionId}}/{{OSSBucketName}}/object?path=Backup_{{InstanceId}}/{{ACS::CurrentDate}}/