Use Network Intelligence Service (NIS) to promptly receive notifications about network anomaly events. Then, troubleshoot instances, paths, and traffic to identify the root causes of anomalies and resolve them precisely.
Scenarios
NIS identifies network anomalies and determines their root causes by troubleshooting instances, paths, and traffic, ensuring business continuity.
Monitor Event Center to Identify Anomalies
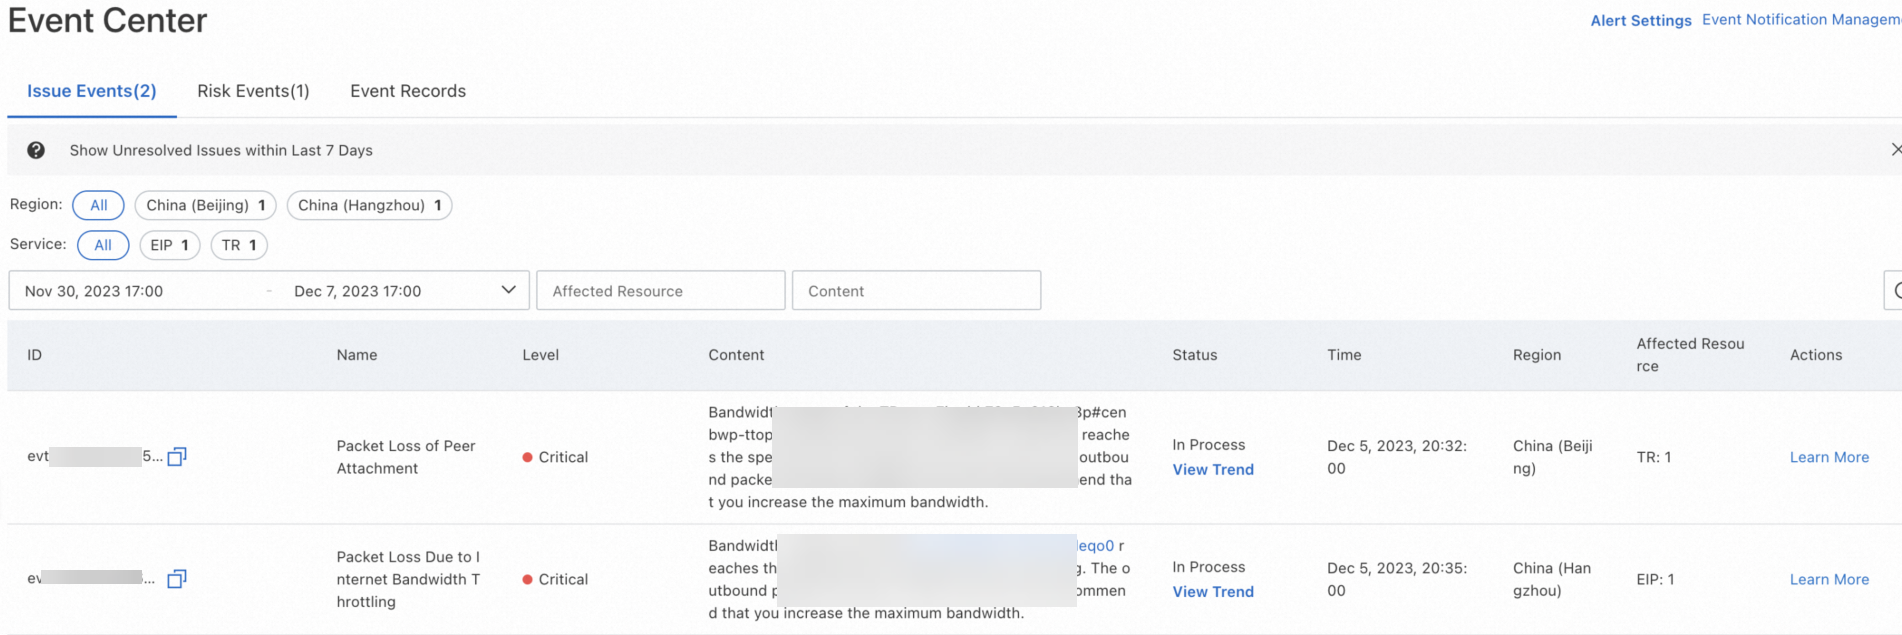
Alibaba Cloud proactively detects network events based on custom event definitions, sends alerts, and displays the results in the console. Monitor the Event Center to receive alerts for network anomalies—such as packet loss caused by threshold breaches—and identify abnormal instances. For more information, see Event Center Overview.
Log on to the NIS console.
In the left-side navigation pane, click Event Center.
On the Event Center page, you can see that TransitRouter instances have failed and the bandwidth of an Elastic IP Address (EIP) has exceeded its limit.
Initiate Real-time Diagnostics for Abnormal Instances
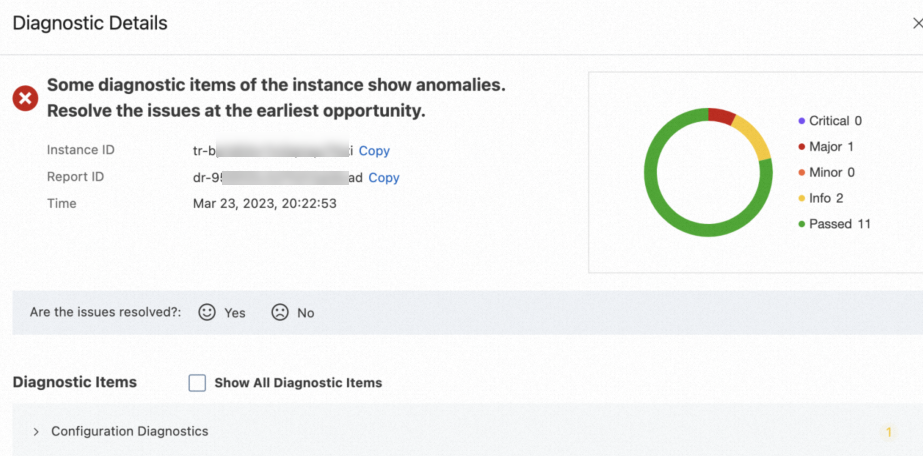
You can initiate diagnostics for abnormal TR instances detected by the Event Center to obtain exception reports and handling suggestions. For more information, see Work with instance diagnostics.
Log on to the NIS console.
In the left-side navigation pane, choose .
On the Instance Diagnostics page, click Diagnose Instance.
In the Instance Health Diagnostics dialog box, configure the instance information, then click Start.
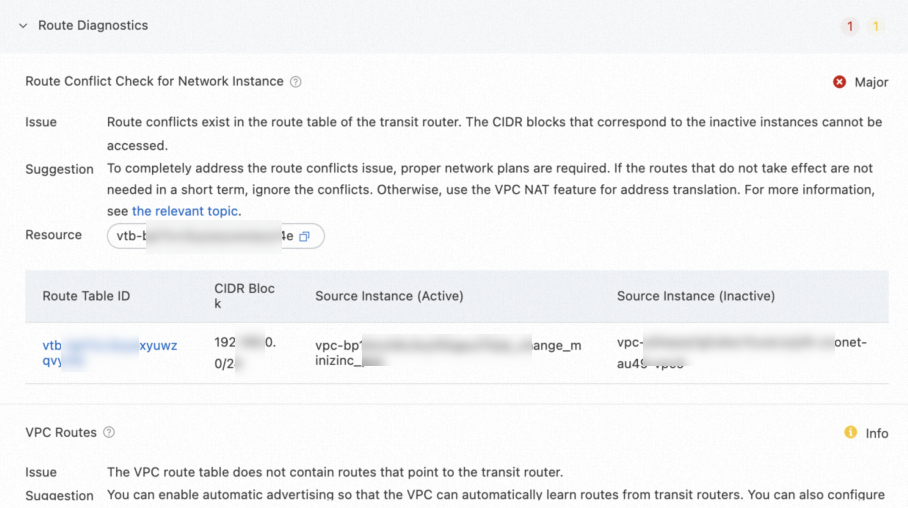
In the Diagnostic Details panel, view the diagnostic progress, result statistics, and specific diagnostic details for the instance.
Troubleshoot Bandwidth Saturation Issues
When business bandwidth utilization remains consistently high, use NIS Traffic Analyzer to analyze traffic composition and quickly identify instances or IP addresses consuming excessive bandwidth.
View the VPC Traffic Chart or TR Traffic Chart, and use TopN Traffic Trend to identify instances or IP addresses consuming high bandwidth.
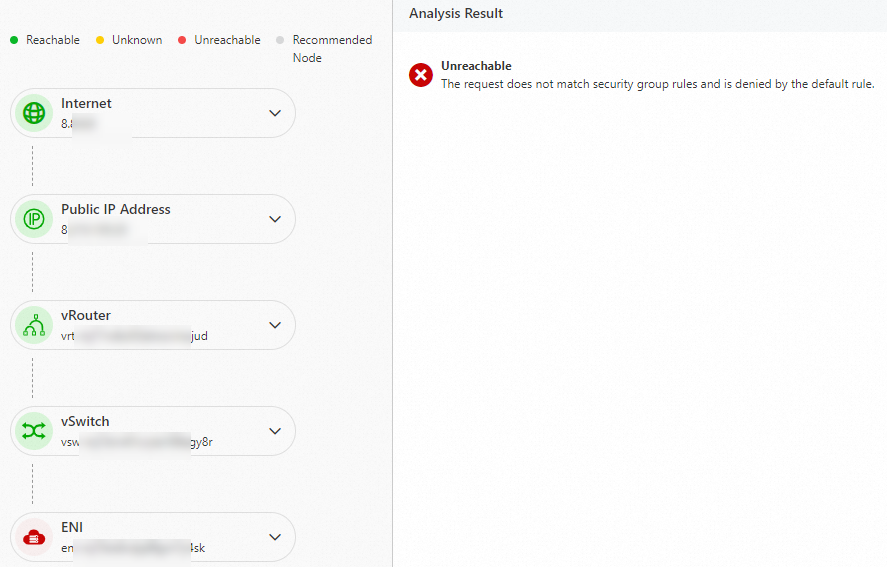
Troubleshoot Network Connectivity Issues
If a network connection fails, use path analysis to identify breakpoints. For more information, see Using Path Analysis.
Log on to the NIS console.
On the Reachability Analyzer page, click Start Analyzing.
On the Start Analysis page, configure the parameter information.
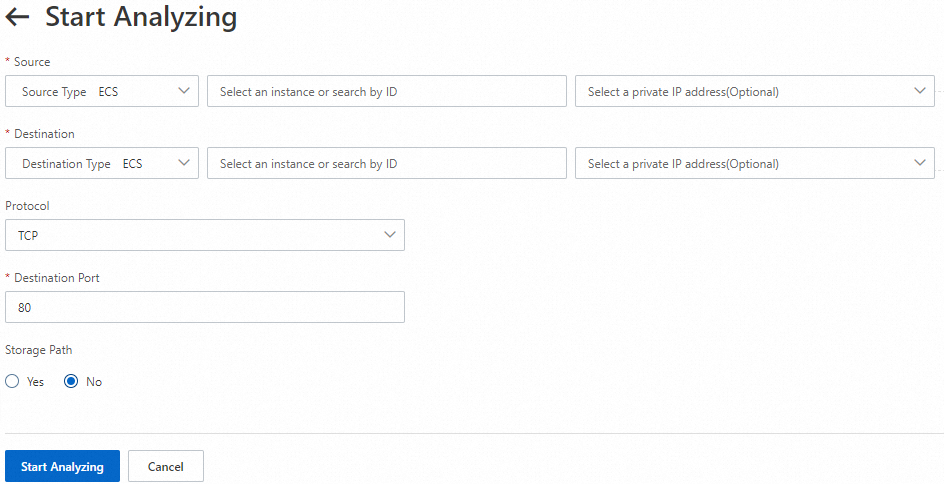
Select whether to save the path. The default value is No.
Click Start Analysis and view the Internet analysis results.