Create an SMB file system in the NAS console and mount it on a Windows Server 2019 ECS instance within a VPC to upload and download data.
Prerequisites
NAS is activated.
To activate NAS, go to the NAS product details page and follow the prompts.
An ECS instance running Windows Server 2019 exists in the China (Hangzhou) region. Create an ECS instance by using the wizard.
Step 1: Create a file system and mount target
Log on to the NAS console.
At the bottom of the Overview page, click Create General-purpose NAS File System.
On the General-purpose NAS (Pay-As-You-Go) page, configure the following parameters. Use default values for other parameters or customize as needed.
For parameter details, see Create a file system.
Parameter
Description
Region
Select China (Hangzhou).
Zone
Select China (Hangzhou) Zone F. The zone must be the same as the zone of the ECS instance.
Protocol Type
Select SMB.
Network Type
Select VPC.
VPC
Select the same VPC as your ECS instance.
vSwitch
Select a vSwitch in the selected VPC.
Click Buy Now and follow the on-screen instructions to complete the purchase.
A mount target is automatically created and associated with the default VPC permission group. You can also Create a permission group or Create a mount target for custom configurations.
Return to the NAS console, select , and click the file system that you just created.
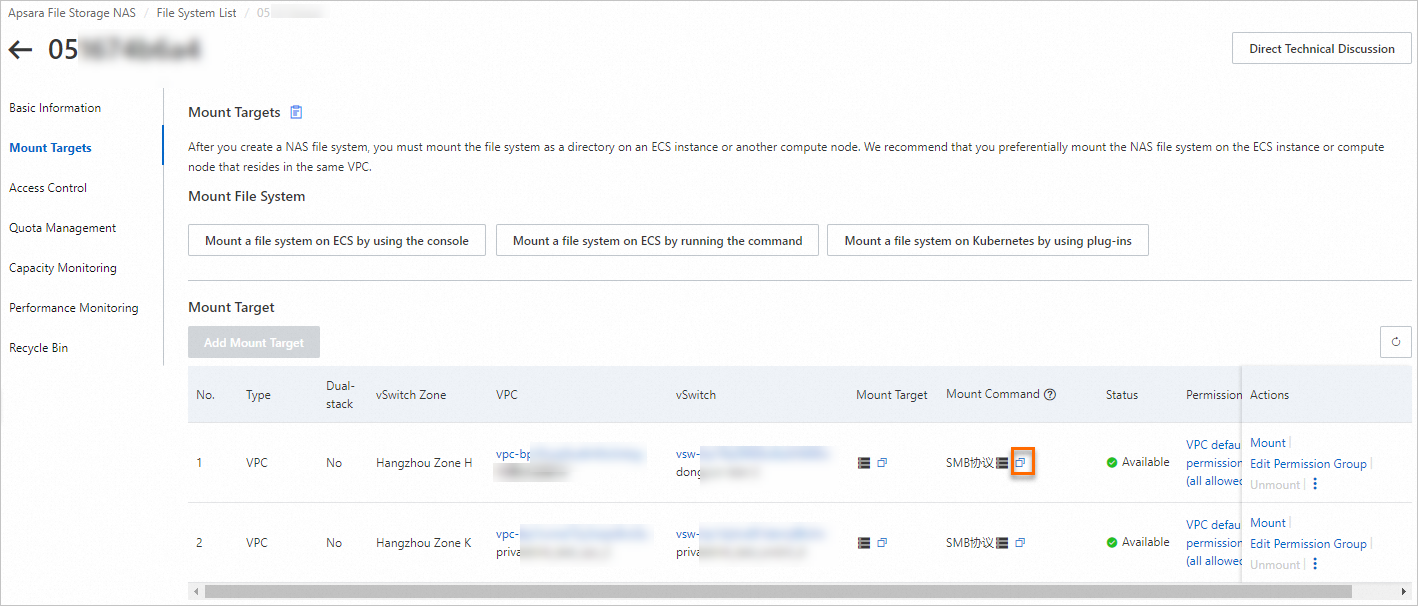
On the file system details page, click Mount Targets.
In the Mount Target list's Mount Command column, copy the mount command for later use.
Step 2: Mount the file system
Connect to the ECS instance. For more information, see Connection methods.
Open Command Prompt and run the following command to allow insecure guest authentication on the client.
REG ADD HKEY_LOCAL_MACHINE\SYSTEM\CurrentControlSet\services\LanmanWorkstation\Parameters /f /v AllowInsecureGuestAuth /t REG_DWORD /d 1Enable the Workstation service.
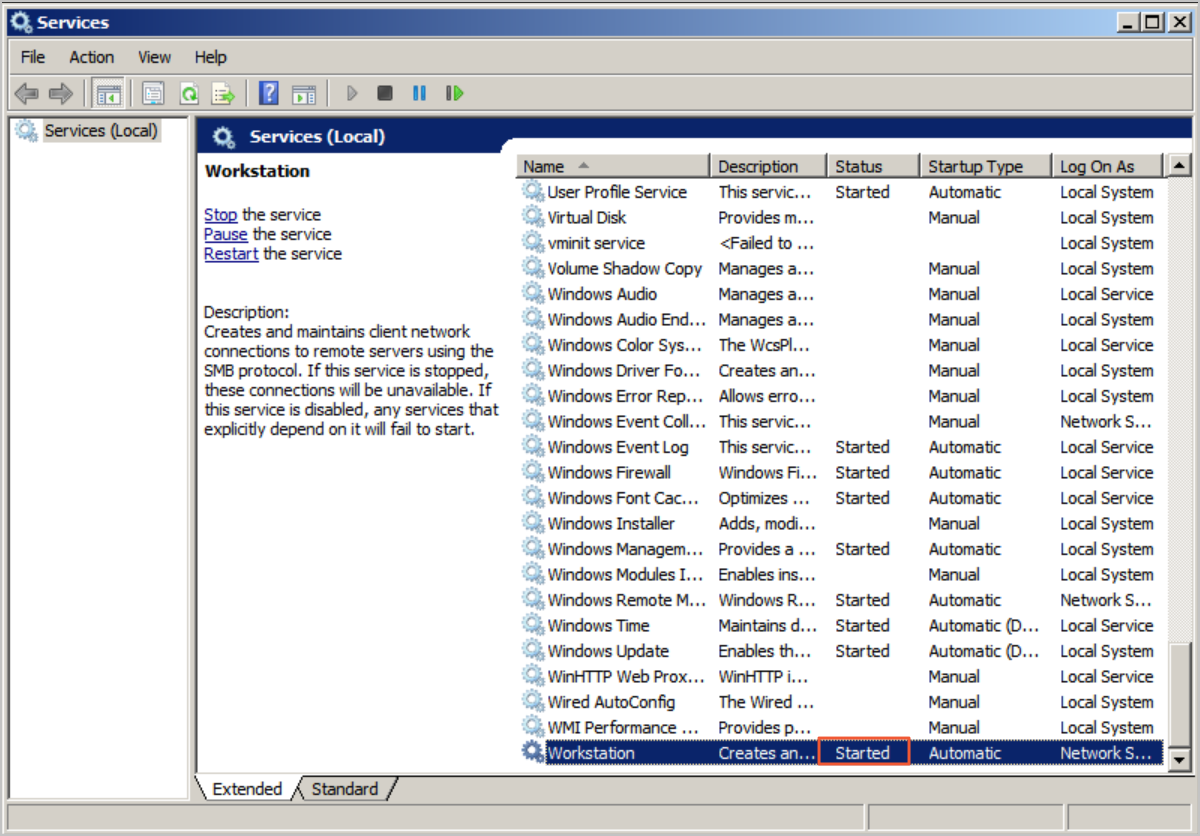
Press
Win+Rto open the Run dialog box, enterservices.msc, and click OK.In Services, find Workstation and set its running status to Running and startup type to Automatic.
Enable the TCP/IP NetBIOS Helper service.
Open Control Panel, select , and then click the network that the host is connected to.
In the Status dialog box, click Properties, and then double-click Internet Protocol Version 4 (TCP/IPv4).
In the Internet Protocol Version 4 (TCP/IPv4) Properties dialog box, click Advanced.
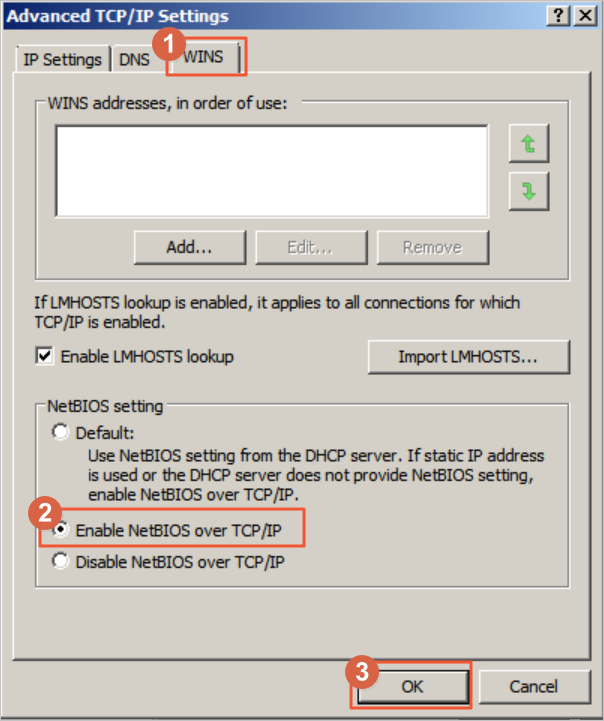
In the Advanced TCP/IP Settings dialog box, click the WINS tab, select Enable NetBIOS over TCP/IP, and click OK.
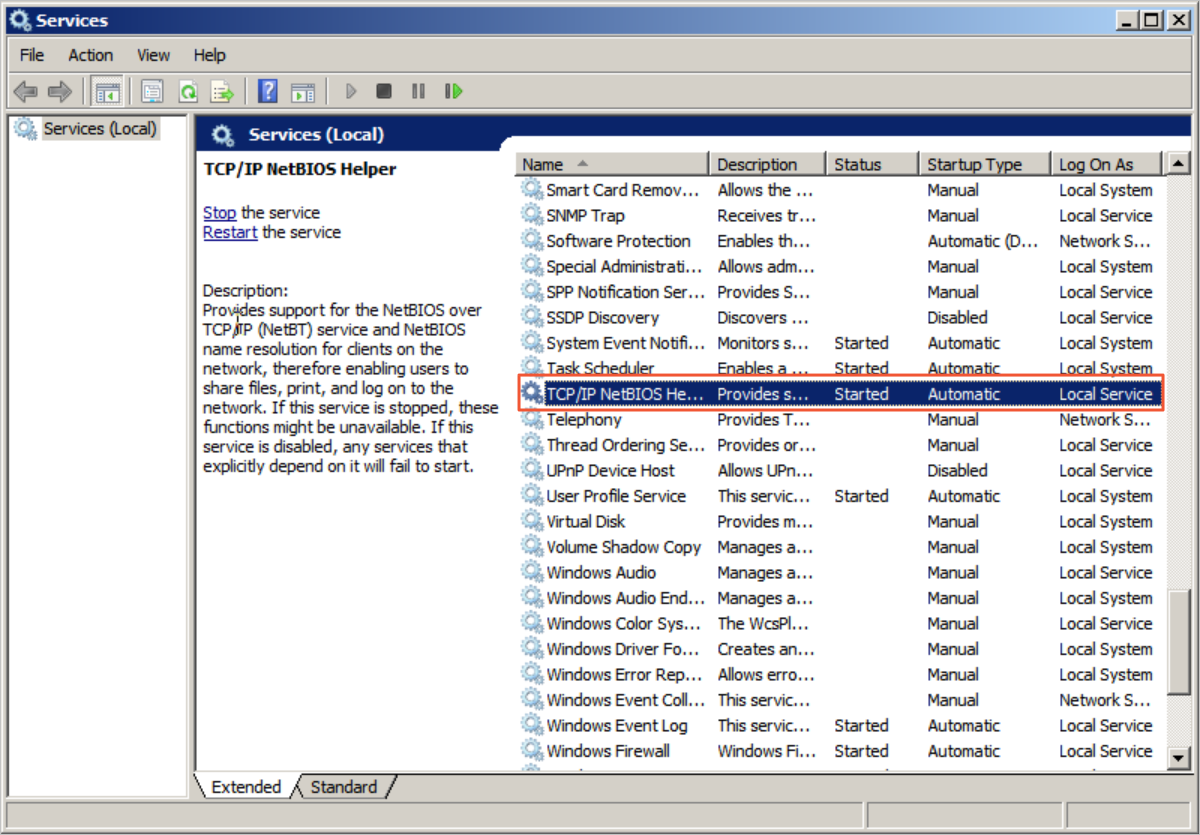
Press
Win+Rto open the Run dialog box, enterservices.msc, and click OK.Find the TCP/IP NetBIOS Helper service, set its status to Running, and set its startup type to Automatic.
Open Command Prompt and run the mount command you copied in Step 1.
NoteThe default drive letter in the mount command is Z. Replace the drive letter as needed.
After the mount command finishes, run the
net usecommand to check the mount result.If the output contains information similar to the following, the file system is mounted.
C:\Users\Administrator>net use
New connections will be remembered.
Status    Local    Remote                    Network
-------------------------------------------------------------------------------
OK        Z:       \\xxx.nas.aliyuncs.com\myshare
                                             Microsoft Windows Network
The command completed successfully.
C:\Users\Administrator>
If the mount fails, troubleshoot the error. For more information, see Troubleshoot file system mount failures.
Step 3: Use the file system
You can access the mounted file system from your ECS instance just like a local directory.
Connect to the ECS instance and run the following commands to access the NAS file system.
Enter the mounted drive, create directories, and add a file. This example uses drive Z. Replace the drive letter as needed.
Z:
mkdir dir1
mkdir dir2
echo 'some file content' > file2
dir
The following output confirms successful access to the NAS SMB file system.
Volume in drive Z is Myshare
Volume Serial Number is D038-9B7F
Directory of Z:\
12/23/2020  09:59 AM    <DIR>          .
12/23/2020  09:59 AM    <DIR>          ..
12/23/2020  09:58 AM    <DIR>          dir1
12/23/2020  09:58 AM    <DIR>          dir2
12/23/2020  09:59 AM                22 file2
               1 File(s)             22 bytes
               4 Dir(s)  11,258,999,068,422,144 bytes free