Switch the primary node of an ApsaraDB for MongoDB instance to co-locate it with your application servers and reduce cross-zone write latency.
Zone placement and write latency
In a replica set or sharded cluster, ApsaraDB for MongoDB designates one node as the primary and the others as secondaries. All write operations go to the primary, so when your Elastic Compute Service (ECS) application servers are in a different zone from the primary node, every write crosses zones — increasing latency and degrading throughput.
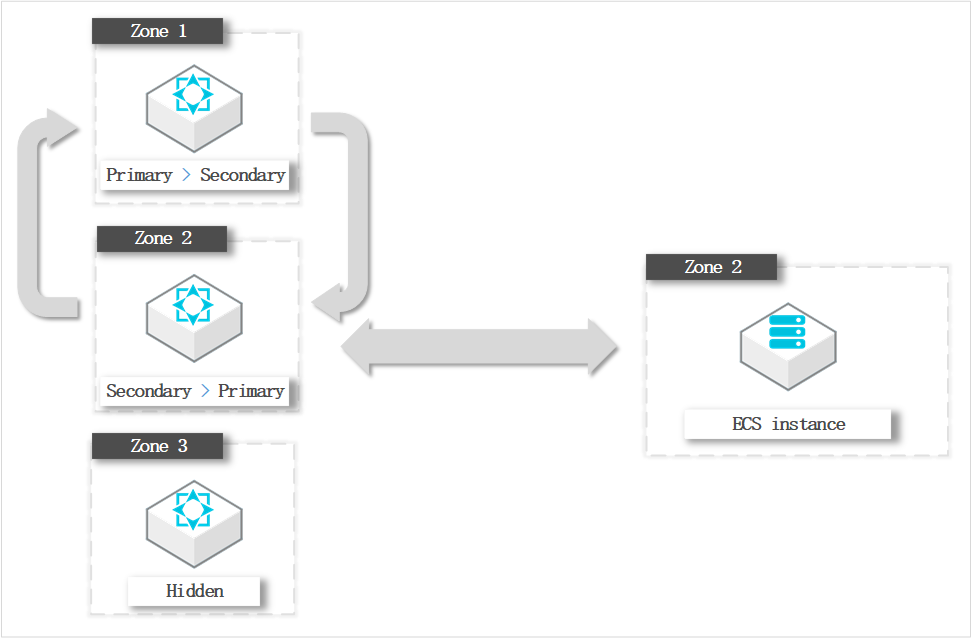
For example, if your ECS instances are in Zone 2 and the primary node is in Zone 1, writes travel cross-zone on every request. Switching the primary to Zone 2 keeps traffic within the same zone.
A switchover changes only node roles — zones and role IDs stay the same. After the switchover, the node that was secondary remains physically in Zone 2; it simply becomes primary.
Prerequisites
Before you begin, make sure that:
Your ApsaraDB for MongoDB instance is a replica set or sharded cluster instance.
Scheduling and limitations
Disconnection during switchover: Each switchover may disconnect the instance for up to 30 seconds. Schedule the operation during off-peak hours and make sure that your application can automatically reconnect to the instance.
Sharded clusters: For sharded cluster instances, you can manage the zone distribution of shard and Configserver nodes only.
Roles only, not zones: After a switchover, node zones and role IDs remain unchanged. Only the primary/secondary designation changes.
Switch roles in the console
Log on to the ApsaraDB for MongoDB console.
In the left-side navigation pane, click Replica Set Instances or Sharded Cluster Instances based on your instance type.
In the upper-left corner of the page, select the resource group and region where the instance is located.
Click the ID of the instance, or click
 in the Actions column and select Manage.
In the left-side navigation pane of the instance details page, click Service Availability.
In the Zone Distribution section, click Switch Role in the upper-left corner.
For sharded cluster instances, go to the Zone Distribution for Shards or Zone Distribution for Configservers section and click Switch Role.
In the Switch Role panel, configure the following parameters.
Parameter Description Role (before) The node role before the switchover. Role (after) The node role after the switchover. Effective At When the switchover runs. Select Effective Immediately to run it now, or Effective Within Maintenance Window to schedule it. If you choose Effective Within Maintenance Window, select the current window or customize one in the Change Maintenance Window drop-down list. Click OK.
Verify the switchover
After the switchover completes, confirm that node roles changed as expected:
On the Service Availability page, check the Zone Distribution section.
Verify that the node in your target zone now shows as the primary, and the former primary shows as a secondary.