This topic describes how to integrate and use Ant Cube Card.
Ant Cube Card is in public preview starting from the mPaaS 10.2.3 baseline version. Currently, it only supports the mPaaS native AAR connection type. For more information about connection types, see Introduction to connection types.
Prerequisites
You have activated and integrated mPaaS.
You have installed the Ant Cube Card AntCubeTool. For more information, see About AntCubeTool.
Procedure
Select a baseline.
Click mPaaS > Native AAR Connection. In the panel that appears, click Start Configuration under Connect/Upgrade Baseline to add the 10.2.3 baseline.
Add the Cube Card and Cube Card-Network Image Loading Library components.
ImportantThe Cube Card-Network Image Loading Library is a sample library that helps you quickly integrate and try out cube cards. Replace it with your own imageLoader before you publish your application. This change reduces the package size, unifies image management, and lets you monitor image exceptions. For more information about setting the network image download Handler, see Client sends notifications to the card.
Initialize the card.
The initialization process differs depending on the baseline version. Follow the steps for your specific version.
For baseline versions 10.2.3 and later, add
MP.init(this);in your Application class to initialize mPaaS. To set initialization parameters, see DPI engine initialization parameters.For baseline versions earlier than 10.2.3, add the following code in your Application class to initialize mPaaS.
public class MainApplication extends Application {

    @Override
    public void onCreate() {
        super.onCreate();
        // Initialize mPaaS
        MP.init(this);
    }
}
In the
AndroidManifest.xmlfile in the App folder, add the following code to ensure that C layer crashes can be scraped.<!-- Required for Ant Cube Card to scrape C layer crashes --> <receiver android:name="com.alipay.mobile.common.logging.process.LogReceiverInToolsProcess" android:enabled="true" android:exported="false" android:process=":tools"> <intent-filter> <action android:name="${applicationId}.monitor.command" /> </intent-filter> </receiver> <receiver android:name="com.alipay.mobile.logmonitor.ClientMonitorWakeupReceiver" android:enabled="true" android:exported="false" android:process=":push"> <intent-filter> <action android:name="android.intent.action.BOOT_COMPLETED" /> <action android:name="${applicationId}.push.action.CHECK" /> <action android:name="${applicationId}.monitor.command" /> </intent-filter> </receiver>
Build the card project.
Initialize the project. In the terminal, run the
act initcommand.Select Cube as the application type and choose the card template (VUE format).
Enter the application name. The name must be a combination of English letters, numbers, and underscores.
Select An extra folder for project source code is needed. This option creates an additional folder with the same name as your application. If you do not select this option, the project is initialized in the current folder.
Build the project. Use the
cdcommand to navigate to the card project directory that you just created. Then, runact buildto build the project. The build output is located in the/dist/folder of your project.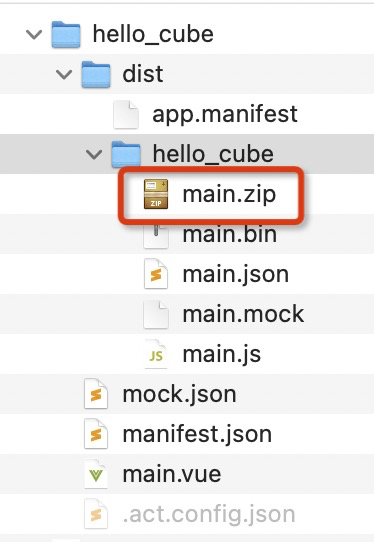
Publish the card.
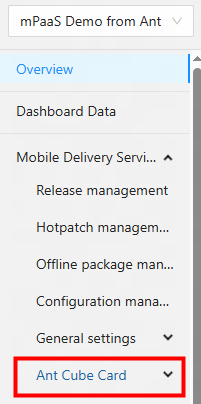
Go to the card console.
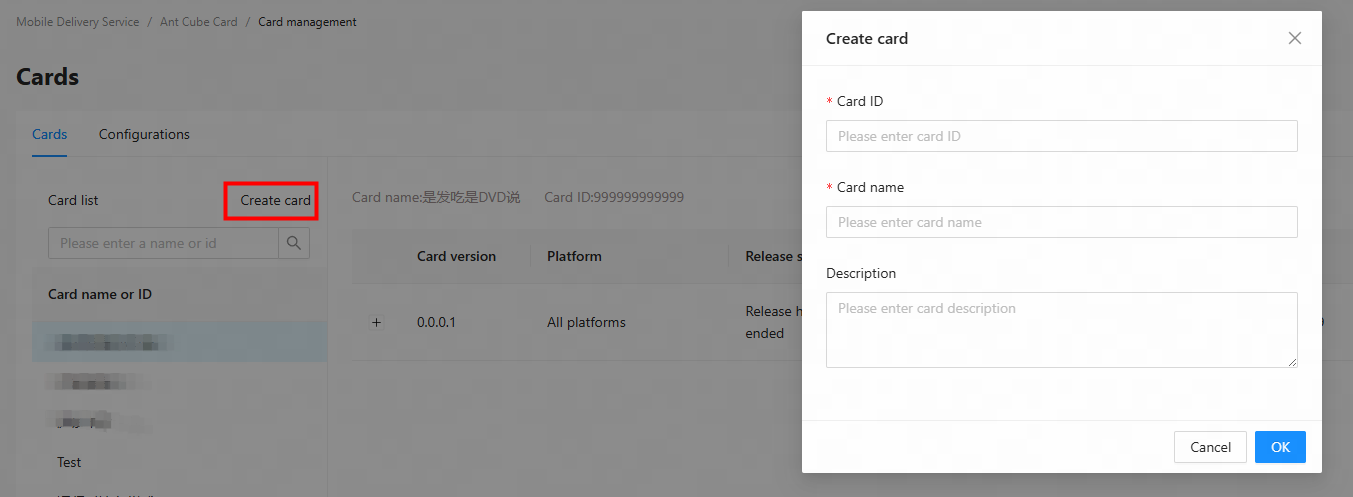
Click Create Card.
Set the card ID and card name. The card ID must be at least 8 characters long and can only contain English letters, numbers, and underscores. The client uses this ID for rendering. The card name can be any string up to 20 characters long.
Add card resources.
Use a 4-digit version number.
Select the
main.zipfile that you just compiled.The Client Scope parameter specifies the range of client versions that can pull this card. To include all client versions, enter
0.0.0.0as the minimum version.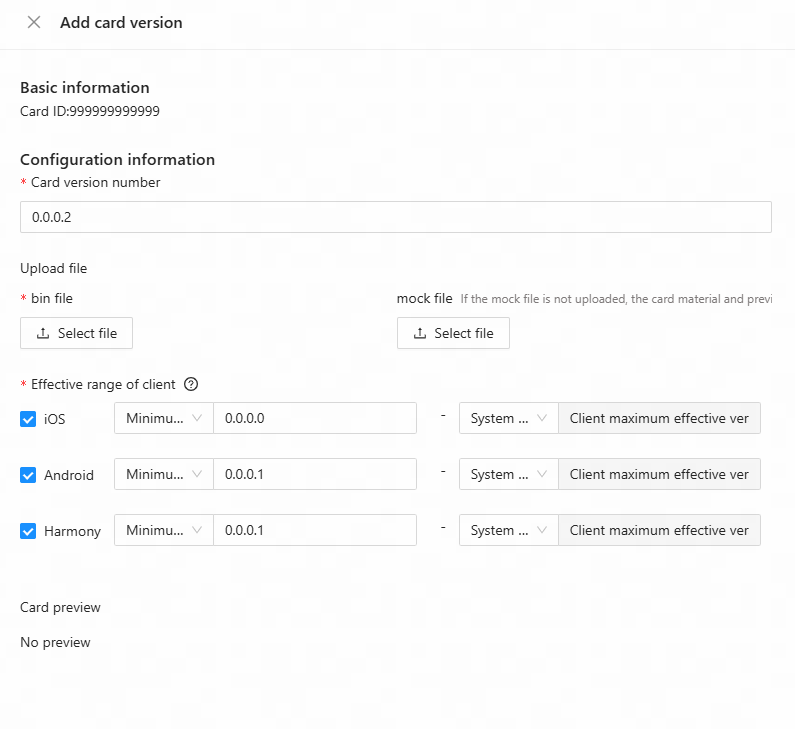
Publish the card.
Click Create a release.

Select Official release.
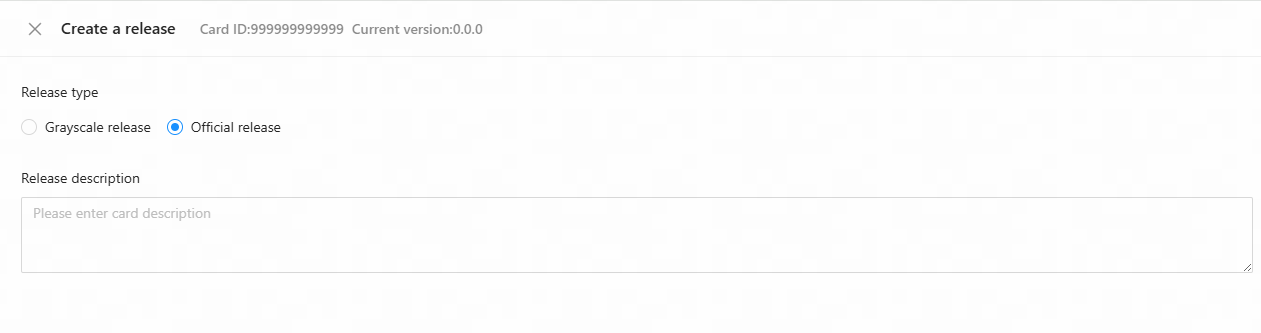
After the card is published, the client can pull it.
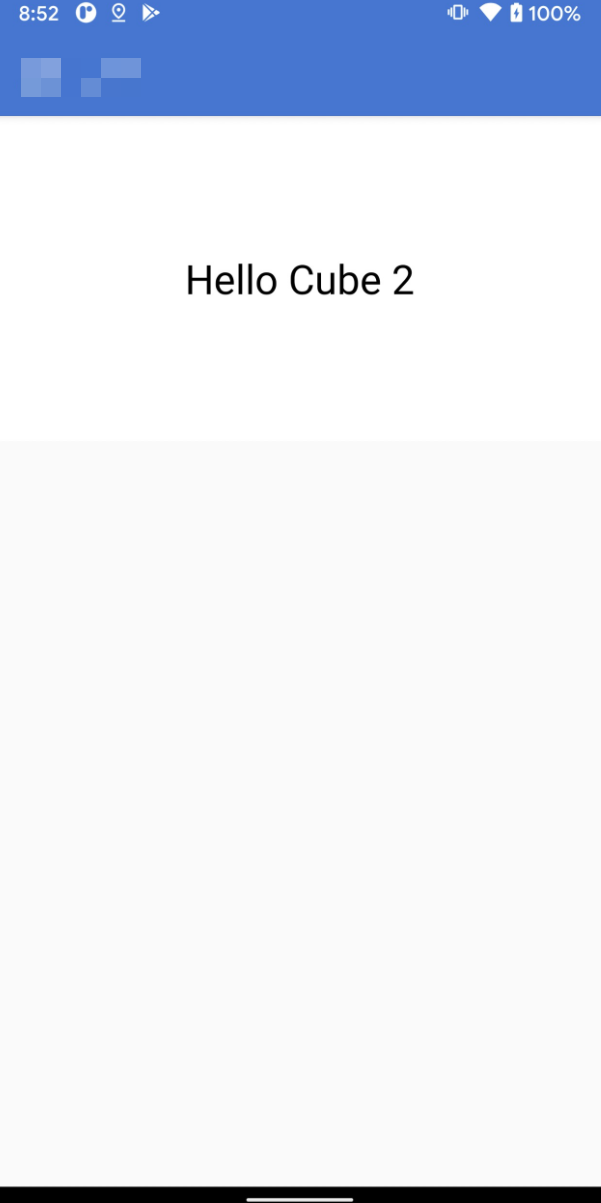
Render the card.
// Create card configuration
CubeCardConfig cardConfig = new CubeCardConfig();
// Card ID created in the console
cardConfig.setTemplateId("hello_cube");
// Card version
cardConfig.setVersion("1.0.0.0");
// Card width, set to screen width here
cardConfig.setWidth(MFSystemInfo.getPortraitScreenWidth());
// Card data (data for rendering the card, usually the content of mock.json)
JSONObject obj = new JSONObject("xxxxx");
cardConfig.setData(obj);
// Create card information
CubeService.instance().getEngine().createCard(cardConfig, new CCardCallback() {
    @Override
    public void onLoaded(final CubeCard crystalCard, CCardType cardType, CubeCardConfig cubeCardConfig, CubeCardResultCode result
        if (resultCode == CubeCardResultCode.CubeCardResultSucc) {
            // Must run on the main thread
            runOnUiThread(new Runnable() {
                @Override
                public void run() {
                    // Create the card View
                    CubeView view = CubeService.instance().getEngine().createView(FastActivity.this);
                    // Add to the outer ViewGroup
                    mWrapperLl.addView(view);
                    // Render the card
                    crystalCard.renderView(view);
                }
            });
        } else {
            MPLogger.info("cube", "fail " + cubeCardConfig.getTemplateId() + " style " + cardType + " error " + resultCode);
        }
    }
});
When the page is destroyed, you must manually revoke the card.
@Override
protected void onDestroy() {
    super.onDestroy();
    if (mCard != null) {
        mCard.recycle();
    }
    int chidrenCount = mWrapperLl.getChildCount();
    for (int i = 0; i < chidrenCount; i++) {
        if (mWrapperLl.getChildAt(i) instanceof CubeView) {
            ((CubeView) mWrapperLl.getChildAt(i)).destroy();
        }
    }
    mWrapperLl.removeAllViews();
}
Preview.