Prerequisites
You have already integrated your project with mPaaS. For more information, see the following:
Add SDK
Choose the appropriate method based on your integration approach.
Use mPaaS Xcode Extension This method is applicable to mPaaS-based integration or existing projects that use mPaaS plug-ins.
Click the Xcode menu item Editor > mPaaS > Edit Project to open the project editing page.
Select Ariver Mini Program, save your changes, and click Edit to complete the process.
Use cocoapods-mPaaS plug-ins This method is applicable to the integration mode that uses CocoaPods based on existing projects.
In your Podfile, specify the baseline as
10.2.3and add the Ariver Mini Program component dependency usingmPaaS_pod "mPaaS_Ariver".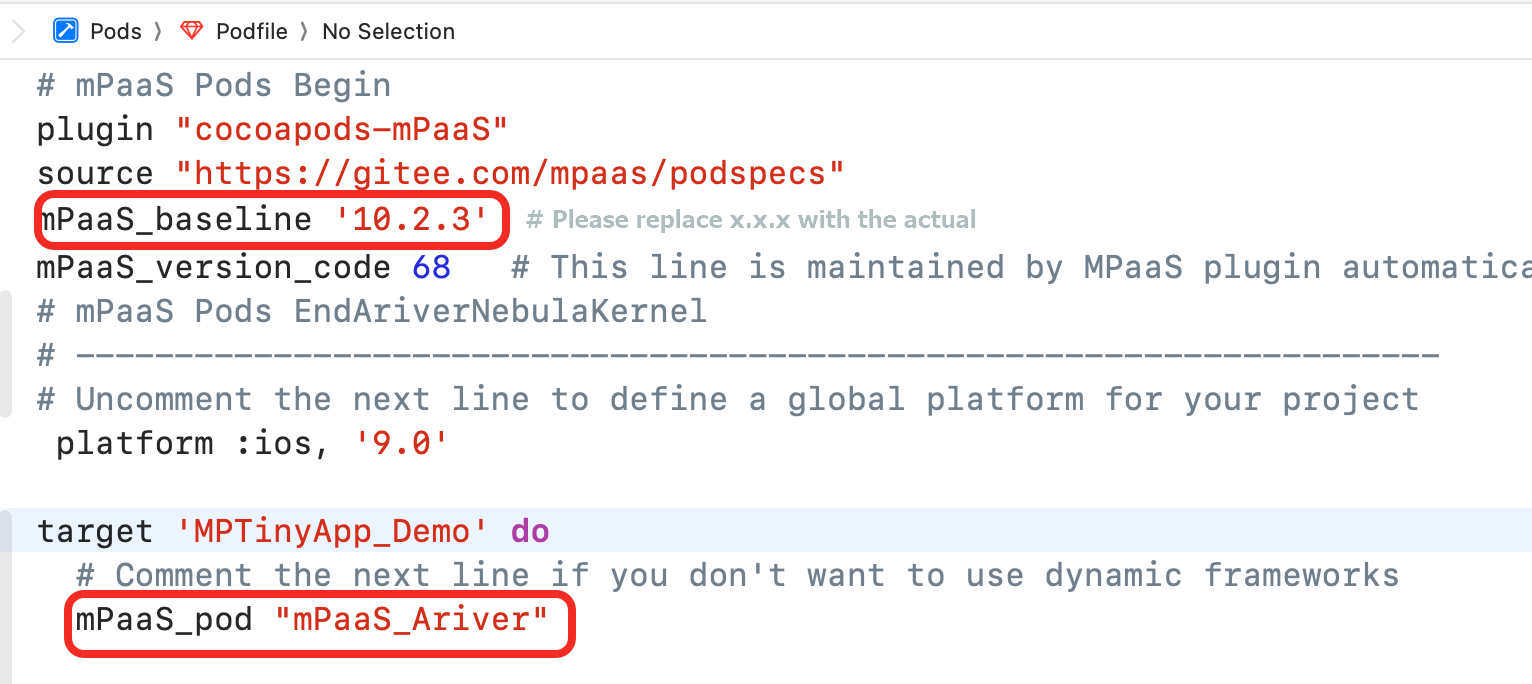
Run the command
pod mpaas update 10.2.3to update the baseline.Run
pod installon the command line to complete the integration.
The following sections use the official Mini Program demo to demonstrate the process, which consists of three main steps:
Initialize configuration
Initialize the mPaaS framework
If your app's lifecycle is not managed by the mPaaS framework and instead uses a custom delegate, as shown in the following figure, you must initialize the mPaaS framework manually.
If the mPaaS framework manages your app's lifecycle, its delegate is set to DFClientDelegate. In this case, manual initialization is not required.

After you create your app's
windowandnavigationController, call the following method to initialize the mPaaS framework.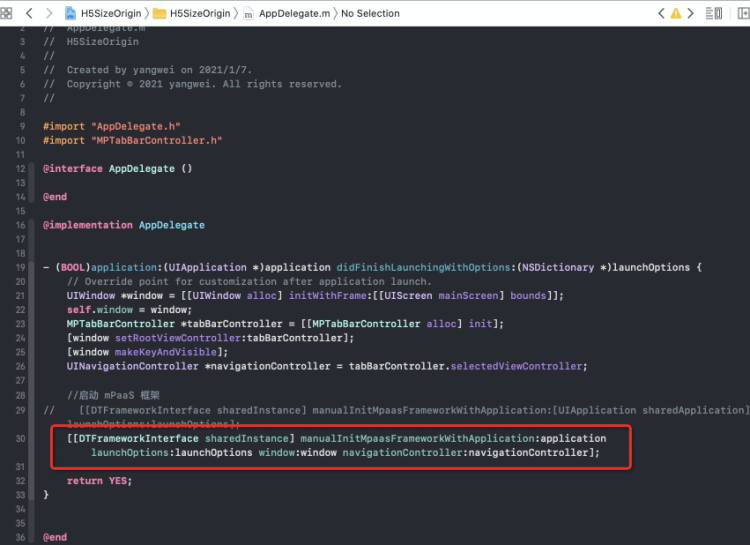
In the
categoryofDTFrameworkInterface, override theshouldInheritDFNavigationControllermethod and returnNOso that your navigation controller does not inherit fromDFNavigationController.
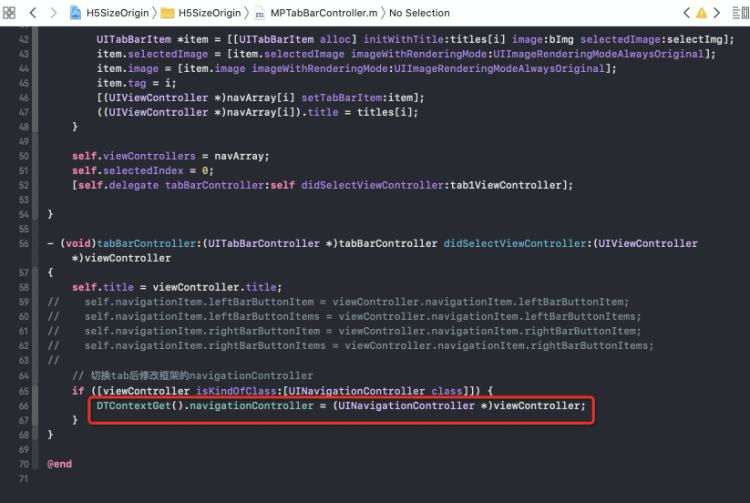
If your app uses multiple navigation controllers and you need to open Mini Programs in different ones, you must reset the container's navigation controller after each switch.
Initialize the container
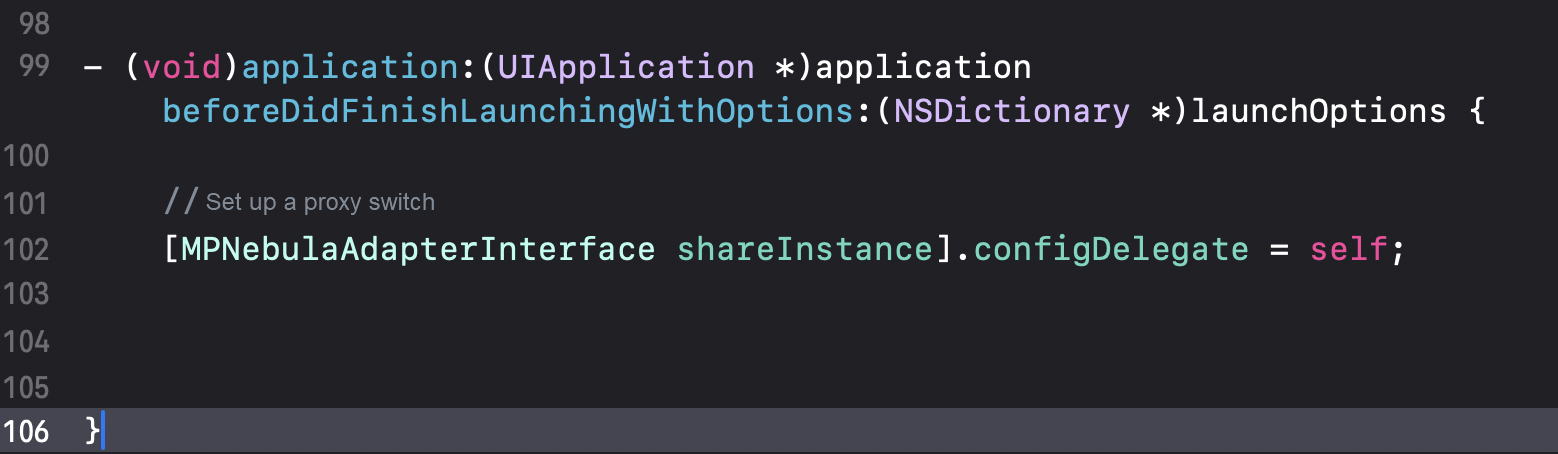
To ensure that a Mini Program can be launched correctly, you must initialize the container by calling the SDK interface after your app finishes launching. This initialization must be performed in the DTFrameworkInterface method - (void)application:(UIApplication *)application beforeDidFinishLaunchingWithOptions:(NSDictionary *)launchOptions.
- (void)application:(UIApplication *)application beforeDidFinishLaunchingWithOptions:(NSDictionary *)launchOptions
{
    // Initialize the container
    [MPNebulaAdapterInterface initNebula];
}
Notes
If you use the mPaaS framework's managed mode with a privacy alert dialog in the 10.2.3 baseline and set the switch configuration delegate using [MPNebulaAdapterInterface shareInstance].configDelegate = self;, you must configure the switch delegate in both of the following methods. If you do not use a switch delegate, you can skip this step.

Publish the Mini Program
Before you can launch a Mini Program, you must publish it in the mPaaS console. To do so, follow these steps:
Log on to the mPaaS console, select your target application, and then choose Mini Program > Release from the navigation pane on the left.
Configure a virtual domain name. If this is your first time configuring a virtual domain name, go to Mini Program > Mini Program Release > Configuration Management to configure it. Always use a domain that your company controls, such as
example.com, to prevent hijacking by third parties.Create a Mini Program. In the mPaaS console, do the following:
In the navigation pane on the left, choose Mini Program > Mini Program Publishing.
In the left-side navigation pane, choose Mini Program > Mini Program Release.
On the page that appears, click Create.
In the Create Mini Program dialog box, enter the ID and name of the mini program and click OK. The mini program ID is any 16-bit number, for example,
2018080616290001.In the mini app list, find the new mini app and click Add.
In the Basic Information section, complete the following settings:
Version: Enter the Mini Program package version number, such as
1.0.0.0.Client Range: Select the minimum and maximum iOS client versions that are compatible with this Mini Program. The Mini Program can be launched only on clients within this version range. To allow all client versions to launch the Mini Program, set the minimum version to
0.0.0and leave the maximum version field empty.NoteThis version number refers to the version of your client application. You can find this value in the
Product Versionfield of your project'sInfo.plistfile.
Icon: Click Select File to upload an icon for the Mini Program package. You must upload an icon when you create a Mini Program for the first time. The following figure shows an example icon:

Upload the Mini Program resource file in
.zipformat. You can directly use the mPaaS sample Mini Program (download here).NoteBefore you upload the file, you must rename both the
.zipfile and the folder inside it to match your 16-digit Mini Program ID.
In the Configuration Information section, complete the following settings:
Main Entry URL: Required. This is the homepage of the Mini Program. The URL must be in the format
/index.html#xxx/xxx/xxx/xxx, where the path after the#symbol matches the first value in thepagesarray of the Mini Program'sapp.jsonfile. For the mPaaS sample Mini Program, the main entry URL is/index.html#page/tabBar/component/index, as shown in the following figure.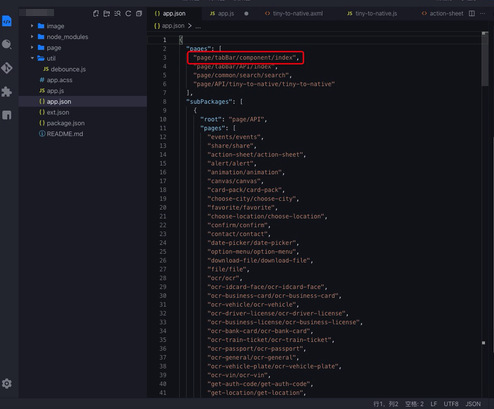
Keep all other settings at their default values.
Select the Confirm that the preceding information is accurate and do not modify it after you submit it check box.
Click Submit.
Publish the Mini Program. In the mPaaS console, perform the following steps:
In the left-side navigation pane, choose Mini Program > Mini Program Release > Official Mini Program Package Management.
On the Small Packages page, select the small package and version that you want to release, and click Create Release.
In the Create Release panel, configure the following settings:
Release Type: Select Official.
Release Description: Optional.
Click OK to create the release.
Launch the Mini Program
After you complete the preceding steps, you can launch the sample Mini Program in your iOS project using the following code:
[MPNebulaAdapterInterface startTinyAppWithId:@"2018080616290001" params:nil];The 2018080616290001 in the preceding code is a sample Mini Program ID. You must replace it with the ID of your Mini Program.