This section demonstrates the following operations:
Set virtual domain name in console
Log in to the mPaaS console, enter the target mPaaS App, and then click Mini Program > Release Mini Program menu from the left navigation pane.
On the Manage configuration tab page, set the virtual domain name in the Manage domain area. In principle, you need to use a second-level domain name managed by your company.
Click Save to complete the virtual domain name configuration.
Create a mini program in console
In the mPaaS console, click Mini Program > Release Mini Program menu from the left navigation pane.
On the Manage mini program packages page, click Create Mini Program App.
In the Create mini program window, enter mini program ID and name, and click OK. Then, the App is created and shown in the left mini program package list.
The mini program ID is a 16-digit number, for example 2020080120200801.
Upload the mini program code package here by clicking Add here.
Develop the mini program with IDE
The procedure of developing the mini program with IDE falls into four steps:
Create a mini program
Download the Mini Program development tool (IDE).
Create a mini program. Open the IDE, choose Mini Program on the left side menu, and then click the plus icon on the right to add a new project.
In the Select Target Platform step, choose mPaaS and click Next.
In the Select Template step, choose the mPaaS sample template and click Next.
Enter the project name, specify the project path, and click Complete to complete the Mini Program project creation.
Download configuration file
It is required to upload the IDE configuration file of the corresponding mini program downloaded from the mPaaS console every time you created a new environment.
Log in to the mPaaS console, go to the Mini Program > Release Mini Program > Manage configuration page, and click Download configuration file in the Manage IDE configuration area.
NoteThe IDE configuration file is different from the configuration file of mPaaS application.
In the pop-up Download configuration file window, enter the Dynamic password which is the login password to Log in to the Mini Program IDE), and click OK to download the configuration file. Please keep the password in mind.
NoteThe downloaded configuration file is named config.json by default.
Log in to Mini Program IDE
In the Mini Program IDE, click the upper-right Log in.
In the pop-up New login environment window, enter the environment name “mPaaSminiprogram”, upload the Mini Program IDE configuration file (
config.jsonfile) downloaded from the mPaaS console, and then click OK.In the login window, enter the account and password to log in.
The account refers to the username for logging in to the mPaaS console.
The password refers to the dynamic password you set when downloading the IDE configuration file.
Develop mini program
After you log in to the IDE, click Associated mini program, and select the mini program previously created in the mPaaS console from the drop-down menu.
Click the dependency management icon on the left pane, and add the dependency
mini-ali-ui.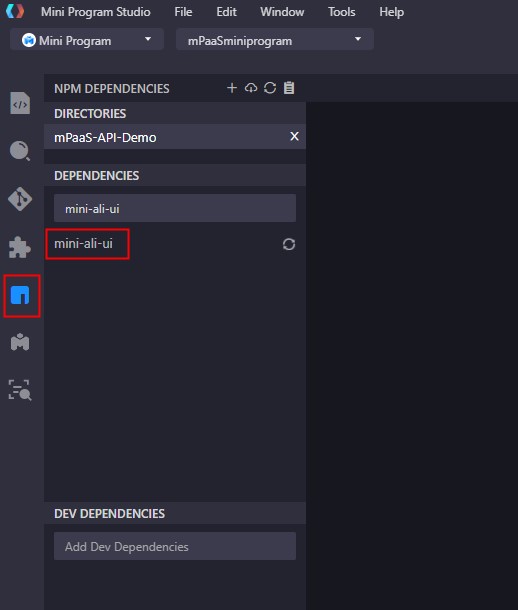
Click the toolbox icon on the left pane to set the mini program.
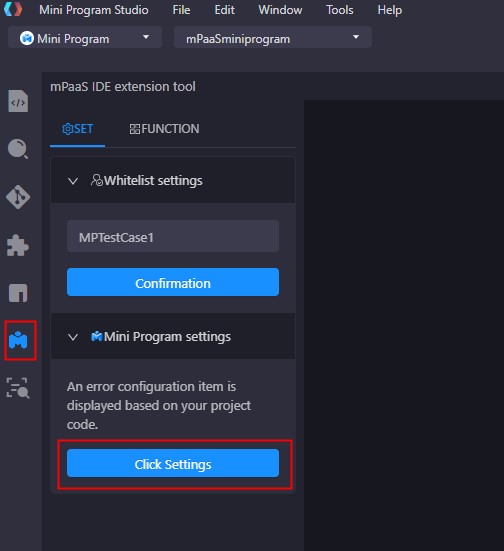
If any problem occurs in setting, for example main entrance configuration error, the system will prompt you the incorrect configuration items according to your project code. Click Auto modify and submit.
Start to compile the mini program code. You can also download the demo below, upload and release it in the mPaaS console directly.
Release the mini program
In the Mini Program IDE, click Upload in the upper-right corner to upload the mini program package to the mPaaS console.
The IDE will prompts a tip once the package is successfully uploaded.
Log in to the mPaaS console, enter the target mPaaS App, and then click Mini Program > Release Mini Program menu from the left navigation pane. On the Manage official package tab page, you can find the uploaded package which is pending to be released.
Click Create release, select the release type as Official on the release task creation page, and click OK.
Now, the mini program has been successfully released.
Code sample
Click to download the mPaaS mini program demo. You can directly upload and release the demo package in the mPaaS console.
Before you upload the demo .zip file, you should rename the .zip file and the file in the zip to the 16-digit ID of your mini program.