Kettle is an open source extract, transform, load (ETL) tool that connects to MaxCompute through a Java Database Connectivity (JDBC) driver. This topic walks you through installing the driver, configuring a database connection in Spoon, building an ETL workflow, and verifying the results.
Background information
Kettle is an open source ETL tool written in Java. It runs on the Windows, UNIX, and Linux operating systems and provides a GUI. Kettle supports a wide range of input and output data sources, including databases such as Oracle, MySQL, and DB2, and open source big data systems such as the Hadoop Distributed File System (HDFS), HBase, Cassandra, and MongoDB.For more information about Kettle, see Kettle.
Prerequisites
Before you begin, make sure you have:
A MaxCompute project. See Create a MaxCompute project.
An AccessKey pair for your Alibaba Cloud account. Go to AccessKey Management to get your AccessKey ID and AccessKey secret.
The MaxCompute JDBC driver package (V3.2.8 or later) downloaded from GitHub Releases. Download the file whose name ends with
jar-with-dependencies.jar— this variant bundles all required dependencies, so you do not need to configure the classpath separately. This topic usesodps-jdbc-3.2.9-jar-with-dependencies.jar.Kettle downloaded from the Hitachi Vantara community site and extracted to a local directory. This topic uses Kettle 8.2.0.0-342.
Step 1: Install the JDBC driver
Copy odps-jdbc-3.2.9-jar-with-dependencies.jar (or whichever version you downloaded) into the data-integration/lib directory inside your Kettle installation.
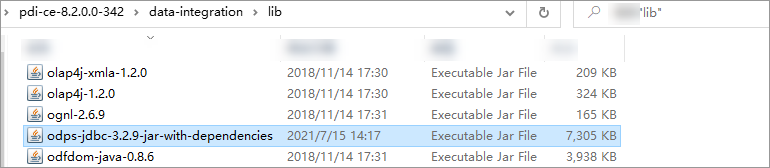
To confirm the driver is in place, check that the file appears in data-integration/lib with the correct name before launching Spoon.
Step 2: Connect Kettle to MaxCompute
Find your connection values
You need two values to build the connection URL:
MaxCompute endpoint — depends on the region where your project resides. See Endpoints for the full list.
MaxCompute project name — log in to the MaxCompute console, select your region in the top navigation bar, and find the project name on the Project management tab.
The project name refers to your MaxCompute project, not the DataWorks workspace associated with it.
The connection URL format is:
jdbc:odps:<MaxCompute_endpoint>?project=<MaxCompute_project_name>Replace <MaxCompute_endpoint> and <MaxCompute_project_name> with your actual values.
Configure the connection in Spoon
In the
data-integrationdirectory, launch Spoon:Windows: double-click
Spoon.batmacOS: double-click
Spoon
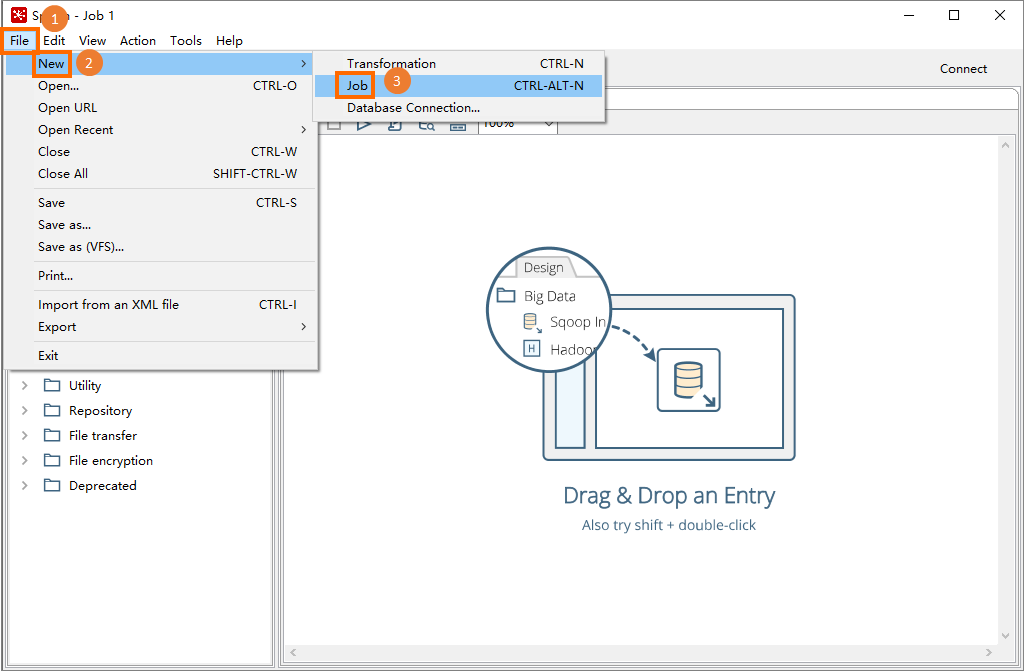
In the menu bar, choose File > New > Job.
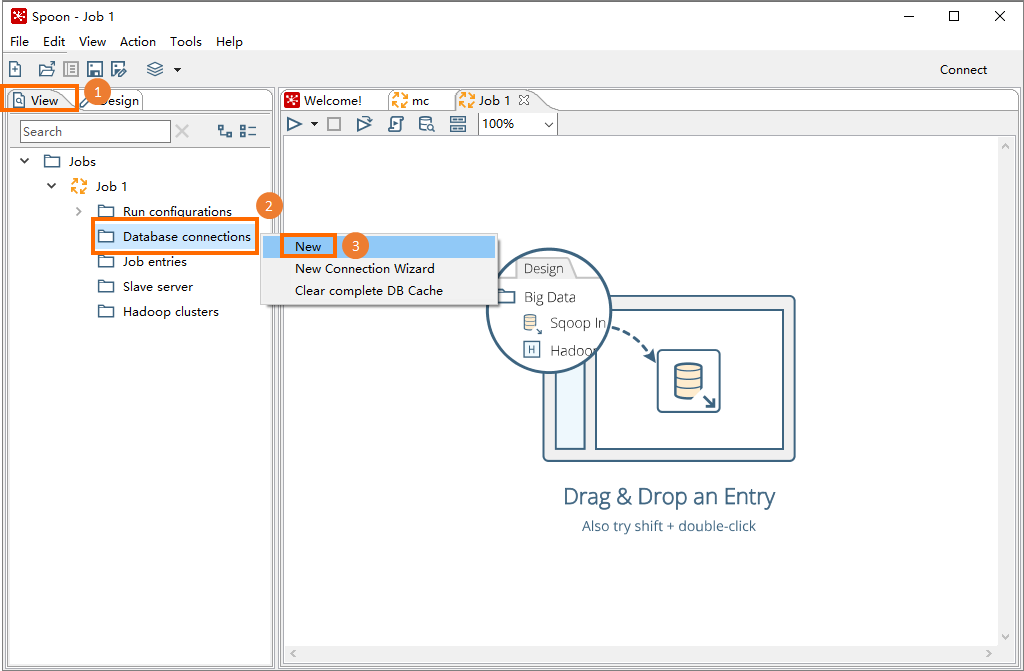
Click the View tab. In the navigation tree, right-click Database connections and select New.
In the General tab of the dialog box, set the following parameters:
Click Test. If the connection succeeds, click OK and then Confirm.
Step 3: Create a job scheduling workflow
This step creates an ETL workflow that loads CSV data from Object Storage Service (OSS) into a MaxCompute internal table using the LOAD command. The sample data is described in Use a built-in extractor or a storage handler to import data.
The workflow uses three jobs connected in sequence:
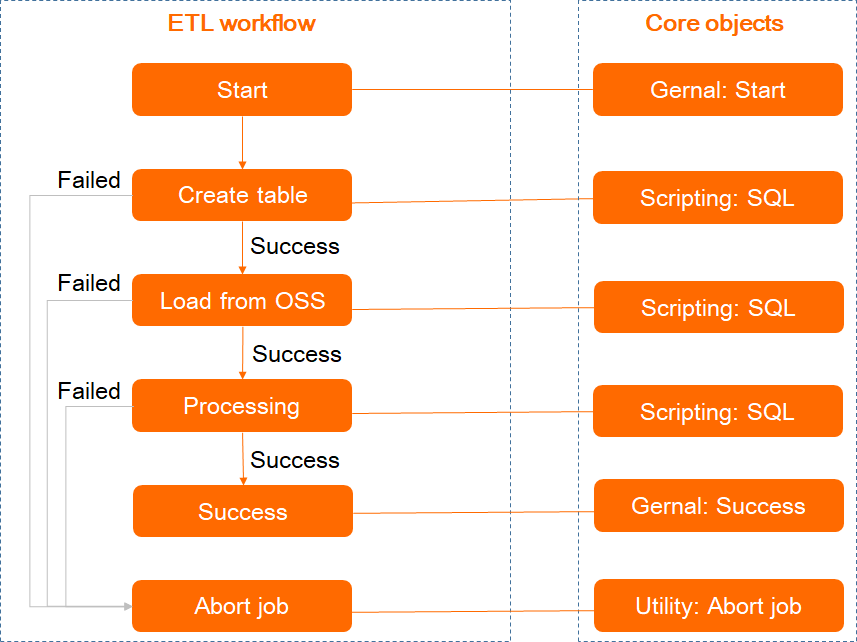
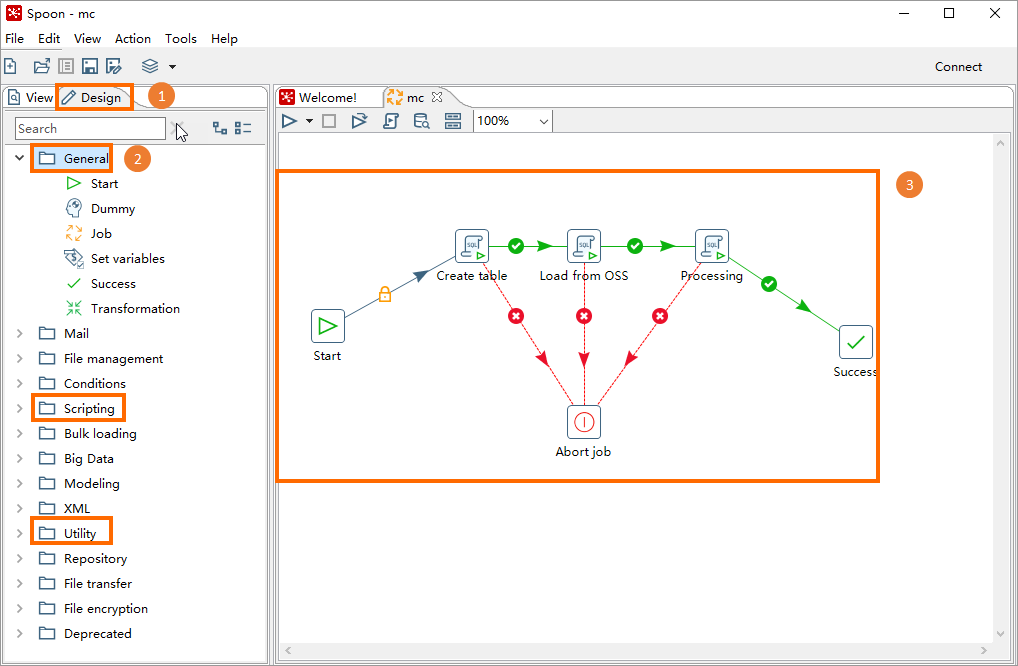
Click the Design tab. Drag the three job objects from the left panel onto the canvas, then connect them in the order shown above. To connect two objects, select the source object and press Shift while clicking the destination object.
Right-click each job object and select Edit. In the SQL dialog box, configure the following parameters, then click OK. Repeat for all three jobs. Create table
Parameter Description Job entry name The job name, such as Create table,Load from OSS, orProcessingConnection Select the database connection you created in Step 2, such as MaxComputeSend SQL as single Leave unchecked SQL Script The SQL script for each job (see below) CREATE TABLE ambulance_data_csv_load ( vehicleId INT, recordId INT, patientId INT, calls INT, locationLatitute DOUBLE, locationLongtitue DOUBLE, recordTime STRING, direction STRING);Load from OSS
LOAD OVERWRITE TABLE ambulance_data_csv_load
FROM
LOCATION 'oss://oss-cn-hangzhou-internal.aliyuncs.com/mc-test/data_location/'
STORED BY 'com.aliyun.odps.CsvStorageHandler'
WITH serdeproperties (
'odps.properties.rolearn'='acs:ram::xxxxx:role/aliyunodpsdefaultrole', -- Alibaba Cloud Resource Name (ARN) of the AliyunODPSDefaultRole role. Get it from the Roles page in the Resource Access Management (RAM) console.
'odps.text.option.delimiter'=','
);
Processing
INSERT OVERWRITE TABLE ambulance_data_csv SELECT * FROM ambulance_data_csv_load;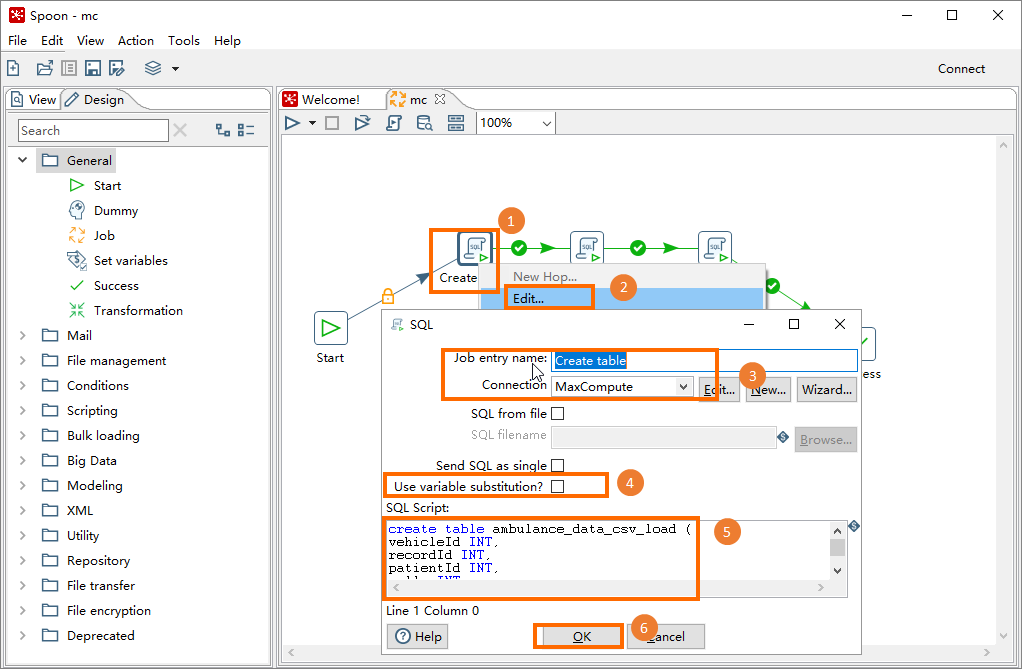
Step 4: Run the workflow
Click the
 icon in the upper-left corner of the job tab. In the Run Options dialog box, click Run.
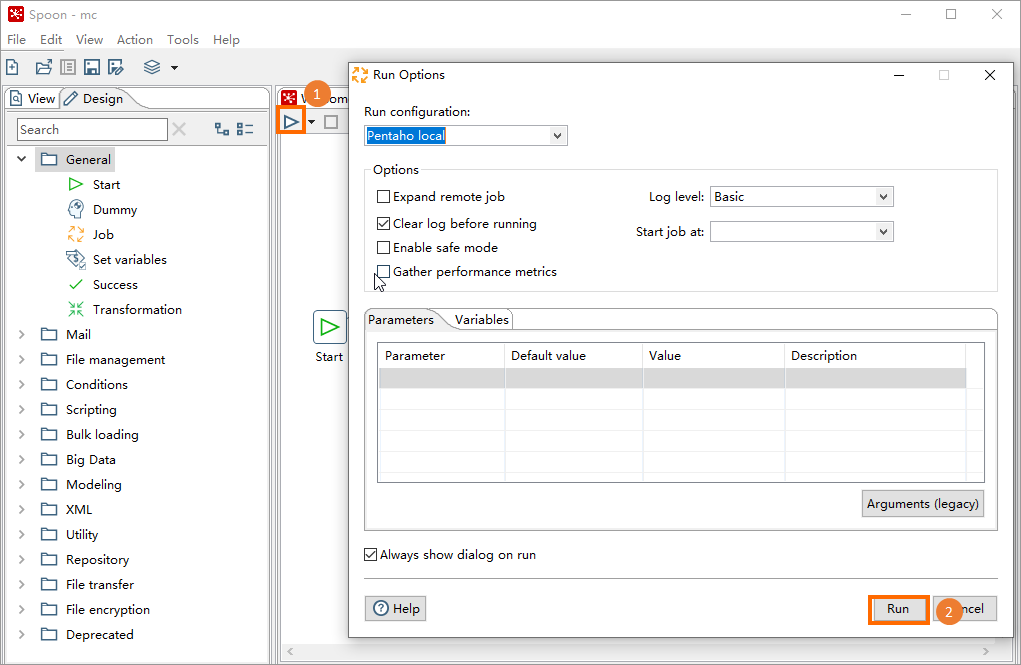
(Optional) If prompted to save the workflow, click Yes and enter a name such as
mc.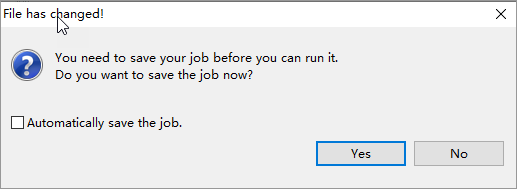
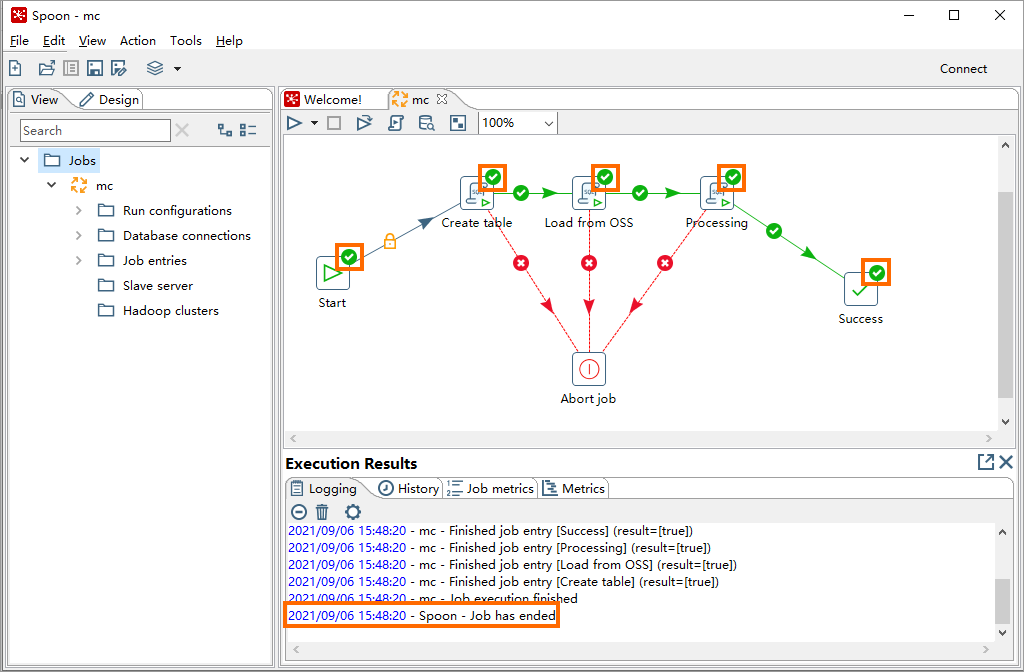
Monitor progress in the directed acyclic graph (DAG) view or the Execution Results section. The workflow is complete when all jobs show a success status.
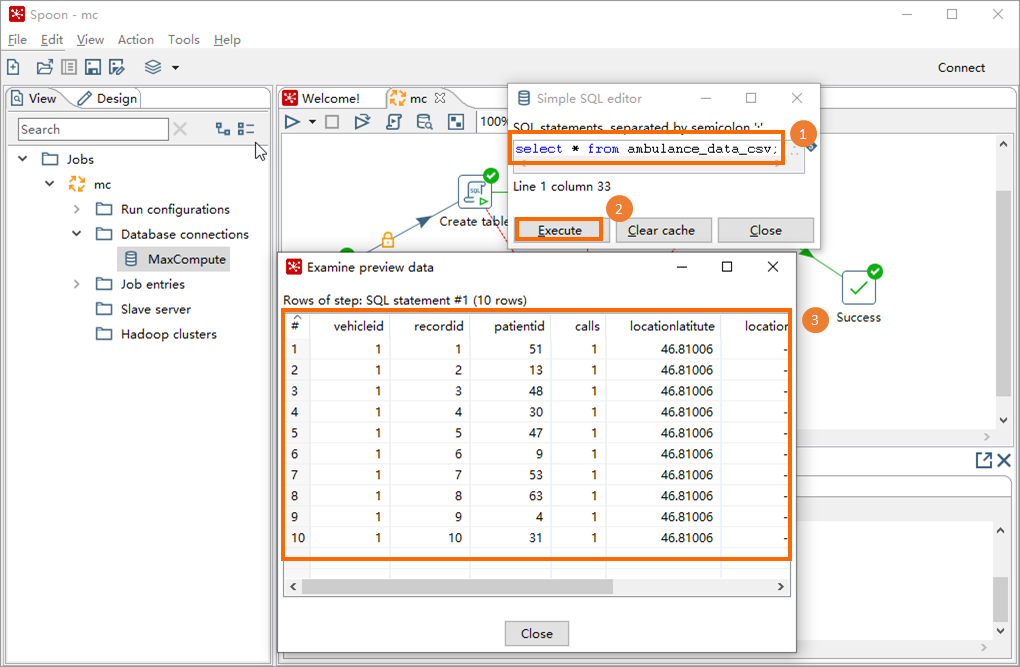
Step 5: Verify the results
Click the View tab, then expand the database connection under your job (such as
mc).Right-click the database connection (such as
MaxCompute) and select SQL Editor.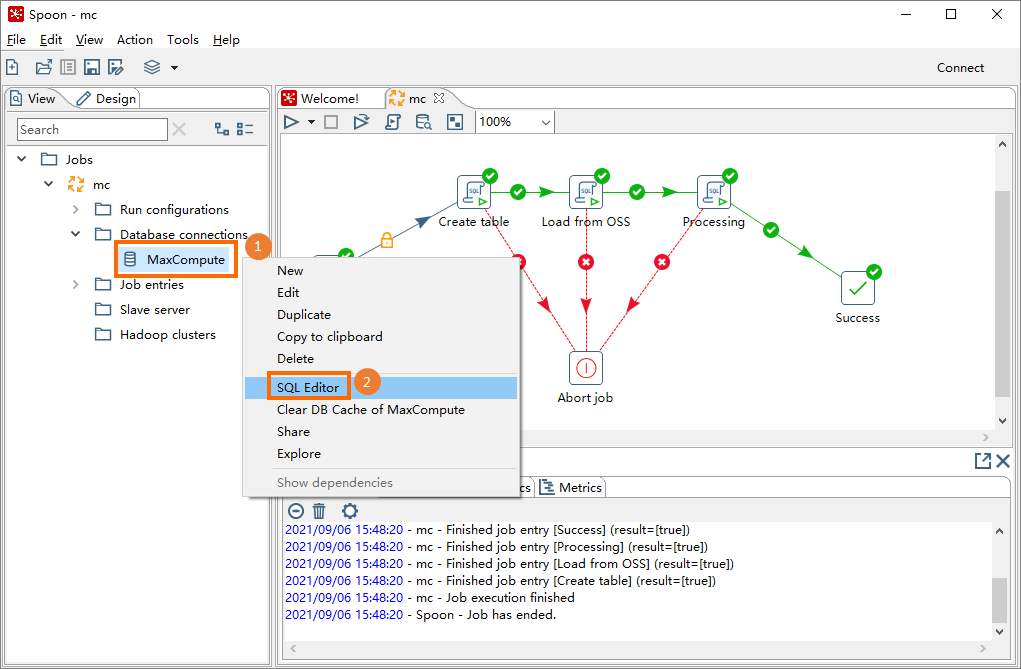
In the Simple SQL editor dialog box, run the following query and review the output in the Examine preview data dialog box.
SELECT * FROM ambulance_data_csv;If the query returns rows, the data has been successfully loaded into the MaxCompute table.