This guide shows how to create a MaxCompute external project backed by a FileSystem Catalog so you can read from and write to Paimon tables stored in Object Storage Service (OSS) — without migrating data.
The workflow: prepare Paimon data in OSS (using Flink or your existing pipeline), create an external data source and external project in MaxCompute, then run SQL against your Paimon tables directly.
Supported operations
Only Paimon format tables are supported. The following table lists the supported read and write operations.
| Operation | Supported |
|---|---|
| Read from Paimon tables | Yes |
| Write to standard Paimon tables | Yes |
| Write to Dynamic Bucket tables | No |
| Write to Cross Partition tables | No |
For data type mappings between Paimon and MaxCompute, see Data type mapping.
Prerequisites
Before you begin, make sure you have:
-
An OSS bucket with Paimon table data, or permissions to create one
-
Access to a Realtime Compute for Apache Flink workspace (required only if you need to generate sample data in Step 1)
-
A Resource Access Management (RAM) role with permissions for both Data Lake Formation (DLF) and OSS — note the role's ARN (Alibaba Cloud Resource Name)
-
A MaxCompute quota to assign to the external project
Step 1: Prepare source data
Skip this step if you already have Paimon table data in OSS.
This step uses Flink to create a Paimon table in a FileSystem Catalog and insert sample rows. The data is stored in OSS following Paimon's file system structure: <catalog_name>/<database_name>.db/<table_name>/.
Any engine that reads or writes Paimon data in this OSS directory must follow this structure and store only Paimon-formatted data. Non-Paimon data in the directory is treated as abnormal and causes errors.
1. Create an OSS bucket and folder
-
Log on to the OSS console and create a bucket named
paimon-fs. For details, see Create a bucket. -
In the bucket, create a folder named
paimon-test.
2. Create a Paimon FileSystem Catalog in Flink
-
Log on to the Flink console and select a region.
-
Click the name of your workspace. In the left navigation pane, select Catalogs.
-
On the Catalog List page, click Create Catalog. In the dialog box, select Apache Paimon, click Next, and configure the following parameters:
Parameter Required Description metastore Required The metastore type. Select filesystem.catalog name Required A custom catalog name. For example, paimon-fs-catalog.warehouse Required The OSS directory to use as the catalog warehouse. For example, oss://paimon-fs/paimon-test/.fs.oss.endpoint Required The OSS endpoint. For the China (Hangzhou) region: oss-cn-hangzhou-internal.aliyuncs.com.fs.oss.accessKeyId Required The AccessKey ID for OSS access. fs.oss.accessKeySecret Required The AccessKey secret for OSS access.
3. Create a table and insert data
-
In the left navigation pane, go to Development > Scripts.
-
On the New Script tab, click
 to create a query script.
 -
Run the following SQL. Adjust the table and catalog names as needed.
CREATE TABLE `paimon-fs-catalog`.`default`.test_tbl ( id BIGINT, data STRING, dt STRING, PRIMARY KEY (dt, id) NOT ENFORCED ) PARTITIONED BY (dt) WITH ( 'bucket' = '3' ); INSERT INTO `paimon-fs-catalog`.`default`.test_tbl VALUES (1,'CCC','2024-07-18'), (2,'DDD','2024-07-18'),(3,'EEE','2025-06-18'); -
After the job completes, log on to the OSS console and confirm the Paimon table files appear under
paimon-fs/paimon-test/.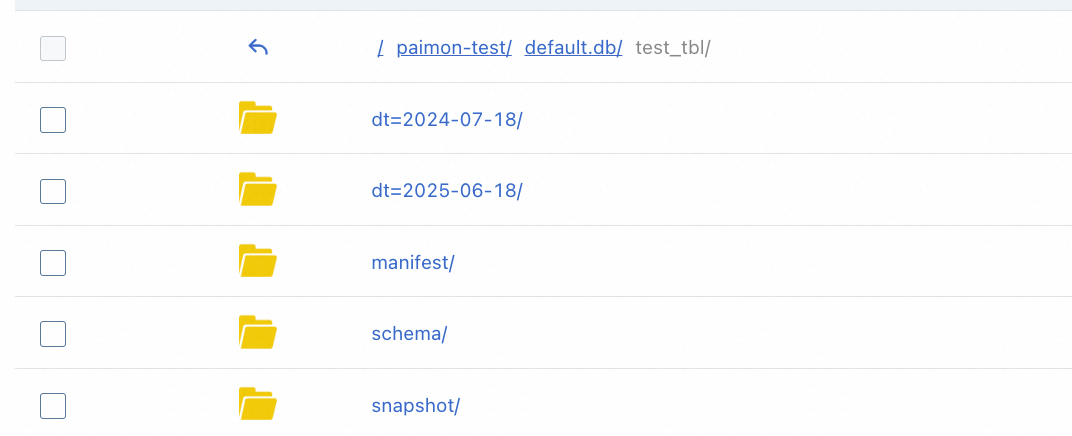
Step 2: Create an external data source in MaxCompute
The external data source stores the OSS connection details and the RAM role that MaxCompute uses to access your Paimon data.
-
Log on to the MaxCompute console and select a region.
-
In the left navigation pane, choose Manage Configurations > External Data Source.
-
On the External Data Source page, click Create External Data Source.
-
Configure the following parameters:
Core settings
Parameter Required Description External Data Source Type Required Select Filesystem Catalog.External Data Source Name Required A custom name that starts with a letter and contains only lowercase letters, underscores ( _), and digits. Maximum 128 characters. For example,external_fs.Description Optional A description for the data source. Region Required The current region is selected by default. Authentication settings
Parameter Required Description Authentication And Authorization Required Alibaba Cloud RAM role (selected by default). RoleARN Required The ARN of a RAM role with permissions for DLF and OSS. To find the ARN: log on to the RAM console, go to Identities > Roles, and look in the Basic Information section. Example: acs:ram::124****:role/aliyunodpsdefaultrole.Storage settings
Parameter Required Description Storage Type — OSS or OSS-HDFS. Endpoint — Auto-generated based on your region. For China (Hangzhou): oss-cn-hangzhou-internal.aliyuncs.com.Foreign Server Supplemental Properties Optional Additional attributes that control how tasks access the data source. See the official documentation for supported parameters as the product evolves. -
Click OK.
-
On the External Data Source page, find the data source you just created and click Details in the Actions column to verify the configuration.
Step 3: Create an external project in MaxCompute
-
Log on to the MaxCompute console and select a region.
-
In the left navigation pane, choose Manage Configurations > Projects.
-
On the External Project tab, click Create Project.
-
Configure the following parameters:
Project settings
Parameter Required Description Project Type Required External project is selected by default. Region Required The current region is selected by default and cannot be changed. Project Name (Globally Unique) Required Must start with a letter and contain letters, digits, and underscores ( _). Between 3 and 28 characters.Billing Method Required Subscription or Pay-as-you-go. Default Quota Required Select an existing quota. Description Optional A description for the project. External data source settings
Parameter Required Description MaxCompute Foreign Server Type Optional Select Filesystem Catalog.MaxCompute Foreign Server Optional Use Existing to select a previously created data source, or Create Foreign Server to create a new one. MaxCompute Foreign Server Name Required Select an existing data source name, or specify a name for the new data source. Table Format Required Paimon is selected by default. Bucket Catalog Required The OSS bucket and directory at the catalog level. For example, oss://paimon-fs/paimon-test/.Authentication settings
Parameter Required Description Authentication and Authorization Required The identity used to run tasks. If a service-linked role does not exist, create one before proceeding. RoleARN Required The ARN of a RAM role with permissions for DLF and OSS. To find the ARN: log on to the RAM console, go to Identities > Roles, and look in the Basic Information section. Example: acs:ram::124****:role/aliyunodpsdefaultrole.Storage Type — OSS or OSS-HDFS. Endpoint Required Generated by default. -
Click OK to create the project.
Step 4: Read from and write to Paimon tables
Select a connection tool and log on to the external project you just created.
The following examples assume you are connected to the external project. The SET statements at the start of a session apply to all subsequent queries in that session.
View existing schemas
-- Enable schema syntax for this session.
SET odps.namespace.schema=true;
SHOW schemas;

-- Expected output:
-- ID = 20250922********wbh2u7
-- default
--
-- OK
Read from a Paimon table
-- Run SET odps.namespace.schema=true first if you have not done so in this session.
SET odps.sql.allow.fullscan=true;
SELECT * FROM <external_project_name>.default.test_tbl;

-- Expected output:
-- +------------+------------+------------+
-- | id         | data       | dt         |
-- +------------+------------+------------+
-- | 1          | CCC        | 2024-07-18 |
-- | 2          | DDD        | 2024-07-18 |
-- | 3          | EEE        | 2025-06-18 |
-- +------------+------------+------------+
Replace <external_project_name> with the name of your external project.
Write to an existing Paimon table
INSERT INTO test_tbl PARTITION(dt='2025-08-26') VALUES(4,'FFF');
SELECT * FROM test_tbl;

-- Expected output:
-- +------------+------------+------------+
-- | id         | data       | dt         |
-- +------------+------------+------------+
-- | 1          | CCC        | 2024-07-18 |
-- | 2          | DDD        | 2024-07-18 |
-- | 3          | EEE        | 2025-06-18 |
-- | 4          | FFF        | 2025-08-26 |
-- +------------+------------+------------+
Create a schema and table, then write data
MaxCompute writes new data following Paimon's file system structure, so the data is immediately accessible from other engines that read the same OSS path.
-- Create a schema.
CREATE schema testschema;

-- Create a table in the new schema.
use schema testschema;
CREATE TABLE table_test(id INT, name STRING);

-- Insert data and verify.
INSERT INTO table_test VALUES (101,'Zhang San'),(102,'Li Si');
SELECT * FROM table_test;

-- Expected output:
-- +------------+------------+
-- | id         | name       |
-- +------------+------------+
-- | 101        | Zhang San  |
-- | 102        | Li Si      |
-- +------------+------------+
After inserting data, log on to the OSS console to confirm the new schema and table files appear in the bucket directory of your external project.
What's next
-
Data type mapping — review how Paimon data types map to MaxCompute types
-
Select a connection tool — choose the right tool for your workflow