MaxCompute allows you to use the database management tool DBeaver to access MaxCompute projects and manage data. This topic describes how to use a MaxCompute Java Database Connectivity (JDBC) driver to connect DBeaver to a MaxCompute project and use DBeaver to manage data.
Background information
DBeaver is a free, and multi-platform database management tool designed for developers, database administrators, analysts, and other professionals who work with databases.
Prerequisites
Create an AccessKey pair for your Alibaba Cloud account, which will be used to access the MaxCompute project.
The JAR package, jar-with-dependencies, is downloaded.
Click odps-jdbc-3.9.0.jar to download it, or get the latest version of the MaxCompute JAR package from GitHub or the Maven repository. MaxCompute JDBC driver v3.9.0 is used in this topic.
DBeaveris downloaded and installed.
For more information about how to install DBeaver, see Install.
DBeaver Community Edition 24.3.1 is used in this topic.
Step 1: Connect DBeaver to MaxCompute
Launch DBeaver and access its interface.
Select the type of database you want to connect to.
In the top menu bar, click
 . In the Select your database dialog box, choose , then click Next to proceed to the Generic JDBC Connection Settings dialog box.
Edit the driver settings.
In the Generic JDBC Connection Settings dialog box, click the Main tab, and then click Driver Settings.
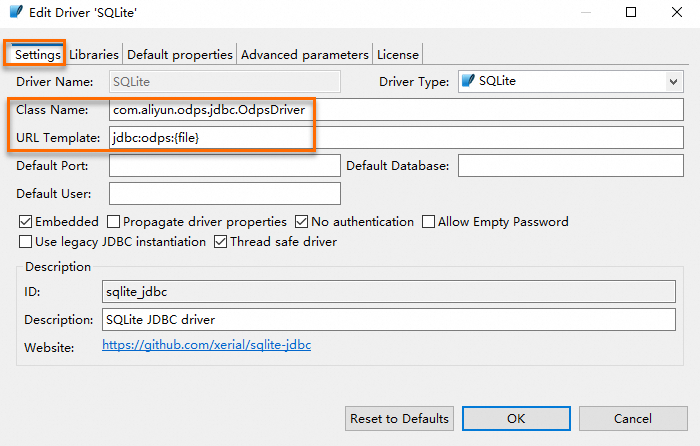
Set the class name and URL template.
In the Edit Driver 'SQLite' dialog box, click the Settings tab. Enter Com.aliyun.odps.jdbc.odpsdriver in the Class Name field and Jdbc:odps:{file} in the URL Template field.
Add the JDBC driver JAR package.
In the Edit Driver 'SQLite' dialog box, click the Libraries tab. Click Add File to associate the MaxCompute JDBC driver JAR package
odps-jdbc-3.9.0-rc4-jar-with-dependencies.jarwith the libraries of the data source.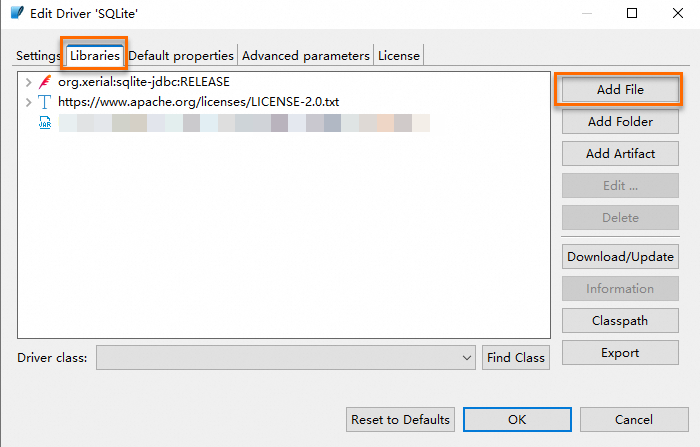
Click OK.
Enter the JDBC URL information.
In the Generic JDBC Connection Settings dialog box, click the Main tab, then fill out JDBC URL details.
Parameter
Description
Connect by
Select URL.
JDBC URL
The URL that is used to connect to the MaxCompute project.
Example:
jdbc:odps:https://service.cn-hangzhou.maxcompute.aliyun.com/api?project=test&accessId=xx&accessKey=xx.URL format:
jdbc:odps:<maxCompute_endpoint>?project=<maxCompute_project_name>&accessId=<access_id>&accessKey=<access_key>[&interactiveMode={true|false}]. Delete the angle brackets (<>) when you configure this parameter.<maxCompute_endpoint>: required. The endpoint of the region to which the MaxCompute project belongs.
<maxCompute_project_name>: required. The name of the MaxCompute project that you want to access.
access_id: required. The AccessKey ID that is used to access the MaxCompute project. You can go to the AccessKey Management page to get the AccessKey ID.
access_key: required. The AccessKey secret that corresponds to the AccessKey ID.
interactiveMode: optional. This parameter specifies whether to enable the MaxCompute Query Acceleration (MCQA) feature.
If you want to enable the MCQA feature, add
&interactiveMode=trueto the end of the URL. For more information about the MCQA feature, see Query acceleration.
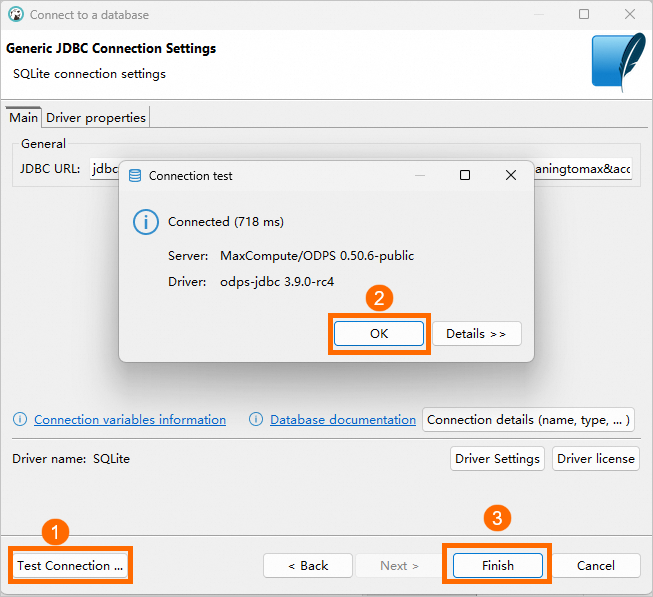
Click Test Connection. If the Connection Test dialog box indicates Connected, it means the connection between DBeaver and MaxCompute has been established successfully.
Step 2: Use DBeaver to query and analyze data
After connecting DBeaver to MaxCompute, you can view the established MaxCompute connection in the left-side navigation tree of DBeaver and manage the MaxCompute project using the SQL feature. You can perform the following operations based on your business requirements. For more information about these operations, see the DBeaver help information.
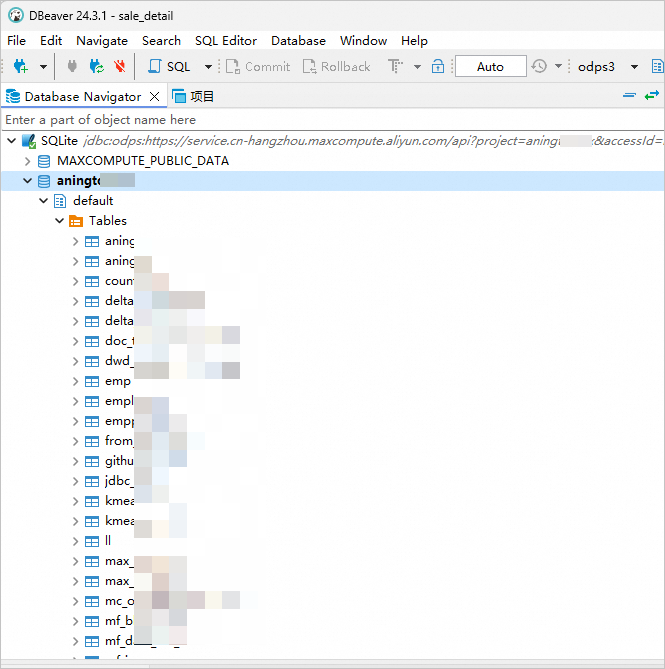
Query all existing tables
You can query the information of all existing tables listed under the established MaxCompute connection.
Query table schema
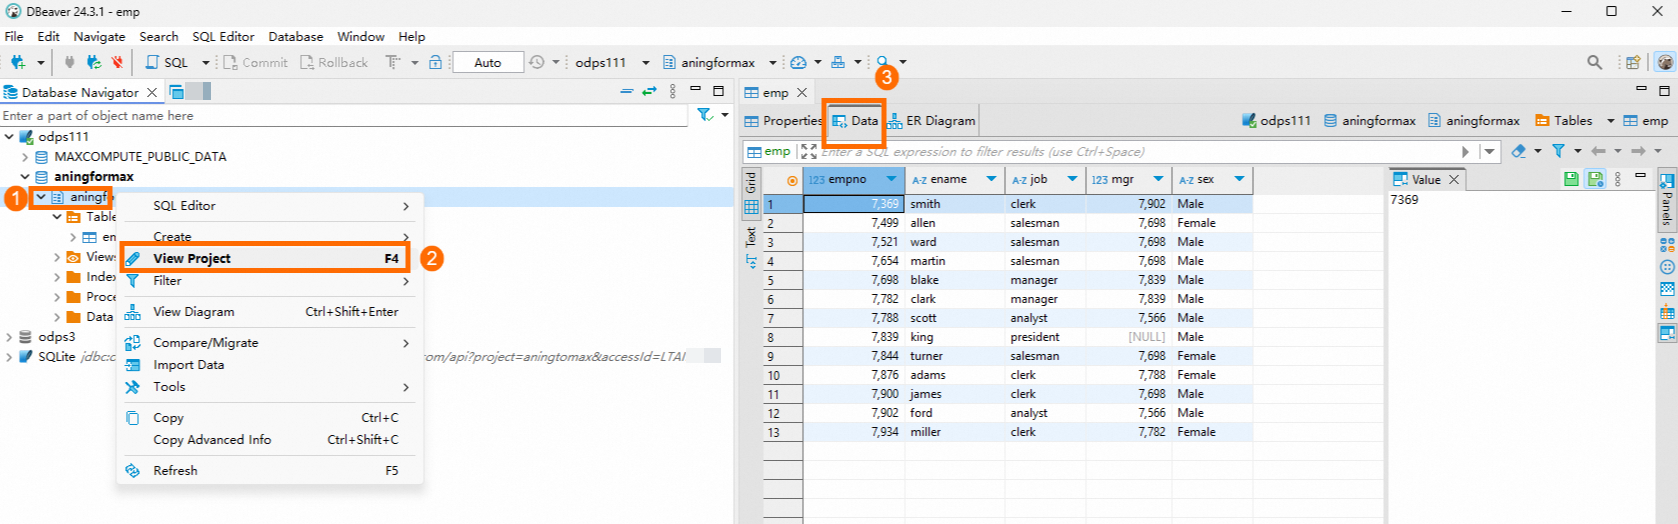
Right-click the table you want to query under the established MaxCompute connection and select View Table to view its schema.

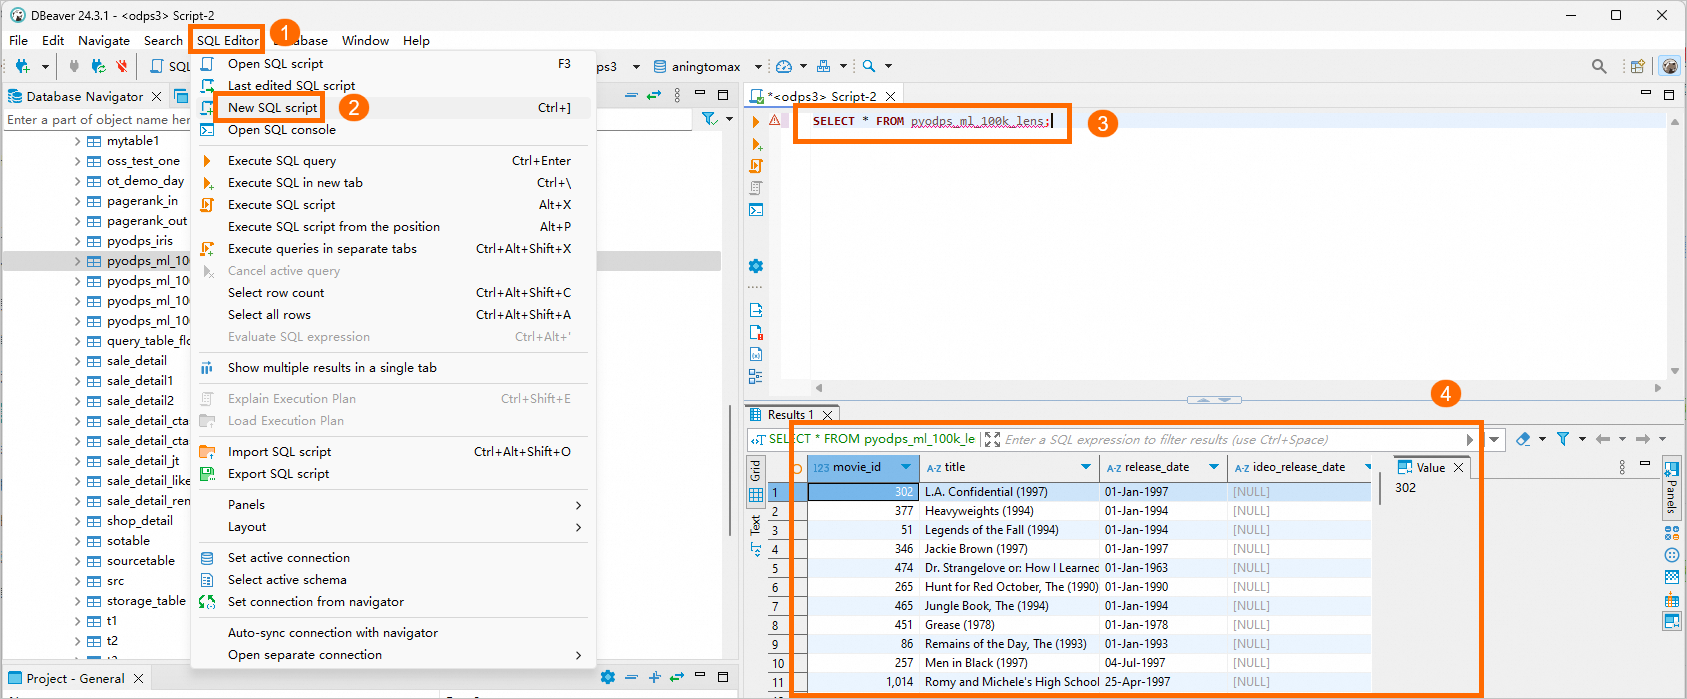
Query table data
You can click under the established MaxCompute connection, enter your desired table's SQL query into the editor, and then execute the query.
If your project's schema syntax switch is not enabled, see Enable the schema feature for details. Alternatively, right-click the desired table under the established MaxCompute connection, select View Project, and navigate to the Data tab to view the data.