This topic describes how to implement role-based single sign-on (SSO) to log on to the Machine Learning Platform for AI (PAI) console. Role-based SSO is a convenient and secure access method that simplifies the login process while enhancing account security and management flexibility.
Background information
Alibaba Cloud provides role-based SSO, an access method to cloud resources for enterprises that have stricter security requirements, instead of entering the usernames and passwords. For more information, see Overview of Role-based SSO by using SAML.
Logon methods supported by PAI
PAI supports the following logon methods:
Account-based logon
You can log on to the Alibaba Cloud Management Console by entering the username and password of your Alibaba Cloud account or RAM user account. In this case, your account becomes a member of a PAI workspace and is authorized to use PAI.
CloudSSO is integrated with Alibaba Cloud Resource Directory to provide unified multi-account identity management and access control. You can use CloudSSO to manage enterprise users who need to access Alibaba Cloud resources and assign access permissions on the accounts in a resource directory to the users in a centralized manner. You can also configure settings only once to implement single sign-on (SSO) access to Alibaba Cloud resources from an identity provider (IdP).
Role-based SSO logon
You can implement role-based SSO to log on to the Alibaba Cloud Management Console and use PAI. In this case, the RAM role becomes a member of a PAI workspace. The user who assumes this role can access the resources of the Alibaba Cloud account that created the role. For more information about RAM roles, see Overview of RAM roles.
Implement role-based SSO to log on to the PAI console
Create a RAM role and specify a trust policy for the role.
Create a RAM role that can be assumed by RAM users
To create a RAM role that can be assumed by other RAM users through switching identities in the Alibaba Cloud Management Console, select Alibaba Cloud Account as the trusted entity for the role. Perform the following steps.
Create a RAM role whose Principal Type is set to Cloud Account. For more information, see Create a RAM role for a trusted Alibaba Cloud account.
You must set Principal Name to Current Account.
Go to the details page of the created role and perform the steps demonstrated in the following figure to edit the trusted policy.
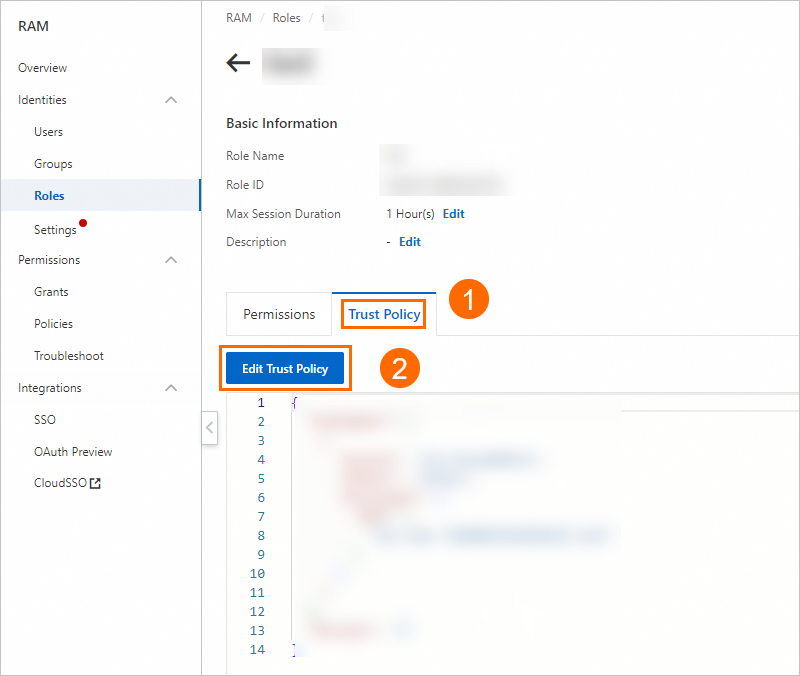 Change the policy content to the following script.
 { "Statement": [ { "Action": "sts:AssumeRole", "Effect": "Allow", "Principal": { "RAM": [ "acs:ram::{Alibaba Cloud account ID}:root" ] } }, { "Action": "sts:AssumeRole", "Effect": "Allow", "Principal": { "Service": [ "dataworks.aliyuncs.com" ] } } ], "Version": "1" }You must replace Alibaba Cloud account ID in acs:ram::Alibaba Cloud account ID:root with the actual account ID to which you want to grant permissions. You can obtain the Alibaba Cloud account ID on the Security Settings page.
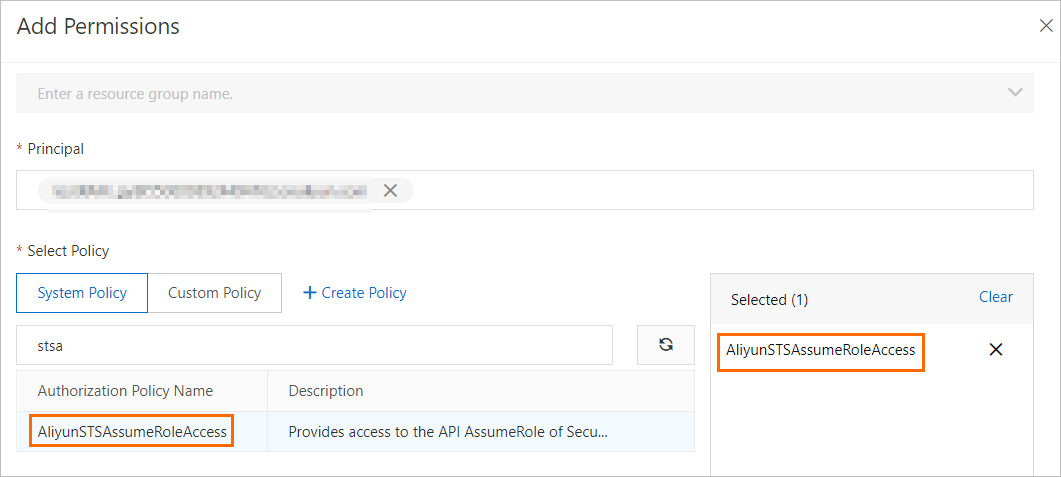
Create a RAM user. You can create multiple RAM users at a time. For more information, see Create a RAM user.
Find the created RAM user and click Add Permissions in the Actions column. In the Add Permissions panel, attach the AliyunSTSAssumeRoleAccess policy to the RAM user. Then, the RAM user has the permissions to call the AssumeRole operation of Security Token Service (STS).
Create a RAM role that can be assumed by an IdP
To create a RAM role that can be assumed by an identity provider (IdP), select IdP as the trusted entity for the role. The following section describes the detailed procedure:
Create a RAM role whose trusted entity is set to IdP. For more information, see Create a RAM role for a trusted IdP.
Go to the details page of the created role and perform the steps demonstrated in the following figure to edit the trusted policy.
Change the policy content to the following script. { "Statement": [ { "Action": "sts:AssumeRole", "Effect": "Allow", "Principal": { "Federated": [ "acs:ram::Alibaba Cloud account ID:saml-provider/IDP" ] }, "Condition": { "StringEquals": { "saml:recipient": "https://signin.aliyun.com/saml-role/sso" } } }, { "Action": "sts:AssumeRole", "Effect": "Allow", "Principal": { "Service": [ "dataworks.aliyuncs.com" ] } } ], "Version": "1" }Replace Alibaba Cloud account ID in acs:ram::Alibaba Cloud account ID:saml-provider/IDP with the actual account ID to which you want to grant permissions. You can obtain the Alibaba Cloud account ID on the Security Settings page.
Grant permissions to the RAM role.
After you create the RAM role, you need to grant permissions to the role by assigning a policy to the role. A RAM role that is not assigned a policy may not be able to use PAI as expected. For example, the RAM role may fail to manage resources in the workspace. Perform the following steps to assign policies to your RAM role.
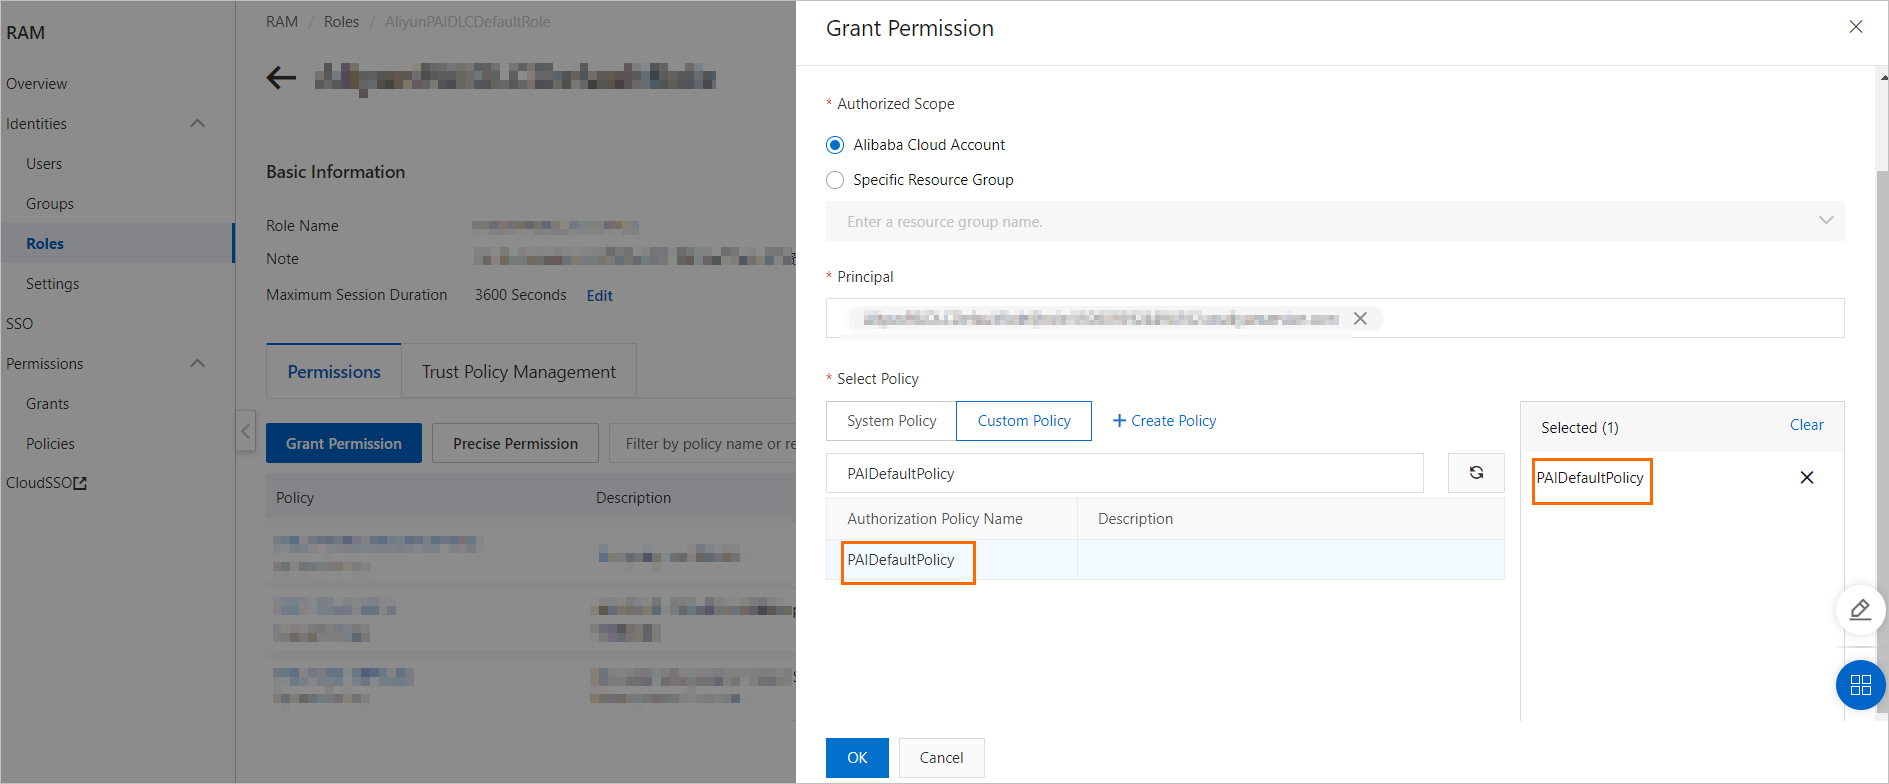
Create a policy. For example, you can create a policy named PAIDefaultPolicy. For more information, see the example in Grant the permissions that are required to use Machine Learning Designer.
Specify the following script on the JSON tab:
{
    "Version": "1",
    "Statement": [
        {
            "Action": [
                "cs:GetClusterById",
                "cs:GetClusters",
                "cs:GetUserConfig",
                "cs:DescribeClusterNodes",
                "cs:DescribeClusterInnerServiceKubeconfig",
                "cs:RevokeClusterInnerServiceKubeconfig"
            ],
            "Resource": "*",
            "Effect": "Allow"
        },
        {
            "Action": [
                "vpc:DescribeVSwitchAttributes",
                "vpc:DescribeVpcs",
                "vpc:DescribeVSwitches",
                "vpc:DescribeVpcAttribute"
            ],
            "Resource": "*",
            "Effect": "Allow"
        },
        {
            "Action": [
                "ecs:DescribeSecurityGroupAttribute",
                "ecs:DescribeSecurityGroups",
                "ecs:CreateNetworkInterface",
                "ecs:DeleteNetworkInterface",
                "ecs:DescribeNetworkInterfaces",
                "ecs:CreateNetworkInterfacePermission",
                "ecs:DescribeNetworkInterfacePermissions",
                "ecs:DeleteNetworkInterfacePermission"
            ],
            "Resource": "*",
            "Effect": "Allow"
        },
        {
            "Action": [
                "nas:DescribeFileSystems",
                "nas:CreateMountTarget",
                "nas:DescribeMountTargets",
                "nas:ModifyMountTarget",
                "nas:DescribeProtocolMountTarget"
            ],
            "Resource": "*",
            "Effect": "Allow"
        },
        {
            "Action": [
                "cr:ListNamespace",
                "cr:ListRepository",
                "cr:GetAuthorizationToken",
                "cr:ListInstanceEndpoint",
                "cr:PullRepository",
                "cr:PushRepository",
                "cr:GetInstance",
                "cr:GetInstanceVpcEndpoint",
                "cr:ListInstance",
                "cr:ListInstanceDomain"
            ],
            "Resource": "*",
            "Effect": "Allow"
        },
        {
            "Action": [
                "oss:ListBuckets",
                "oss:GetObjectMetadata",
                "oss:GetObject",
                "oss:ListObjects",
                "oss:PutObject",
                "oss:CopyObject",
                "oss:CompleteMultipartUpload",
                "oss:AbortMultipartUpload",
                "oss:InitiateMultipartUpload",
                "oss:UploadPartCopy",
                "oss:UploadPart",
                "oss:DeleteObject"
            ],
            "Resource": "acs:oss:*:*:*",
            "Effect": "Allow"
        },
        {
            "Action": [
                "datasetacc:DescribeInstance",
                "datasetacc:DescribeSlot",
                "datasetacc:DescribeEndpoint"
            ],
            "Resource": "*",
            "Effect": "Allow"
        }
    ]
}
Item
Description
cs:***
Permissions that are used to manage Container Service for Kubernetes (ACK) resources.
vpc:***
Permissions that are used to manage Virtual Private Cloud (VPC) resources.
ecs:***
Permissions that are used to manage Elastic Compute Service (ECS) resources.
nas:***
Permissions that are used to manage File Storage NAS resources.
cr:***
Permissions that are used to manage Container Registry resources.
oss:***
Permissions used to manage Object Storage Service (OSS) resources.
datasetacc:***
Permissions required for dataset acceleration.
In the left-side navigation pane of the RAM console, choose .
Search for the role that you created in Step 1 and click the name of the role to go to the details page.
On the Permissions tab, click Grant Permission to assign the created policy to the role, as shown in the following figure.
Add the role as a member of a PAI workspace and grant permissions.
To allow the RAM role to access PAI modules, you must add the role as a member of a PAI workspace and grant the required permissions to the role.
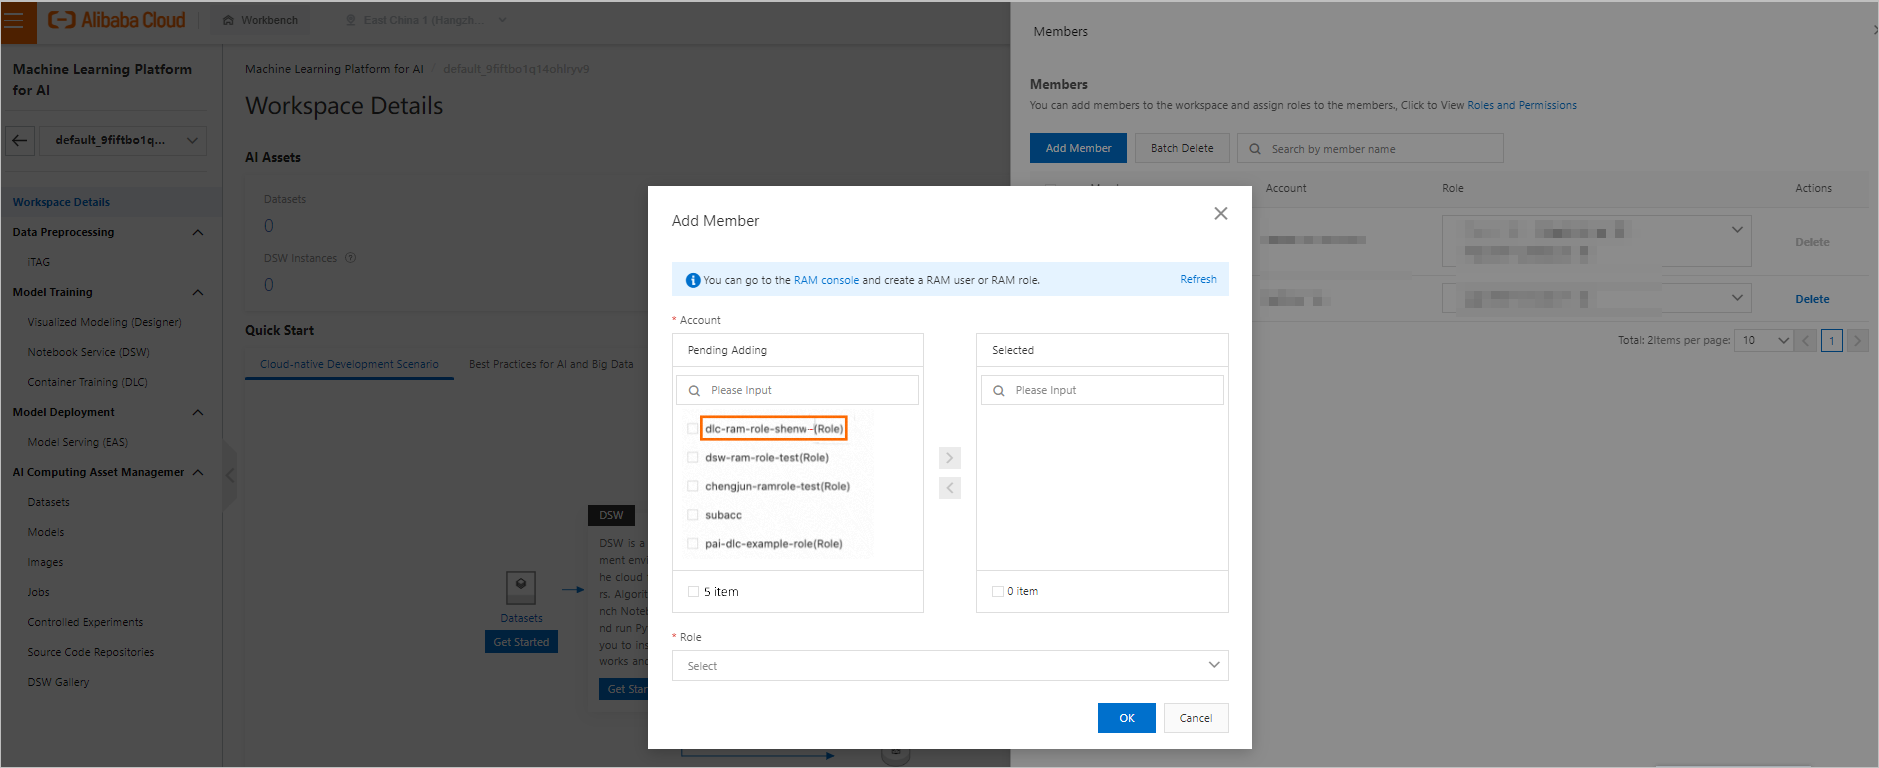
To add the role as a workspace member, perform the following steps: Go to the details page of a workspace and click Manage in the upper-right corner of the Members section. In the Workspace Member panel, click Add Member to add the role as a member. For more information, see Manage members of a workspace.
 Note
NoteIf you cannot find the role in the Pending Adding list, you can:
In the Add Member dialog box, click the refresh button to refresh the account list.
Use the role to log on to the PAI console and then search for the role. For more information, see Assume a RAM role.
Log on to the PAI console by using the RAM role.
After you grant the required permissions to the role, the user who assumes the role can log on to the PAI console and use PAI. For more information, see Assume a RAM role.