To use ApsaraVideo Real-time Communication (ARTC), create an ARTC application to implement capabilities such as video communication, voice chat, and conferencing. This topic describes how to create an ARTC application.
Create an ARTC application
Log on to the ApsaraVideo Live console.
In the left navigation pane, choose .
Click Create Application.
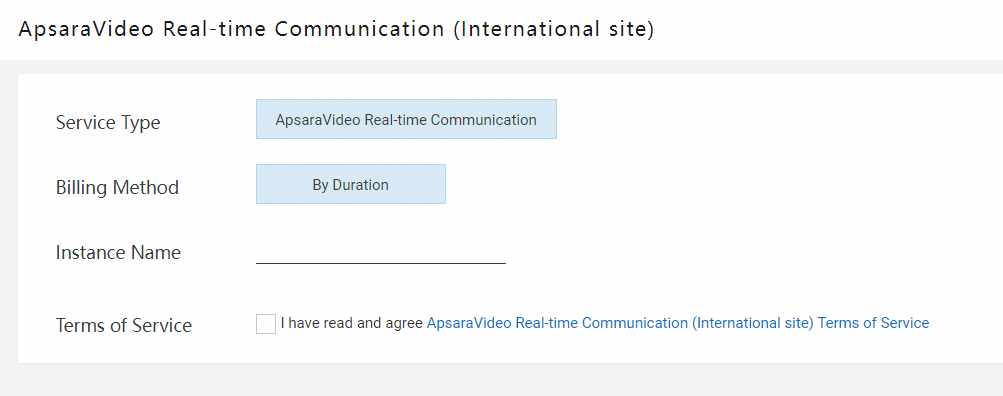
Enter a custom name in the Instance Name field, then click Buy Now. This indicates that you have read and agreed to the Alibaba Cloud International Website Product Terms of Service.
After the application is created, refresh the Applications page to view the application.
NoteBy default, no fees are incurred when you create an application. You are charged based on your actual usage in the cloud. For more information, see Billing of ARTC.
Configure stream relay
Log on to the ApsaraVideo Live console.
In the left navigation pane, choose . Find the application that you want to manage and click Manage in the Actions column.
Click Stream Relay. You can use one of the following modes to configure stream relay:
Mode 1: Relay of Specified Streams
Call StartLiveMPUTask to configure stream relay for a specific channel in real time. This way, the streams can be relayed to ApsaraVideo Live or a third-party platform. This requires a small amount of development on the server side.
Mode 2: Global Stream Relay to ApsaraVideo Live
After you enable the stream relay feature, audio and video streams are relayed to the origin server of ApsaraVideo Live. You can configure features such as transcoding, recording, and snapshot capture based on streaming domains. You can also pull live streams to watch.
Turn on Stream Relay.
Configure the stream relay parameters.
Parameter
Configuration
Description
Stream Relay
Select an option.
After you enable single-stream relay, all audio and video streams are relayed to ApsaraVideo Live by default. You can still update the layout of a mixed stream by using the SDK or server API.
Streaming Domain
Example: play.example.com
The destination streaming domain for standard streaming. You can play live streams, configure transcoding and recording, and perform other operations based on the streaming domain.
NoteIf you do not have a streaming domain, add one on the Domain Management page.
RTS half-second latency streaming is not supported. Choosing a streaming domain with this feature enabled will result in a stream relay failure.
AppName
The name can be up to 255 characters in length and can contain digits, letters, hyphens (-), underscores (_), and equal signs (=).
Default value: live. You can specify a custom value.
The application name in the streaming URL after stream relay. For more information, see Generate ingest and streaming URLs.
NoteIf you need to configure templates such as transcoding, recording, and snapshot templates for the relayed stream, you must specify an application name that is the same as the application name specified in the templates. Otherwise, the templates do not take effect.
SEI Insertion
Insert SEI at Regular Intervals: This option lets you insert supplemental enhancement information (SEI) at a specified interval from 1,000 to 5,000 ms.
Insert SEI in I-frames: This option lets you insert SEI in I-frames of a video stream.
SEI: You can use SEI to insert basic user information such as the UID and mixed-stream layout parameters into streams. This way, in co-hosting scenarios, when the layout for stream mixing and relay changes, the app that viewers use to watch streams can parse the layout information from SEI in real time. This helps facilitate the adjustment of interaction styles. For more information, see SEI format.
NoteIf no streaming domain is available, add a domain name. For more information, see Add a domain name.
SEI format
Data type | Parameter | Description |
Video stream information | stream | The information about the host. uid: the user ID of the host. |
The layout information. Take note of the following parameters:
|
If the stream of a user with UID 111 and the stream of a user with UID 222 are mixed, the SEI message is as follows:
{"stream":[{"uid":"111","paneid":0,"zorder":1,"x":0,"y":0.25,"w":0.5,"h":0.5,"type":0,"ms":0,"vol":1,"vad":119},{"uid":"222","paneid":1,"zorder":1,"x":0.5018382,"y":0.25,"w":0.5,"h":0.5,"type":0,"ms":0,"vol":60,"vad":123}]}Callbacks
The ARTC feature provides channel callbacks, user callbacks, and mixed-stream relay callbacks. The following section describes how to configure these callbacks in the ApsaraVideo Live console.
Overview
After you configure the callbacks, your business server can receive channel and user status changes and mixed-stream relay events that occur in an ARTC application in real time.
Channel callbacks: Notifications about events such as creating a channel and closing a channel are sent.
User callbacks: Notifications about events related to users are sent. For example, when a user joins or leaves a channel, a user switches the role, or a user ingests or pulls a stream.
Mixed-stream relay callbacks: Notifications about stream relay events are sent.
For more information about channel and user callbacks, see CreateEventSub. For more information about mixed-stream relay callbacks, see CreateRtcMPUEventSub.
Create a callback task
Channel and user callbacks
Log on to the ApsaraVideo Live console.
In the left navigation pane, choose .
Find the application for which you want to create a callback task and click Manage in the Actions column.
In the left navigation tree, click Callbacks. On the Channel and User Callbacks tab, click Create Task.
Configure the callback parameters. The following table describes the parameters.
Parameter
Description
Callback URL
The URL that is used to receive the callbacks. Supported protocols include HTTP and HTTPS. We recommend that you use HTTPS.
Event Scope
The callback events include user events and channel events.
User events include the following events:
Join the channel
Start to ingest a screen-sharing stream
Leave the channel
Stop ingesting a video stream
Switch the role
Stop ingesting an audio stream
Start to ingest a video stream
Stop ingesting a screen-sharing stream
Start to ingest an audio stream
Channel events include the following events:
Start the channel
End the channel
Specified Channel
Optional. If you do not specify a channel, callbacks are generated for all channels by default. If you specify a channel, callbacks are generated for only the channel.
Specified User
Optional. This parameter takes effect only for user events. If you specify a user, you must also specify a channel. You can specify up to 20 users. Separate multiple user IDs with commas (,).
Click OK.
Mixed-stream relay callbacks
Log on to the ApsaraVideo Live console.
In the left navigation pane, choose .
Find the application for which you want to create a callback task and click Manage in the Actions column. The application management page appears.
In the left-side navigation tree, click Callbacks. Click the Mixed-stream Relay Callbacks tab, and then click Configure.
Configure the callback parameters. The following table describes the parameters.
Parameter
Description
Callback URL
The URL that is used to receive the callbacks. Supported protocols include HTTP and HTTPS. We recommend that you use HTTPS.
Channel
Optional. This parameter is used to specify the IDs of the channels for which the callbacks are received. You can specify up to 20 channel IDs. Separate multiple channel IDs with commas (,). Each channel ID can be up to 64 characters in length and can contain letters, digits, underscores (_), and hyphens (-). If you do not specify this parameter, callbacks for all channels are received by default.
Edit or delete a callback task
Channel and user callbacks
After you create a channel and user callback task, you can edit the task or delete the task.

On the Channel and User Callbacks tab, find the task that you want to edit or delete.
Click Edit or Delete in the Actions column of the task to edit or delete the task.
Mixed-stream relay callbacks
After you create a mixed-stream relay callback task, you can modify or delete the task.
View callback records
After you create a callback task and the task takes effect, callback records are generated if related events occur. You can view the details of a callback on the Callback Records tab.

