Android
Run the ARTC demo project to try out ApsaraVideo Real-time Communication (ARTC) features.
Demo source code
Alibaba Cloud provides an open-source demo project that demonstrates ARTC SDK API usage and helps you integrate the SDK features. Download the project from the Android demo project repository.
Prerequisites
Before you run the demo project, make sure your development environment meets the following requirements:
-
Development tool: Android Studio 2020.3.1 or later.
-
Recommended configuration: Android Studio 2024.1.2 or later, Android Gradle Plugin (AGP) 8.6.0, Gradle 8.7, and JDK 17.
NoteEarlier versions of Android Studio may have compatibility issues with AGP. If you encounter build failures, downgrade your AGP, Gradle, and JDK versions accordingly. For more information, see Android Studio and AGP compatibility.
-
-
Test device: A test device running Android 5.0 (SDK API Level 21) or later.
NoteWe recommend testing on a physical device. An emulator may not support all features.
-
Network environment: A stable internet connection.
-
Application preparation: Obtain an AppID and AppKey for your ApsaraVideo Real-time Communication application. For more information, see Create an application.
Procedure
Step 1: Get the demo project
Clone the ARTC demo project to your local machine:
git clone https://github.com/MediaBox-Demos/amdemos-artcThis repository contains demo projects for the ARTC SDK on multiple native platforms. The Android demo project is in the Android/ARTCExample directory.
The demo project includes client-side token generation code for testing.
The following section describes the file structure of the Android/ARTCExample project.
├── Android       		       // Root directory of the Android project
│   ├── ARTCExample            // API Example project directory
│       ├── app                // Demo entry point
│       ├── KeyCenter          // AppID, AppKey, and other information
│           ├── keycenter      // Set AppID, AppKey, and other information
│       ├── quickstart         // Quick start module
│           ├── TokenGenerate  // Token generation and joining a channel
│           ├── VideoCall      // Quickly implement an audio and video call
│           ├── VoiceChat      // Quickly implement a voice chat room
│       ├── BasicUsage          // Basic features module
│           ├── AudioBasicUsage  // Common audio operations and configuration
│           ├── VideoBasicUsage // Common video operations and configuration
│           |—— CameraCommonControl // Common camera configuration
│           |—— SEIUsage         // SEI message sending and receiving
│           |—— DataChannelMessage // Custom message sending and receiving
│           |—— ScreenShare  // Screen sharing
│           |—— StreamMonitoring // In-call stream quality monitoring
            |—— PlayAudioFiles    // Play background music and sound effects
        |—— AdvancedUsage // Advanced features module
            |—— ProcessAudioRawData // Raw audio data
            |—— ProcessVideoRawData // Raw video data
            |—— CustomAudioCaptureAndRender // Custom audio capture and rendering
            |—— CustomVideoCaptureAndRender // Custom video capture and rendering
            |—— PreJoinChannelTest // Pre-join channel test (device + network)
            |—— PictureInPicture // Picture-in-Picture
            |—— H265 // H.265 encoding
            |—— IntelligentDenoise // Intelligent noise reduction
            |—— LocalRecord     // Local recording
│       ├── build.gradle
│       └── settings.gradle
Step 2: Configure the demo project
-
Open the
Android/ARTCExamplefolder in Android Studio. -
Configure the project's AppID and AppKey: Open
Android/ARTCExample/KeyCenter/src/main/java/com/aliyun/artc/api/keycenter/ARTCTokenHelper.java, then enter the AppID and AppKey you obtained from the console.
// ARTCTokenHelper.java
// ApsaraVideo Real-time Communication AppID
private static String AppId = "<Your AppID>";
// ApsaraVideo Real-time Communication AppKey
private static String AppKey = "<Your AppKey>";
Step 3: Compile and run the demo project
Enable Developer Options on your Android test device, connect the device to your computer, and select your device in Android Studio.
-
In Android Studio, click Sync Project with Gradle Files.
-
After the sync succeeds, click Run 'app'. After the build succeeds, the ARTCExample application is installed on your device.
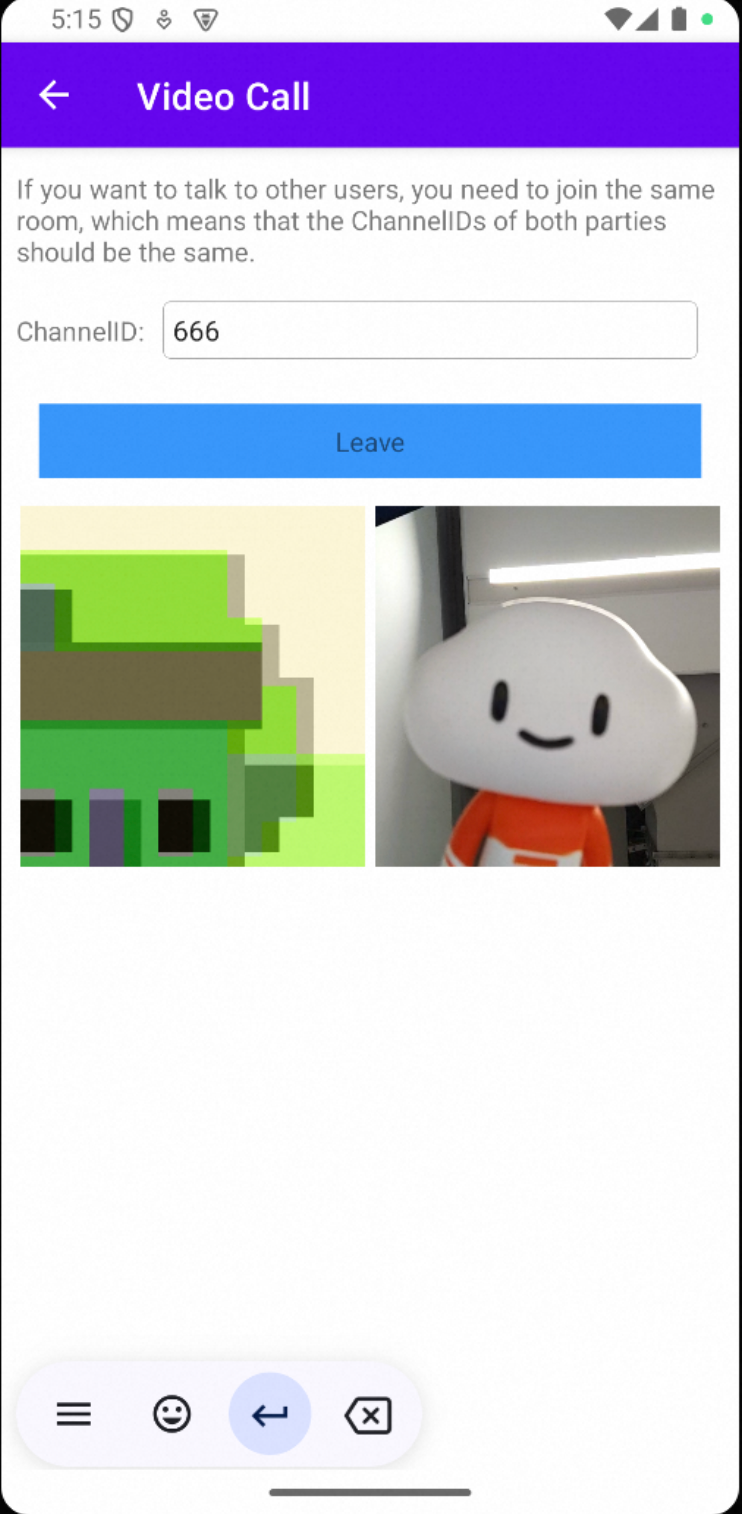
|
Run the demo on a physical device, then tap Video Call. |
Join the same channel on two devices. In the ChannelID field, enter the same channel ID (for example, |
The real-time audio and video call begins.
|
Next steps
Integrate the ARTC SDK into your project. For more information, see Implement an audio and video call on Android.