Manage roles and create custom roles in Lingma Enterprise Edition.
Supported editions | Enterprise Dedicated Edition |
Default roles
Lingma provides roles at different levels to meet the requirements of your enterprises and teams. The roles include default administrator roles and member roles for basic permission management, and custom roles for your business scenarios.
Administrator roles: Include Owner, Global Administrator, and Lingma Administrator.
Member roles: Include Member and External Member. All newly joined enterprise users have the default role of Member.
Custom roles: Cover settings in knowledge bases, extensions, filter & model configuration, authorization, and dashboards.
To start organization settings, make sure you have one of the roles: Owner, Global Administrator, or Lingma Administrator.

Custom roles
Before you start, make sure you have one of the roles: Owner, Global Administrator, or Lingma Administrator.
Access the role permission page:
Go to the Lingma console and click Settings in the lower left corner.
On the Organization Setting page, click Role to enter the Role Permissions page.
Create custom roles according to your requirements on this page.
The following sections will use two custom roles, Enterprise Knowledge Base Administrator and Enterprise Dashboard Administrator, as examples to explain how to create custom roles.
Custom knowledge base administrator
Create knowledge base administrator
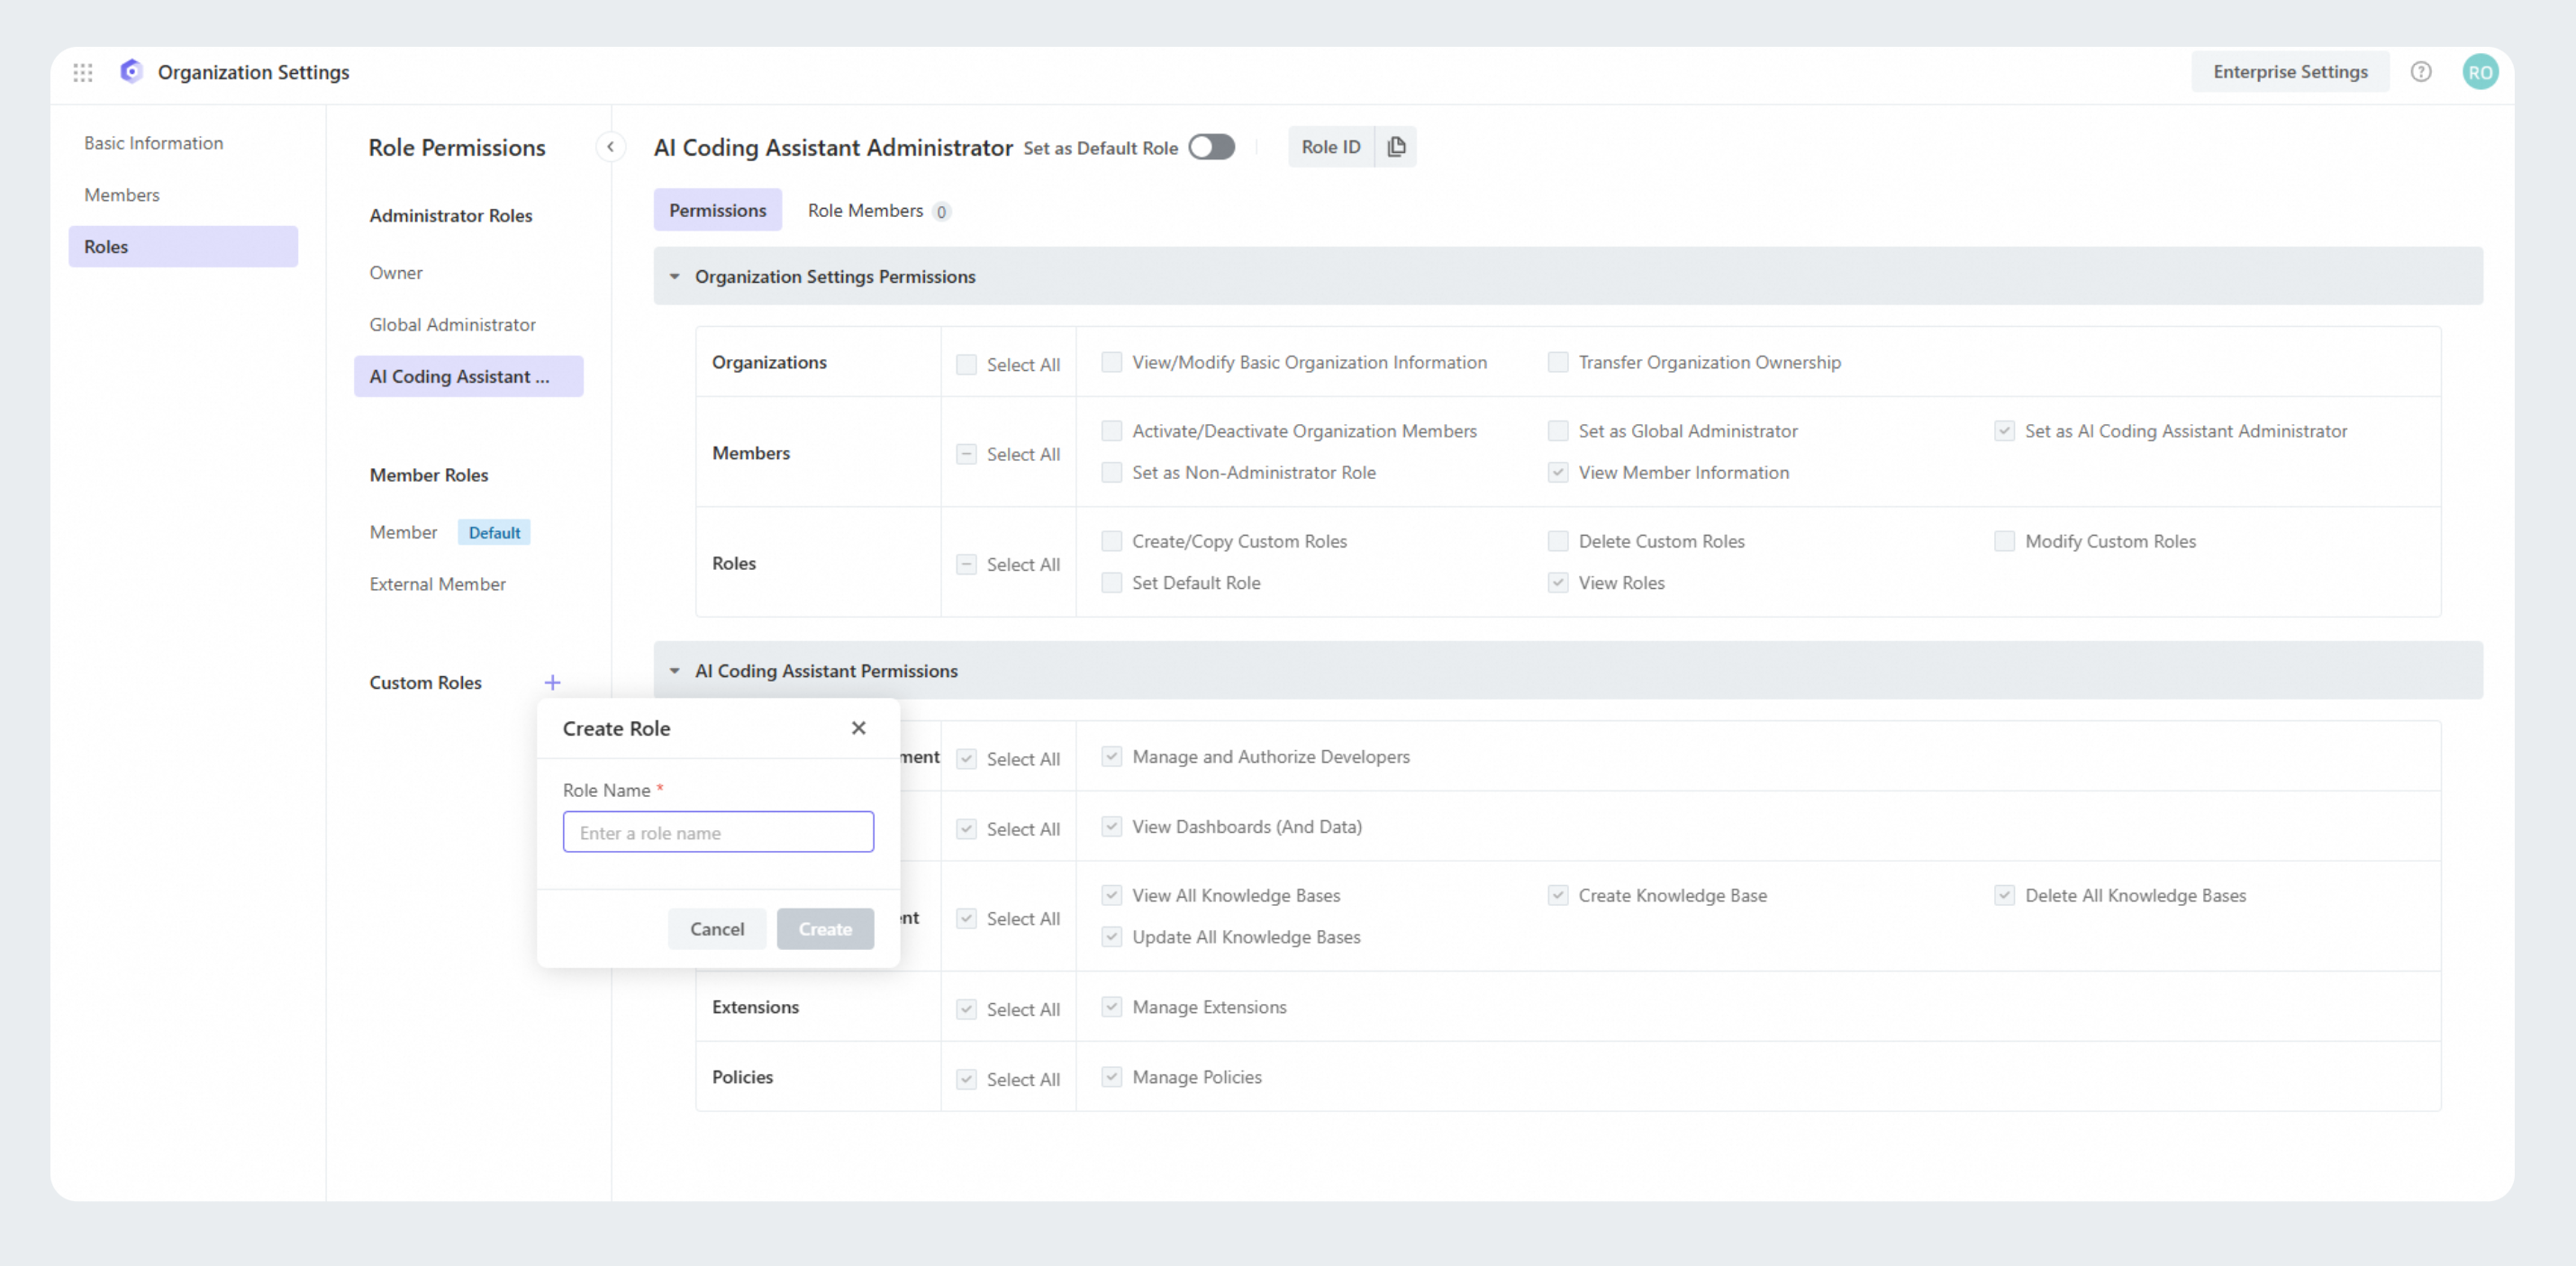
Create a new role: In the custom role section, click the Create Role icon, enter a role name, such as Enterprise Team Knowledge Base Administrator, and click Create.
Set permissions for the role: For different roles, select the permissions required for the role and click Save. Here're some common knowledge base administrator roles and their corresponding permissions.
Team admin (recommended)
Scenarios
Applicable to scenarios that require knowledge base management permission isolation. In this case, each administrator can view, create, and manage content only in authorized private knowledge bases and all public knowledge bases.
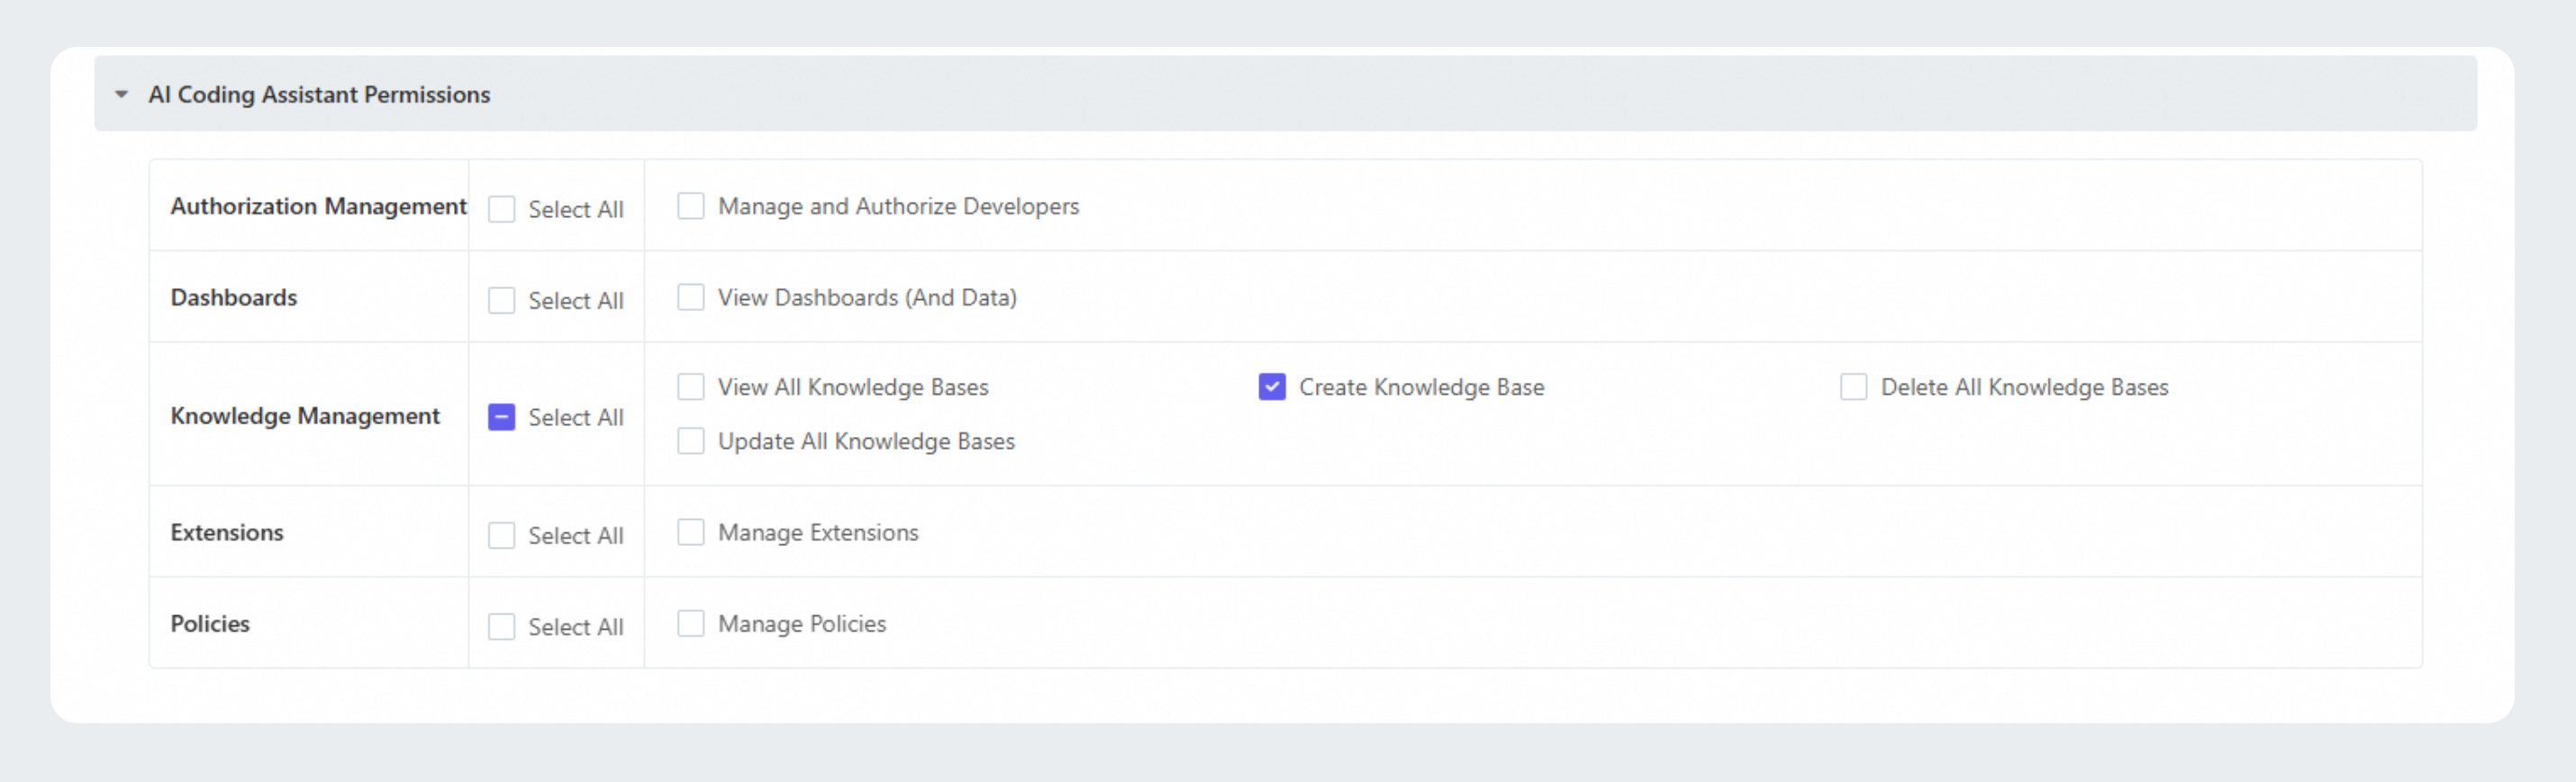
Permission settings
In Knowledge Management, select the Create Knowledge Base permission and deselect all other options.
Permission description
Access the knowledge base page.
Create new knowledge bases.
View and manage (including edit and delete) authorized private knowledge bases only.
View and manage (including edit and delete) all public knowledge bases.
Global admin
Scenarios
Applicable to scenarios that require viewing, creating, and comprehensive management of all knowledge bases (public and private) in the organization.
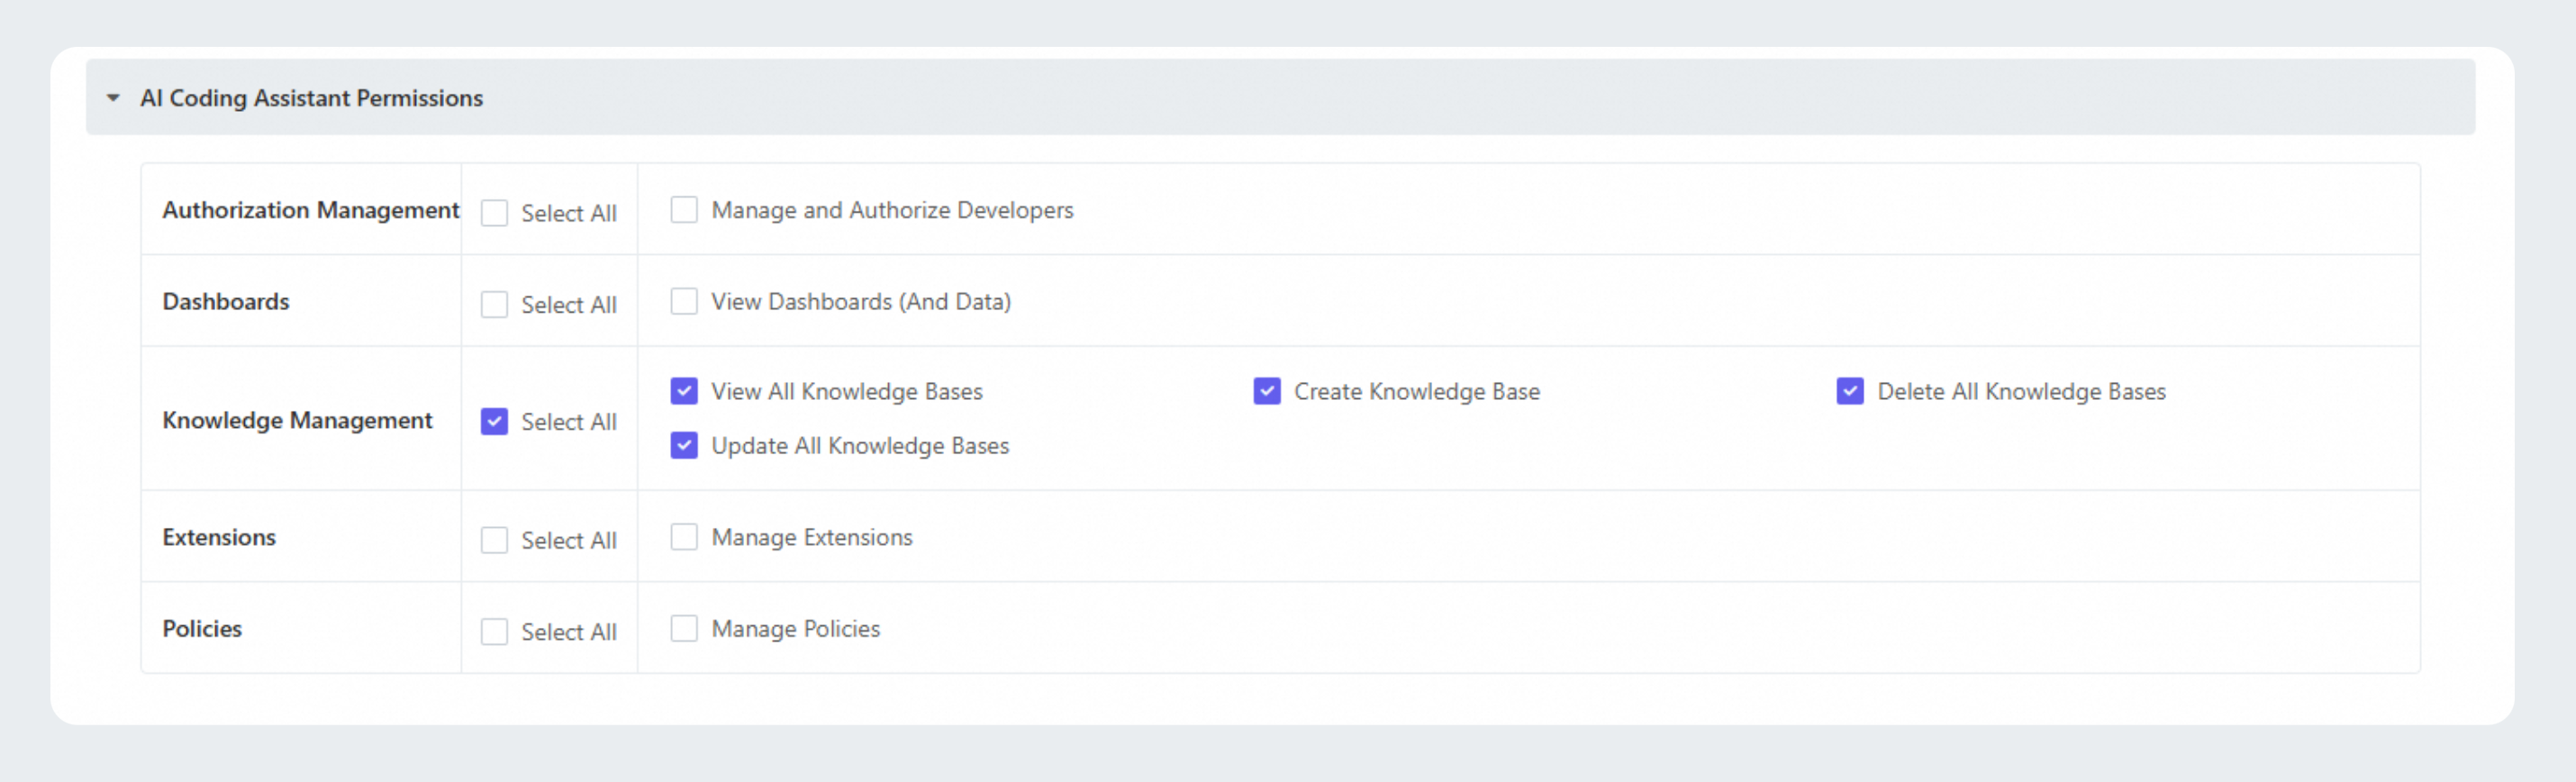
Permission settings
In Knowledge Management, select the following 4 permissions:
View All Knowledge Bases
Create Knowledge Base
Delete All Knowledge Bases
Update All Knowledge Bases
Permission description
Access the knowledge base page.
Create new knowledge bases.
View and manage (including edit, delete) all private and public knowledge bases.
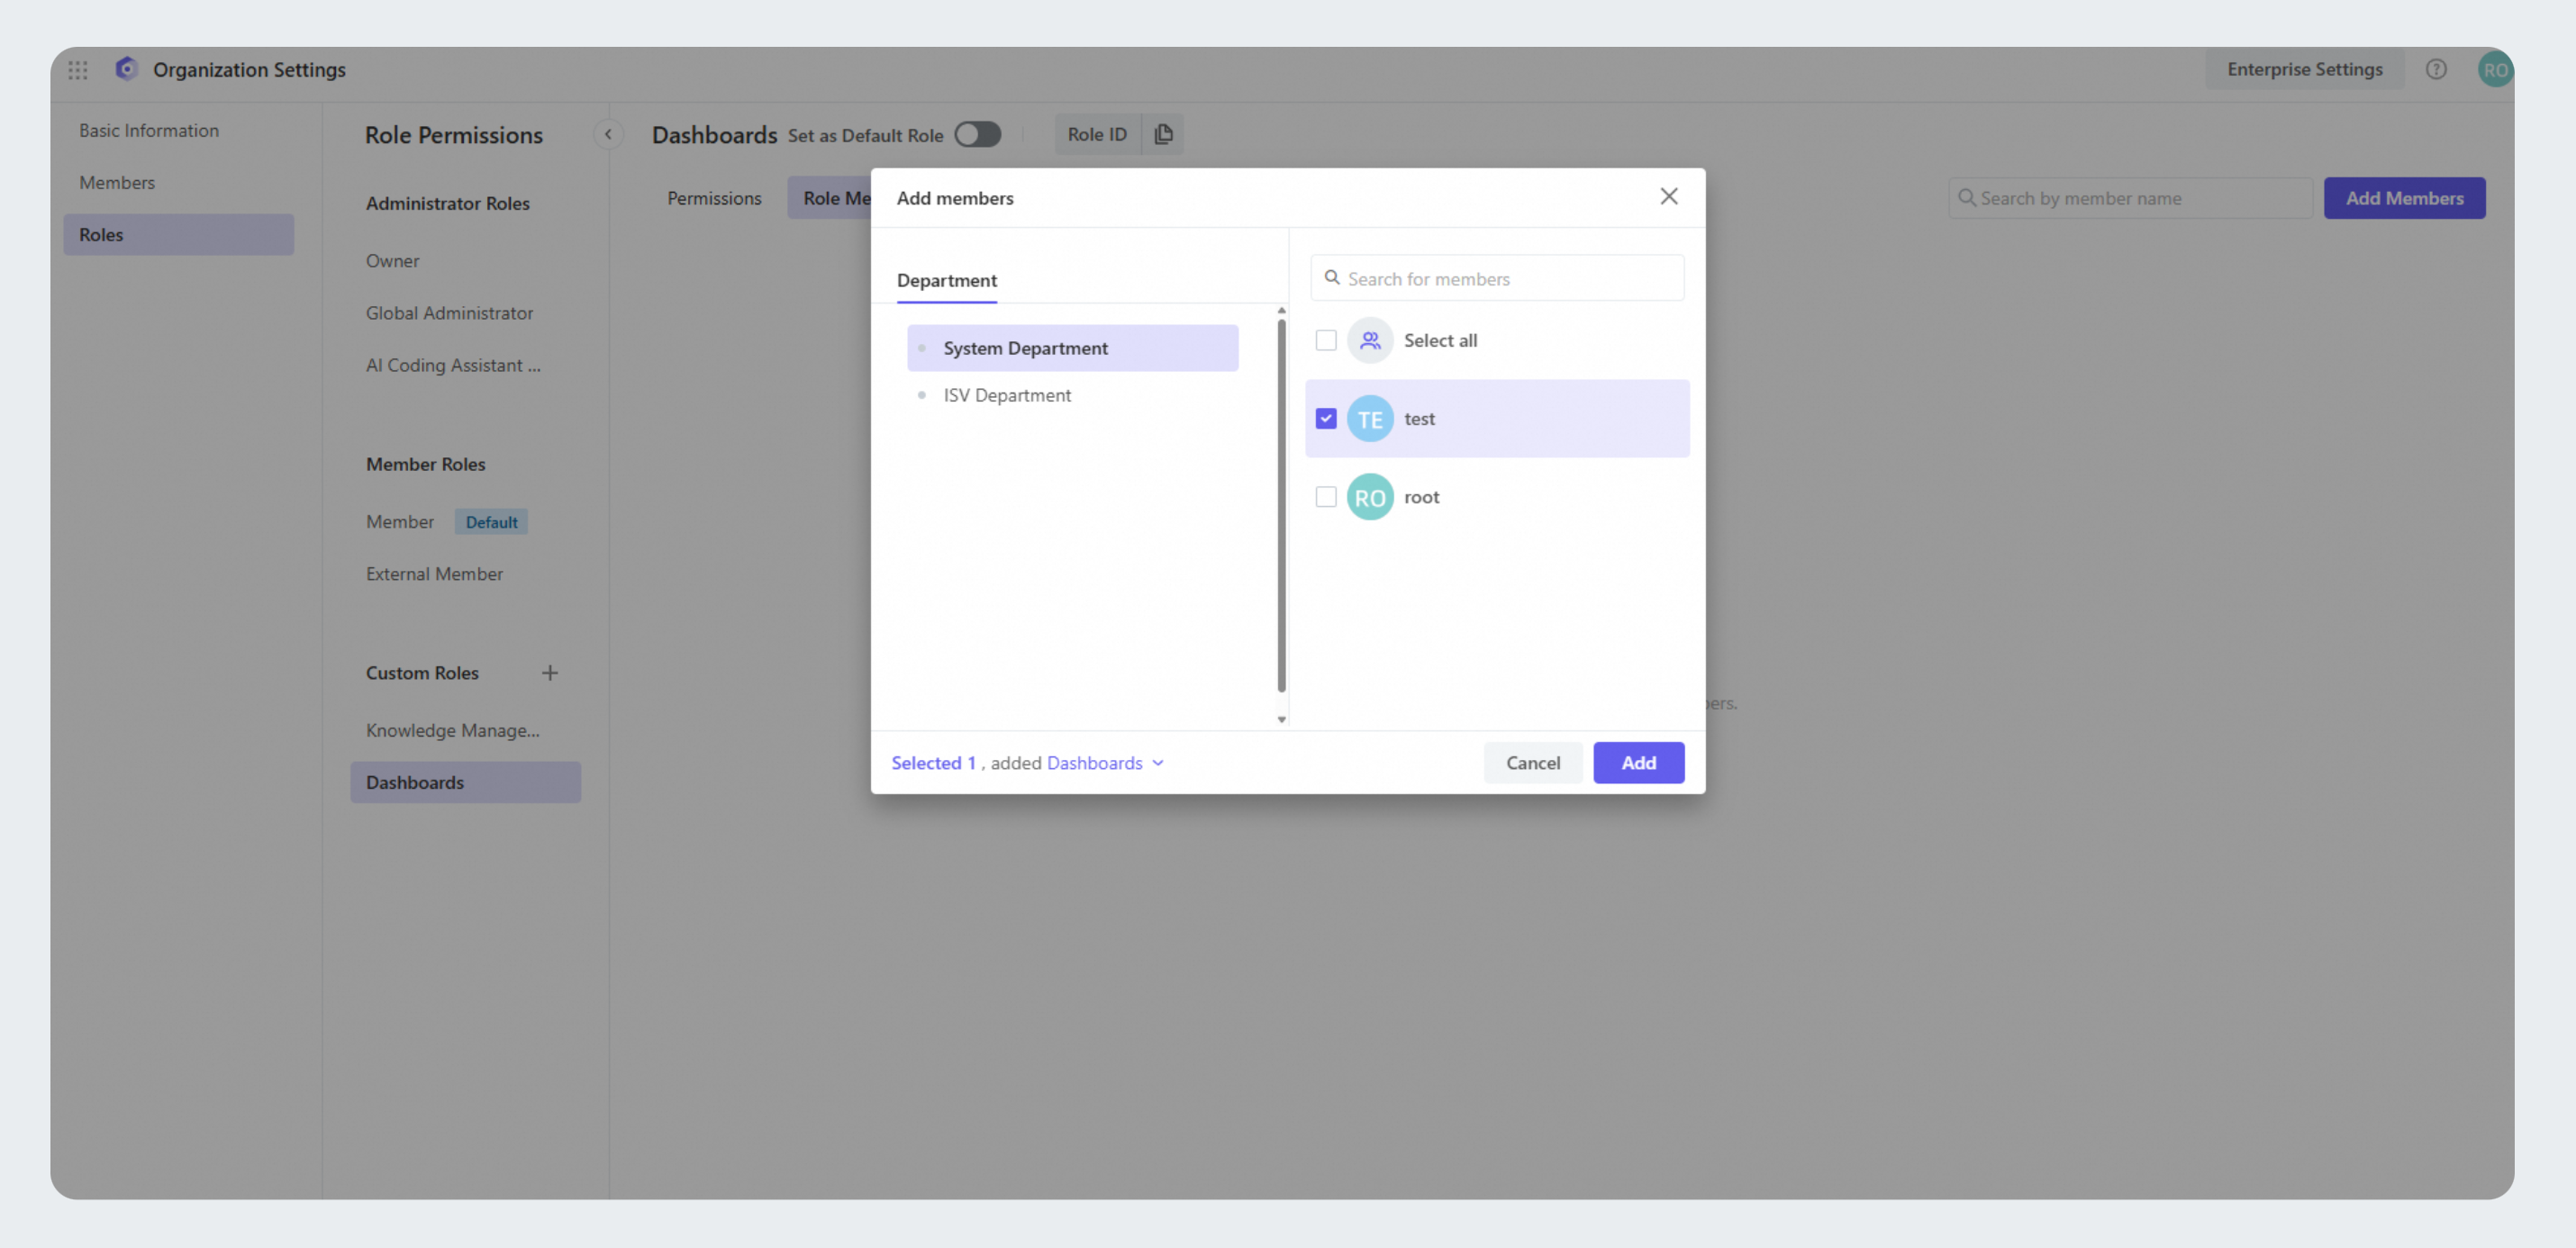
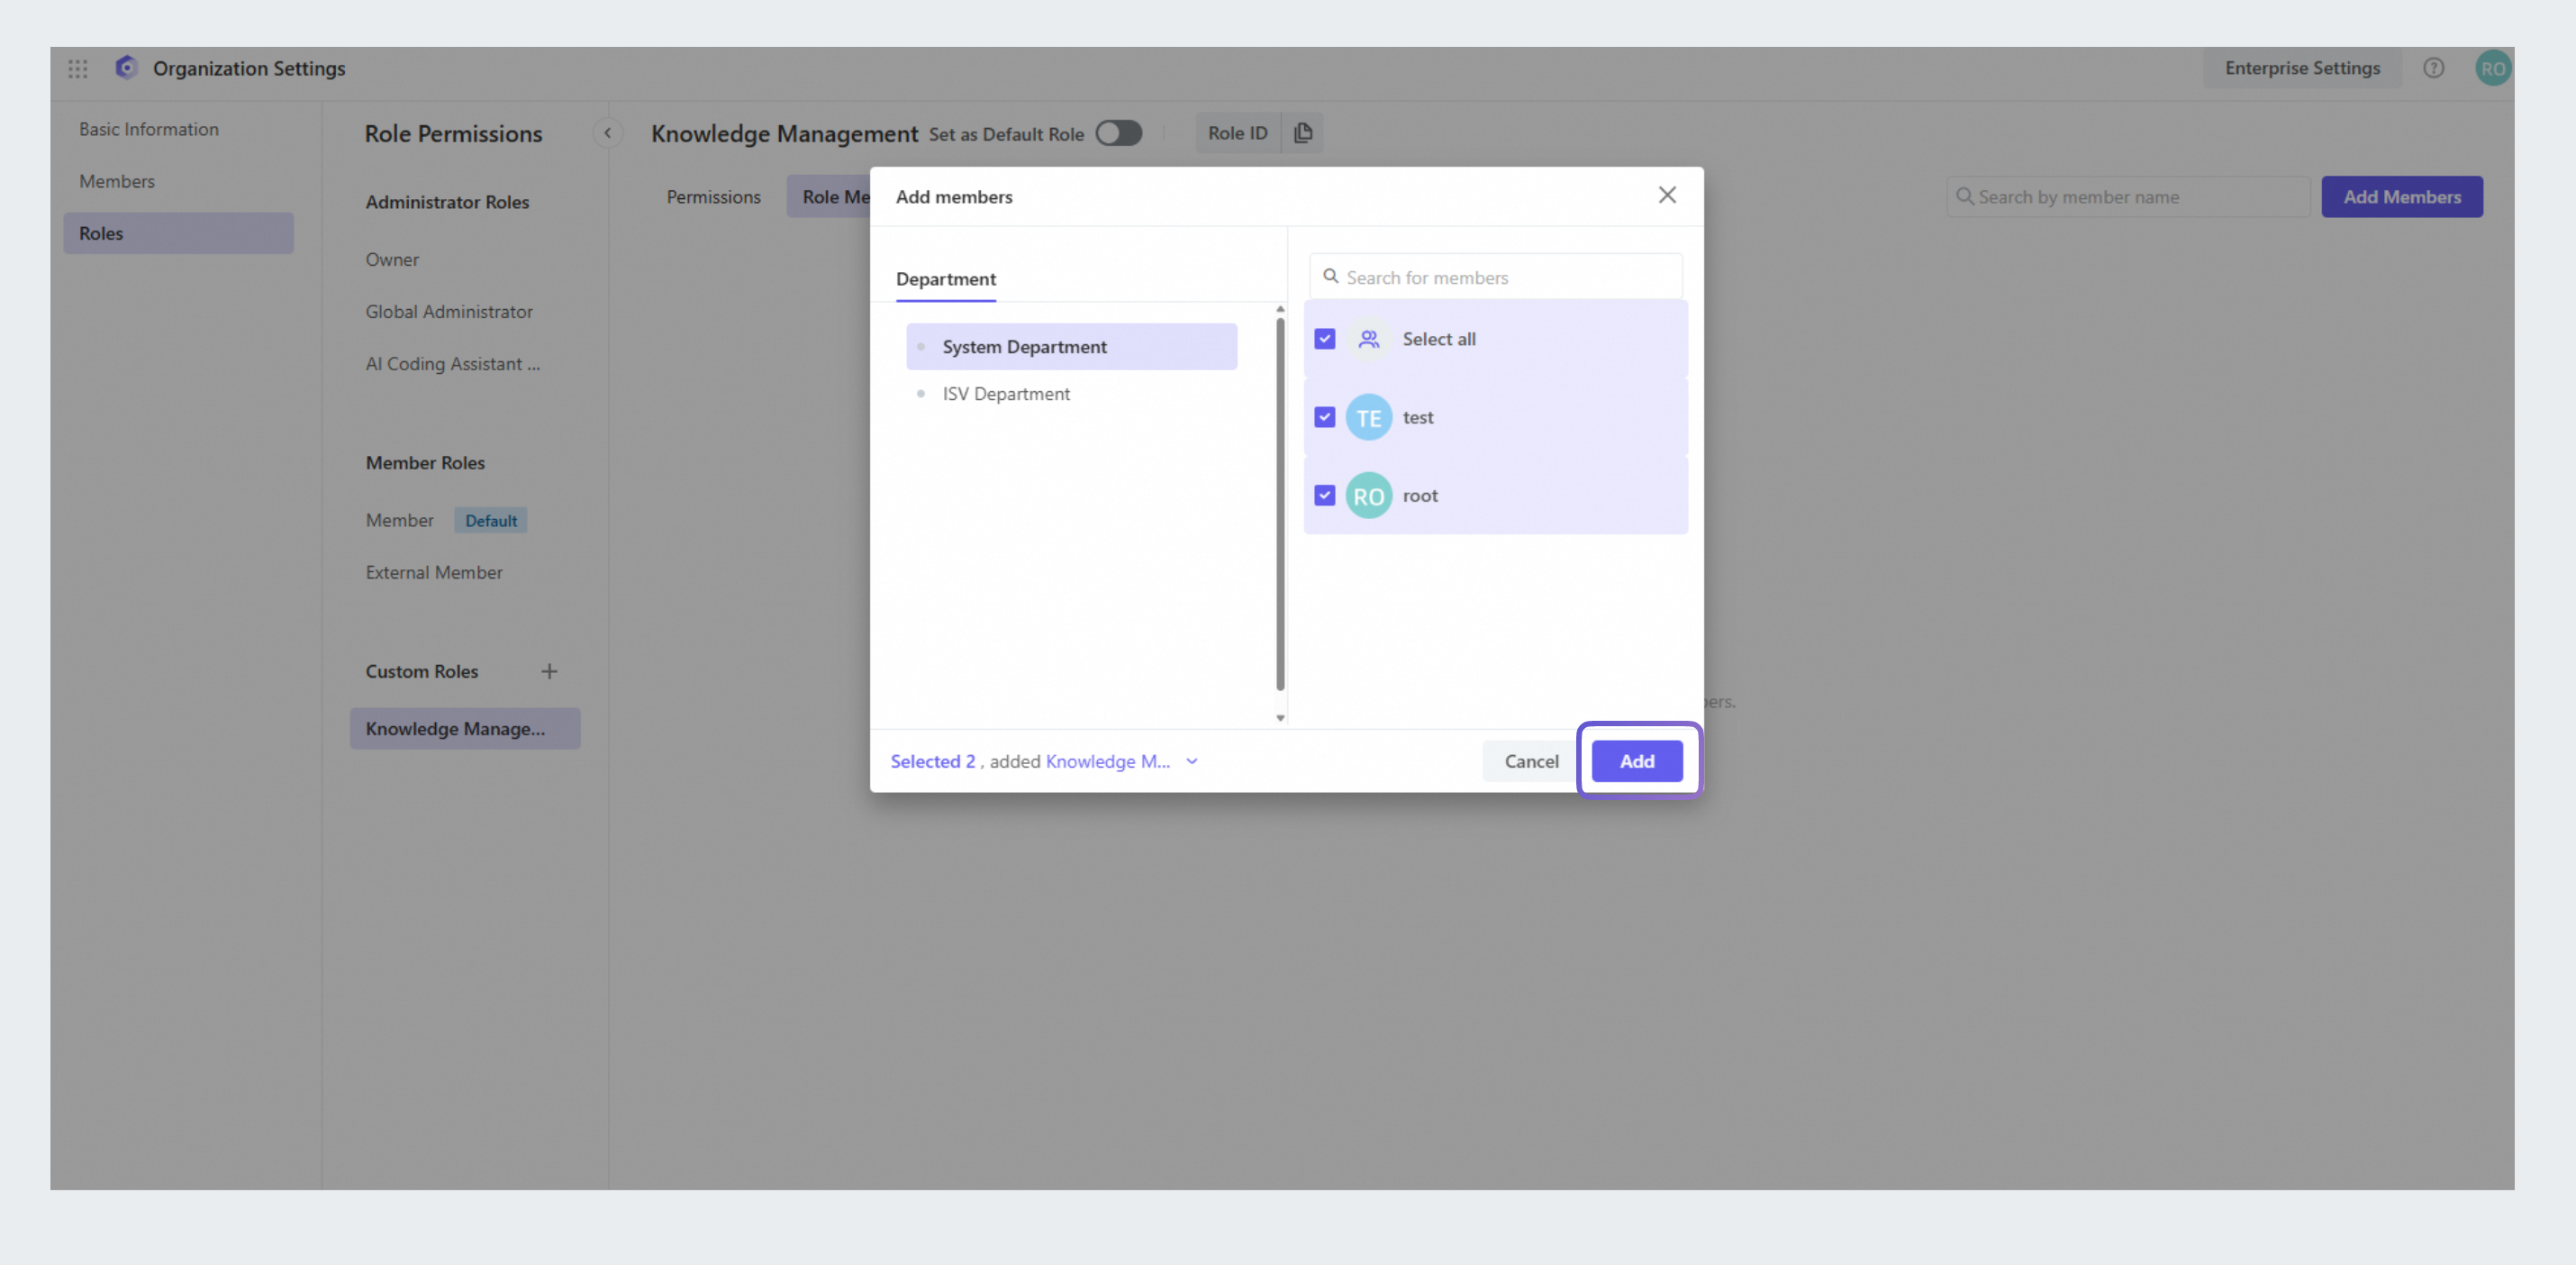
Authorize members: Choose the role you created to enter the custom role page, click the Role Members tab, and then click the Add Member button in the upper right corner to add target users and complete role authorization. After completion, the member will have permission to access the knowledge management page.
Configure private knowledge base admin
After the custom role is created and authorized, the member can access the knowledge base page. However, if the custom role is a Team Knowledge Base Administrator, he or she still cannot view and manage specific private knowledge bases if an administrator role for that knowledge base is not assigned to this member. Lingma Administrator, Enterprise Administrator, or the administrator of the target knowledge base can do this. The detailed steps are as follows:
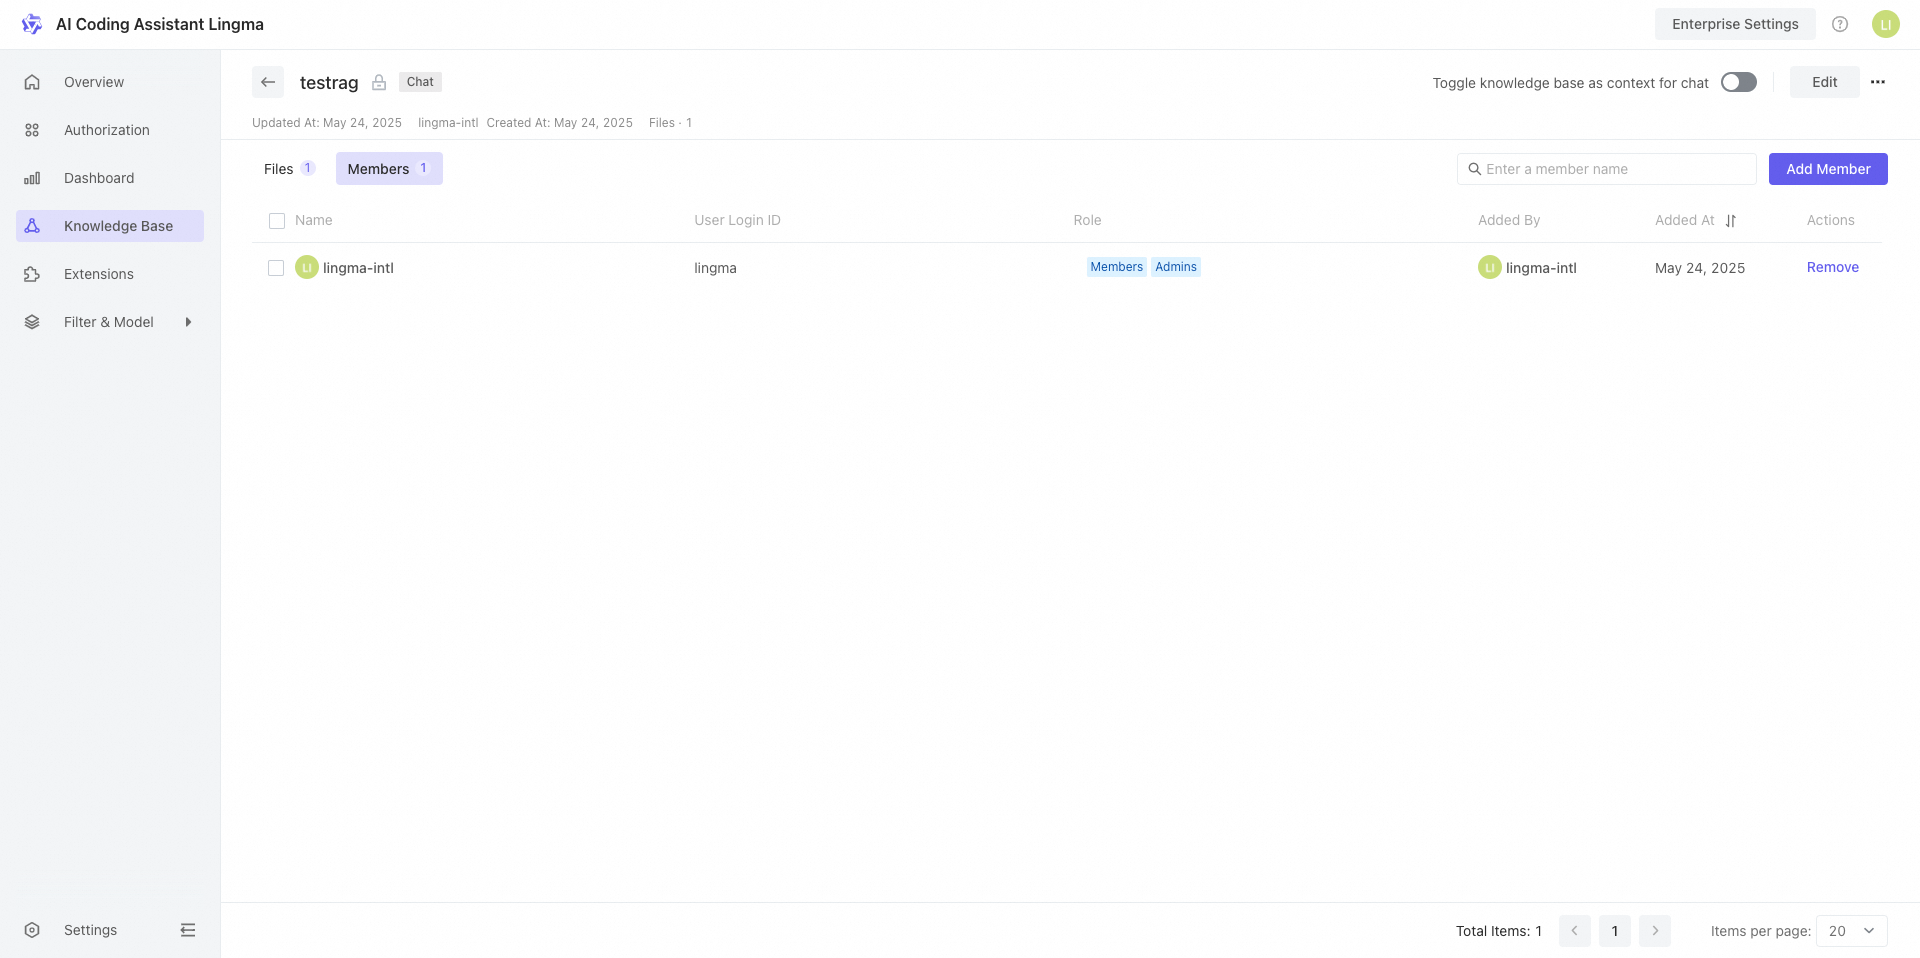
Go to the Knowledge Base page and select the target private knowledge base.
Under the Members tab, click Add Member to add new administrators, or select existing members and add the Admin role for them. After completion, these members will be able to view and manage the private knowledge base.
NoteAdmins: Can view and manage authorized private knowledge bases and all public knowledge bases, including knowledge base member management, file management, etc. The creator of a private knowledge base is the default admin of that knowledge base.
Members: Can use this knowledge base as context for code completion or chat in the IDE.
Custom dashboard administrator
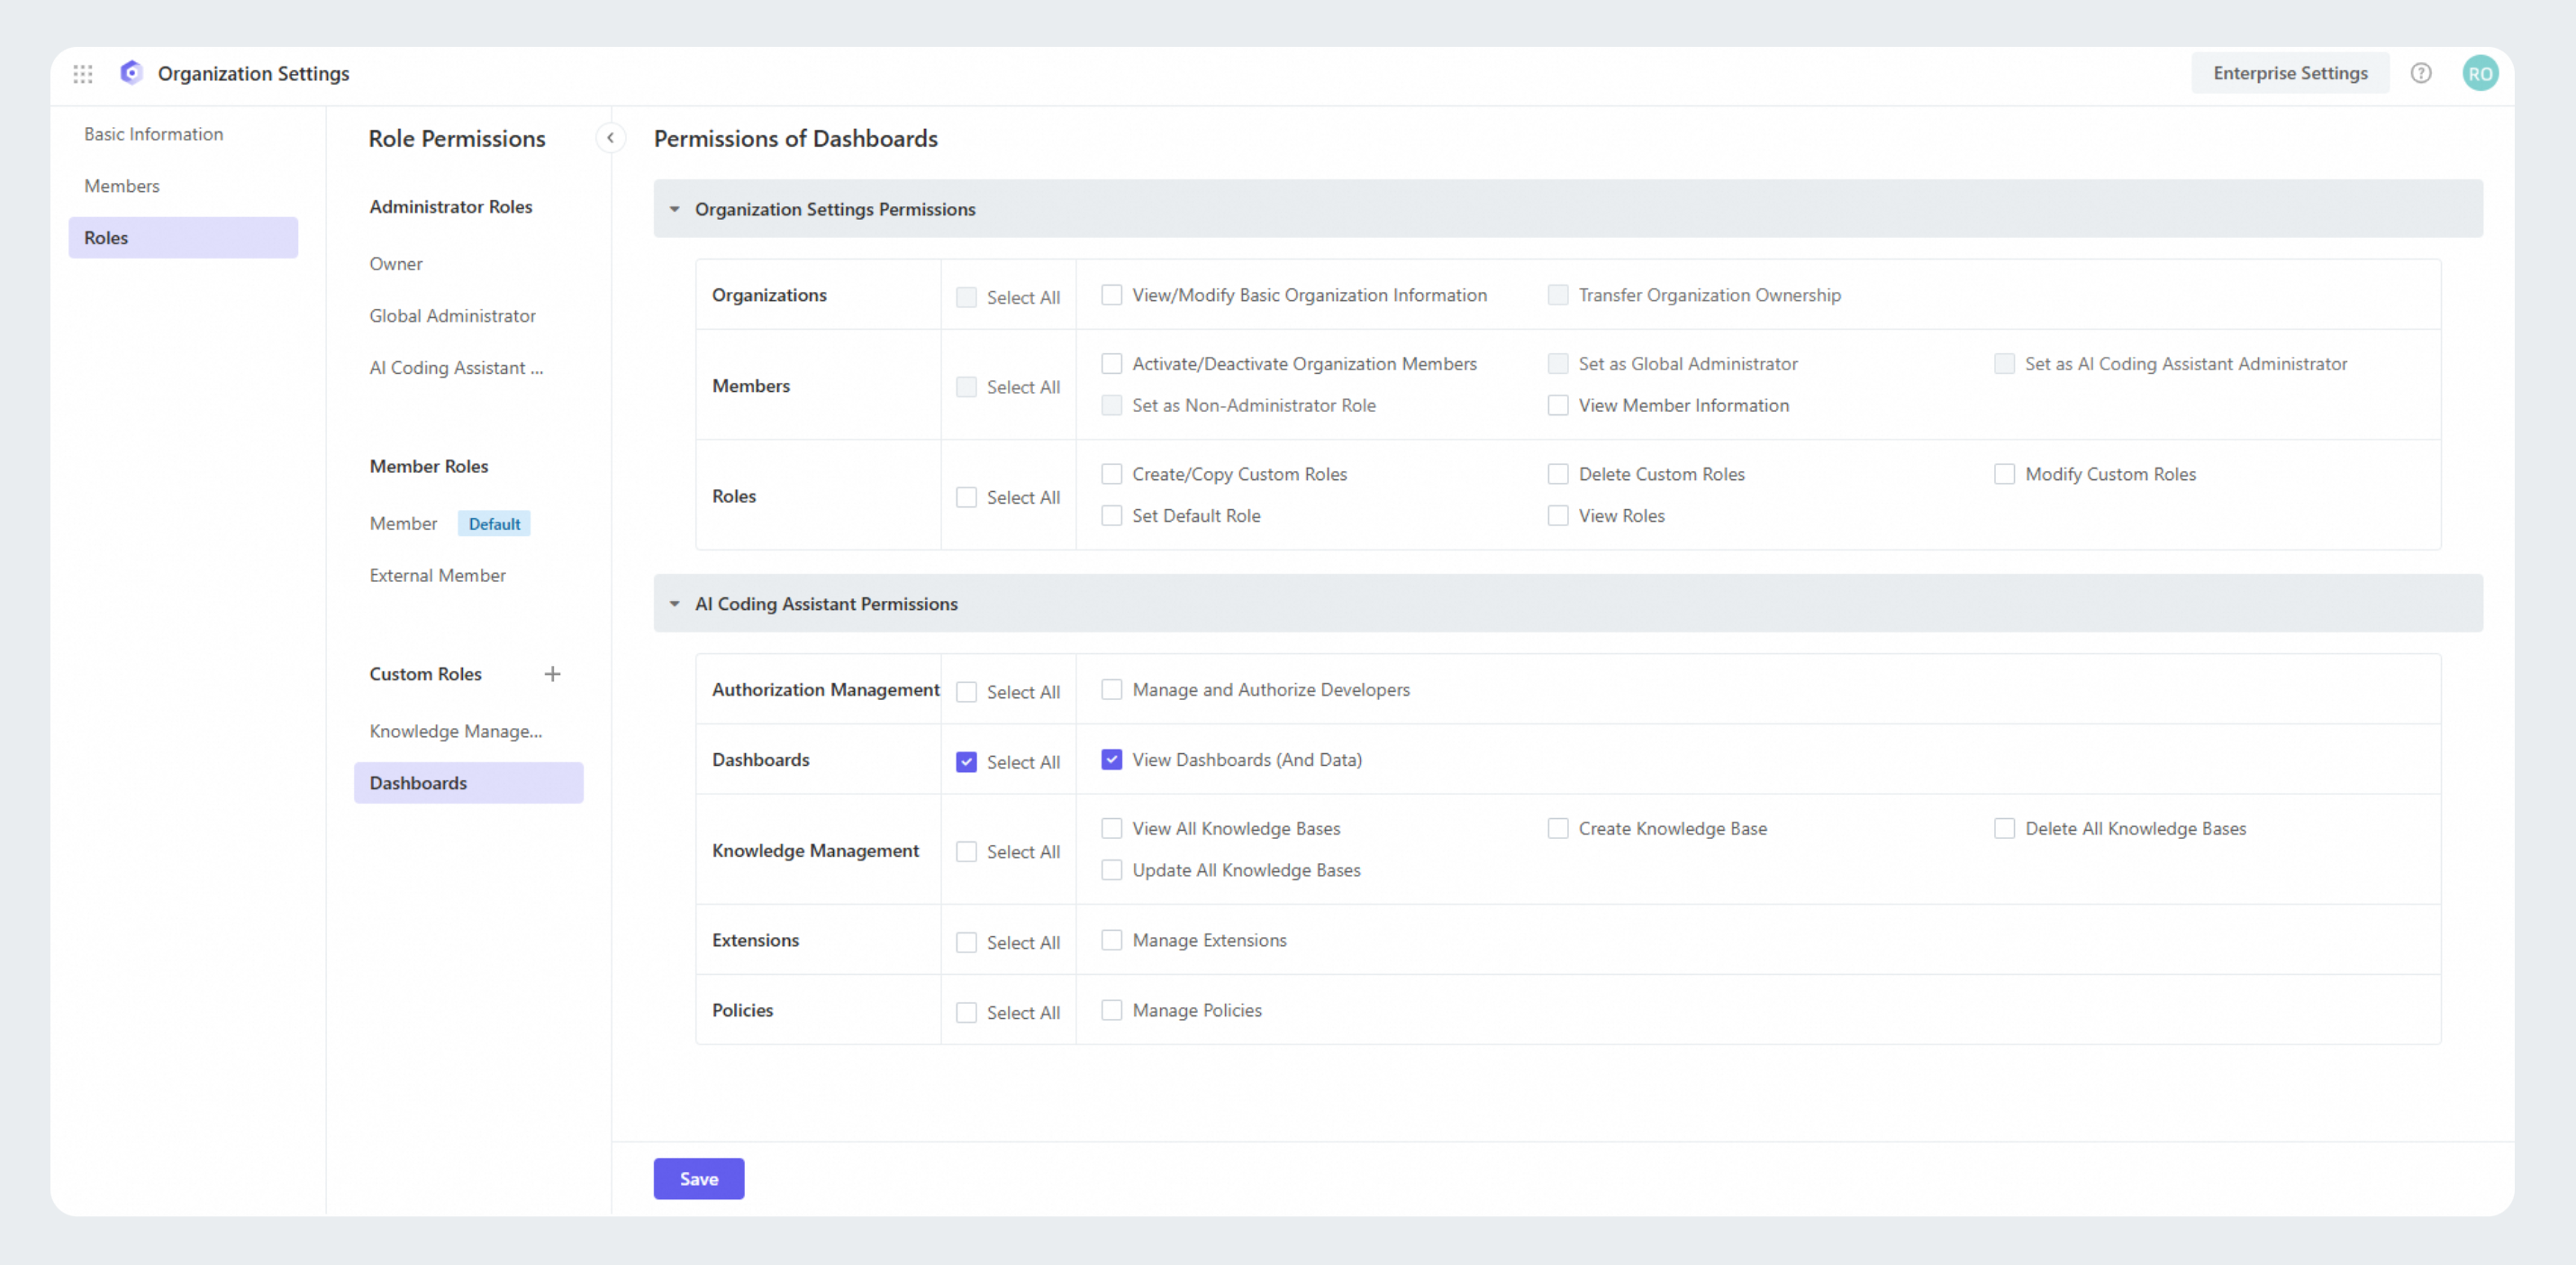
Create role: Under , click the Create Role icon. Enter a role name, such as Dashboard Admin, and click Create.
Set permissions for the role: Select the View Dashboards (and Data) permission and click Save.
Authorize members: Choose the role you created to enter the custom role page, click the Role Members tab, and then click the Add Member button in the upper right corner to complete role authorization. After authorization is complete, the member can enter the dashboard page and view the statistics on that page.