Ambari allows you to install, manage and maintain, and monitor Hadoop components. You can use Ambari to manage Hadoop clusters. This topic describes how to integrate LindormDFS (LDFS) with Ambari as the underlying storage to replace Hadoop Distributed File System (HDFS). You can use Ambari together with LindormDFS to build an open source cloud-native big data system in which storage and computing resources are decoupled.
Prerequisites
Your Lindorm instance and Ambari cluster are deployed in the same virtual private cloud (VPC).
The IP address of the Ambari node is added to the whitelist of the Lindorm instance. For more information, see Configure whitelists.
Specify LindormDFS as the default storage engine of Ambari
Activate LindormDFS for the Lindorm instance. For more information, see Activate LindormDFS.
Configure the connection information about LindormDFS.
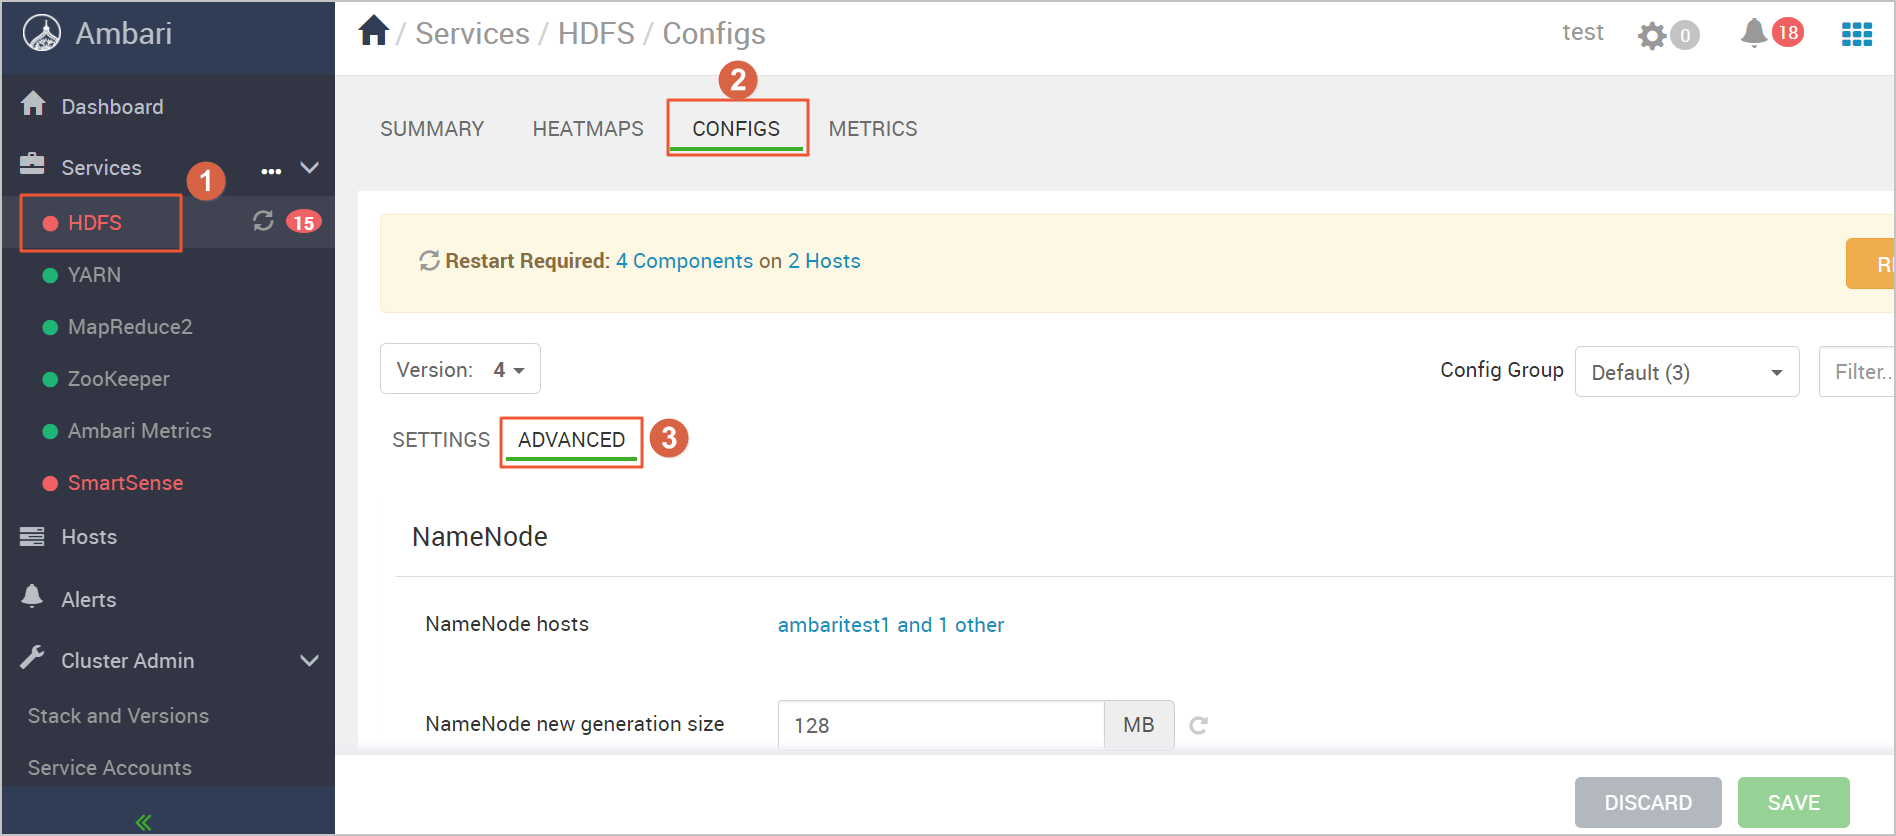
Log on to Ambari. In the left-side navigation pane, click HDFS. Then, click the CONFIGS tab and click ADVANCED. You are redirected to HDFS Configuration page.
By default, a Hadoop distributed file system that is built in Ambari uses a primary/secondary architecture. In this architecture, NameNodes on HDFS are deployed in primary/secondary mode to ensure high availability (HA). Therefore, when you initialize Ambari, deploy HDFS in HA mode.
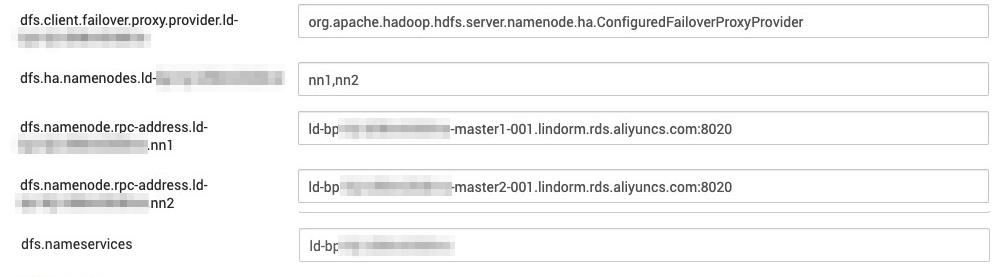
In the Custom hdfs-site section, choose Custom hdfs-site > Add Property. Configure Key, Value, and Property Type to add a configuration item for LindormDFS. The following table describes the parameters.
Key
Value
Property Type
Description
dfs.client.failover.proxy.provider.{Instance ID}
org.apache.hadoop.hdfs.server.namenode.ha.ConfiguredFailoverProxyProvider
TEXT
N/A
dfs.ha.namenodes.{Instance ID}
nn1 and nn2
TEXT
The service ID of the primary and secondary NameNodes in HA mode
dfs.namenode.rpc-address.{Instance ID}
{Instance ID}-master1-001.lindorm.rds.aliyuncs.com:8020
TEXT
N/A
dfs.namenode.rpc-address.{Instance ID}
{Instance ID}-master2-001.lindorm.rds.aliyuncs.com:8020
TEXT
N/A
dfs.nameservices
{Instance ID}
TEXT
N/A

Click ADD to add the configuration item.
Specify LindormDFS as the default storage engine of Ambari.
Log on to Ambari. In the left-side navigation pane, click HDFS. Then, click the CONFIGS tab and click ADVANCED. You are redirected to HDFS Configuration page.

In the Advanced core-site section, enter the endpoint of LindormDFS in the fs.defaultFS field. For more information about how to obtain the endpoint, see Activate LindormDFS.

Modify the configuration file
hdfs-site.In the left-side navigation pane of the Ambari homepage, click HDFS. Then, click the CONFIGS tab and click ADVANCED. Find the Custom hdfs-site section.
Set dfs.internal.nameservices to the ID of the Lindorm instance.
Add the configuration item dfs.namenode.http-address.{Instance ID}.nn1 and set the value to
{Instance ID}-master1-001.lindorm.rds.aliyuncs.com:50070.Add the configuration item dfs.namenode.http-address.{Instance ID}.nn2 and set the value to
{Instance ID}-master2-001.lindorm.rds.aliyuncs.com:50070.
Click SAVE to save the settings.
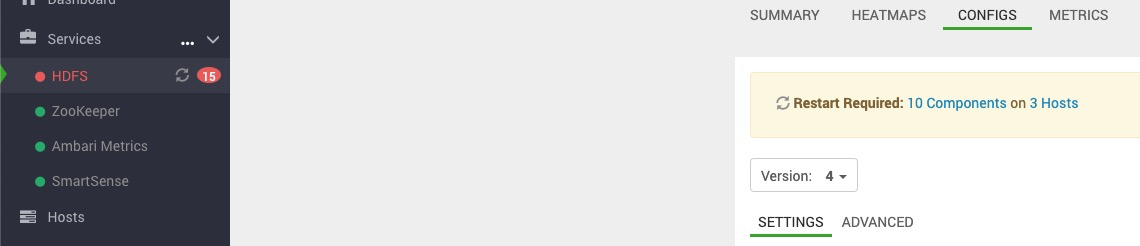
In the upper-right corner of the page, choose ACTIONS > Restart All to restart HDFS.
ImportantAfter you modify the configuration, perform this step to apply the configuration to each Ambari node. HDFS cannot restart due to the configuration changes. Therefore, disable HDFS. To check whether you can use Ambari to connect to LindormDFS, log on to an Ambari node and run the command that is listed in the following step. If the command output shown in the next step appears, the endpoint of LindormDFS is configured.
In the upper-right corner of the page, choose ACTIONS > Stop to disable HDFS.
Check whether the Ambari cluster can connect to LindormDFS.
Log on to an Ambari node. Then, run the following command:
$ hadoop fs -ls /Verify the result. If the following command output appears, the endpoint of LindormDFS is configured.
 Important
If the configuration in Step 3 does not take effect, log on to Ambari and choose ACTIONS > Restart All in the upper-right corner. Then, click Stop to disable LindormDFS. This way, the new configuration immediately takes effect.
If each component is running as expected, the underlying HDFS storage service is replaced with LindormDFS, as shown in the following figure.
Install YARN
Log on to Ambari. In the left-side navigation pane, click the
 icon next to Services and click Add Service. On the page that appears, select YARN + MapReduce2.
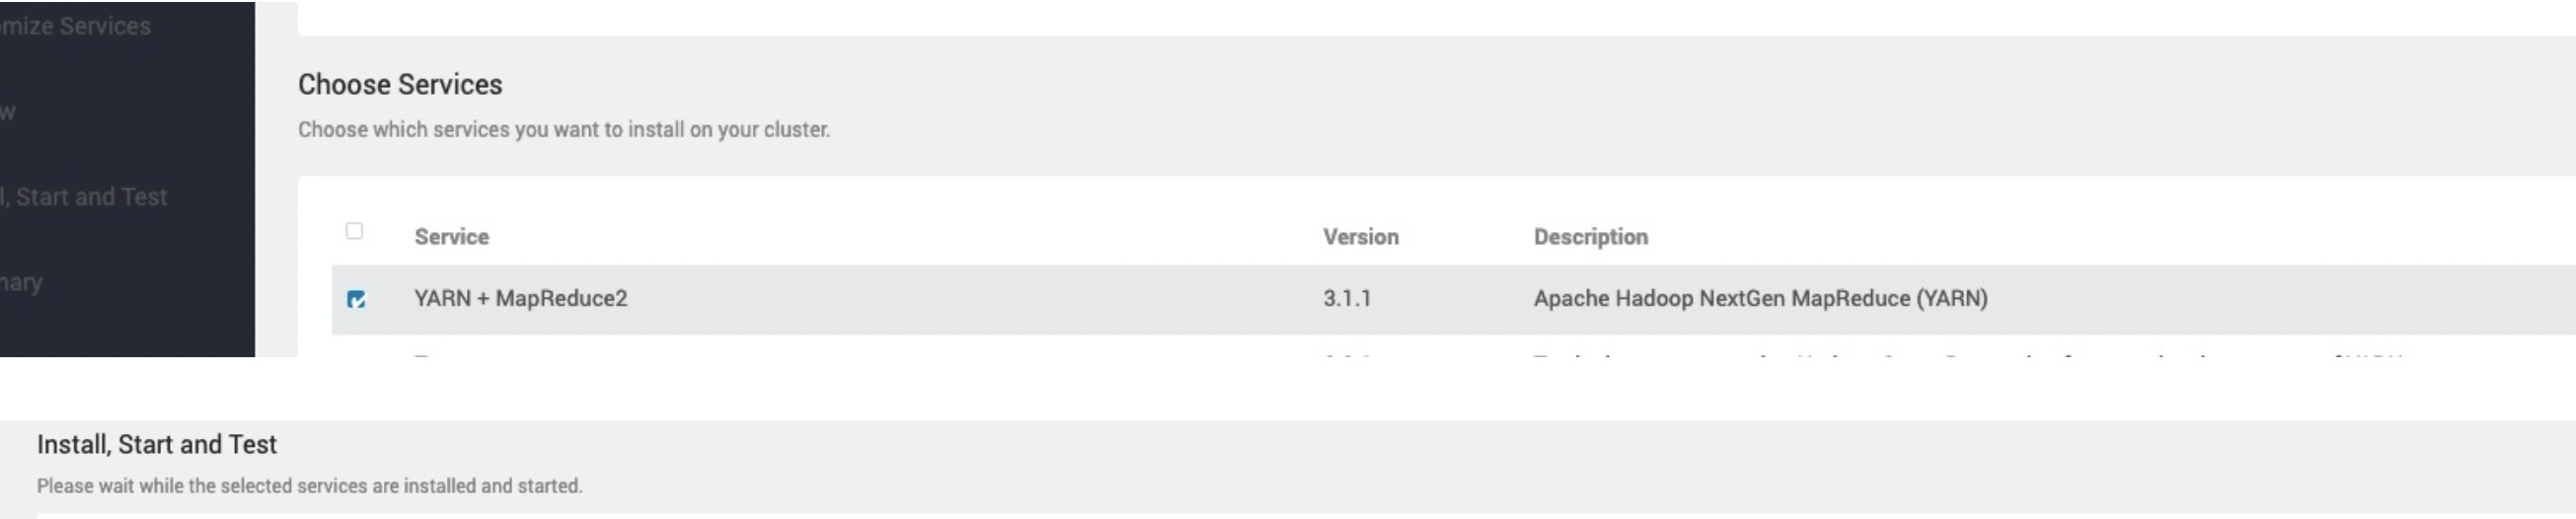
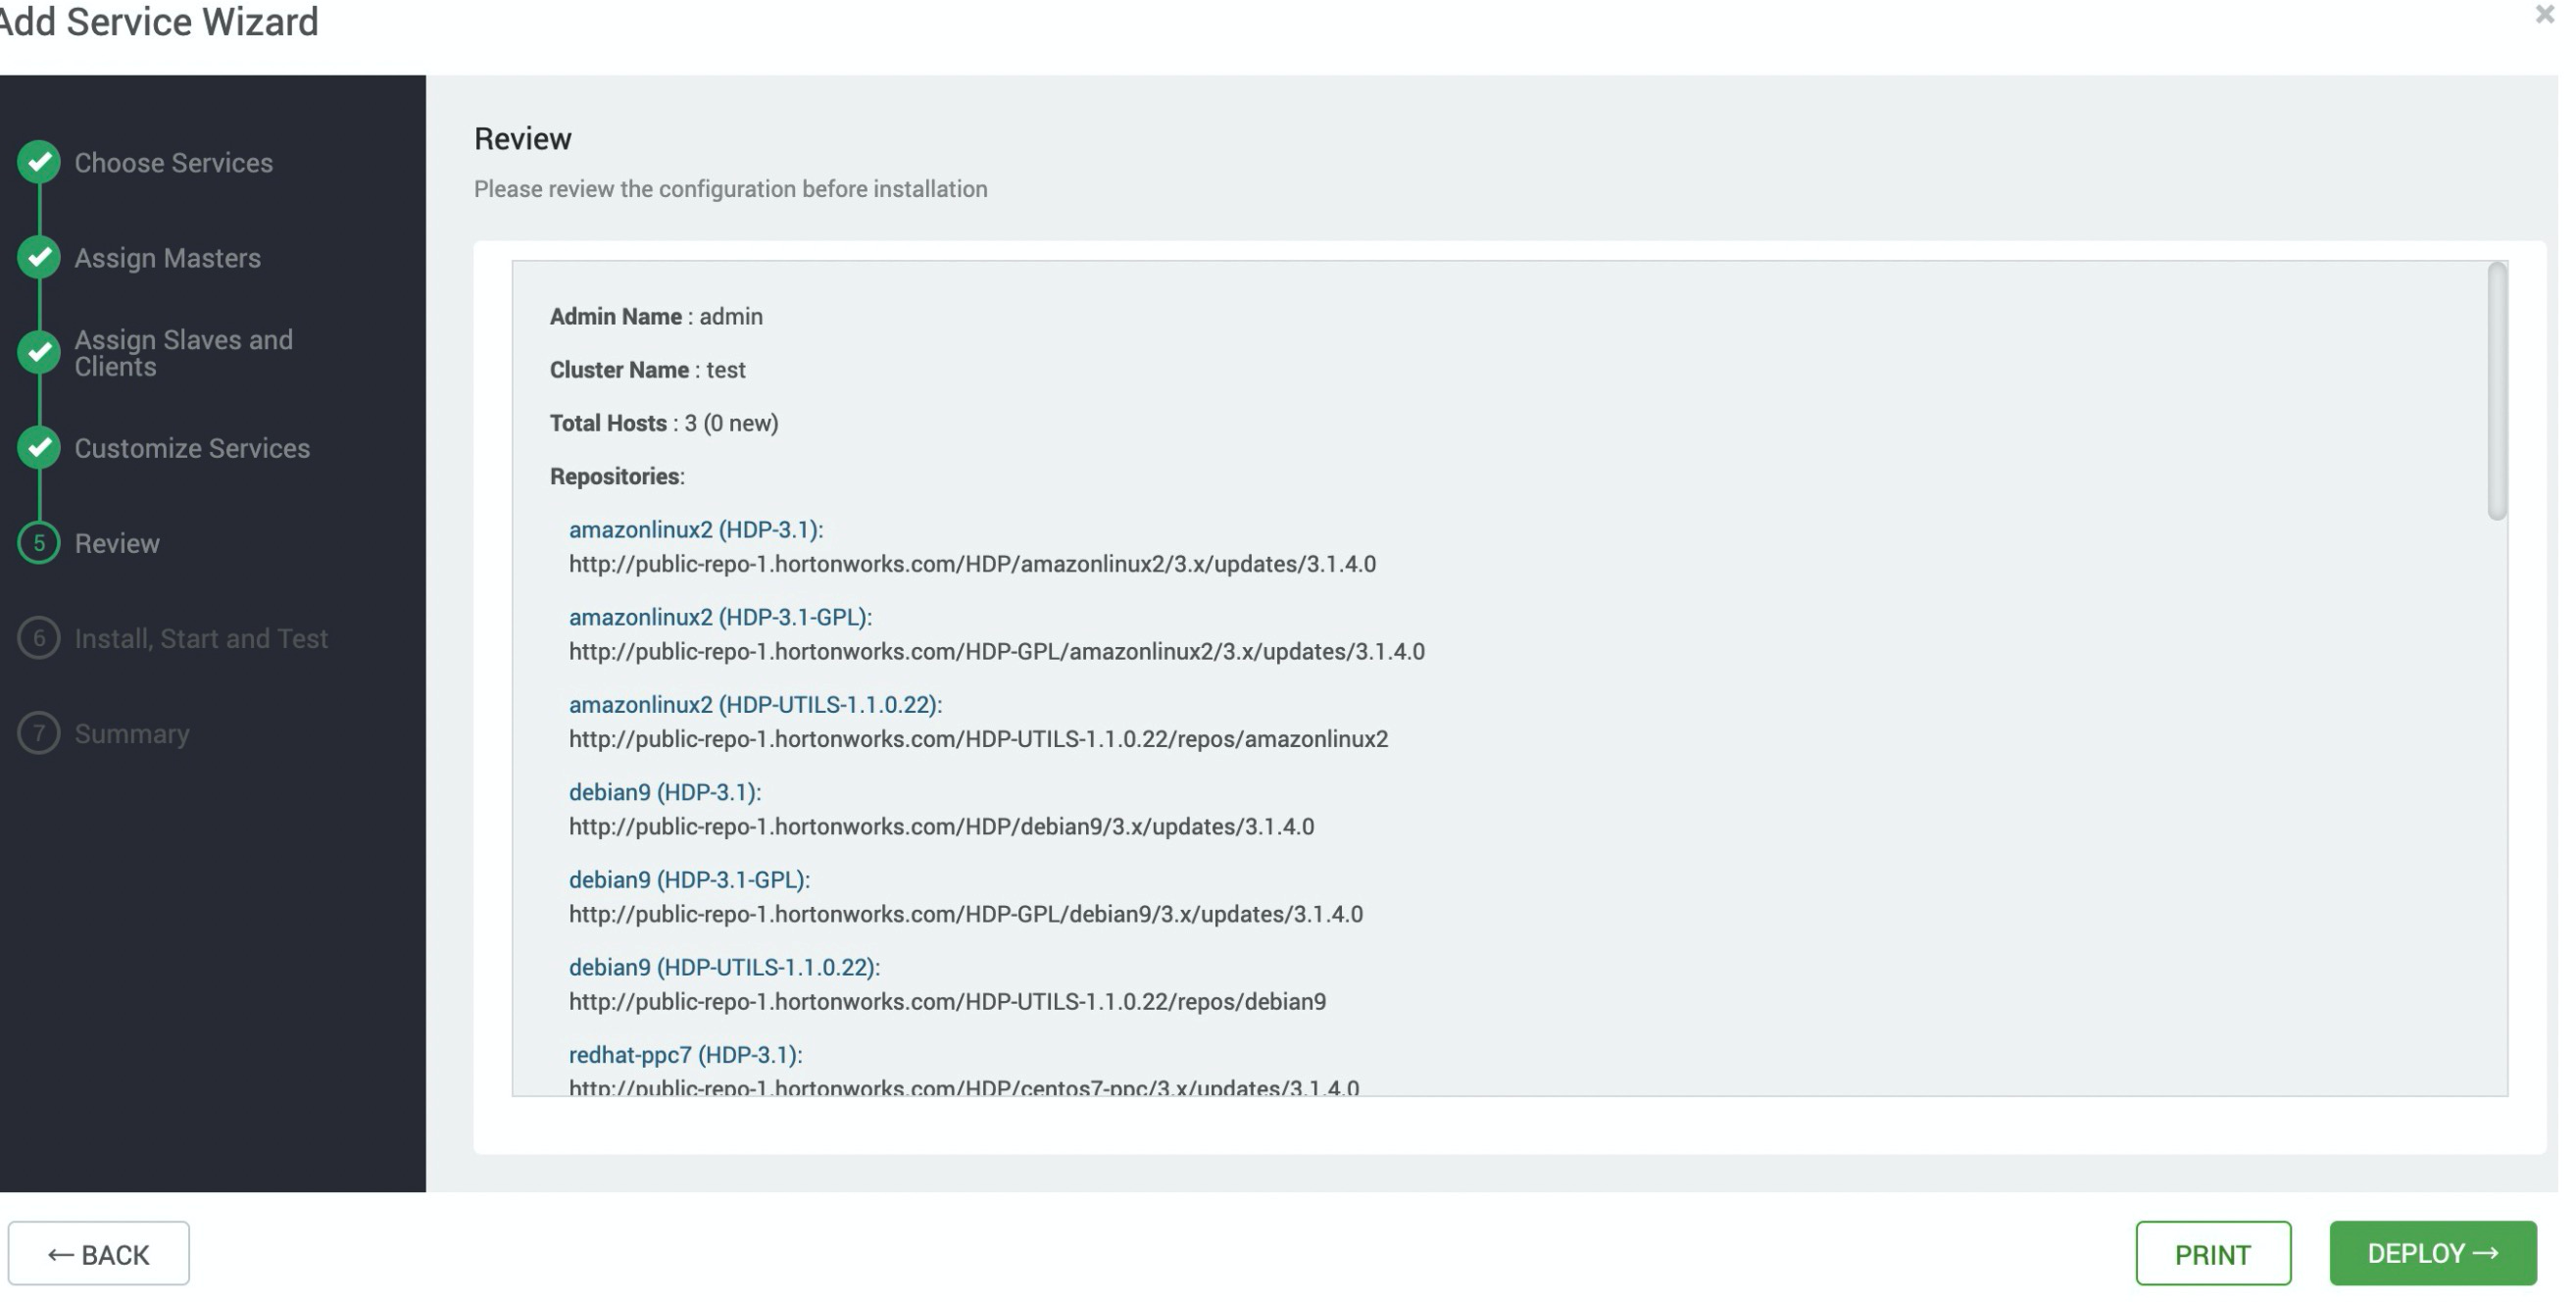
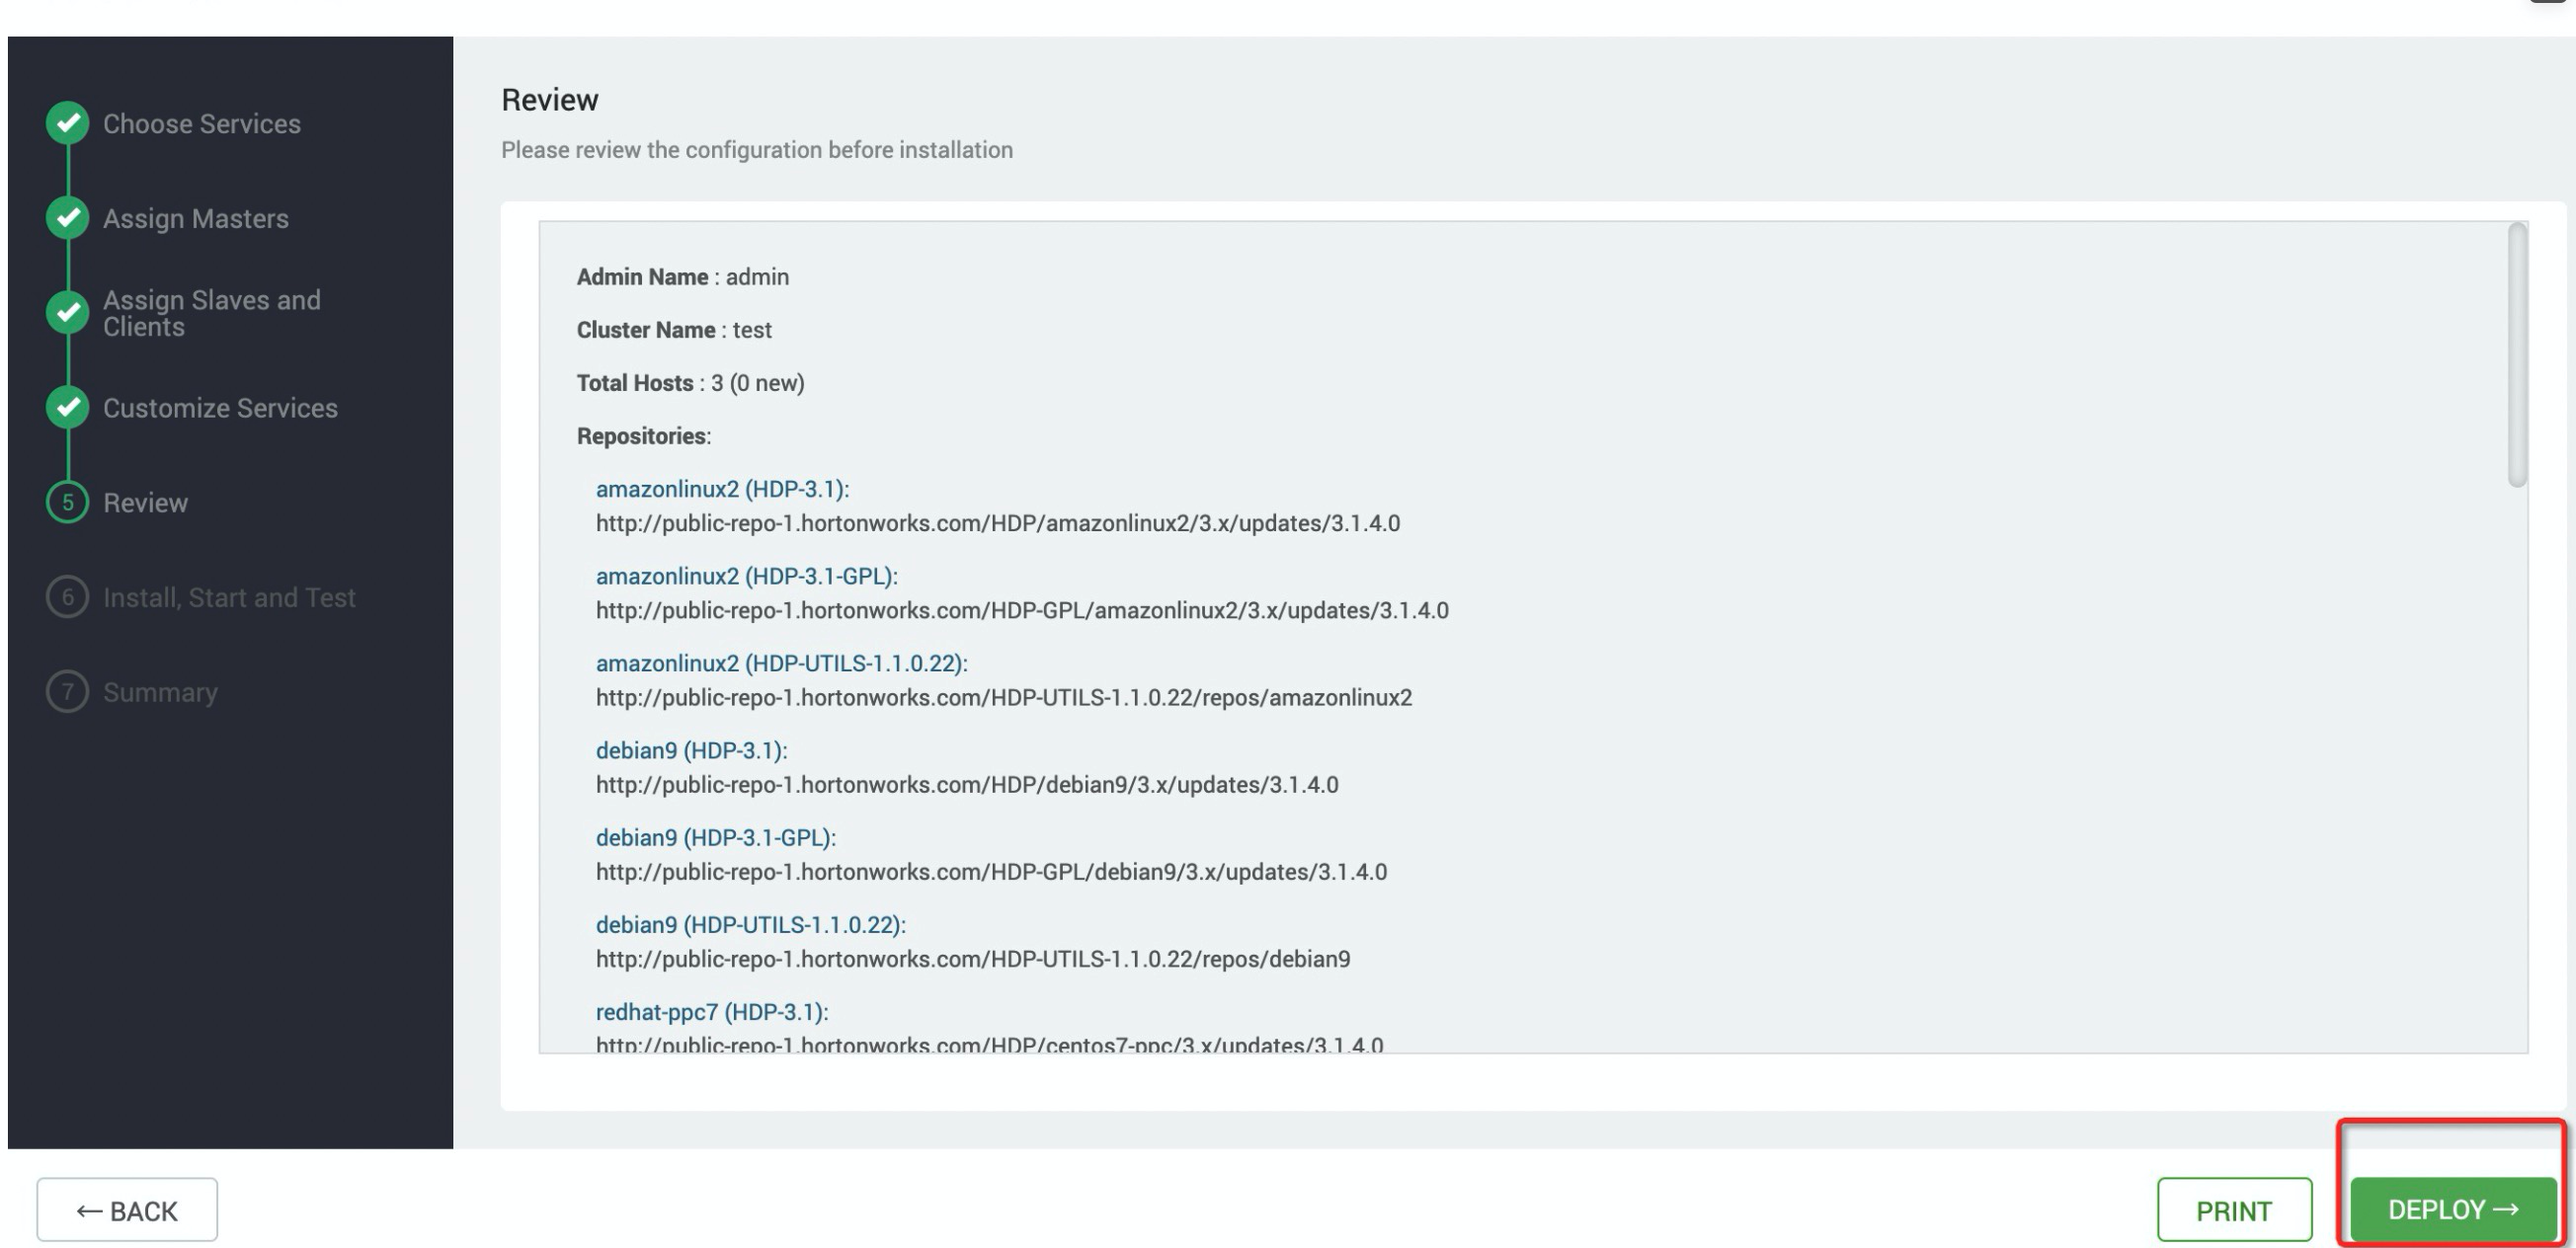
On the Add Service Wizard page, follow the steps in the wizard to install YARN. After you configure the settings, click DEPLOY. Wait until YARN is installed.

Check whether YARN is running as expected.
After you use Ambari to install YARN, a file named
hadoop-mapreduce-examples-3.1.1.3.1.4.0-315.jaris generated. Use the file to test whether YARN is running as expected. When you use Ambari to install YARN, the file is stored in the usr/hdp/3.1.4.0-315/hadoop-mapreduce directory.Log on to an Ambari node. Then, run the following command to generate a test file of 128 MB in the /tmp/randomtextwriter directory:
$ yarn jar /usr/hdp/3.1.4.0-315/hadoop-mapreduce/hadoop-mapreduce-examples-3.1.1.3.1.4.0-315.jar randomtextwriter -D mapreduce.randomtextwriter.totalbytes=134217728 -D mapreduce.job.maps=4 -D mapreduce.job.reduces=4 /tmp/randomtextwriterNoteIn the command,
hadoop-mapreduce-examples-3.1.1.3.1.4.0-315.jarspecifies the test file that is generated in Ambari. Replace the value with the actual file name.Check whether the job is submitted to YARN.
Log on to an Ambari node. Then, run the following command:
$ yarn application -listIf the following command output appears, YARN is running as expected.

Install Hive
Log on to Ambari. In the left-side navigation pane, click the
icon next to Services and click Add Service. On the page that appears, select Hive. 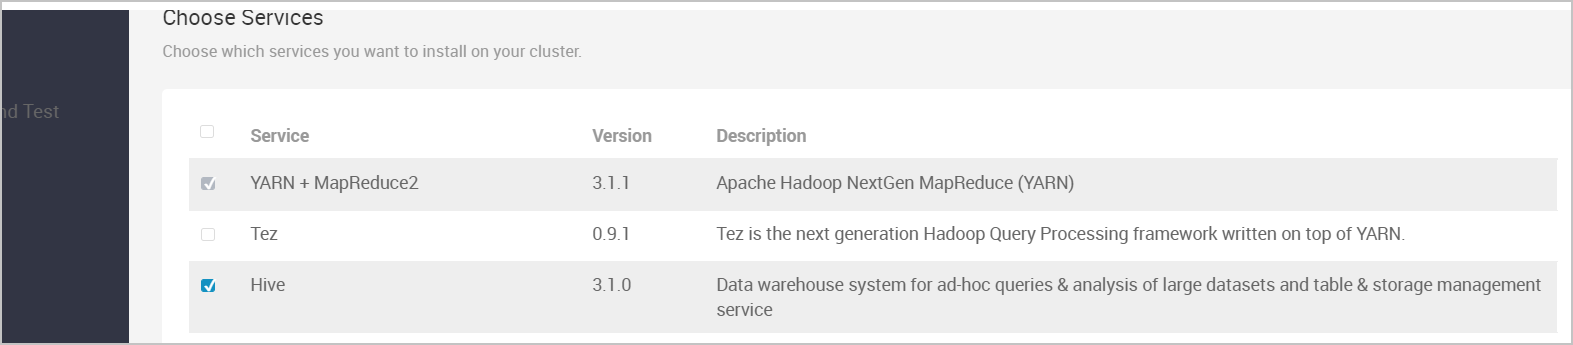
On the Add Service Wizard page, follow the steps in the wizard to install Hive. After you configure the settings, click DEPLOY. Wait until Hive is installed.
If the following page appears, Hive is installed.

Add proxy users. Add proxy users. Hive uses a proxy to connect to LindormDFS. Therefore, before you use Hive to connect to LindormDFS, grant the required permissions on common services, such as Hive and Spark, to the users. If you need to add other users, contact the technical support. For more information, see Technical support.
Restart the YARN service. The Tez component is built on top of YARN. Tez can accelerate jobs that are running in Hive. Therefore, when you install Hive, some of the YARN settings is added to Ambari. If you need to validate the configuration, restart YARN.
In the left-side navigation pane, click YARN. In the upper-right corner of the page, choose ACTIONS > Restart All to restart YARN.
Check whether Hive is running as expected.
Log on to an Ambari node. Then, run the following command:
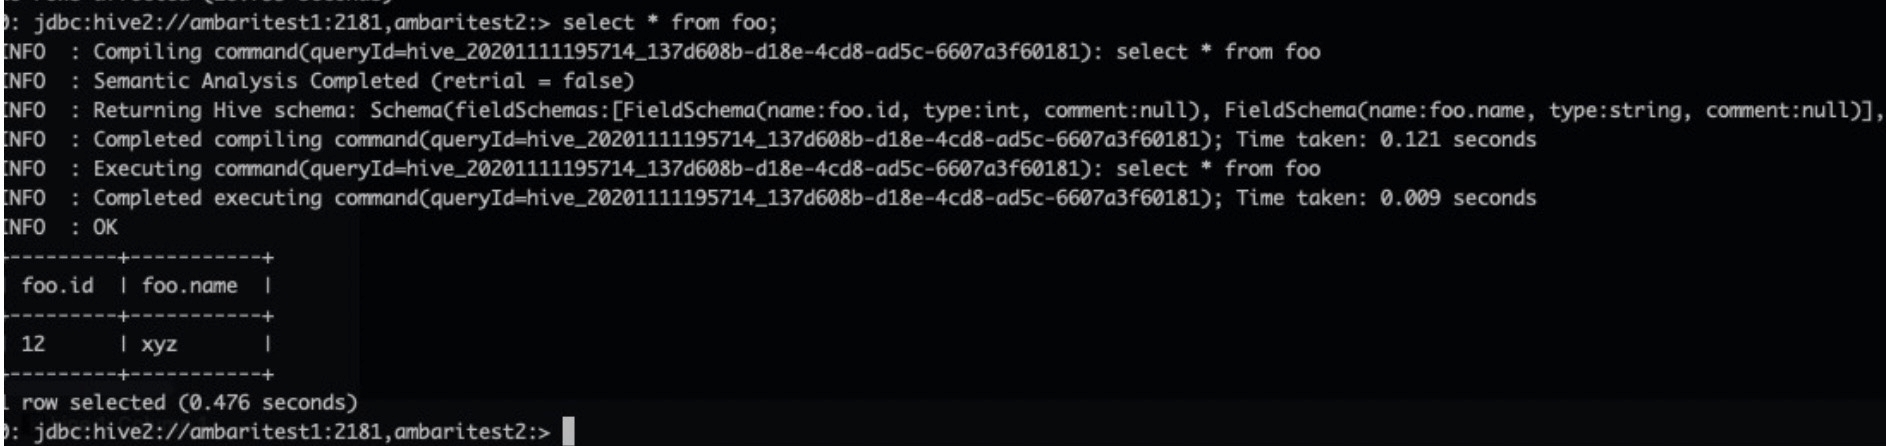
# su - hive
# Log on to the Hive client.
hive@ambaritest2 ~]$ hive
Beeline version 3.1.0.3.1.4.0-315 by Apache Hive
0: jdbc:hive2://ambaritest1:2181,ambaritest2:> create table foo (id int, name string);
INFO  : Compiling command(queryId=hive_20201111193943_5471ede8-e51f-44b8-a91a-b6fde9f58b49): create table foo (id int, name string)
INFO  : Semantic Analysis Completed (retrial = false)
INFO  : Returning Hive schema: Schema(fieldSchemas:null, properties:null)
INFO  : Completed compiling command(queryId=hive_20201111193943_5471ede8-e51f-44b8-a91a-b6fde9f58b49); Time taken: 1.337 seconds
INFO  : Executing command(queryId=hive_20201111193943_5471ede8-e51f-44b8-a91a-b6fde9f58b49): create table foo (id int, name string)
INFO  : Starting task [Stage-0:DDL] in serial mode
INFO  : Completed executing command(queryId=hive_20201111193943_5471ede8-e51f-44b8-a91a-b6fde9f58b49); Time taken: 0.814 seconds
INFO  : OK
No rows affected (2.596 seconds)
0: jdbc:hive2://ambaritest1:2181,ambaritest2:> insert into table foo select * from (select 12,"xyz")a;
Run the following command to query data on Hive:
0: jdbc:hive2://ambaritest1:2181,ambaritest2:> select * from foo;If the following command output appears, Hive is installed and running as expected.
Install Spark
Log on to Ambari. In the left-side navigation pane, click the
icon next to Services and click Add Service. On the page that appears, select Spark2. 
Follow the steps in the wizard to install Spark 2. After you configure the settings, click DEPLOY. Wait until Spark 2 is installed.
Check whether Spark is running as expected.
After you use Ambari to install Spark, a file named
spark-examples_2.11-x.x.x.x.x.x.0-315.jaris generated. Use the file to test whether Spark is running as expected. When you use Ambari to install Spark, the file is stored in the /usr/hdp/3.1.4.0-315/spark2/examples/jars/ directory.Log on to an Ambari node. Then, run the following command to generate a test file of 128 MB in the /tmp/randomtextwriter directory. Skip this step if the test file exists.
$ yarn jar /usr/hdp/3.1.4.0-315/hadoop-mapreduce/hadoop-mapreduce-examples-3.1.1.3.1.4.0-315.jar randomtextwriter -D mapreduce.randomtextwriter.totalbytes=134217728 -D mapreduce.job.maps=4 -D mapreduce.job.reduces=4 /tmp/randomtextwriterNoteIn the preceding command,
hadoop-mapreduce-examples-3.1.1.3.1.4.0-315.jarspecifies the test file that is generated in Ambari. Replace the value with the actual file name.Log on to a node on which Ambari is deployed. Then, run the following command to use the Spark test file to query the test file on LindormDFS and query the WordCount result:
$ spark-submit --master yarn --executor-memory 2G --executor-cores 2 --class org.apache.spark.examples.JavaWordCount /usr/hdp/3.1.4.0-315/spark2/examples/jars/spark-examples_2.11-2.3.2.3.1.4.0-315.jar /tmp/randomtextwriterIf the following command output appears, Spark is running as expected.
Install HBase
Log on to Ambari. In the left-side navigation pane, click the
icon next to Services and click Add Service. On the page that appears, select HBase. 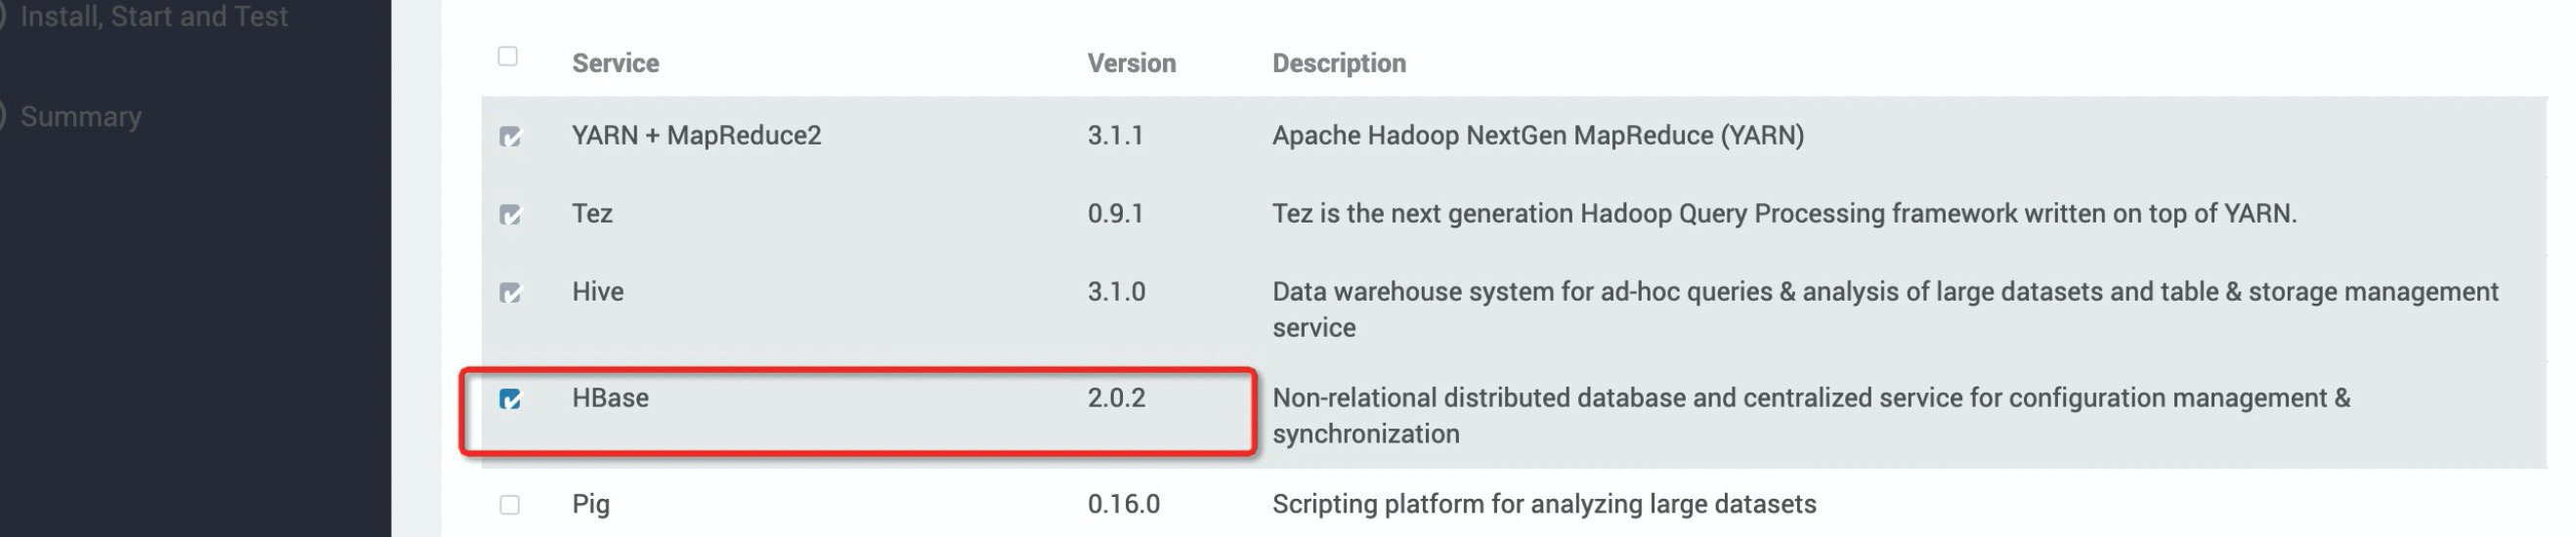
Follow the steps in the wizard to install HBase. After you configure the settings, click DEPLOY. Wait until HBase is installed.
Check whether HBase is running as expected.
Log on to a node on which Ambari is deployed. Run the following command to open HBase Shell:
[spark@ambaritest1 ~]$  hbase shell
SLF4J: Class path contains multiple SLF4J bindings.
SLF4J: Found binding in [jar:file:/usr/hdp/3.1.4.0-315/phoenix/phoenix-5.0.0.3.1.4.0-315-server.jar!/org/slf4j/impl/StaticLoggerBinder.class]
SLF4J: Found binding in [jar:file:/usr/hdp/3.1.4.0-315/hadoop/lib/slf4j-log4j12-1.7.25.jar!/org/slf4j/impl/StaticLoggerBinder.class]
SLF4J: See http://www.slf4j.org/codes.html#multiple_bindings for an explanation.
SLF4J: Actual binding is of type [org.slf4j.impl.Log4jLoggerFactory]
HBase Shell
Use "help" to get list of supported commands.
Use "exit" to quit this interactive shell.
For Reference, please visit: http://hbase.apache.org/2.0/book.html#shell
Version 2.0.2.3.1.4.0-315, r, Fri Aug 23 05:15:48 UTC 2019
Took 0.0023 seconds
hbase(main):001:0>
Run the following commands to create a test table on HBase:
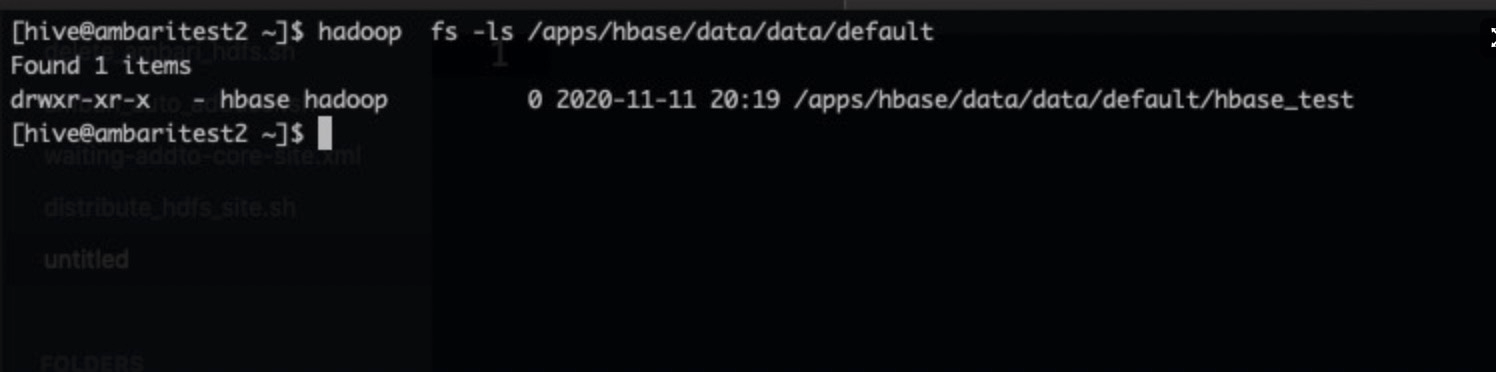
[hive@ambaritest2 ~]$ hbase shell
SLF4J: Class path contains multiple SLF4J bindings.
SLF4J: Found binding in [jar:file:/usr/hdp/3.1.4.0-315/phoenix/phoenix-5.0.0.3.1.4.0-315-server.jar!/org/slf4j/impl/StaticLoggerBinder.class]
SLF4J: Found binding in [jar:file:/usr/hdp/3.1.4.0-315/hadoop/lib/slf4j-log4j12-1.7.25.jar!/org/slf4j/impl/StaticLoggerBinder.class]
SLF4J: See http://www.slf4j.org/codes.html#multiple_bindings for an explanation.
SLF4J: Actual binding is of type [org.slf4j.impl.Log4jLoggerFactory]
HBase Shell
Use "help" to get list of supported commands.
Use "exit" to quit this interactive shell.
For Reference, please visit: http://hbase.apache.org/2.0/book.html#shell
Version 2.0.2.3.1.4.0-315, r, Fri Aug 23 05:15:48 UTC 2019
Took 0.0023 seconds
hbase(main):001:0> create 'hbase_test','info'
Created table hbase_test
Took 1.9513 seconds
=> Hbase::Table - hbase_test
hbase(main):002:0> put 'hbase_test','1', 'info:name' ,'Sariel'
Took 0.2576 seconds
hbase(main):003:0> put 'hbase_test','1', 'info:age' ,'22'
Took 0.0078 seconds
hbase(main):004:0>  put 'hbase_test','1', 'info:industry' ,'IT'
Took 0.0077 seconds
hbase(main):005:0> scan 'hbase_test'
ROW                                                                                         COLUMN+CELL
 1                                                                                          column=info:age, timestamp=1605097177701, value=22
 1                                                                                          column=info:industry, timestamp=1605097181758, value=IT
 1                                                                                          column=info:name, timestamp=1605097174400, value=Sariel
1 row(s)
Took 0.0230 seconds
hbase(main):006:0>
Run the following command to query the /apps/hbase/data/data/default directory on LindormDFS. If the hbase_test directory exists in /apps/hbase/data/data/default, HBase is running as expected.
Install other services
You can install other services based on the methods described in this topic.