Standard speech recognition models are trained on everyday conversational language. When your audio contains domain-specific terminology — such as medical, legal, or technical vocabulary — the model may fail to recognize those terms accurately. A custom linguistic model learns the vocabulary and context of your domain by training on text from that domain, improving transcription accuracy for specialized content.
This topic describes how to create a custom linguistic model and apply it to a project in the Intelligent Speech Interaction (ISI) console.
Prerequisites
Before you begin, ensure that you have:
Activated Intelligent Speech Interaction. For more information, see Activate Intelligent Speech Interaction.
Custom linguistic model creation is free for all ISI free trial and commercial version users. Each account supports a maximum of 10 custom linguistic models.
Create and train a custom linguistic model
Training a custom linguistic model is typically an iterative process. You select a basic model, upload a corpus, train the model, and evaluate accuracy. If the results do not meet your requirements, you revise the corpus and train again.
Log on to the Intelligent Speech Interaction console.
In the left-side navigation pane, choose Self-Learning Platform > Custom Linguistic Models. On the Model tab of the Custom Linguistic Models page, click Create Model.
In the Select Basic Model step, select a basic model and click Next.

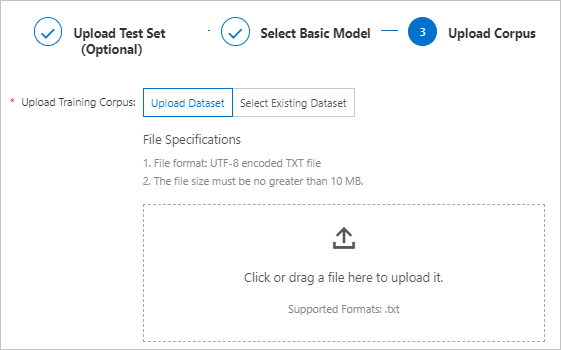
In the Upload Corpus step, upload or select a training corpus and click OK. Training starts automatically after the corpus is uploaded or selected. The Model Status column shows Training while the model trains.
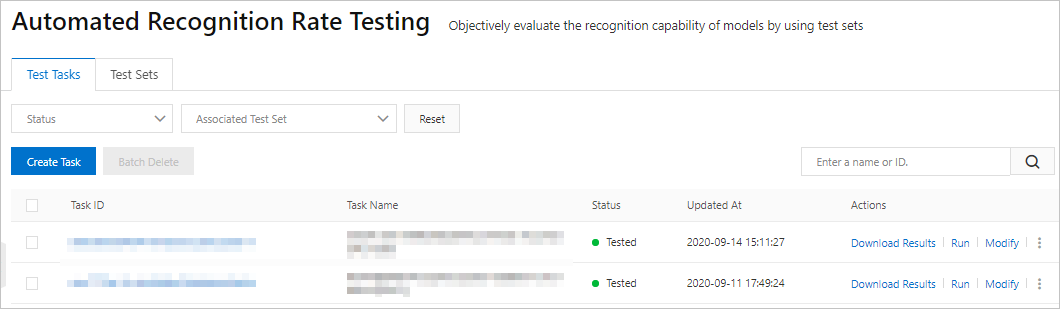
Create an automated test task after the model reaches Deployed status.
If you uploaded a test set in step 4, the system creates a test task automatically when the model reaches Deployed status.
If you did not upload a test set in step 4, click Automated Testing in the Actions column to create a test task manually.
Apply the custom linguistic model to your project. After the model reaches Deployed status, apply it in your project:
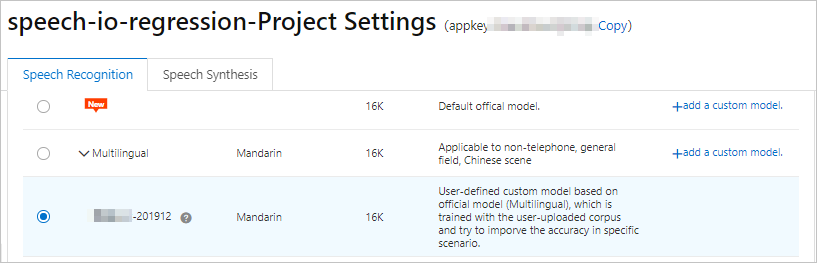
In the left-side navigation pane, click My Projects. Find your project and click Project Settings in the Actions column.
On the Speech Recognition tab, click Switch Scene and select the custom linguistic model.
Click Publish.