A Lingjun network interface controller (NIC) is an abstraction of the bond interface of the physical network card on a Lingjun node, and is attached to a Lingjun node instance. Lingjun NICs enable network connectivity between different Lingjun nodes within the same Lingjun CIDR block.
Note: This document applies only to node instance types that require configuring Lingjun connection instances when creating a cluster.
Background information
Lingjun nodes connect to the Lingjun network through Lingjun NICs to communicate with other cloud products. Lingjun NICs are created with Lingjun node instances and cannot be detached from them.

View Lingjun Network Interface Controllers (NICs)
-
Log on to the Lingjun console.
-
In the left navigation bar, choose Network Resources > Lingjun NICs, and click to switch to the Lingjun NICs tab.
-
View info about the Lingjun NIC, including Lingjun CIDRs, Zone, Lingjun Subnets, Primary Private IP Address, and more. Filter Lingjun NIC instances by instance ID, Lingjun CIDR block, edge zone ID, and other criteria.
-
Lingjun segment: A Lingjun network interface controller (NIC) and the attached Lingjun node instance belong to the same Lingjun segment.
-
Lingjun subnet: A Lingjun NIC belongs to a Lingjun subnet within a Lingjun segment. For more information about Lingjun segments and Lingjun subnets, see Manage Lingjun Segments.
-
Zone: The zone of the Lingjun node instance attached to the Lingjun NIC.
-
Primary private IP address: The IPv4 address assigned by the system when the Lingjun node is created.
-
Manage Secondary Private IPs
-
Log on to the Lingjun console.
-
In the left navigation bar, choose Network Resources > Lingjun NICs, and click to switch to the Lingjun NICs tab.
-
Click the instance ID of the Lingjun NIC.
-
View the Instance ID, Zone, Lingjun CIDRs, Private IP Address, and other info of the Lingjun NIC.
-
Add or delete secondary private IP addresses of the Lingjun NIC.
-
Click Delete in the Actions column for the corresponding secondary private IP, then click OK in the dialog box that appears to delete the existing secondary private IP.
ImportantYou can delete a secondary private IP address only when its status is active or Unavailable.
-
Click add to add a secondary private IP address to the Lingjun network interface controller (NIC).
-
If you want to specify a secondary private IP address, enter it in the text box, and then click Yes in the Actions column.
-
If you do not need to specify a secondary private IP address, click Yes in the Actions column directly. The status of the secondary private IP address changes to In Progress. After the assignment is complete, the assigned IP address is displayed and the private IP address status changes to active.
-
-
Configure secondary private IP addresses
After you assign an idle IPv4 address from the Lingjun CIDR block as a secondary private IP address in the Lingjun console, you must configure the address on the Lingjun node before it can communicate with other cloud products.
Configure secondary private IP addresses for RHEL 7/8, CentOS 7/8, and similar operating systems
-
This section applies to Alibaba Cloud Linux 2, Alibaba Cloud Linux 3, CentOS 7, CentOS 8, Red Hat Enterprise Linux (RHEL) 7, RHEL 8, Anolis 7, and Anolis 8.
-
The following example uses the primary NIC bond0. Replace the NIC identifier with your actual one.
-
Log on to the Lingjun node instance. For more information about how to log on, see Connect to a Lingjun node via SSH.
-
Use the following methods to query the subnet mask and default gateway.
-
Use the
ifconfigcommand to query the subnet mask, and use theroute -ncommand to query the default gateway. The query example is shown in the following graph.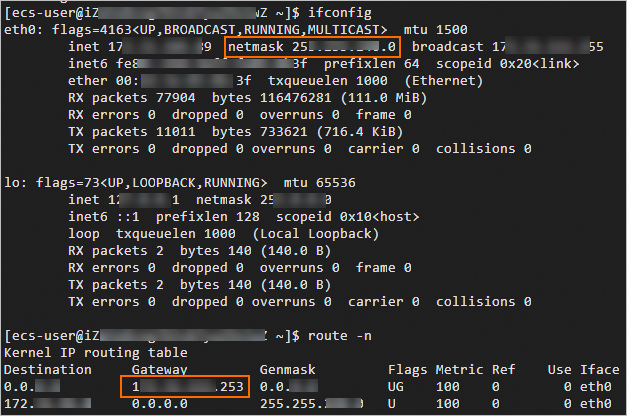
In the output, netmask corresponds to
255.255.*.*, which is the IPv4 subnet mask, and Gateway corresponds to192.**.**.253, which is the default gateway. -
If some systems do not support
ifconfig, use theip addr showcommand to query the subnet mask, and use theip route showcommand to query the default gateway. The query example is shown in the following figure.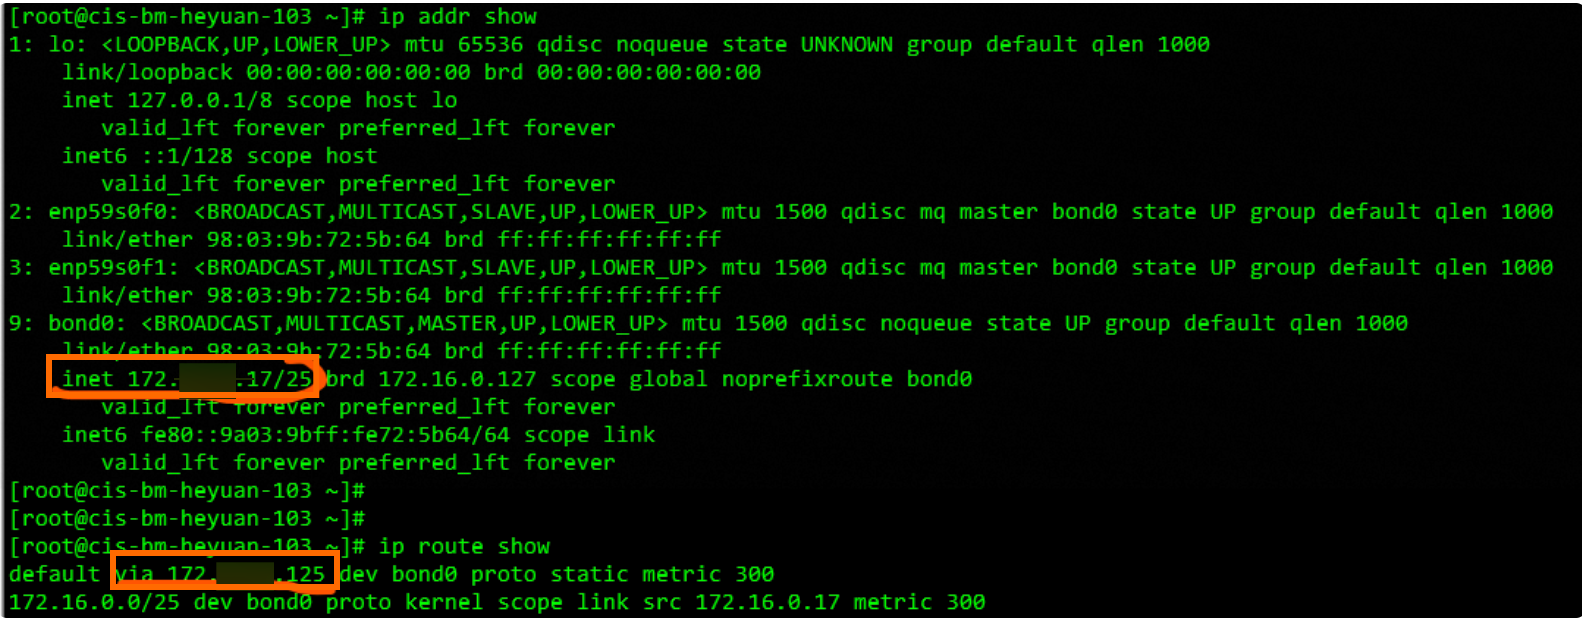
In the output,
172.**.**.17/25, the value25is the subnet mask length, and172.**.**.125is the default gateway.
-
-
Modify the network configuration file.
-
To configure a single private IP address, run the
vi /etc/sysconfig/network-scripts/ifcfg-bond0command and add the corresponding configuration items. Based on the query results of theip addr showcommand in step 2, the configuration item examples are as follows[root@cis-bm-heyuan-103 ~]# cat /etc/sysconfig/network-scripts/ifcfg-bond0 # Created by cloud-init on instance boot automatically, do not edit. # BONDING_MASTER=yes BONDING_OPTS="mode=active-backup miimon=100" BONDING_SLAVE0=enp59s0f0 BONDING_SLAVE1=enp59s0f1 BOOTPROTO=none DEFROUTE=yes DEVICE=bond0 IPADDR1=172.**.**.17 NETMASK1=255.255.255.128 GATEWAY1=172.**.**.125 IPADDR2=172.**.**.27 PREFIX2=25 GATEWAY2=172.**.**.125 -
IPADDR represents the secondary private IP, PREFIX represents the subnet mask, and GATEWAY represents the gateway. To configure more secondary private IPv4 addresses, increment the ordinal numbers after IPADDR, PREFIX and GATEWAY and continue adding configuration items.
-
-
Restart the network service
Operating System
Restart method
-
Alibaba Cloud Linux 2
-
CentOS 7
-
Red Hat 7
-
Anolis 7
Run the following command to restart the network service:
-
service network restart -
systemctl restart network
-
Alibaba Cloud Linux 3
-
CentOS 8
-
Red Hat 8
-
Anolis 8
Follow these steps:
-
Run the
systemctl restart NetworkManagercommand to restart the network service. -
Run the
nmcli device reapply eth0command to reconnect the eth0 network interface card, or run therebootcommand to restart the instance.
-
-
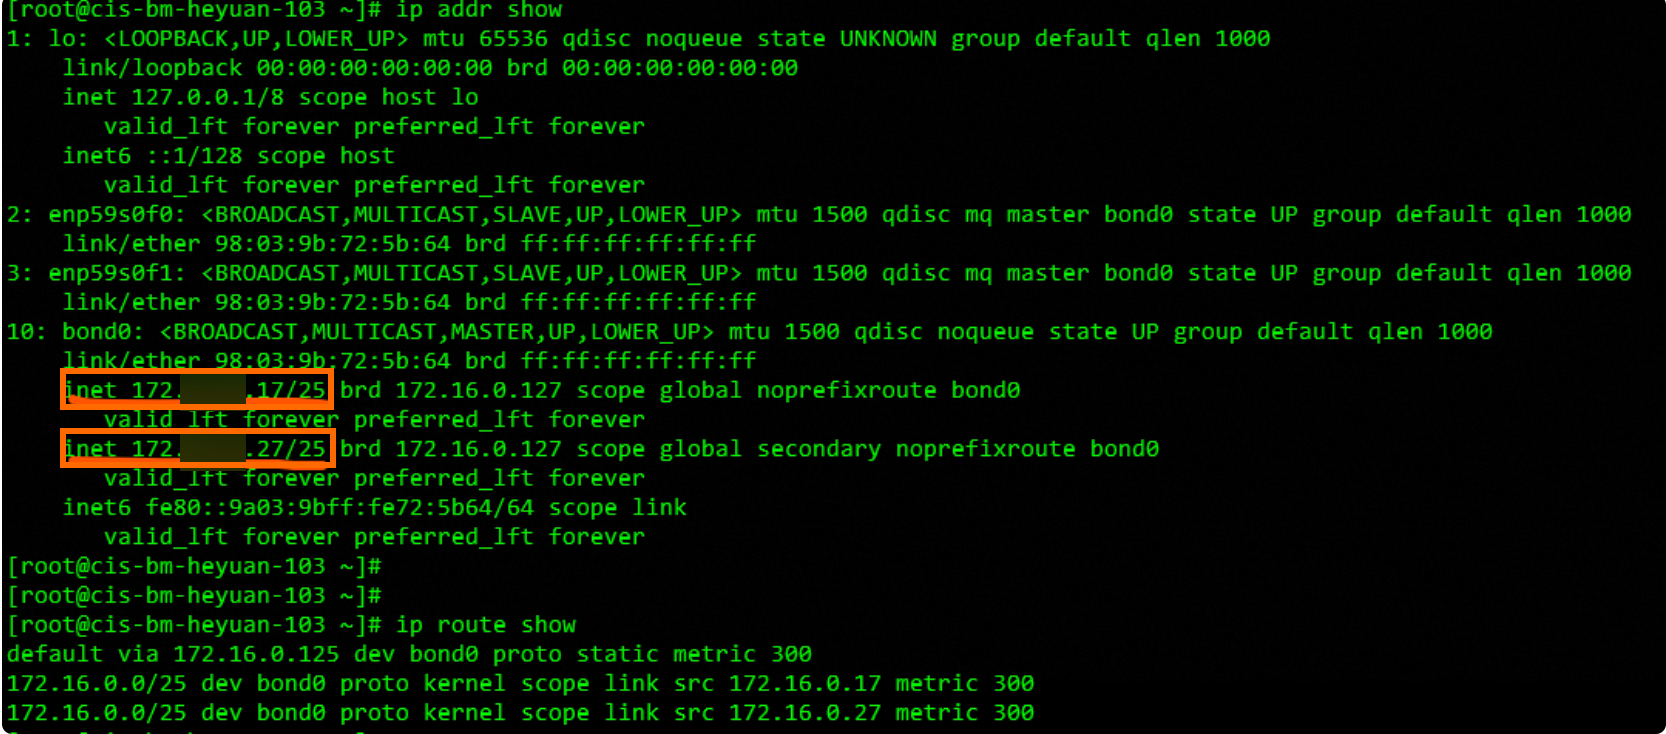
Run ip addr show to view the configuration result. The following graph shows an example of the effect after configuring one secondary private IP.
Configure Secondary Private IPs for Windows OS
-
To log on to a Lingjun node instance, see Connect to a Lingjun node via SSH.
-
Query the subnet mask and default gateway of the instance.
-
Open Command Prompt or Windows PowerShell.
-
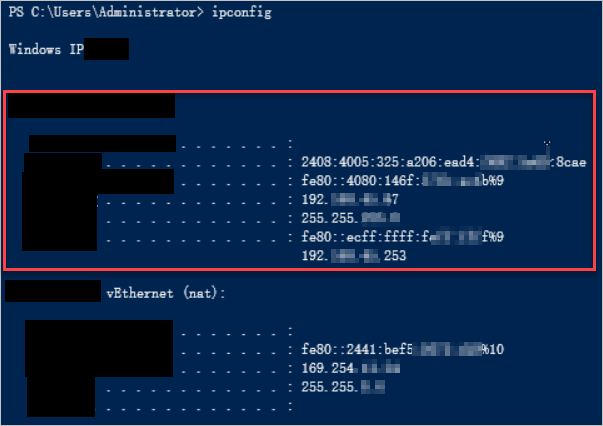
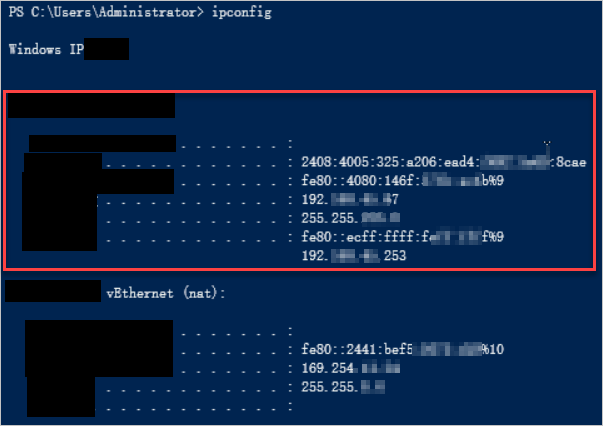
Run the
ipconfigcommand to query the subnet mask and default gateway of the ECS instance.The sample command output is shown in the following figure. The current network connection is named Ethernet.
-
-
Open Network and Sharing Center.
-
Click Change Adapter Settings.
-
Double-click the current network connection name, for example Ethernet, and then click Properties in the Ethernet Status dialog box.
-
In the Ethernet Properties dialog box, double-click Internet Protocol Version 4 (TCP/IPv4).
-
In the Internet Protocol Version 4 (TCP/IPv4) Properties dialog box, select Use the following IP address, and then click Advanced....
-
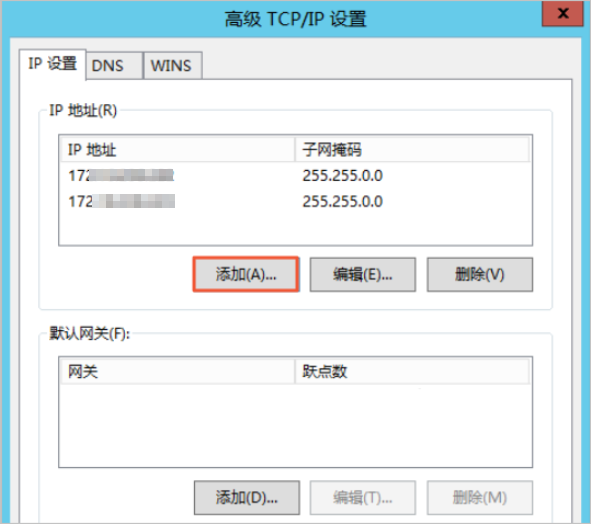
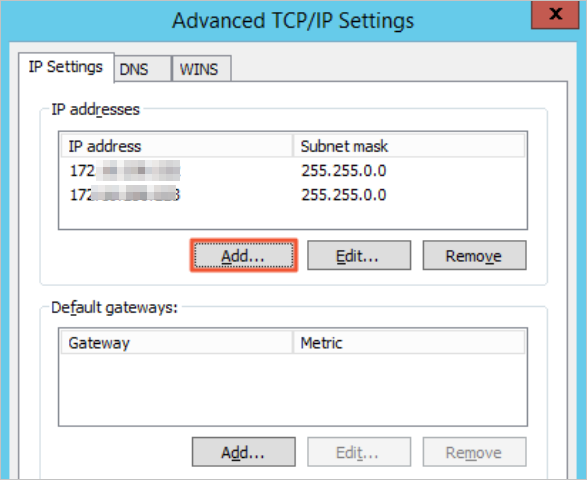
In the Advanced TCP/IP Settings dialog box, set the IP addresses.
-
In the IP Addresses area, click Add..., and then enter the assigned IP address and the queried subnet mask.
Repeat this step to add multiple IP addresses to the same network interface card adapter.
-
In the Default gateways area, click Add..., and enter the queried default gateway.
-
-
Click OK.
-
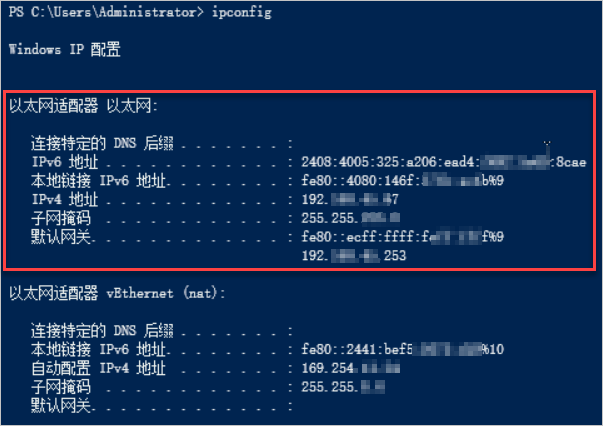
Run the
ipconfigcommand to query the subnet mask and default gateway of the ECS instance.The example output is shown in the following graph. The current network connection is named Ethernet.