Channel Assembly lets you combine live or video-on-demand (VOD) media sources into a linear channel. This guide walks you through setting up your first channel.
Overview
The general workflow for Channel Assembly is as follows:
-
Activate Intelligent Media Services (IMS).
-
Prepare your live or video-on-demand (VOD) media sources.
-
Add your sources.
Configure sources and create source groups.
-
Create a channel.
-
Schedule programs in the channel.
A channel can contain multiple sources, and a source can be part of multiple channels.
-
Start the channel.
-
Play the channel.
Prerequisites
-
Intelligent Media Services (IMS) is activated. For instructions, see Activate the service.
-
Prepare your media sources.
NoteEach media source must be an M3U8 master playlist. All sources within the same channel must have M3U8 master playlists with the same number of media playlists and identical bitrate variants. If you are not familiar with M3U8 master playlists, see Protocol description.
Configure a channel
Step 1: Add media sources
-
Log on to the IMS console. In the upper-left corner, select a region based on your business needs.
-
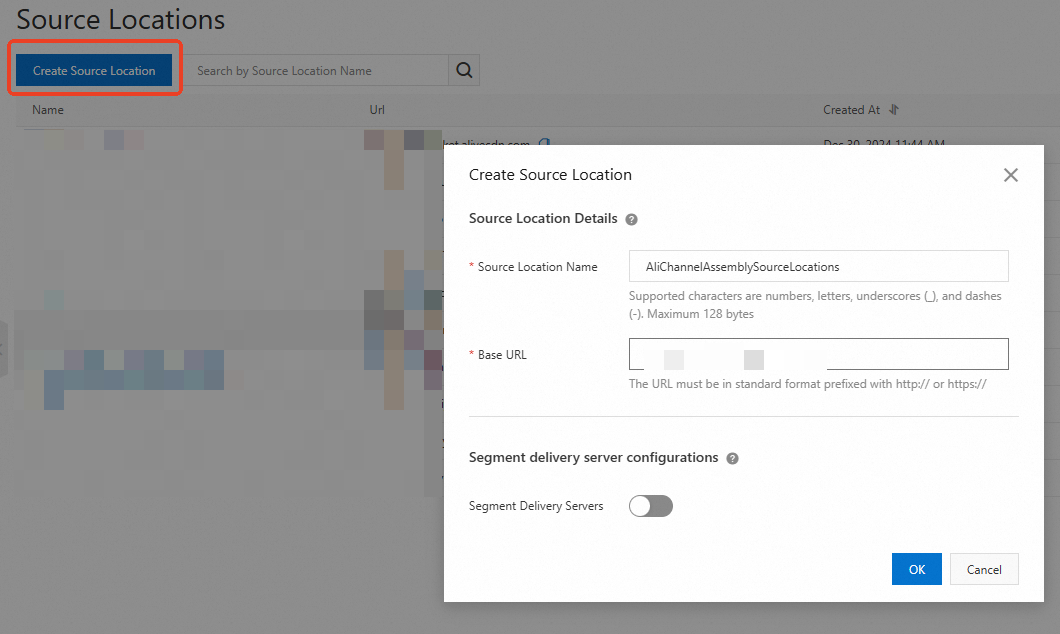
In the navigation pane on the left, choose , and then create a source location.
Example values:
-
Source Location Name: AliChannelAssemblySourceLocations.
-
Base URL: Enter the base URL of your content's origin server. For example, if the full path to your media source is http://myresource.aliyundoc.com/video1.m3u8, enter http://myresource.aliyundoc.com.
-
-
Click the name of the source location (AliChannelAssemblySourceLocations) to open its details page.
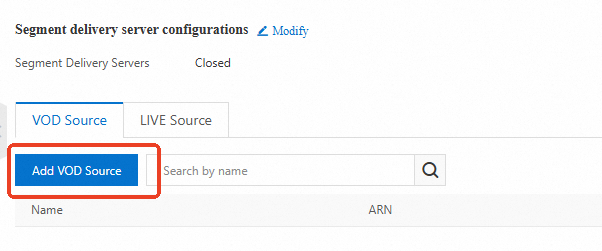
Click the VOD Source tab to add your VOD sources.
NoteEach media source must be an M3U8 master playlist. All sources within the same channel must have M3U8 master playlists with the same number of media playlists and identical bitrate variants. If you are not familiar with M3U8 master playlists, see Protocol description.
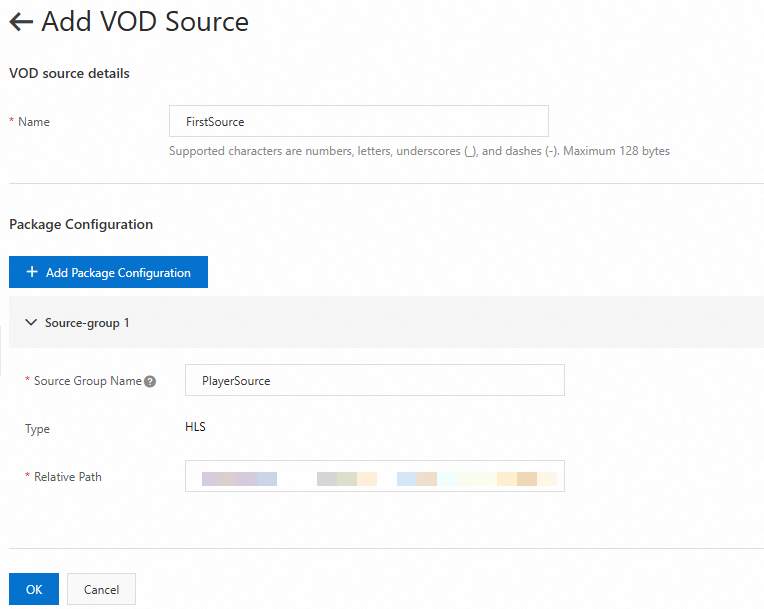
Add the first source:
Example values:
-
Name: FirstSource.
-
Source Group Name: PlayerSource. Note this name. You will need it to configure the channel output.
-
Relative Path: Enter the relative path to the media source. For example, if the full path is http://myresource.aliyundoc.com/video1.m3u8, enter /video1.m3u8.
Add the second source:

Example values:
-
Name: SecondSource.
-
Source Group Name: PlayerSource. Note this name. You will need it to configure the channel output.
-
Relative Path: Enter the relative path to the media source. For example, if the full path is http://myresource.aliyundoc.com/video2.m3u8, enter /video2.m3u8.
-
Step 2: Create a channel
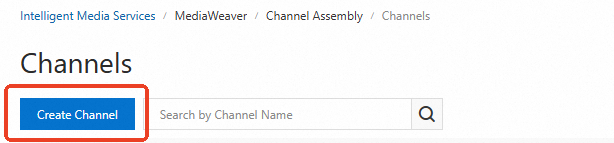
In the navigation pane on the left, choose MediaWeaver > Channel Assembly > Channels, and then create a channel.
Create a channel:
Example values:
-
Name: AliChannelAssemblyChannels.
-
Tier: Basic.
-
Playback Mode: Loop.
-
Access Control: Disabled.
-
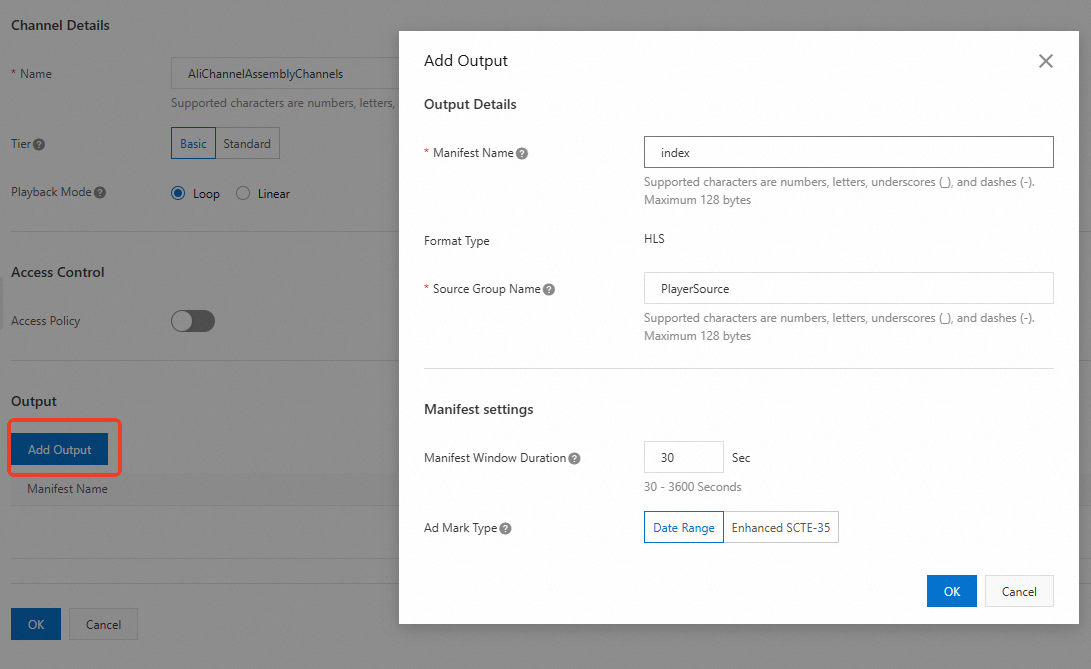
Add Output:
-
Manifest Name: index.
-
Source Group Name: PlayerSource. This must match the Source Group Name you specified for your media sources.
-
Manifest settings: Leave the parameters at their default values.
-
Step 3: Configure channel programs
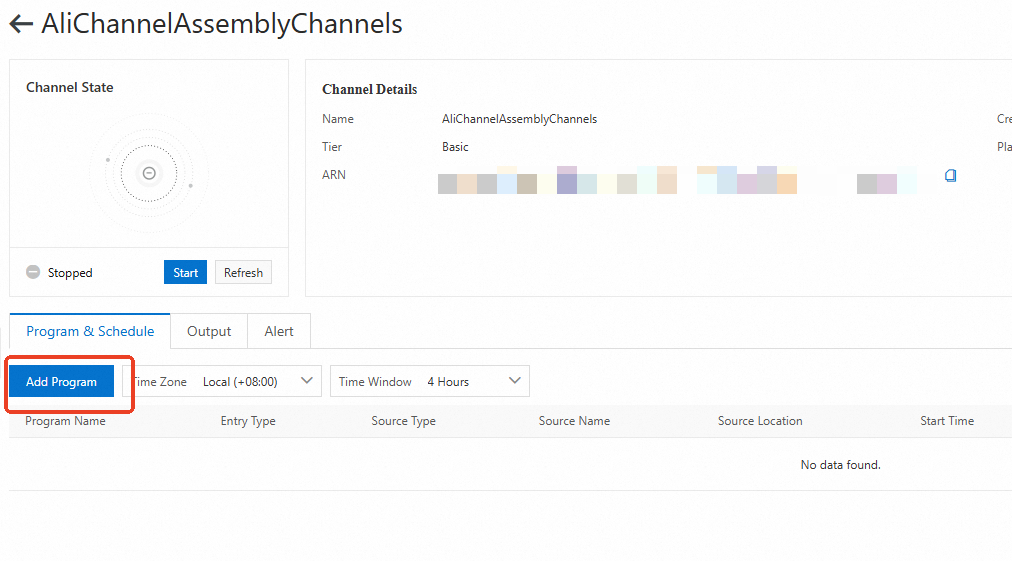
After setting up the channel and sources, add the sources to the channel as programs.
-
Click the channel name (AliChannelAssemblyChannels) to open its details page, and then click Add Program.
Add the first program:
Example values:
-
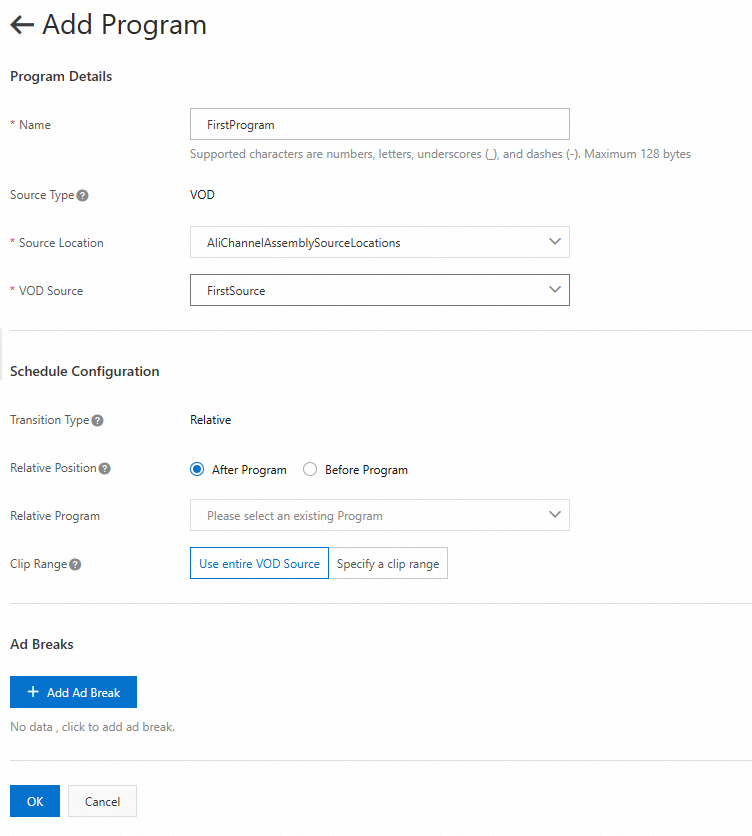
Name: FirstProgram.
-
Source Location: Select AliChannelAssemblySourceLocations.
-
VOD Source: Select FirstSource.
-
Schedule Configuration: Leave the parameters at their default values.
-
Ad Breaks: You can skip this for now.
Add the second program:

Example values:
-
Name: SecondProgram.
-
Source Location: Select AliChannelAssemblySourceLocations.
-
VOD Source: Select SecondSource.
-
Schedule Configuration:
-
Relative Position: Select After Program.
-
Relative Program: Select FirstProgram.
-
Clip Range: Select Use entire VOD Source.
-
-
Ad Breaks: You can skip this for now.
Once added, the programs appear in the list.

-
Play the channel
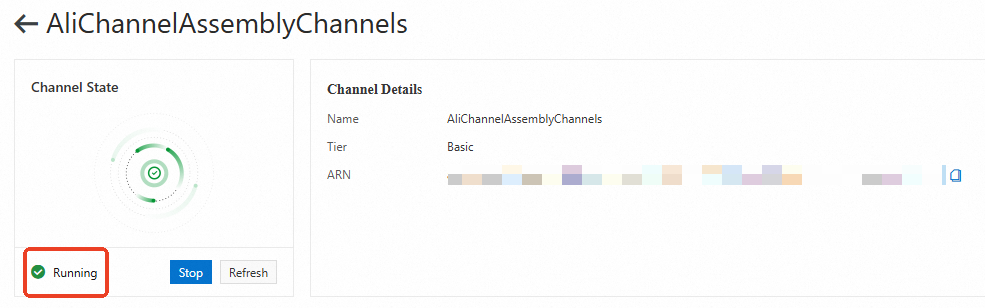
Step 1: Start the channel
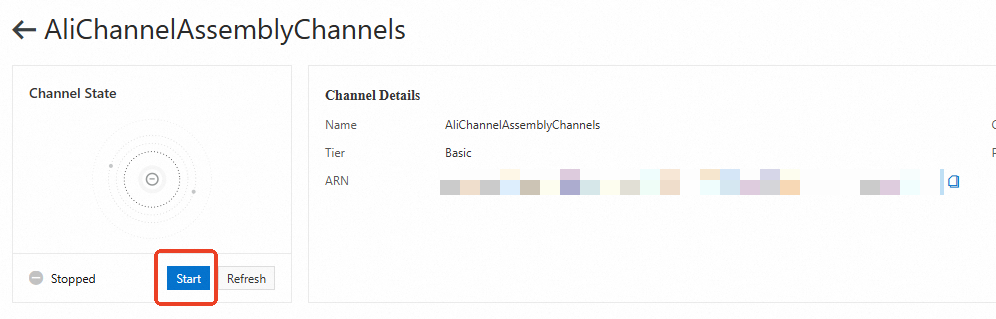
A status of Running indicates the channel has started successfully.
Step 2: Play the channel
-
Get the playback URL. On the channel details page, click the Output tab.
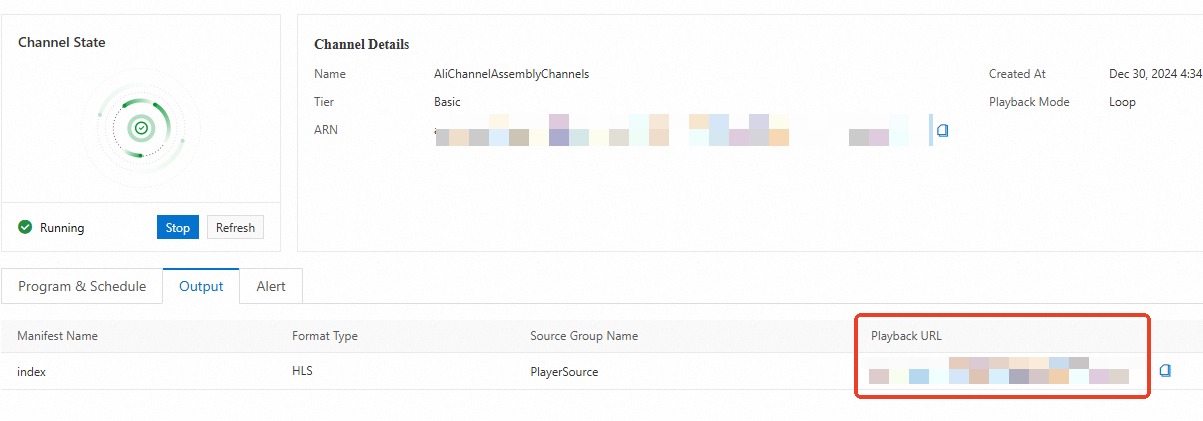
The Playback URL is the stream URL for your channel.
-
Play the channel. You can use any player that supports the HLS protocol to play the stream.
FAQ
Playback errors
-
Your media sources must be M3U8 master playlists. All sources within the same channel must have playlists with the same number of media playlists and identical bitrate variants. For more information, see Protocol description.
-
Ensure the channel is started before you play it.
Playback is stuttering
-
Check your network connection. For a better viewing experience and lower latency, consider using a content delivery network (CDN).
Other playback issues
-
If you encounter other issues during playback, go to the channel details page and click the Alert tab to view the channel's activity log. This log includes records of playback errors.
Next steps
For more configuration options, see Feature configuration.
Channel Assembly incurs fees. For details, see Billing for Channel Assembly.