Presentation Document is one of the four components of the Document Product. You can use the various features of Presentation Document to easily create and play presentations such as courses, speeches, and summary reports. This topic describes the basic operations and common features of Presentation Document.
Basic operations
The contents of a presentation are made up of various objects. Presentation Document provides a wide range of objects, such as text boxes, images, shapes, tables, formulas, and QR codes. This simplifies the presentation creation process and enriches its visual elegance
Insert a slide
A presentation consists of slides. Before you can organize the contents of a presentation, you need to add slides to your presentation.
You can choose one of the following methods to insert a slide:
Click the
 icon above the left-side slide thumbnails. In the master slide pane that appears, click the layout you want to use.
 Select a left-side slide thumbnail. Press Enter to quickly insert a slide.
The new slide is below the selected slide.
Insert a text box
In the Insert ribbon, click the  icon to add a horizontal text box to the slide.
Click the arrow to the right of the icon to select Horizontal Text Box or Vertical Text Box.
Insert an image
In the Insert ribbon, choose  >
>  . You can insert one or more images at the same time.
Insert a shape
In the Insert ribbon, click the  icon and select a shape that you want to insert.
Insert a table
In the Insert ribbon, click the  icon. In the drop-down grid, drag the mouse to select the number of rows and columns that you want. Then, click the grid to insert a table with the specified number of rows and columns.
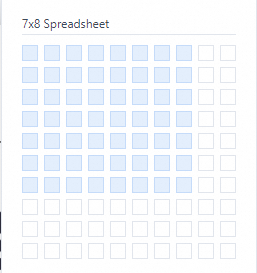
Insert a formula
In the Insert ribbon, click the  icon. In the LaTeX Formula dialog box that appears, edit the formula and click OK.
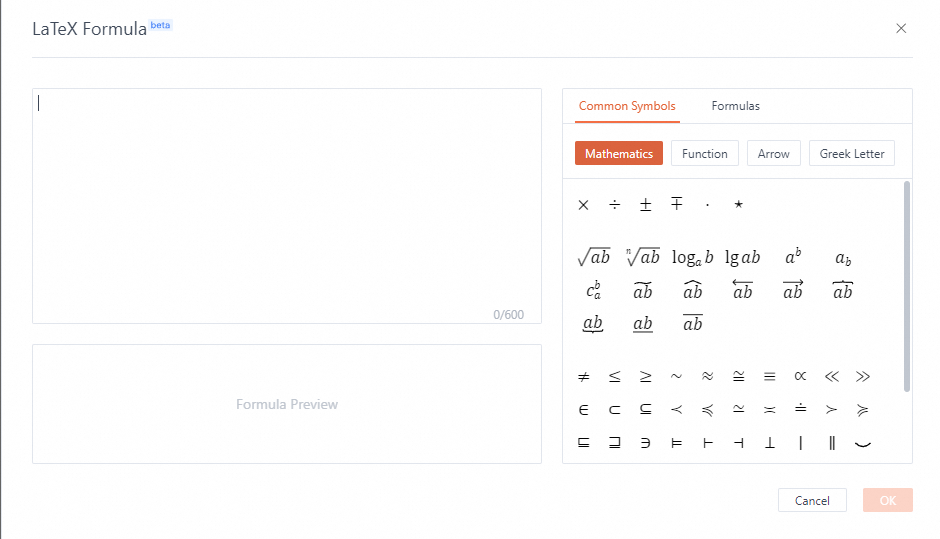
You can click the symbols and formulas from the Common Symbols and Formulas tabs on the right side of the dialog box to use.
Insert a QR code
In the Insert ribbon, click the  icon. In the Insert QR code dialog box that appears, enter text or business card information and click OK.
Insert a link
To insert a link, perform the following steps:
Select the object to which you want to apply a link.
Select one of the following methods to insert a link:
In the Insert ribbon, click the
 icon.
icon. Right-click the object and select Insert link in the right-click menu.
In the Link to dialog box that appears, enter the following content:
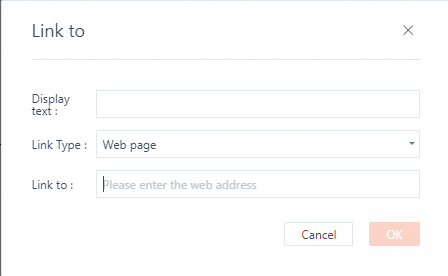
Display text: the name of the link.
Link Type: the type of the link. Valid values: Web page, Slide, and Email.
Link to: If you set Link Type to Web page or Email, enter a web page URL or an email address. If you set Link Type to Slide, select a slide that you want to link to from the drop-down list.
Click OK. If the text of the link is blue and can be clicked, the link is inserted.
Configure object properties
Configure properties in toolbar
After you select an object, the common properties toolbar of the current object is displayed. You can configure the properties in the toolbar.
Slide toolbar
The slide toolbar is in the upper right corner of the slide. You can use the slide toolbar to configure the layout and background of the slide.
 : Slide layout. You can create or change slide layouts, add new slides as placeholders, and apply slide layouts to blank slides.
  : Slide background. You can select a background color or a background image for the slide. The background is displayed under all objects in the slide.
Object toolbar
An object toolbar can include unique properties, text properties, border properties, fill properties, and common properties.
Unique properties: The properties of the selected object. For example, front arrow and end arrow are unique properties of a line shape.
Text properties: If you can enter text in the selected object, the object has text properties. For example, the font, size, and color of text.
Border properties: The color, weight, and other properties of the border of the selected object.
Fill Properties: The fill color or fill picture of the selected object.
Common properties: properties that are available for all objects. For example, Adjust object layer, Rotate object, Comment, and More formats.
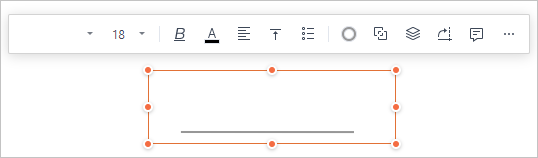
Toolbar for text box, shape, placeholder, and word art.
Provides the following properties: Font, Font size, Text properties (bold, italic, underline, delline, and highlight), Font color, Align horizontally, Align vertically, Number (Bullet and Number format), Border (No border, Border color, Line weight, and Line type), Fill, Adjust object layer, Rotate object, Comment, and More formats.

Toolbar for line shape
Provides the following properties: Front arrow, Swap, End arrow, Border, Adjust object layer, Rotate object, Comment, and More formats.

Toolbar for ink
Provides the following properties: Line weight, Line color, Adjust object layer, Rotate object, Comment, and More formats.
Toolbar for table
Provides the following properties: Insert rows or columns, Delete rows or columns, merge cell, Font, Font size, Text properties (bold, italic, underline, delline, and highlight), Font color, Align horizontally, Align vertically, Number (Bullet and Number format), Border (Border color, Line weight, and Line type), Fill, Adjust object layer, Rotate object, Comment, and More formats.
Toolbar for image
Provides the following properties: View original photo, Picture cropping, Replace, Transparency and other effects, Border (No border, Border color, Line weight, and Line type), Fill, Adjust object layer, Rotate object, Comment, and More formats.
Toolbar for group objects
Provides the properties of all child objects in the group. When you select multiple objects, Group and Alignment are displayed in the toolbar. You can click the
 icon to group the selected objects.
 Before grouping
After grouping
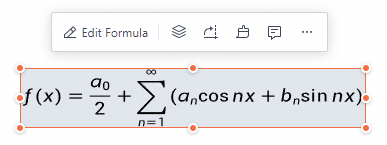
Toolbar for LaTeX formula
Provides the following properties: Edit formula, Adjust object layer, Rotate object, Comment, and More formats.
Toolbar for other objects such as formula, appendix, and icon.
Provides the following properties: Adjust object layer, Comment, and More formats.
Configure properties in the Format panel
If the property that you want to configure is not displayed in the toolbar, you can configure more properties in the right-side Format panel. The Format panel displays all properties, including text properties, and object properties.
You can select one of the following methods to open the Format panel:
Click the
 icon in the object toolbar.
 Click Format in the upper-right corner of the slide.
Configure object animation
You can add animations to the objects in your presentation, such as images and texts, to make your presentation more focused, expressive, and personalized. After you add an animation to your slide, you can adjust the details of the animation and select timing methods. This allows you to control the start, duration, direction, and speed of the animation, making the effect more professional.
Configure object animation
Animation type
Animations in a presentation can be divided into three types:
Entrance animation: animates how an object appears on the screen.
Emphasis animation: animates how an object performs on the screen. Emphasis animation is used to highlight an object.
Exit animation: animates how an object disappears from the screen.
Add an animation
To add an animation to your presentation, perform the following steps:
In normal view, select the slide to which you want to add an animation.
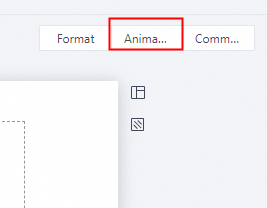
Select the text or object to which you want to add an animation and click Animation in the upper-right corner.
In the Animation panel, select the Object Animation tab. Click the
 icon and select one of the following animation type.
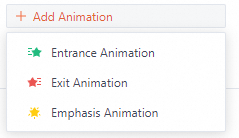
Entrance Animation: The animation appears when the text or object enters the slide.
Exit Animation: The animation appears when the text or object exits the slide.
Emphasis Animation: The animation appears when the text or object is in the slide.
Select an animation that you want from the drop-down list.
NoteThe animations that are displayed in the animation list are triggered from top to bottom.
If you want to preview the effect of a single animation, click the Preview icon in the Animation Panel.
If you want to preview the effect of the entire slide, click the Play icon in the upper-right corner of the slide to play the slide.
Modify animation properties
To modify the properties of an animation, perform the following steps:
In the Animation panel, select the Object Animation tab. Click the animation whose properties you want to modify to open the configuration menu.
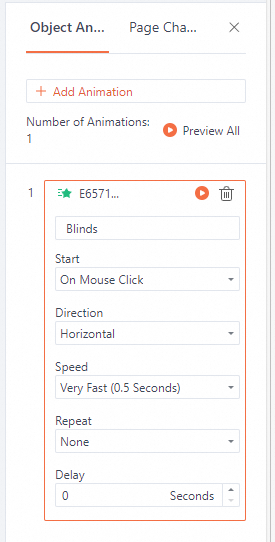
Configure the properties of the animation.
Start: the trigger condition of the animation. Valid values:
On Mouse Click: The animation starts when you click the object.
With Previous: The animation starts at the same time as the previous animation.
Previous Played: The animation starts after the previous animation ends.
Direction: The direction of the animation. Valid values: Horizontal and Vertical.
NoteSome animations do not support this parameter.
Speed: The time used by the animation. Valid values: Very Slow (5 Seconds), Slow (3 Seconds), Medium (2 Seconds), Fast (1 Second), and Very Fast (0.5 Seconds).
Repeat: The number of times the animation repeats. Valid values: None, 2, 3, 4, 5, and 10.
Delay: The delay time of the animation.
Change animation sequence
To change the animation sequence, perform the following steps:
In the Animation panel, select the Object Animation tab.
Drag the animations to change the play order.
Delete an animation.
To delete an animation, perform the following steps:
In the Animation panel, select the Object Animation tab.
Move the mouse over the animation that you want to delete.
Click the Delete icon, as shown in the following figure.

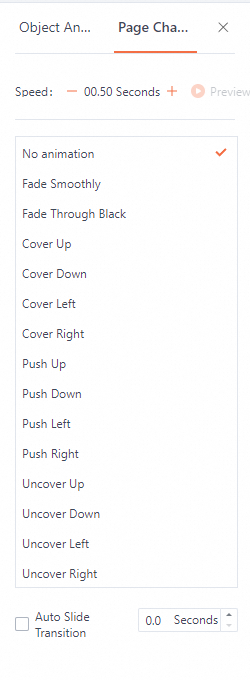
Configure page change animation
Page change animation is the special effect that is added between consecutive slides. You can use the page change animations to control how slides appear on the screen when you move from one slide to the next slide during a slide show.
Configure page change animation
You can apply different page change animations to each slide in your presentation. To configure page change animation, perform the following steps:
Click Animation in the upper-right corner of the slide.
In the Animation panel, select the Page Change Animation tab.
Select the slide to which you want to add a page change animation.
In the right-side Animation panel, select an animation that you want and configure the speed and auto transition time of the animation.
Configure page change animation for multiple slides
You can apply the same page change animation for multiple slides in a presentation at the same time. To configure page change animation for multiple slides, perform the following steps:
Click Animation in the upper-right corner of the slide.
In the Animation panel, select the Page Change Animation tab.
Hold down Shift or Ctrl and click the slides for which you want to configure page change animation.
In the right-side Animation panel, select an animation that you want and configure the speed and auto transition time of the animation.
NoteThe selected animation is applied to all selected slides.
Configure page change animation for all slides
To configure page change animation for all slides, perform the following steps:
Click Animation in the upper-right corner of the slide.
In the Animation panel, select the Page Change Animation tab.
Select a slide in the presentation.
In the right-side Animation panel, select an animation that you want and configure the speed and auto transition time of the animation.
Click Apply to All Slides. The selected animation is applied to all slides in the presentation.
Preview page change animation
After you apply a page change animation, click the Preview icon on the Page Change Animation tab to preview the slideshow animation. You do not need to enter the slideshow mode.
 Note
NoteTo preview the page change animation in the slideshow mode, click the play icon in the upper-right corner of the slide to play the entire presentation.
To remove page change animation, select No animation on the Page Change Animation tab.
Review
Comment
To comment on a slide or an object in a slide, perform the following steps:
You can select one of the following methods to open the Comments panel:
In the Review ribbon, click the
 icon.
icon. Click Comment in the upper-right corner of the slide.

Select a slide or an object to which you want to add a comment.
Click the text box in the lower part of the Comment panel and enter your comment.

Click Send to add the comment.
This step is optional. To edit a comment, perform the following steps:
Click the
 icon in the upper-right corner of the comment that you want to edit and select Edit.
 Enter your comment in the text box.
Click OK.
This step is optional. To delete a comment, perform the following steps:
Click the
icon in the upper-right corner of the comment that you want to delete and select Delete. In the Delete this comment? dialog box, click Delete.
This step is optional. To reply to a comment, perform the following steps:
Click the comment to which you want to reply. The reply text box is displayed.
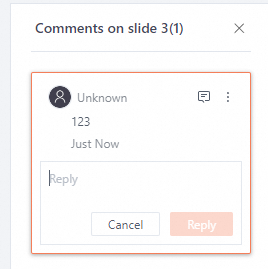
Enter a reply in the text box and click Reply.
Callout
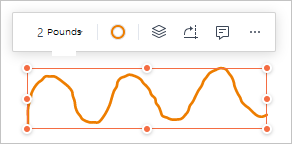
You can use the callout feature to add ink to a slide. Perform the following steps.
In the Review ribbon, click the
 icon and select Add Ink.
 Click the
 icon to the left of the slide to or the
  icon to the right of the slide to move to the slide that you want.
 The toolbar above the slide provides three types of brushes. Click to select a brush type.

Click the small circles below the brush to set the thickness and color of the brush.
After selecting the type, color and thickness of the brush, the pointer becomes a brush. Press the left mouse button to draw ink.
This step is optional. You can select one of the following methods to delete the ink drawn by a brush.
Choose in the toolbar. The pointer becomes an eraser. Press the left mouse button and move over the ink that you want to delete.
Choose to delete all ink in the current slide.
Choose to delete all ink in the presentation.
Click carry out to exit the callout mode and return to the edit mode.
Master editing
You can use the master editing feature of Presentation Document to configure certain content and format and apply them to multiple slides.
To edit a master, perform the following steps:
In the View ribbon, click the
 icon.
icon. In the left-side slide thumbnail panel, select the master or layout you want to edit.
The serial numbers of the slides that use the master or layout are displayed above the slide.
If you insert content or set a background in a master or layout, the content and background are synchronized to the slides to which the master or layout is applied.
Click the
 icon to exit the master editing mode. Note
You can also click the
 icon in the lower-right corner of the slide to quickly enter or exit the master editing mode.
Version history and collaboration record
Presentation Document provides the version history feature and the collaboration record feature. Version history allows you to restore your presentation to a version in the past, and collaboration record allows you to query operations that different users perform on your presentation at different times.
Version history
To view version history, perform the following steps:
In the upper-right corner of the slide, click the
 icon and select Version History.
 In the History Record panel, you can view all historical versions.
Click the
 icon in a historical version to view the content of the version.
 Click Roll back to this version in the upper-right corner to restore the content of the presentation to this version.
Collaboration record
To view collaboration records, perform the following steps:
In the upper-right corner of the slide, click the
icon and select Collaboration Records. In the Collaboration Record panel, you can scroll through the collaboration records.
Click the
 icon to view the detailed operations performed by the user.
 Click the
 icon in the Details dialog box to restore the presentation to the version before this operation is performed.
Play your presentation
Play methods
Presentation Document provides three play methods. You can choose play from the first slide in the file, play from the current slide, or autoplay.
Play a slideshow
Play from the first slide in the file: In the Play ribbon, click the
 icon.
icon. Play from the current slide: In the Play ribbon, click the
 icon.
icon. Autoplay: In the Play section, click the
 icon. In the dialog box that appears, set the number of seconds to play each slide (Valid values: 0.1, 1, 3, 5, 10, 30, and 60), whether to loop, and whether to play slides based on the set transition timing.
Operations in the slideshow mode
Move to the next slide: Click, or press Space, N, ↓, →, or PgDn on your keyboard.
Move to the previous slide: Press P, ↑, ←, or PgUp on your keyboard.
Move to the first slide: Press Home on your keyboard.
Move to the last slide: Press End on your keyboard.
Exit the slideshow mode: Press the Esc key on the keyboard.
Auxiliary tools in slideshow mode
Presentation Document provides auxiliary tools that can be used in the slideshow mode. These tools can help you express yourself more accurately and control the flow of your speech.
To use the auxiliary tools, move your pointer the upper right corner of the screen and a toolbar appears. The toolbar provides the following tools: Laser pointer, Callout, Notes View, More (Countdown, Autoplay, Show Ink, and Show Page Number) Exit Full Screen, and End show.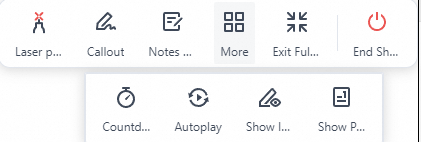
Laser pointer
Click Laser Pointer and the pointer becomes to a red laser pointer. Hold down the left mouse button and move the pointer to see the trace of the laser pointer.
Callout
Click Brush, select one from Watercolor Brush, Highlighter, or Smart Pen, and set the thickness and color of the brush. Hold down the left mouse button and move the pointer to draw ink.
Notes View
Click Notes View and you can perform the following operations:
Click the thumbnails at the bottom of the page to switch between slides.
Click the
 icon or the
  icon in the upper-right corner of the page to adjust the font size of speaker notes.
 Click the Speaker notes text box to edit notes.
Click Audience View on the left side of the page to open an audience view. The audience view displays the same slide as the notes view. Drag the audience view to the screen that your audience watches to hide speaker notes from your audience.
Countdown
To use countdown, perform the following steps:
Choose .
Set a countdown time. If you want a ringing sound when the countdown ends, select Ring at the end,
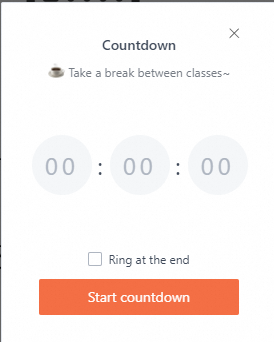
Click Start countdown.
After the countdown starts, click the
 icon to turn off the ringing sound. Click the
  icon to turn off the countdown. This step is optional.
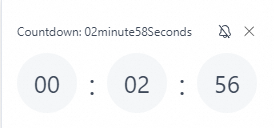
Autoplay
Choose . In the dialog box that appears, set the number of seconds to play each slide, whether to loop, and whether to play slides based on the set transition timing.
Show Page Number
To show page number, perform the following steps:
Choose .
The page number of the current slide is displayed in the lower-right corner of the slide.
Click the page number to open the Please click the slide you want to jump to dialog box.
Click a slide in the dialog box to jump to the slide.