Set up enterprise single sign-on (SSO) for Google Cloud Platform (GCP) using IDaaS as an OpenID Connect (OIDC) identity provider (IdP). After configuration, enterprise users can access GCP cloud resources with their existing enterprise credentials — no separate Google account required.
This guide walks you through Workforce Identity Federation on GCP: creating a workforce pool, connecting IDaaS as the OIDC provider, mapping attributes, and granting IAM permissions.
Prerequisites
Before you begin, make sure you have:
An active IDaaS instance. Go to the IDaaS console and verify your instance is running
Admin access to both the IDaaS console and the Google Cloud console
Permission to manage IAM roles in your GCP project
This guide uses OIDC. GCP Workforce Identity Federation also supports SAML — choose the protocol that fits your environment.
Considerations
Review the following before you begin:
Protocol choice: This guide uses OIDC. If your organization requires SAML, the GCP Workforce Identity Federation setup differs — select the appropriate protocol in Step 2 when choosing an authentication protocol.
Two-console workflow: Configuration requires switching between the IDaaS console and the Google Cloud console. Parameters collected in one console are used in the other. Complete the steps in the order listed to avoid missing dependencies.
Pool creation time: After you click Next in Step 2, GCP takes up to 2 minutes to create the workforce identity pool. Wait for completion before proceeding.
Attribute mapping requirement: GCP requires a subject field mapping. Use
assertion.subfrom your IDaaS OIDC configuration, or provide a Common Expression Language (CEL) expression that returns a string.
Configuration overview
The setup involves both consoles and requires passing parameters between them. Complete the steps in order:
IDaaS: Create an OIDC application and collect parameters
GCP: Create a workforce identity pool
GCP: Configure the identity provider
IDaaS: Set the redirect URI and sign-in URL
GCP: Grant IAM permissions
Verify SSO from both sides
Step 1: IDaaS — Create an OIDC application
Log in to the IDaaS console, select your IDaaS instance, and click Manage in the Actions column.IDaaS console
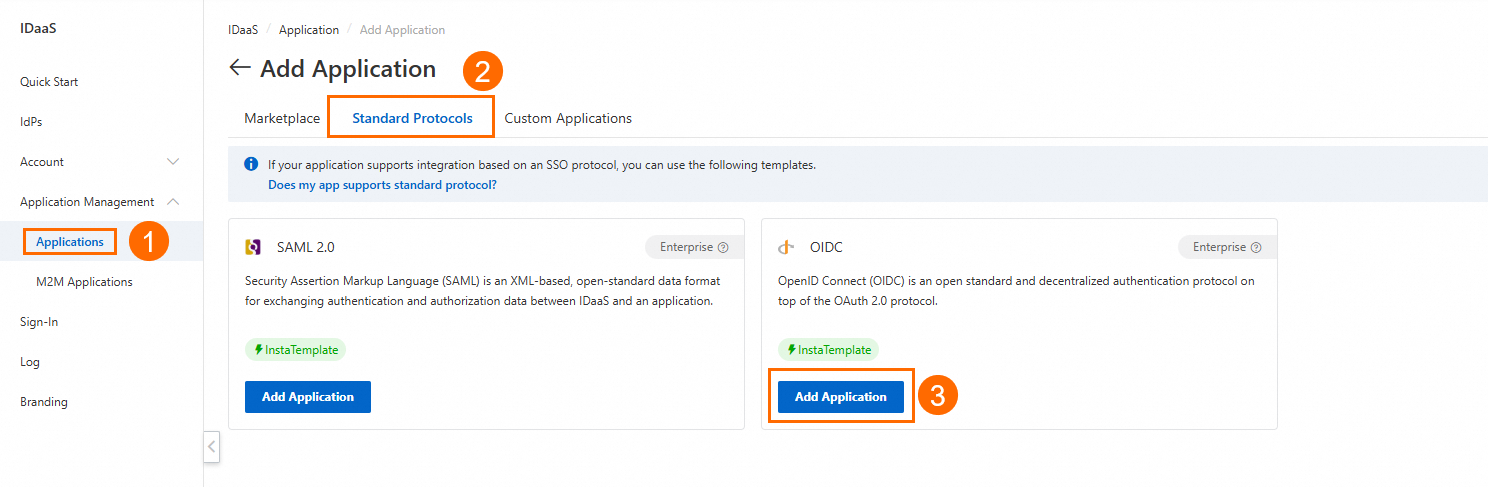
Go to Application Management > Applications > Add Application > Standard Protocol and add an OIDC application.
After the application is created, open its details page and collect the following parameters — you'll need them when configuring GCP:
Parameter Where to find it client_idGeneral tab client_secretGeneral tab Issuer URL Sign-In > SSO tab, under Application Settings 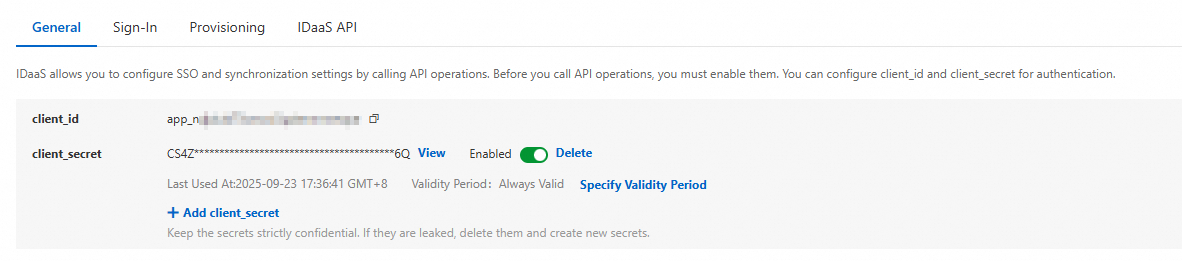

Keep this browser tab open — you'll return to IDaaS to complete two more settings after configuring GCP.
Step 2: GCP — Create a workforce identity pool
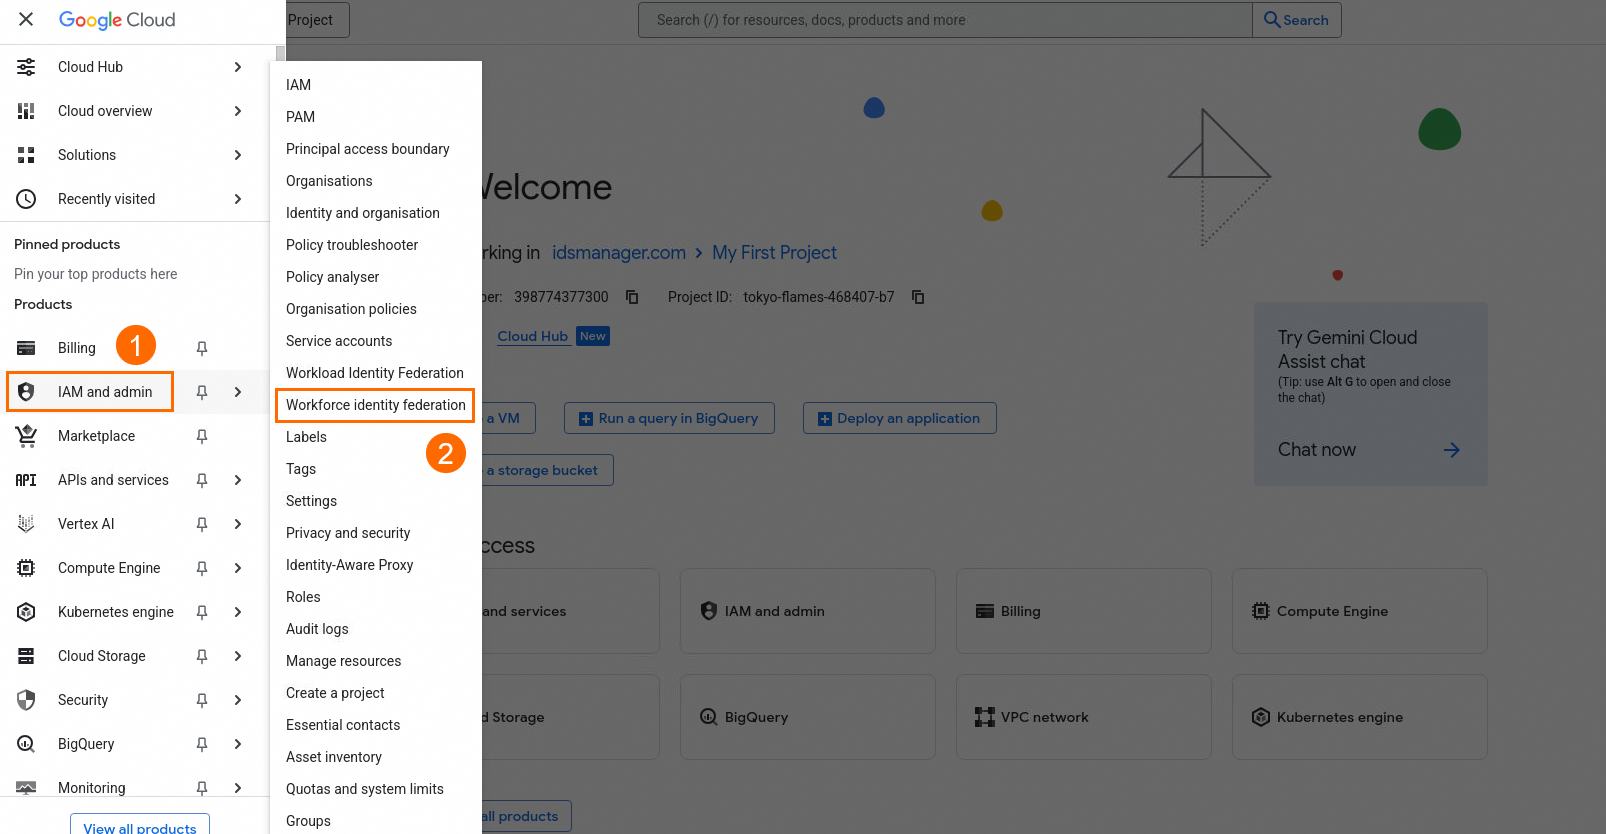
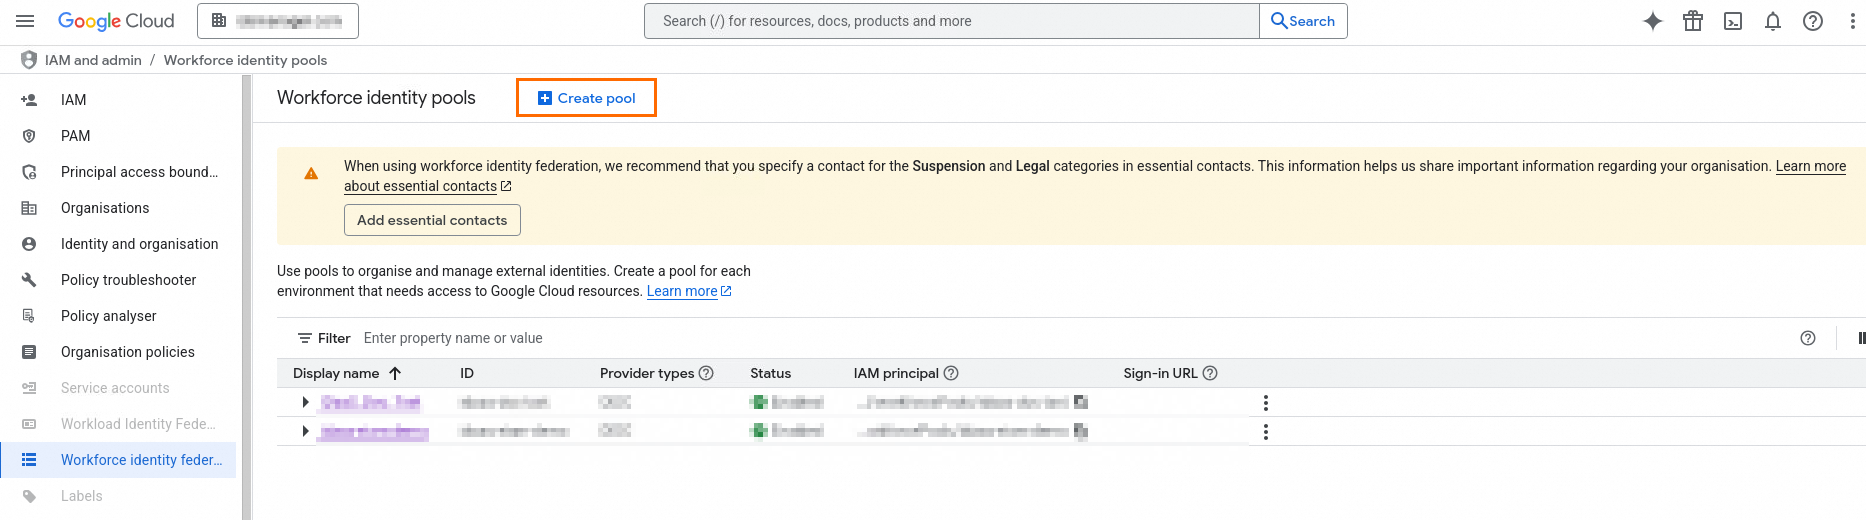
In the Google Cloud console, go to IAM and Admin > Workforce identity federation.
Click Create Pool. The Add new workforce pool and provider page opens.
Fill in the pool details:
Field Description Name A name for the identity pool Description (Optional) A description, for example: Federated identity authentication for XX service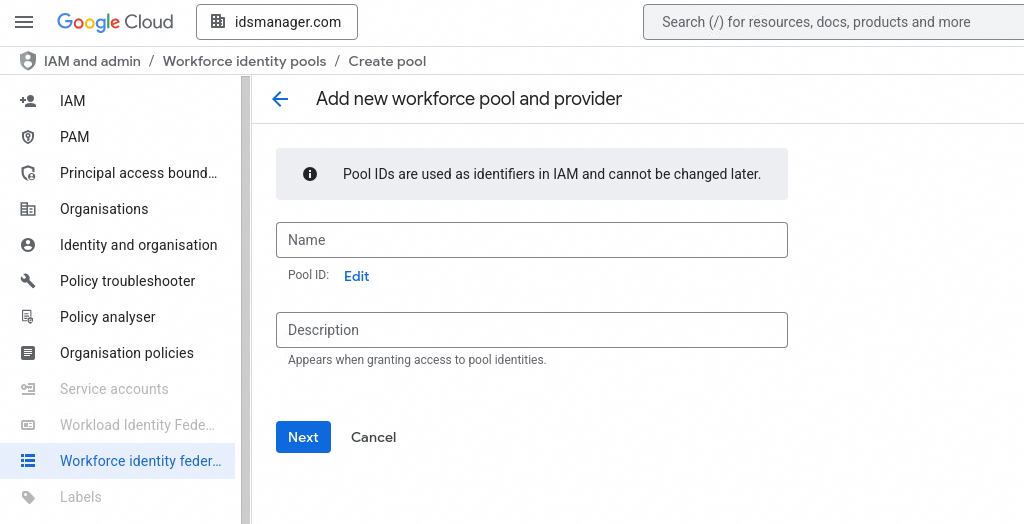
Click Next. Pool creation can take up to 2 minutes.
In the Select an Authentication Protocol section, select OpenID Connect (OIDC).
Step 3: GCP — Configure the identity provider
Create the pool provider
Fill in the provider details using the parameters you collected from IDaaS in Step 1:
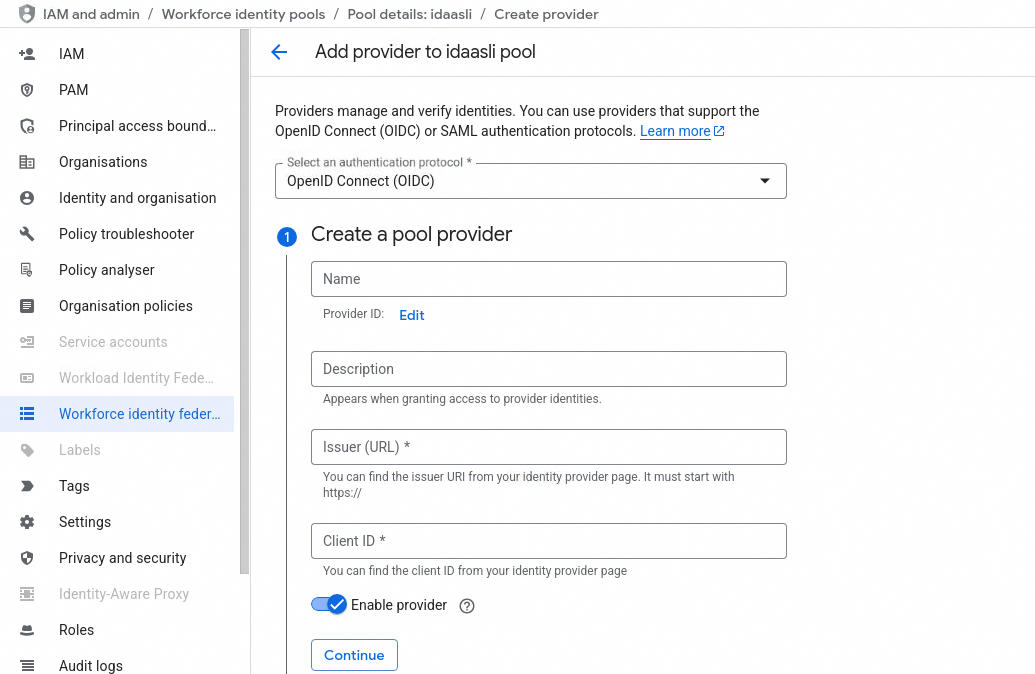
| Field | Value |
|---|---|
| Name | A display name for the identity provider |
| Provider ID | The identity pool ID |
| Description | (Optional) Describes the authorization scenario; shown when granting access to a third-party identity |
| Issuer (URL) | The Issuer URL from IDaaS (Sign-In > SSO > Application Settings) |
| Client ID | The client_id from IDaaS (General tab) |
Select the flow type
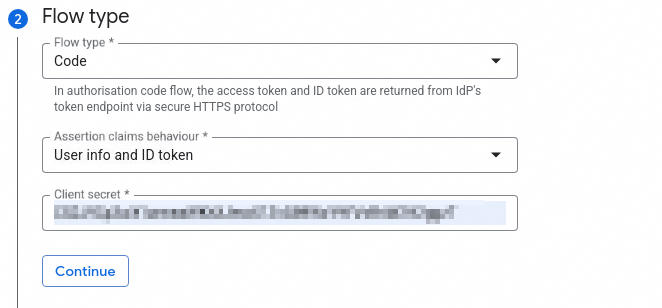
| Field | Value |
|---|---|
| Flow type | code |
| Assertion claims behavior | User info and ID token or ID token only |
| Client secret | The client_secret from IDaaS (General tab) |
Configure attribute mapping
In the attribute mapping section, map the subject field from IDaaS to GCP's expected format. Specify assertion.sub in the OIDC configuration, or use a CEL expression that returns a string.
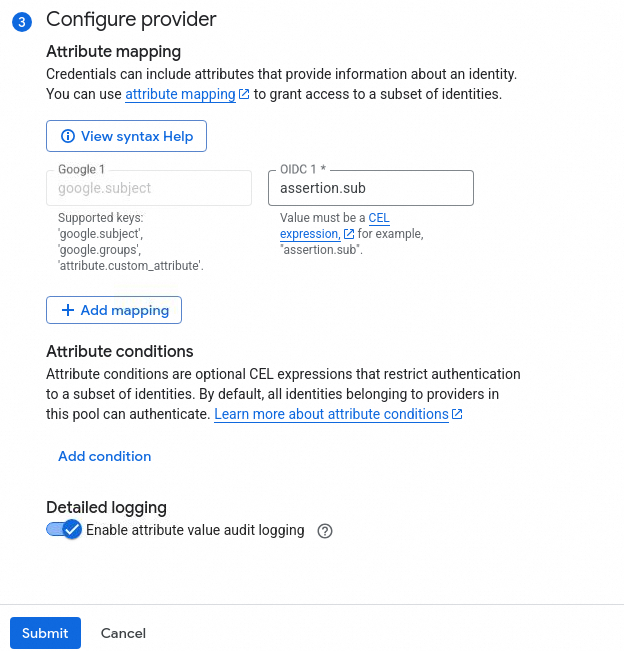
Click Submit and wait for the identity provider to finish creating.

Step 4: IDaaS — Set the redirect URI and sign-in URL
Return to the IDaaS OIDC application you created in Step 1 and configure two settings using values from GCP.
Set the redirect URI
Set Redirect URIs to the following URL. Replace the placeholders with your actual IDs from GCP:
https://auth.cloud.google/signin-callback/locations/global/workforcePools/WORKFORCE_POOL_ID/providers/WORKFORCE_PROVIDER_ID
| Placeholder | Description |
|---|---|
WORKFORCE_POOL_ID | The ID of your GCP workforce identity pool |
WORKFORCE_PROVIDER_ID | The ID of your GCP workforce identity pool provider |
Set the sign-in URL
The sign-in URL lets users launch GCP SSO with a single click from the IDaaS user portal.
In the IDaaS application, expand Show Advanced Settings and set SSO Implemented By to IDaaS & Application.
In your GCP workforce identity pool, locate the sign-in URL under Providers.
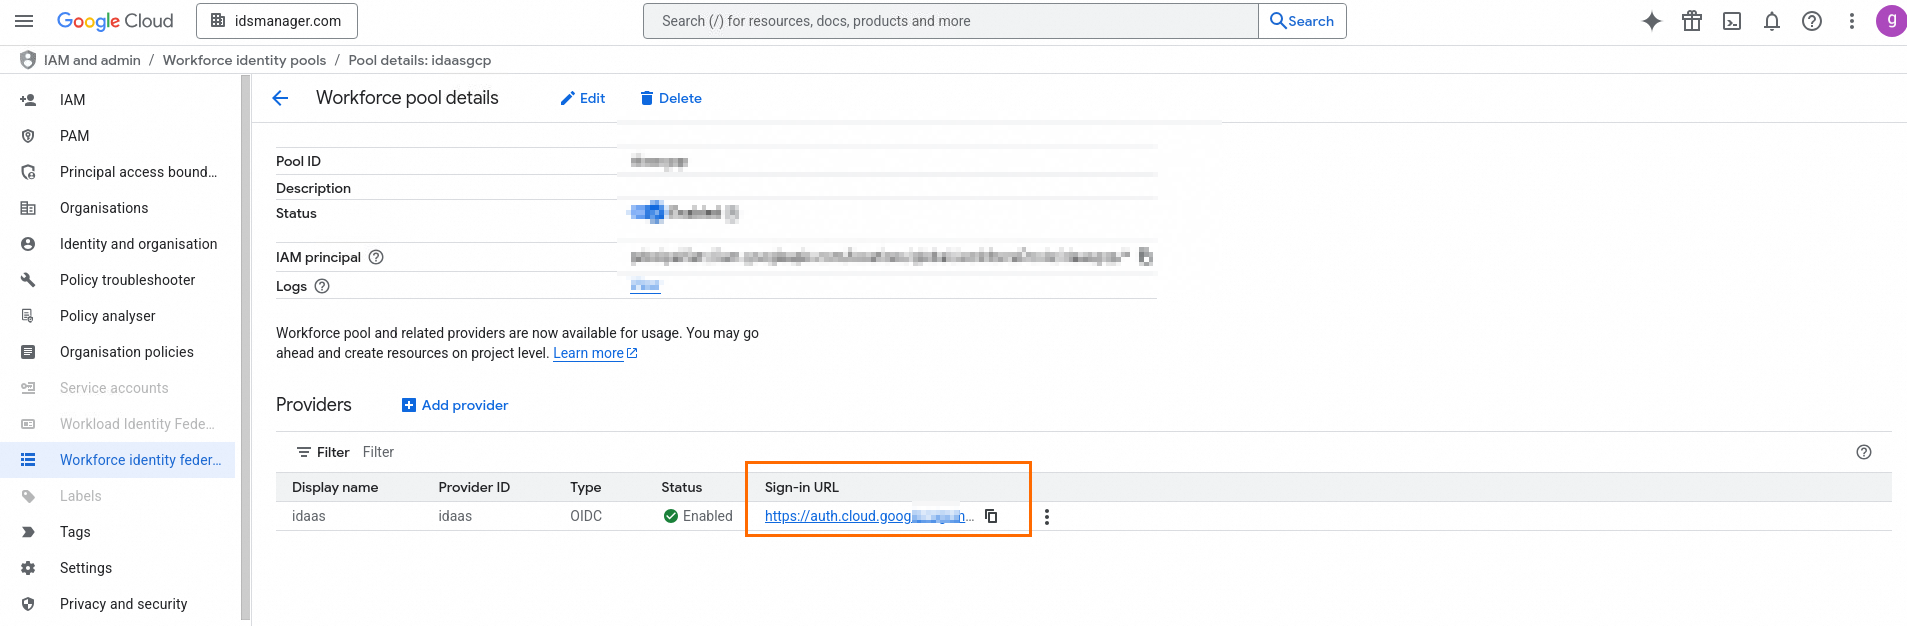
Copy the GCP sign-in URL and paste it into the IDaaS Sign-In URL field in the IDaaS application.

Step 5: GCP — Grant IAM permissions
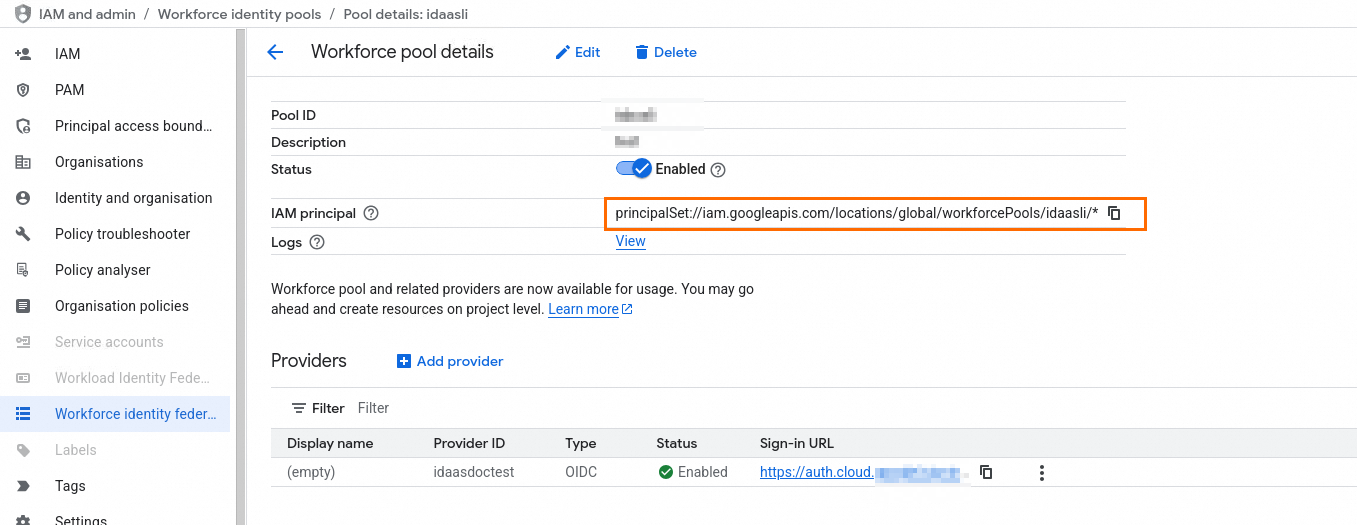
Go to the details page of the workforce identity pool and copy the IAM principal address.
In the navigation pane, click IAM, then click Grant access.
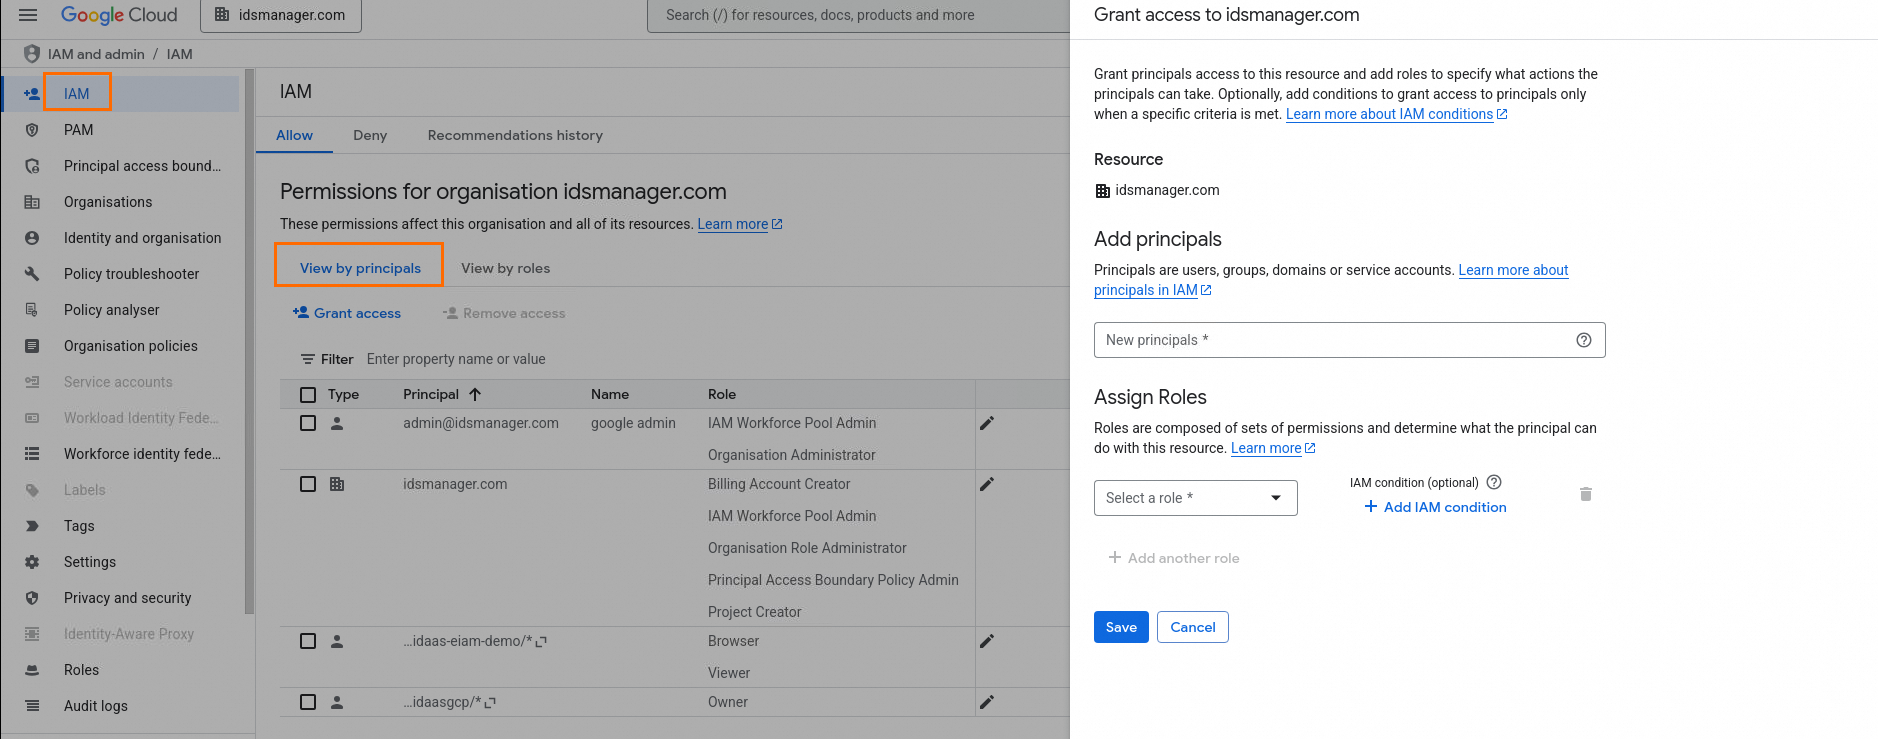
Paste the IAM principal address into the New principals field.
Assign the required roles and click Save.
Verify SSO
Confirm the setup works from both sides.
Verify from IDaaS
Log in to the IDaaS user portal.
Click the OIDC application you created.

The browser redirects you to the Google Cloud console automatically. A successful redirect confirms the IdP-initiated SSO flow is working.
Verify from GCP
In the Google Cloud console, go to IAM and Admin > Workforce identity federation.
Open the workforce identity pool you created, go to the Providers section, and click the Sign-in URL.

The browser redirects you to the IDaaS login page. After logging in, you land on the Google Cloud console. A successful login confirms the SP-initiated SSO flow is working.