Configure your enterprise DingTalk organization as an inbound identity source for Agent ID Guard. DingTalk users can then sign in to Agent applications with synchronized permissions and organization structure.
Prerequisites
-
An Alibaba Cloud IDaaS (EIAM 2.0) instance is activated with Agent ID Guard enabled.
-
You are an IDaaS instance administrator and the primary DingTalk administrator of your enterprise.
-
You have deployed an Agent service sample as described in Deploy an Agent service sample, or registered another Agent service in Agent ID Guard. The Agent client access URL must redirect to IDaaS for authentication.
Step 1: Add a DingTalk identity provider in IDaaS
-
Log on to the IDaaS EIAM console. In the left-side navigation pane, click Identity Providers > Inbound > Add Inbound.
-
Select DingTalk - Inbound (Third-party Application) and click Add.
-
On the Setting page, keep the default settings, or customize them following Bind DingTalk.
-
Click Next to go to the Activation page. Scan the displayed QR code with the DingTalk mobile app to activate the IDaaS third-party application.
-
After the scan, you are redirected to the Scan to Bind page. Follow the on-screen instructions to complete the binding.
Step 2: Configure account synchronization from DingTalk to IDaaS
After binding, if you selected Trigger Full Synchronization during configuration, IDaaS automatically performs a full contact list synchronization.
-
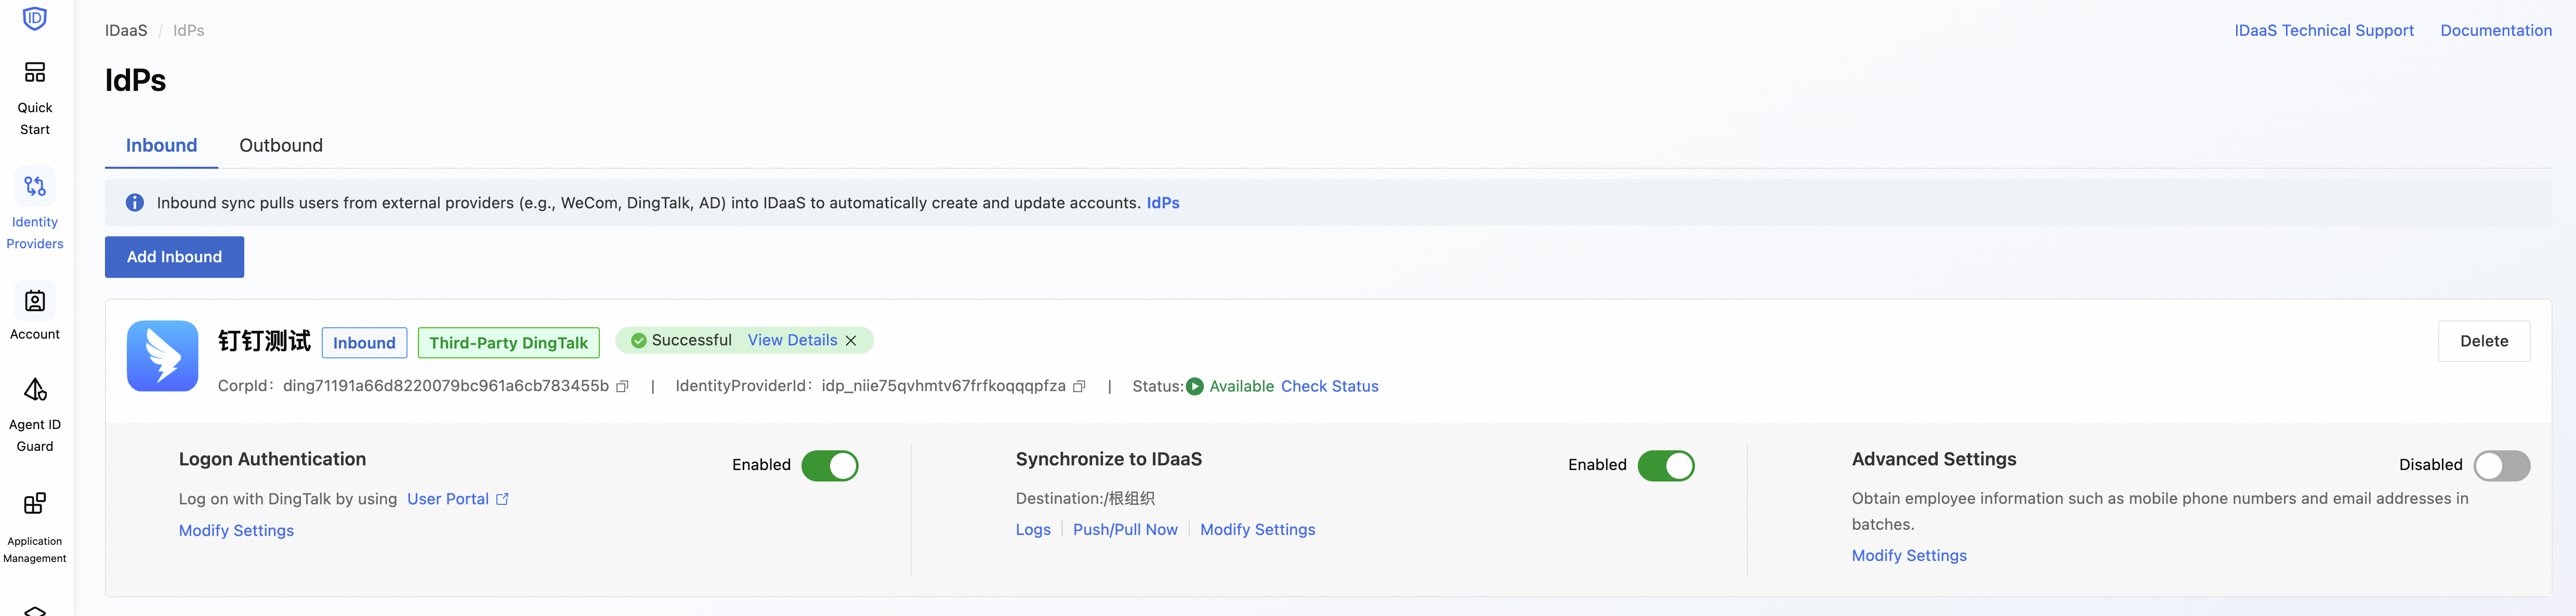
In the left-side navigation pane, click Identity Providers > Inbound. Verify that a DingTalk inbound identity provider is created.
-
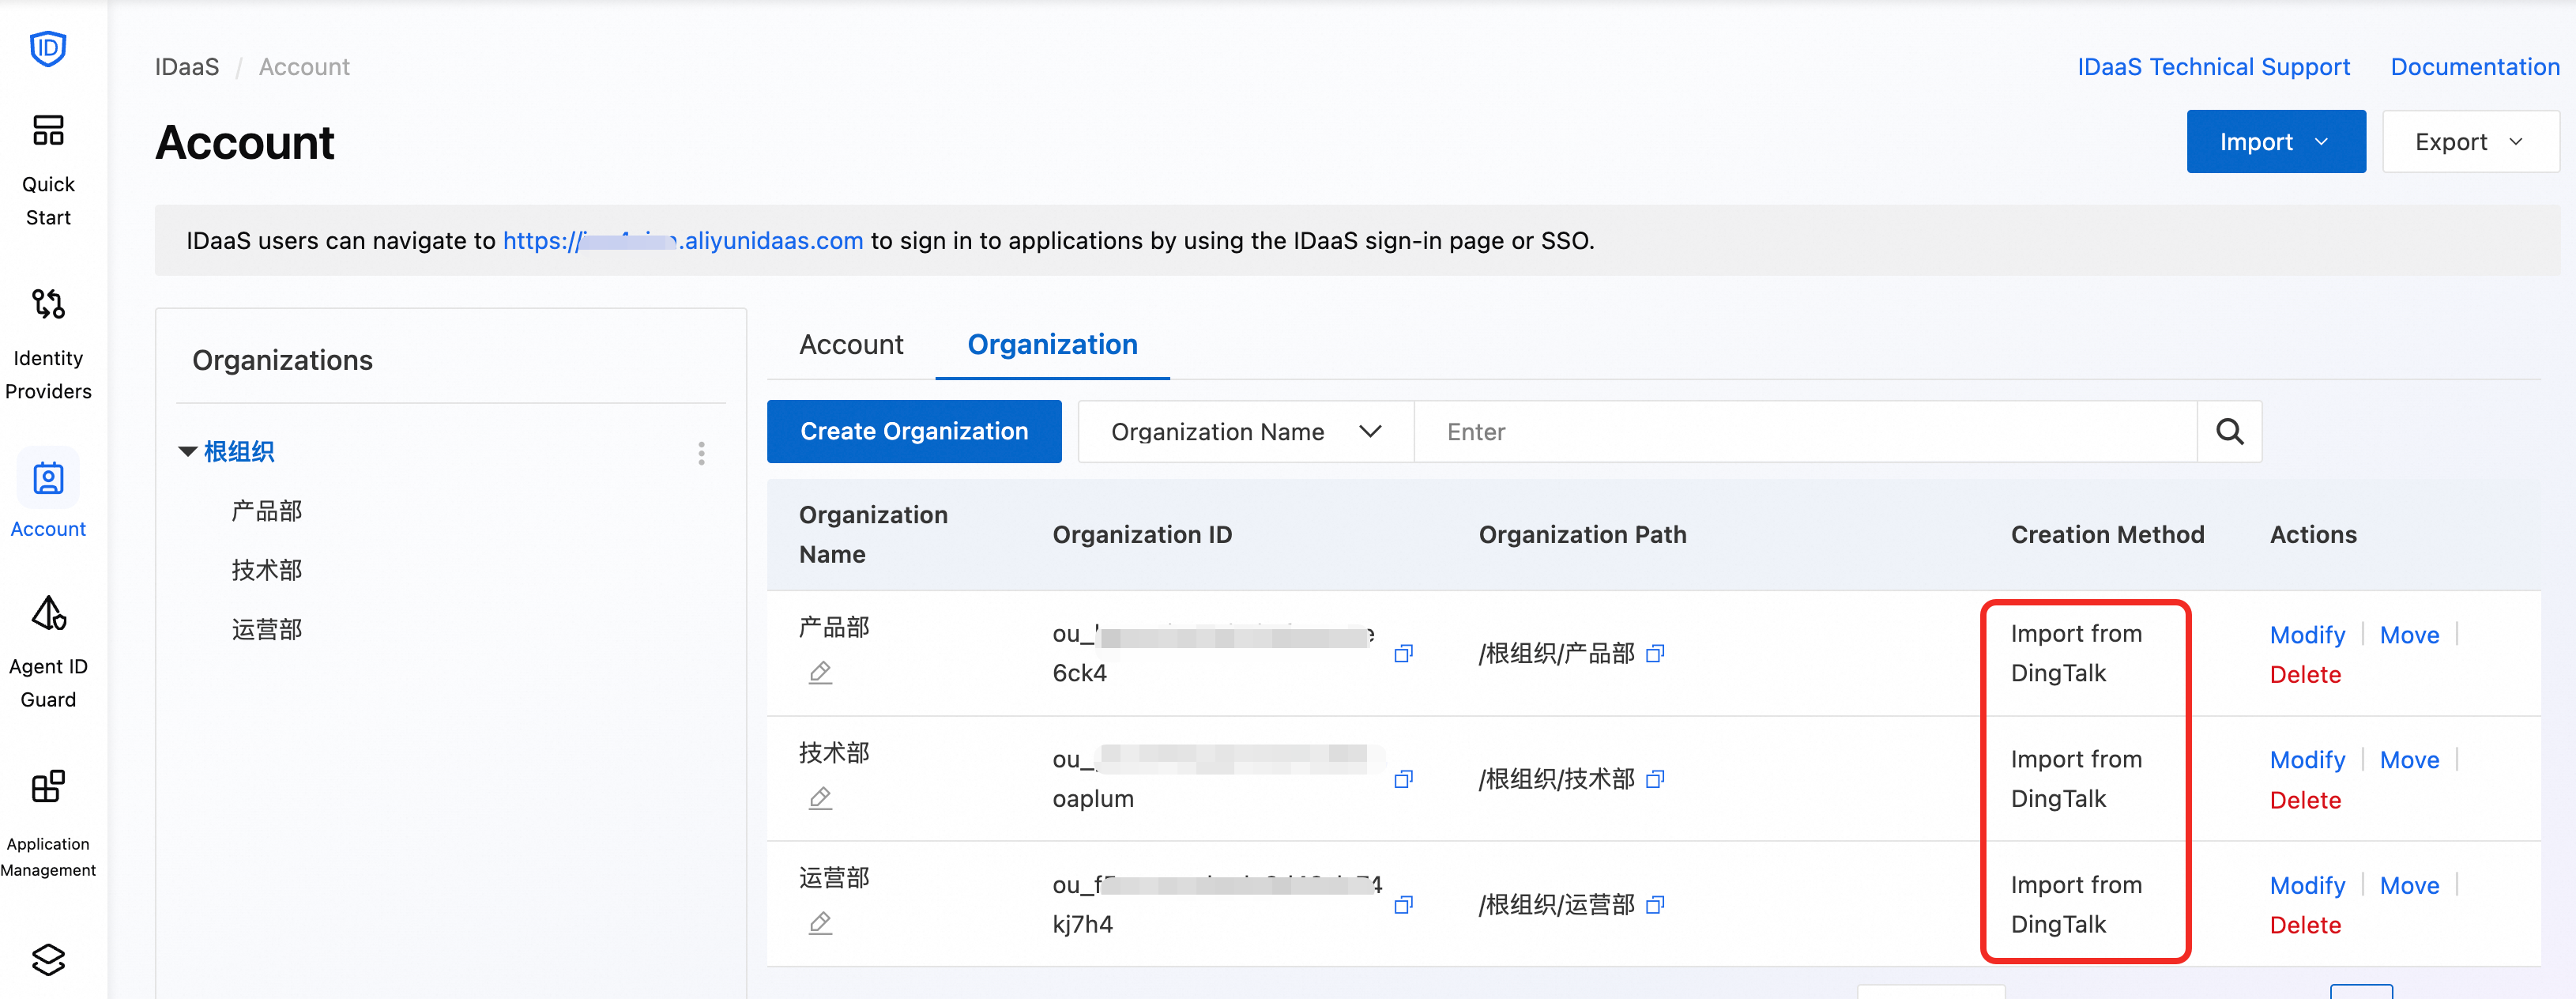
In the left-side navigation pane, click Account. Verify that accounts are imported under Organizations, organized by department.
Step 3: Configure SSO authorization on the Agent details page
-
If you have not registered an Agent identity, configure it in the Agent ID Guard module first, as described in Configure Agent ID Guard.
-
SSO Authorization defines which accounts, groups, or organizations can sign in through the client.
-
Log on to the IDaaS EIAM console.
-
Click Agent Identity Security to go to the Agent ID Guard page.
-
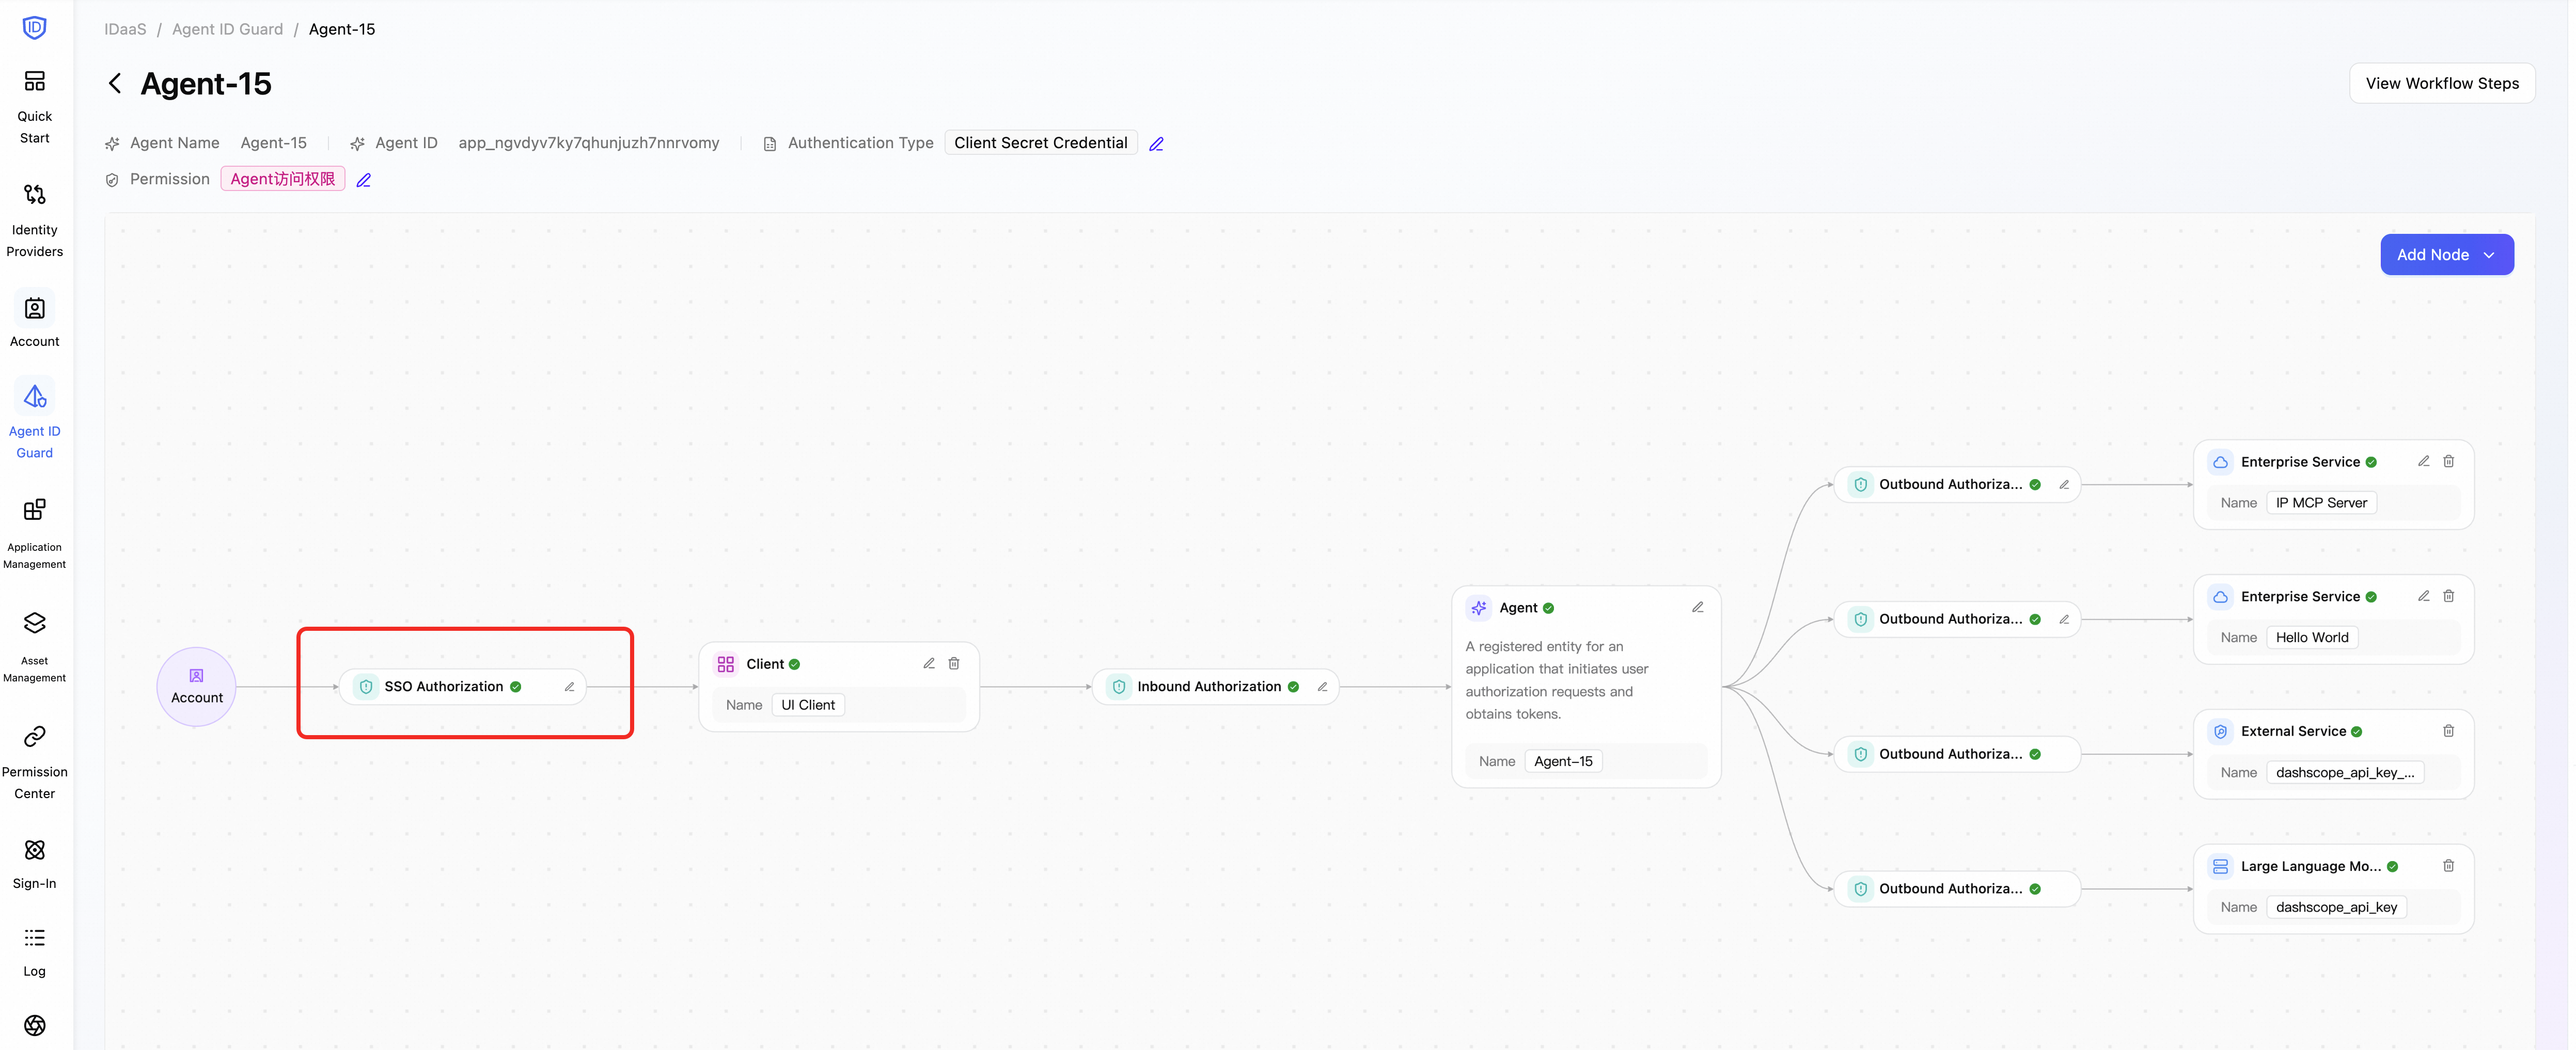
Find the target Agent and click Edit in the Operation column. The Agent details page displays the identity configuration topology.
-
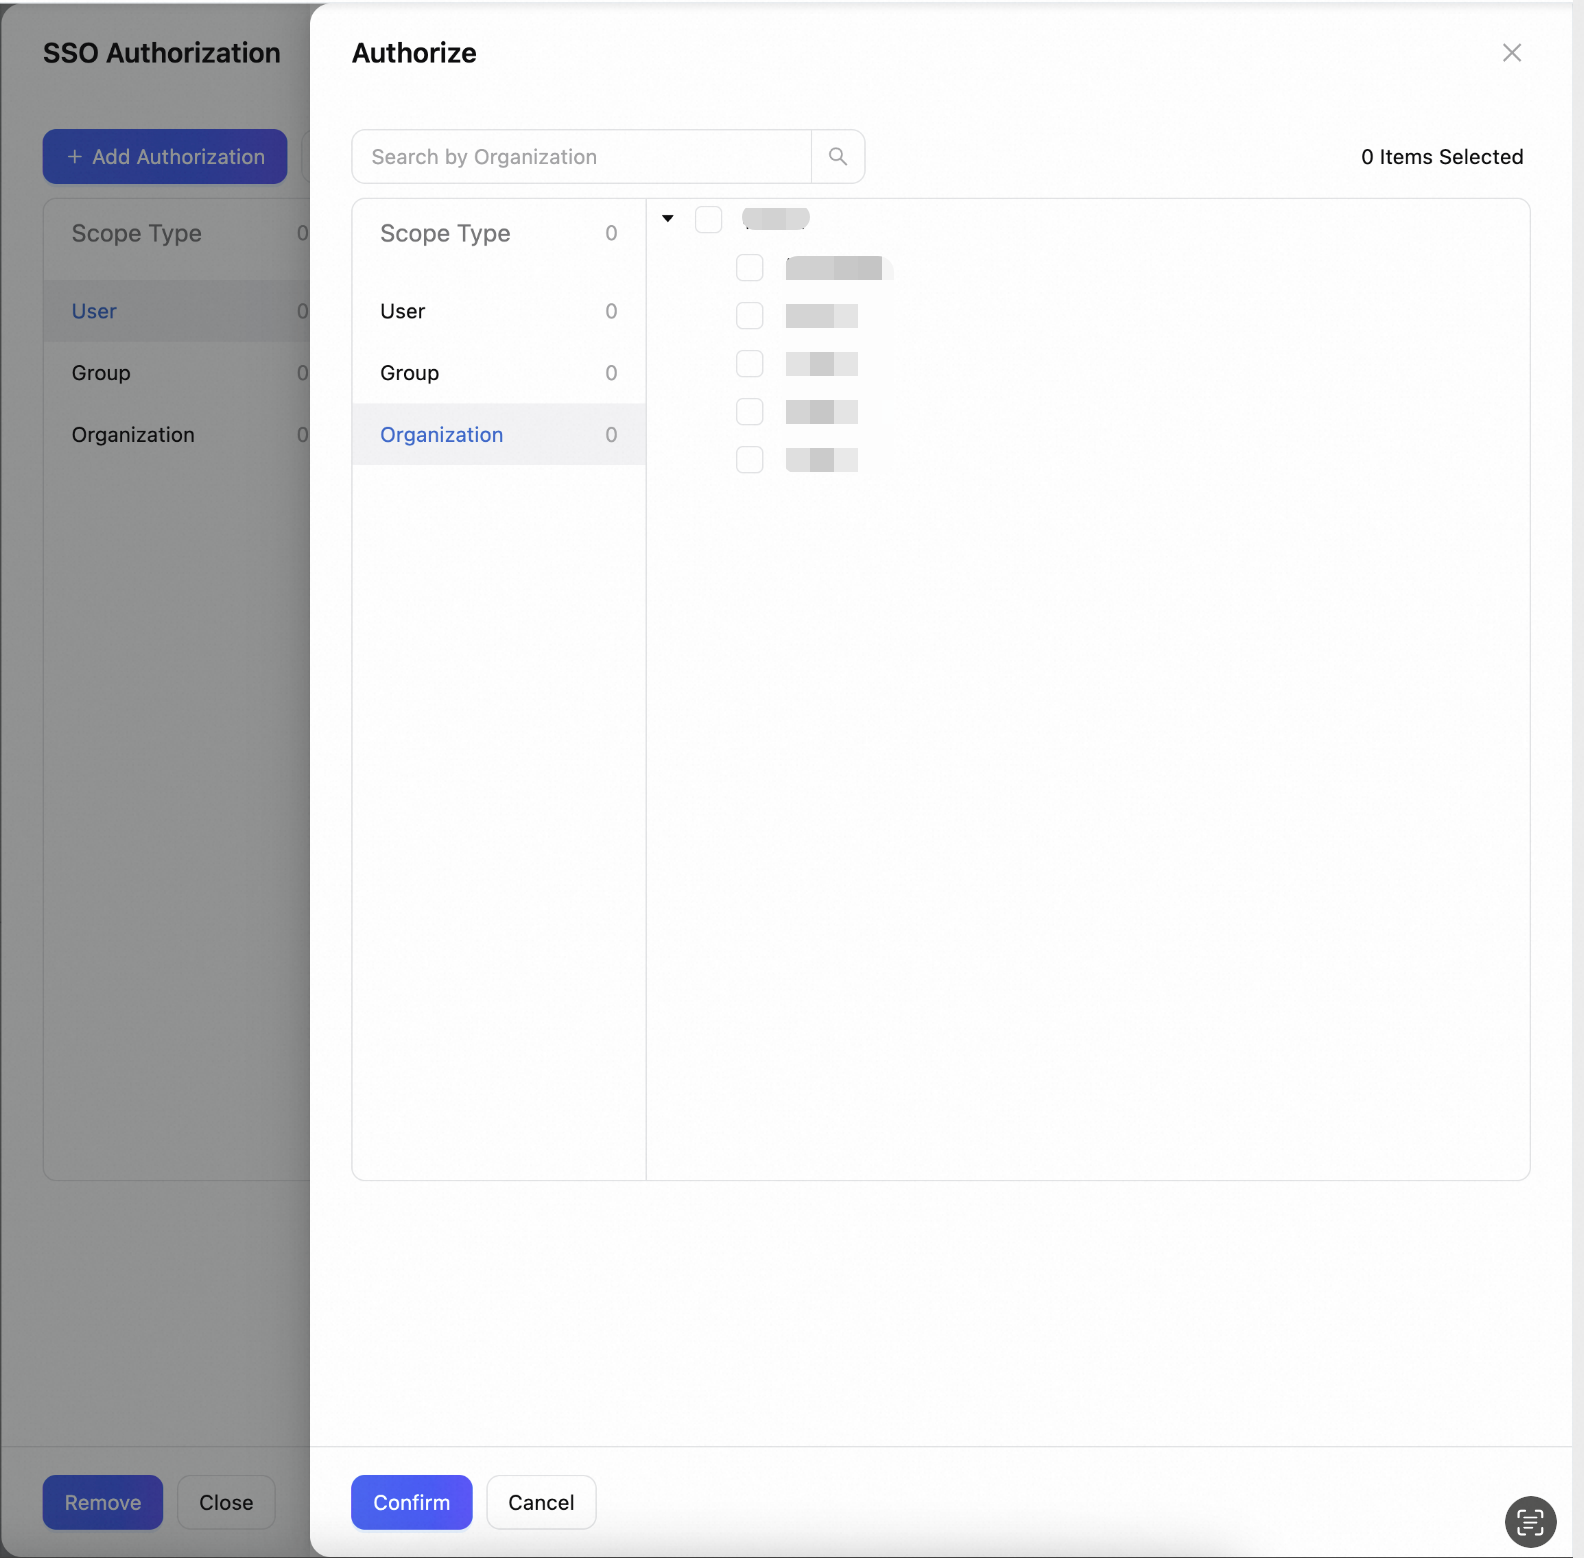
Click SSO Authorization. In the SSO Authorization panel that appears on the right, click Add Authorization.
-
In the dialog box, select an authorization subject type: User, Group, or Organization. Select the objects to authorize, such as an organization synchronized from DingTalk, and click Confirm.
Step 4: Verify SSO sign-in
-
Open a browser and navigate to the Agent client access URL.
-
If you are not signed in, the page redirects to the IDaaS unified sign-in page. Under Other sign-in methods, select the DingTalk application you configured.
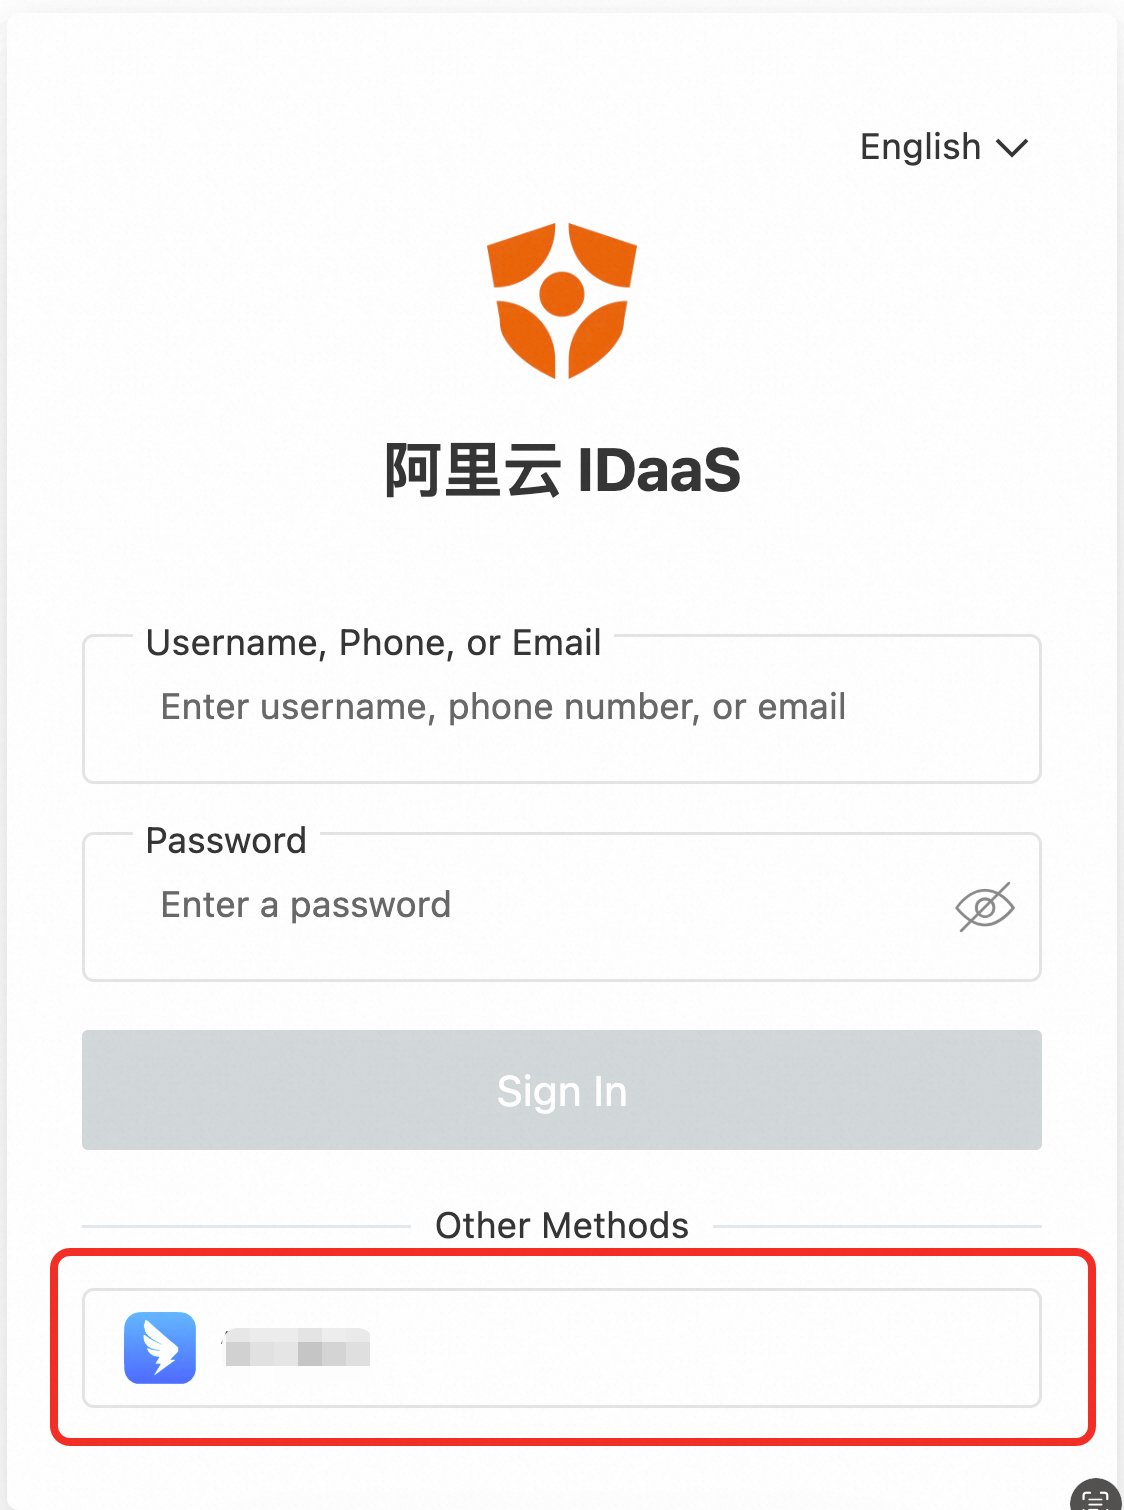
-
Scan the QR code with DingTalk to authenticate. After authentication, you are redirected to the Agent client.