Connect Feishu to IDaaS EIAM as an identity provider to sync your address book and enable single sign-on (SSO) for your organization.
| Category | Capabilities |
|---|---|
| Account | Sync the full Feishu address book to IDaaS EIAM. Scheduled verification is supported. |
| Logon | Scan a QR code with Feishu to log on to IDaaS EIAM or any application in it. Initiate SSO from the Feishu workbench to log on to IDaaS EIAM or any application in it. |
Prerequisites
Before you begin, make sure you have:
Admin access to the Feishu Open Platform
Admin access to the IDaaS console
Feishu requires administrator approval before some permissions take effect. Configure all application permissions in Step 1 before proceeding. Without the required permissions, features such as data synchronization will not work.
Connect to Feishu
The connection process has four steps:
Configure application permissions in Feishu
Configure development settings in IDaaS
Select integration scenarios
Map fields
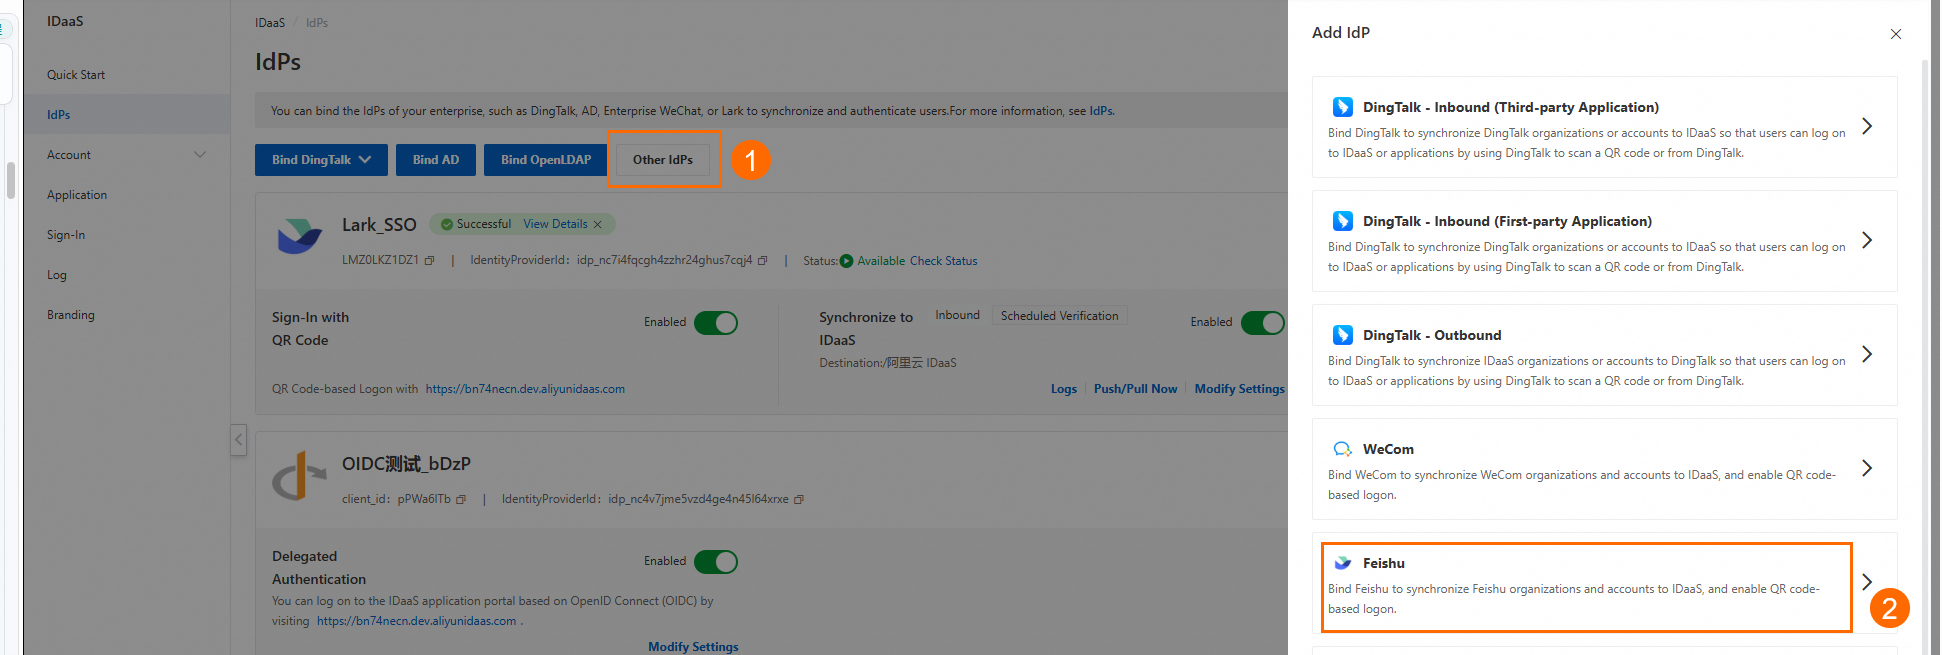
In the Identity Providers menu, click Other Identity Providers > Feishu to start.
Step 1: Configure application permissions
1. Create a Feishu application.
Go to the Feishu Open Platform, log on to the developer backend, and create an enterprise self-built application.
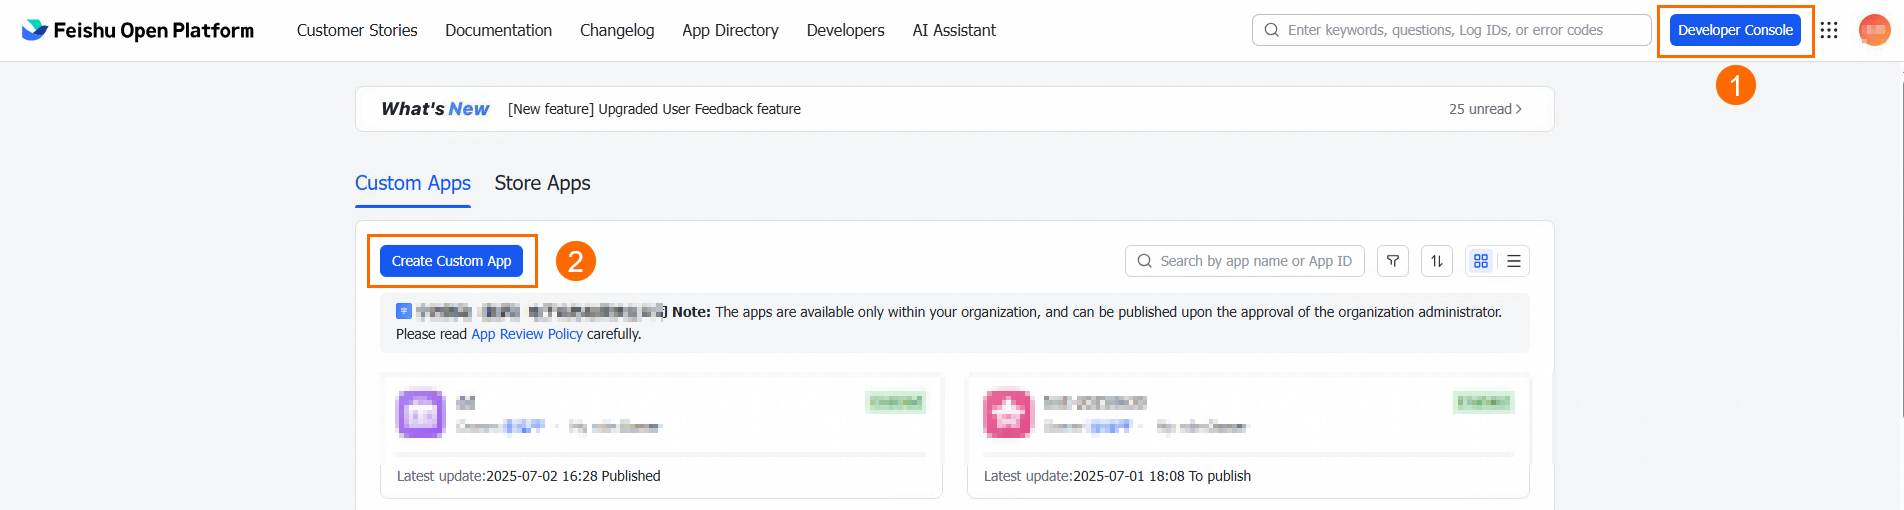
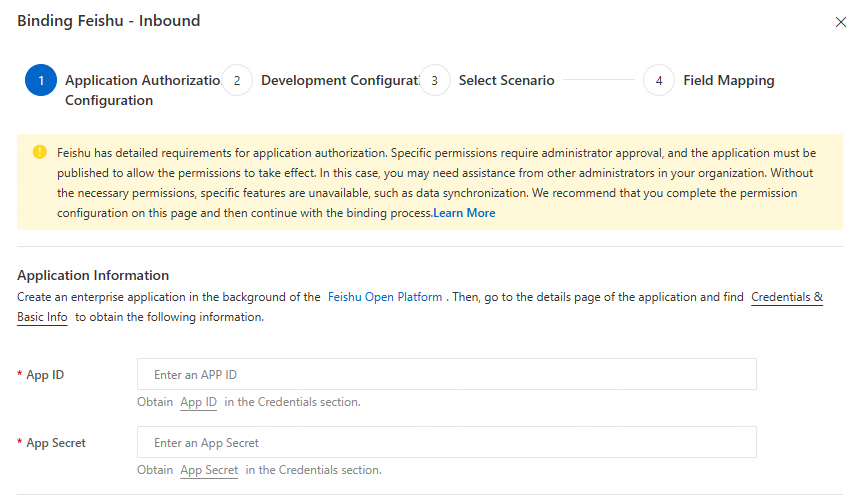
After the application is created, you are redirected to the application details page. Click Credentials & Basic Information to get the App ID and App Secret.

2. Enter your App ID and App Secret in IDaaS.
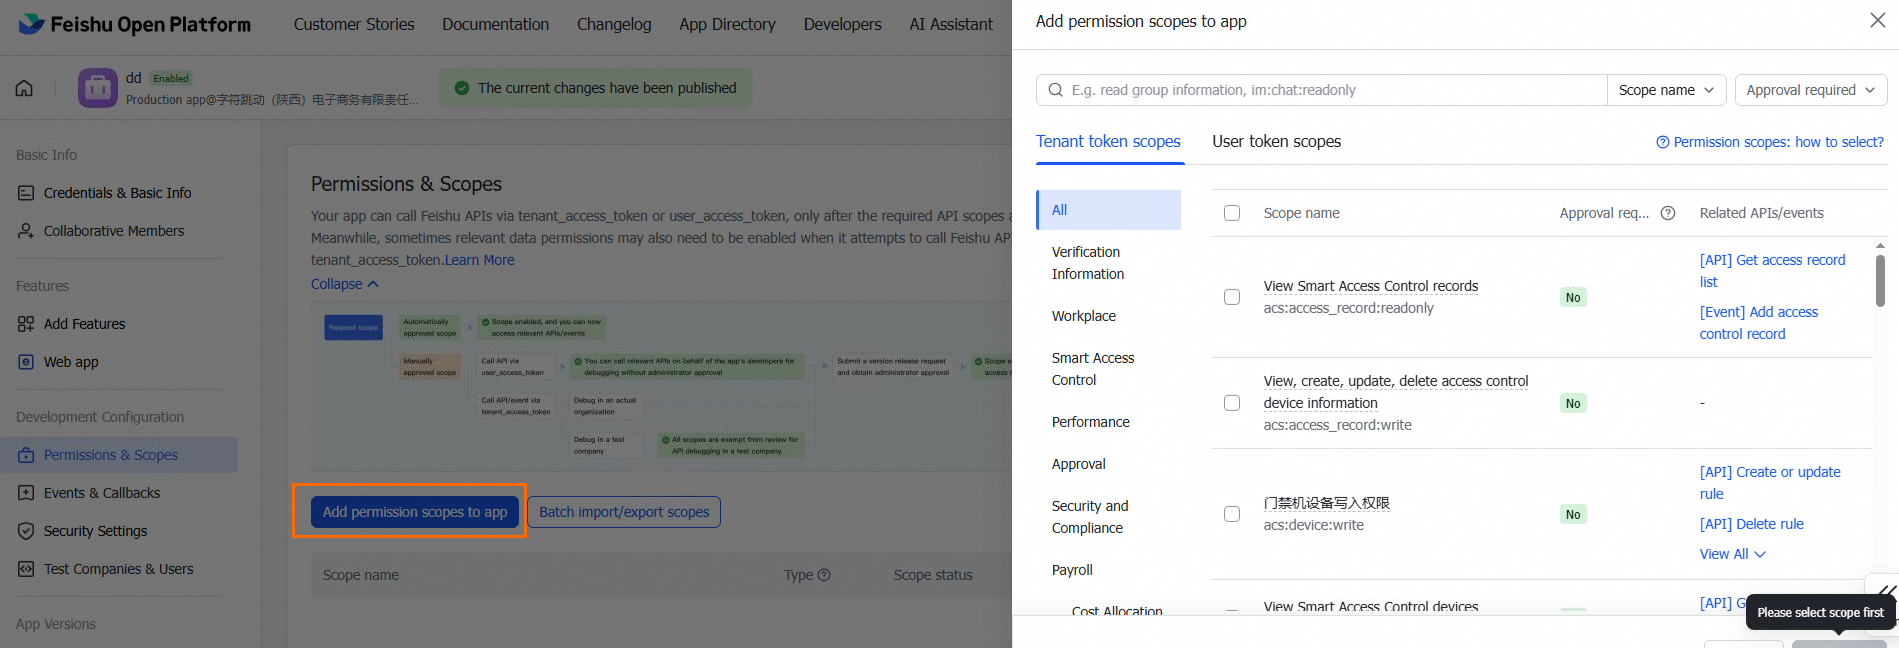
3. Grant address book permissions.
On the Feishu application details page, go to Permission Management > Enable Permissions. Under Address Book, grant the following permissions. These query permissions enable data synchronization and user logon.
| Permission name | Permission value | Notes |
|---|---|---|
| Read basic information of the address book | contact:contact.base:readonly | — |
| Read user IDs | contact:user.employee_id:readonly | — |
| Read basic information of departments | contact:department.base:readonly | — |
| Read the organizational structure of departments in the address book | contact:department.organize:readonly | Requires version release approval before taking effect |
| Read basic information of users | contact:user.base:readonly | — |
| Read the organizational structure of users | contact:user.department:readonly | Requires version release approval before taking effect |
| Read user email addresses | contact:user.email:readonly | Optional. Enable only if you want to sync this field to IDaaS. |
| Read user mobile numbers | contact:user.phone:readonly | Optional. Enable only if you want to sync this field to IDaaS. Requires version release approval before taking effect. |
After you submit a release request, Feishu sends a notification to your administrators. An administrator must review the request in the Feishu Admin console.
4. Enable Feishu database permissions.
In Permission Management, click Configure under Accessible Data Range.
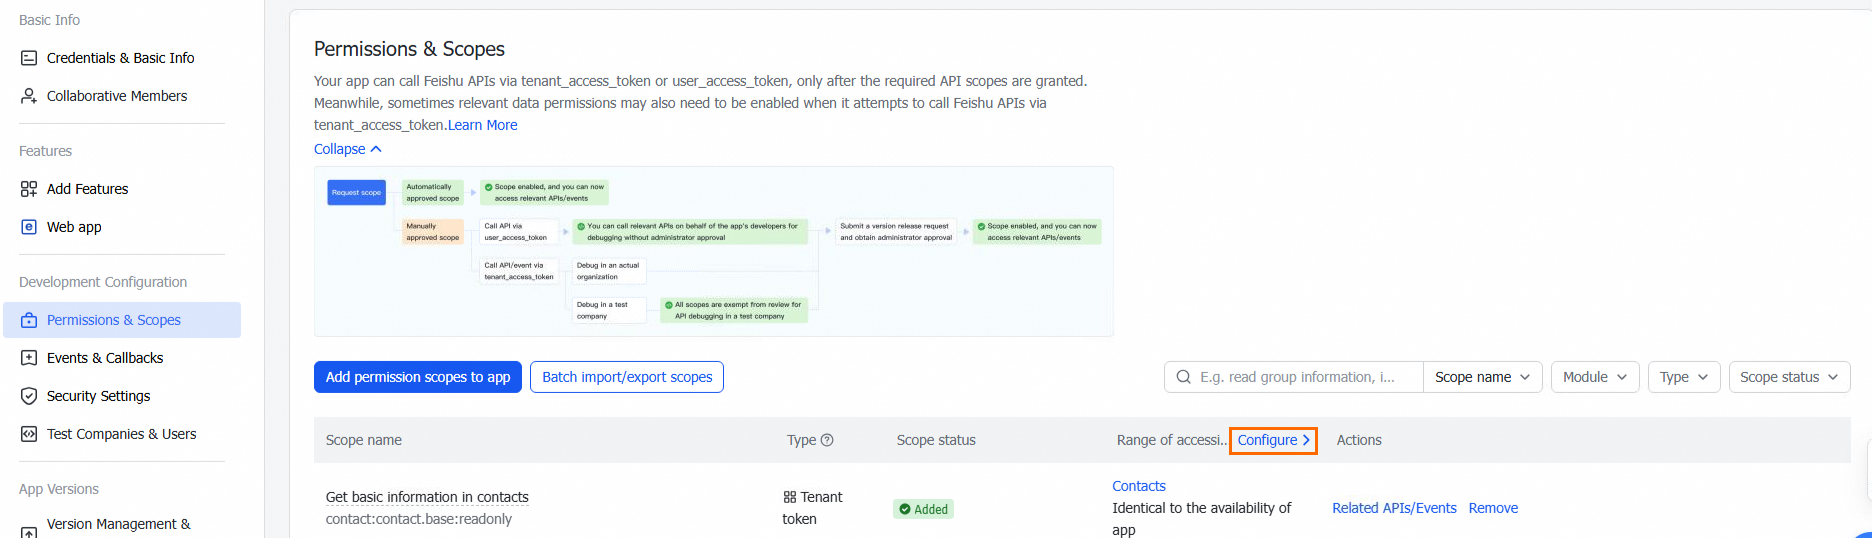
Select the required permissions. This scope determines which user and organization data can be synced to IDaaS and used for Feishu logon.

5. Submit in IDaaS.
After completing permission configuration, click Next in IDaaS. IDaaS checks the API and database permissions. If all required permissions are granted, you can proceed.
Step 2: Configure development settings
1. Enter basic information.
Display Name: Enter a name for the identity provider.
Enterprise ID: Enter your Feishu enterprise ID, which you can get from the Feishu Admin console.

2. Configure development information.
This step requires copying values between IDaaS and Feishu. The following table summarizes what to copy and where.
| Setting | Copy from | Paste to | Purpose |
|---|---|---|---|
| Redirect URL | IDaaS | Feishu > Security Settings > Redirect URL | Processes user logon requests |
| Application homepage URL | IDaaS | Feishu > Add Application Capabilities > Web Application (desktop and mobile homepage) | Enables logon from the Feishu workbench without authentication |
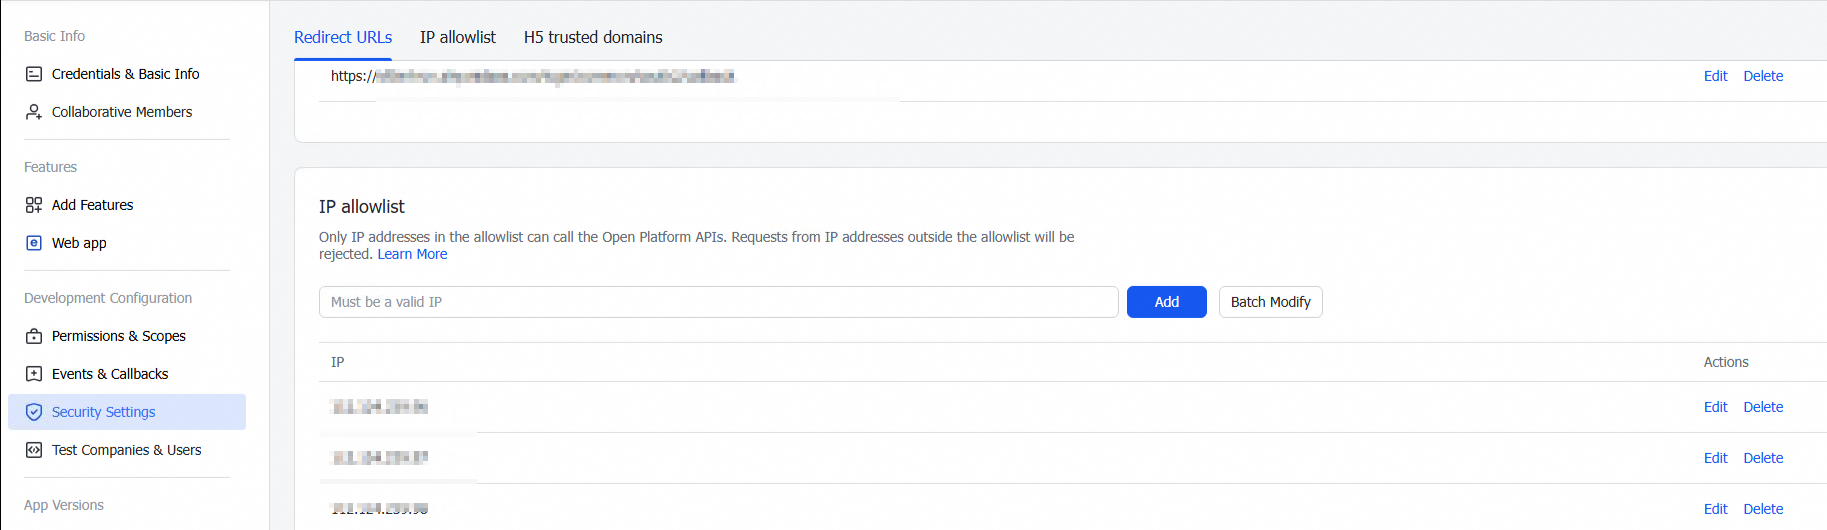
| IP whitelist | IDaaS (view only) | Feishu > Application Security Settings > IP Whitelist > Batch Modify | Restricts incoming requests by IP address |
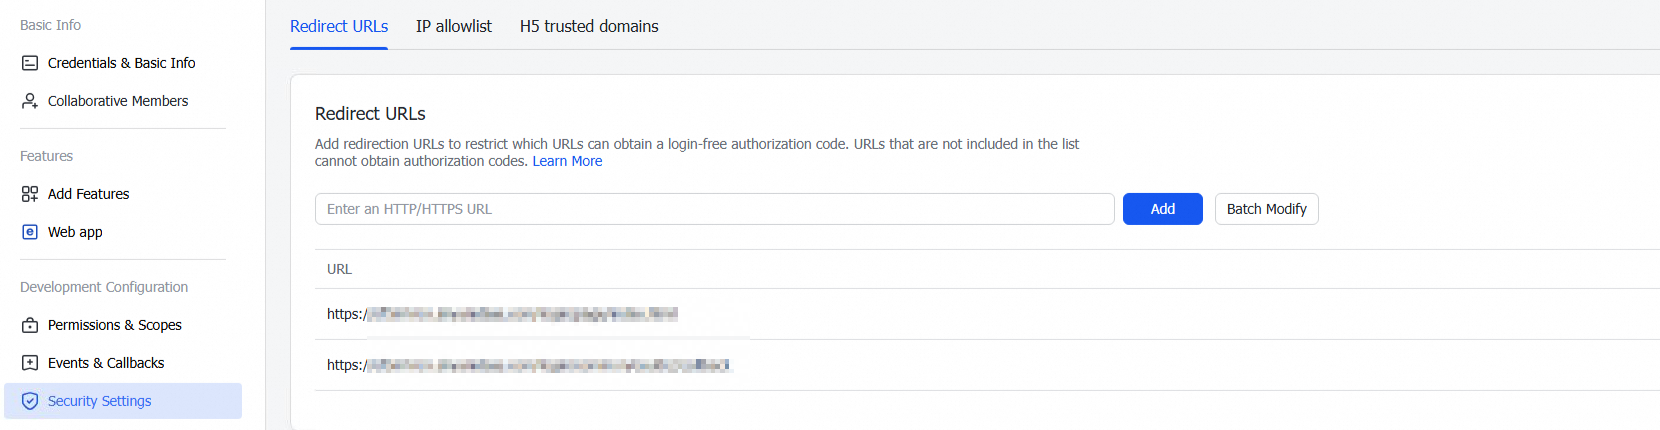
Redirect URL
Copy the redirect URL from IDaaS.

On the Feishu application details page, paste the URL into the Redirect URL field under Security Settings, then click Add.
Application homepage
Copy the application homepage URL from IDaaS. Configure this URL in Feishu if you want users to log on to the IDaaS CloudSSO user portal from the Feishu workbench without authentication.

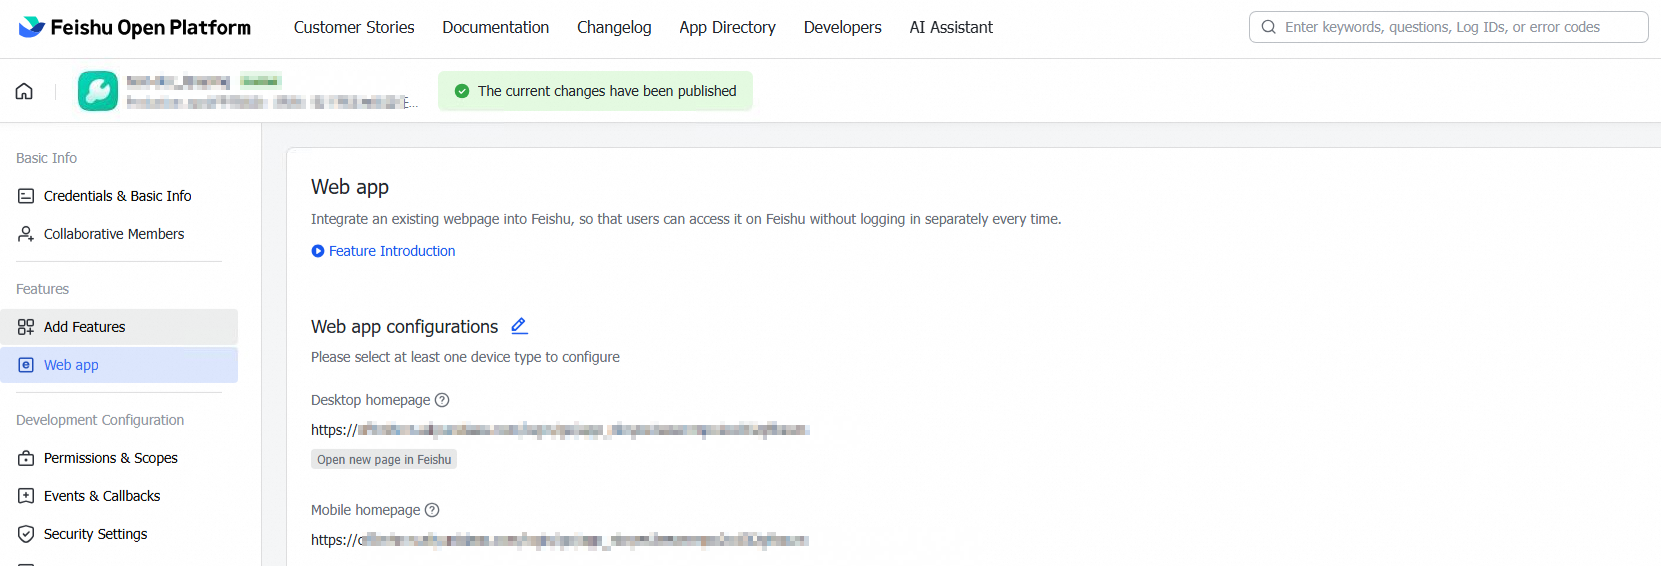
On the Feishu application details page, click Add Application Capabilities and add a Web Application.
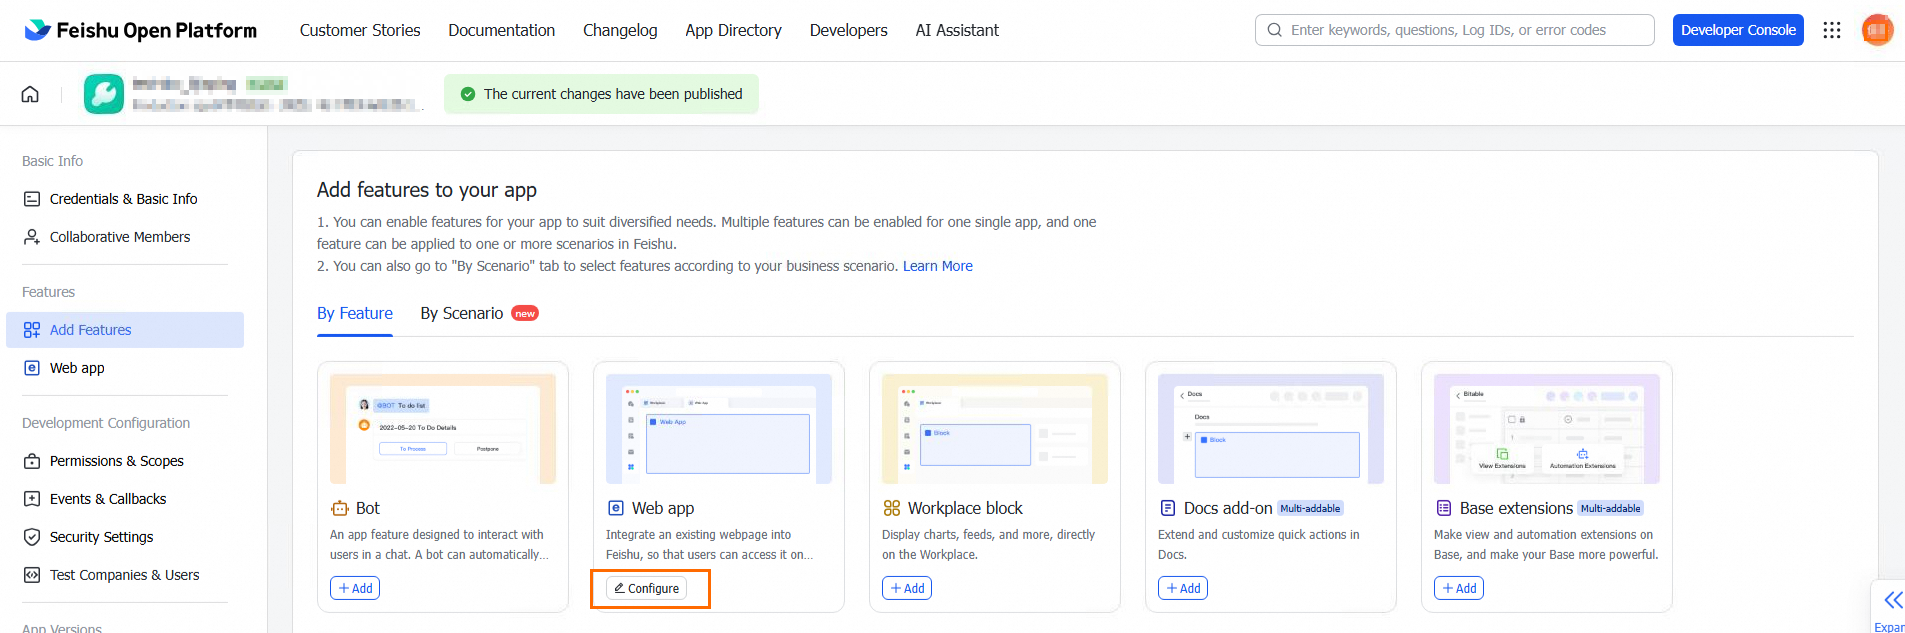
Paste the URL into both the desktop and mobile homepage fields.
IP address whitelist
View the egress IP addresses in IDaaS. IDaaS provides two types of network endpoints:
Endpoint type Description Shared endpoint The default endpoint shared by all IDaaS instances. Supports Internet access only. Dedicated endpoint An endpoint exclusive to your IDaaS instance. Use a dedicated endpoint for data synchronization and delegated authentication with Feishu. For details, see Network endpoints. 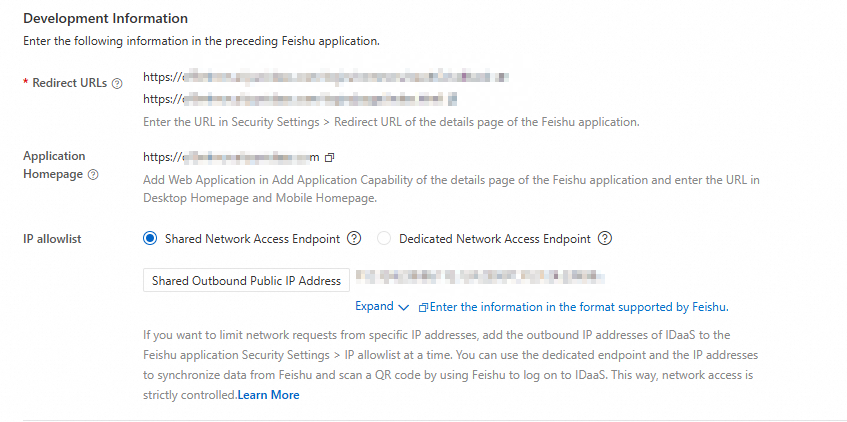
Copy the egress IP address list from IDaaS and add it to the IP Whitelist under Application Security Settings in Feishu. Use Batch Modify to enter the list.
Step 3: Select scenarios
Select the features you want to enable.
| Feature | Description | Additional setup required |
|---|---|---|
| Synchronization target | Select Alibaba Cloud IDaaS from the dropdown. Address book data from Feishu is imported into this IDaaS node. | None |
| Scheduled synchronization | IDaaS performs a full sync of Feishu data at 00:00 every day. Use a cron expression to customize the time. To synchronize data in real time, you can manually trigger a full synchronization task. A built-in protection mechanism stops the sync if more than 30 accounts or 10 organizations are deleted, to prevent accidental data loss. | None |
| Incremental synchronization | Disabled by default. To enable it, you must first configure event notifications after the connection is established. | Configure event notifications after the connection is established (see below). |
| QR code logon | Adds a Feishu QR code logon option to the IDaaS logon page. Users scan the QR code to authenticate. If an application homepage is configured, users can also log on from the Feishu workbench without authentication. | None |
Field mapping: Use field mapping to specify how IDaaS accounts match Feishu users during sync — for example, matching account names to user IDs. If a match is found, the existing account is updated; otherwise, a new account is created.
Enable incremental synchronization
Incremental synchronization requires event notification configuration. Complete this after the connection is established:
On the Identity providers page, find the Feishu application and click Modify.
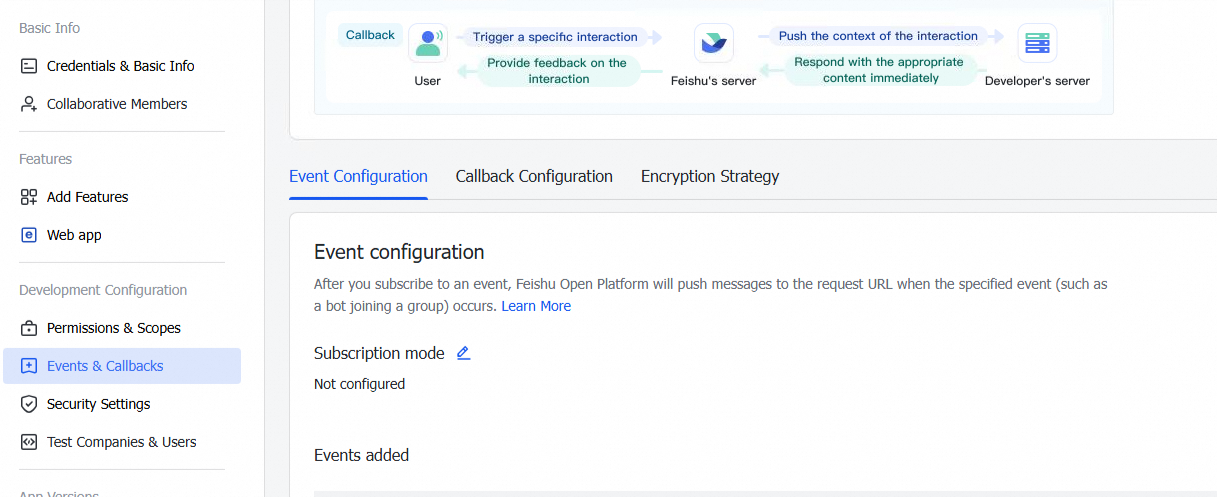
In the event configuration section, enter the Encrypt Key and Verification Token. Get these values from Events & Callbacks > Encryption Policy on the Feishu application details page.
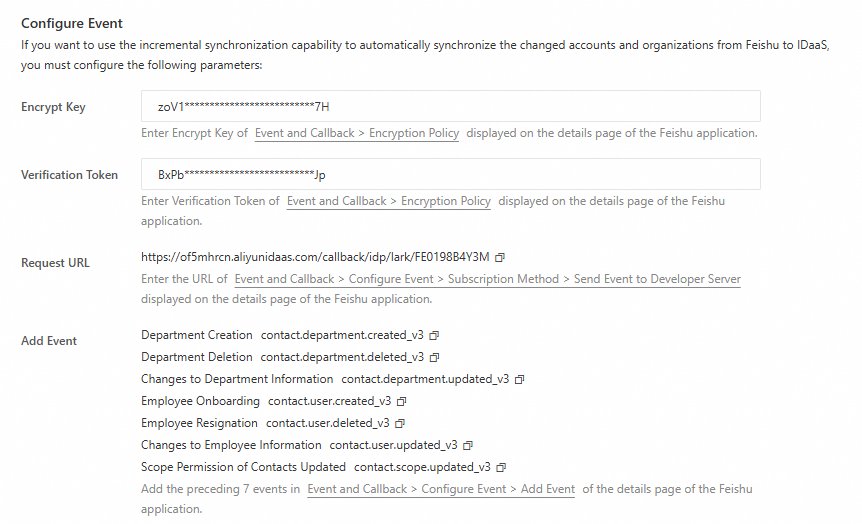
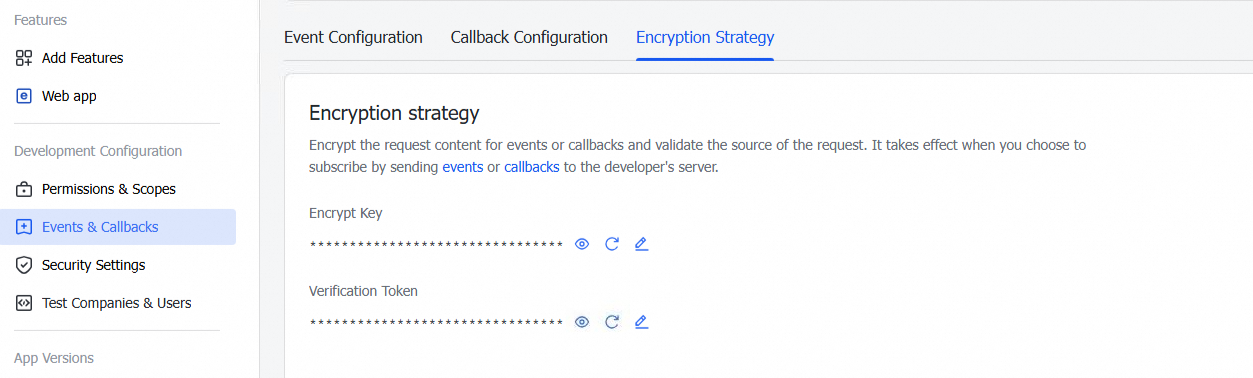
On the Feishu application details page, go to Events & Callbacks > Event Configuration. Paste the Request Address from IDaaS into the request URL field. This URL sends events to the developer server.
Step 4: Map fields
Configure field mapping if either of the following applies:
You have existing IDaaS data and need to link Feishu members or departments to existing IDaaS accounts or organizations.
You want to populate IDaaS account fields with data from specific Feishu member fields — for example, use a Feishu user's name as the IDaaS account display name.
The userid field is the unique identifier for Feishu users and can be modified. Because it is the only primary key IDaaS relies on, modifying userid deletes the corresponding IDaaS account and creates a new one. Modify this field with caution.
Manage Feishu identity providers
After the connection is complete, you are redirected to the Identity Providers menu, where you can manage the identity provider and its features.