Integrate IDaaS EIAM with Alibaba Cloud Resource Access Management (RAM) to enable automatic role-based single sign-on (SSO) for user groups. Users added to a group automatically inherit the corresponding RAM role — no per-account application configuration required.
How it works
A user's group membership in IDaaS drives role selection at logon time. When a user accesses the SAML 2.0 application, IDaaS builds a SAML assertion that maps each group the user belongs to a RAM role (via the group's External ID). RAM evaluates the assertion and presents the matching roles for the user to select.
The full setup involves five stages:
Create a SAML application in IDaaS and connect it to the RAM SAML metadata.
Create a SAML identity provider (IdP) and RAM roles so RAM trusts assertions from IDaaS.
Create users and groups in IDaaS, then grant the application access to those groups.
Configure SAML Attribute Statements to map group membership to RAM roles at runtime.
Verify that users can log on and select the expected roles.
Prerequisites
Before you begin, ensure that you have:
An active IDaaS EIAM instance
Access to the IDaaS console and the RAM console
Your Alibaba Cloud account ID (available on the Alibaba Cloud home page) — required when configuring SAML Attribute Statements in Step 4
Step 1: Create a SAML application
1a. Add the application in IDaaS
Log on to the IDaaS console, select your IDaaS instance, and in the Actions column click Console.IDaaS console
Go to Applications > Add Application > Standard Protocol to create a SAML 2.0 application.
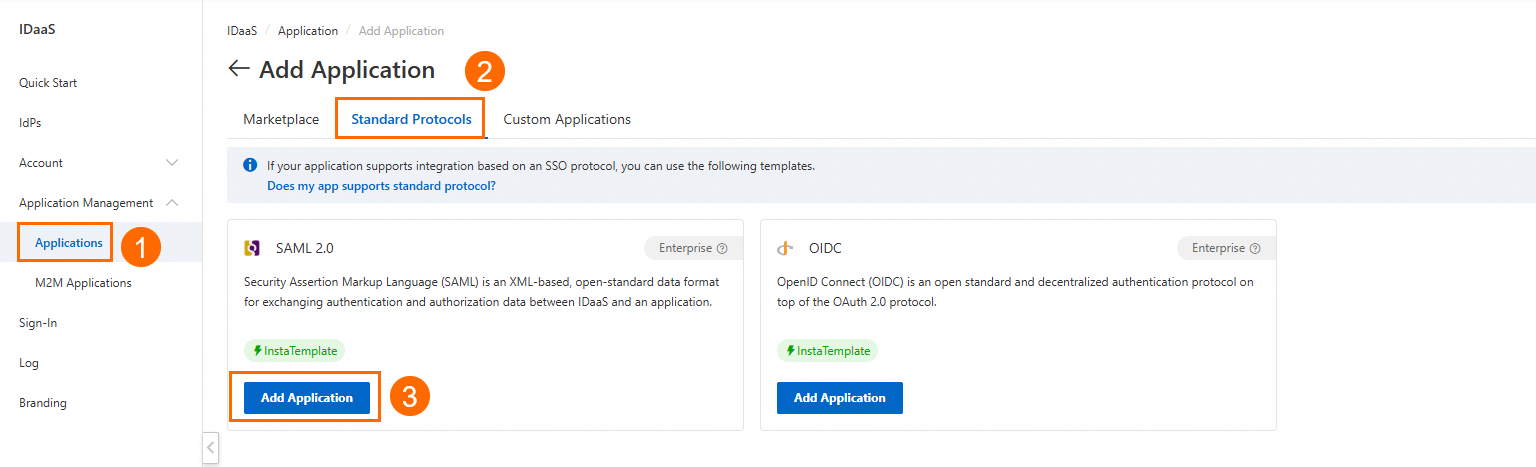
Enter an application name and click Add.
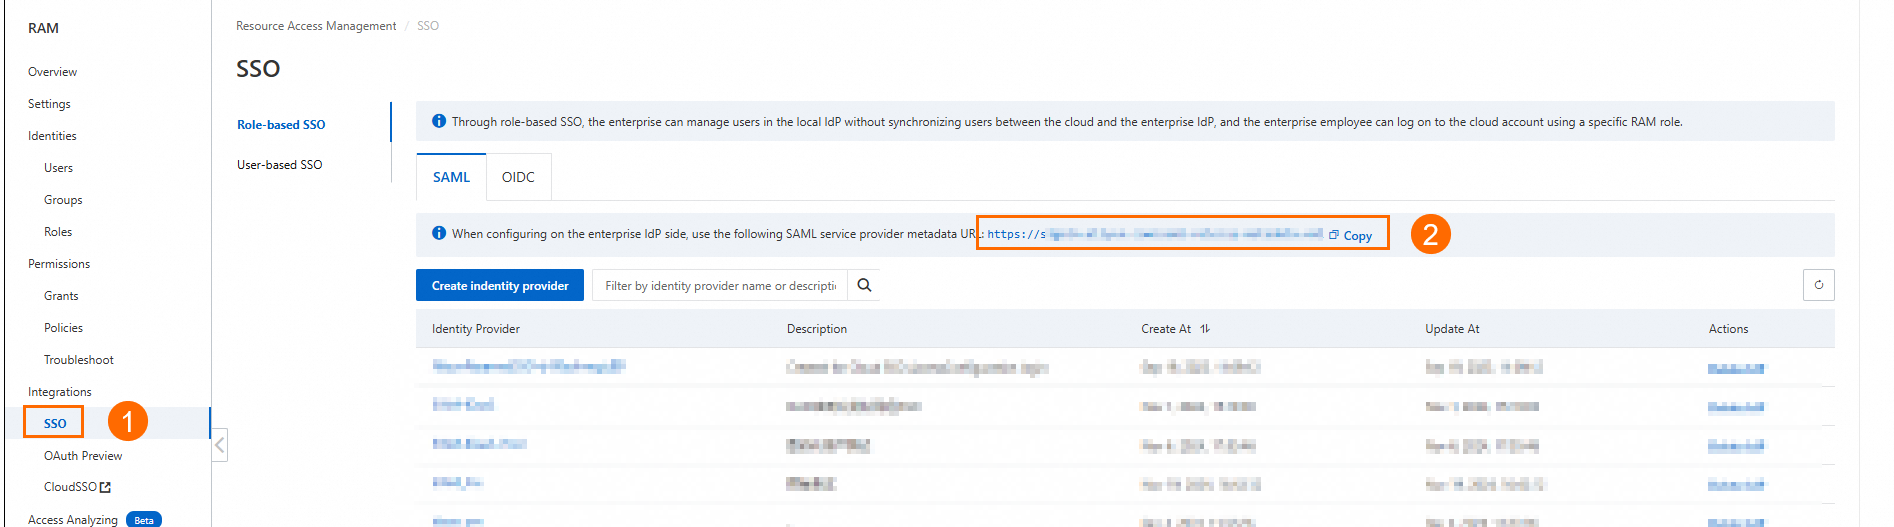
1b. Connect the application to the RAM SAML metadata
In the RAM console, go to Integrations > SSO and copy the SAML service provider metadata URL.
Back on the SAML 2.0 application configuration page in IDaaS, paste the URL into the Enter the URL of the metadata field and click Parse.
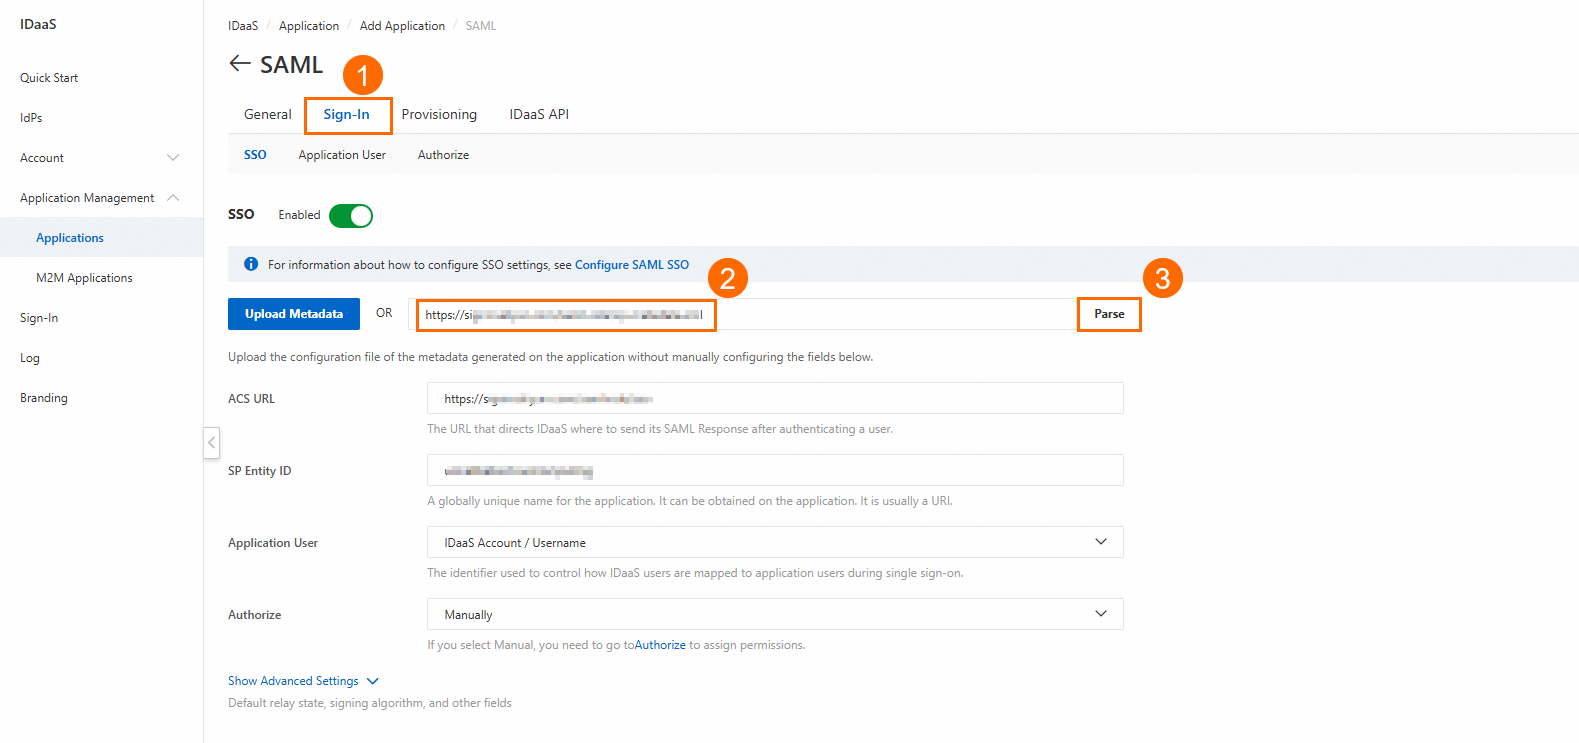
Download the IdP Metadata file. You'll upload this XML file to RAM in Step 2.

Step 2: Create a SAML IdP and RAM roles
2a. Create the SAML identity provider in RAM
The IdP metadata file must be in XML format. It contains the IdP logon service endpoint, the public key for signature verification, and the assertion format.
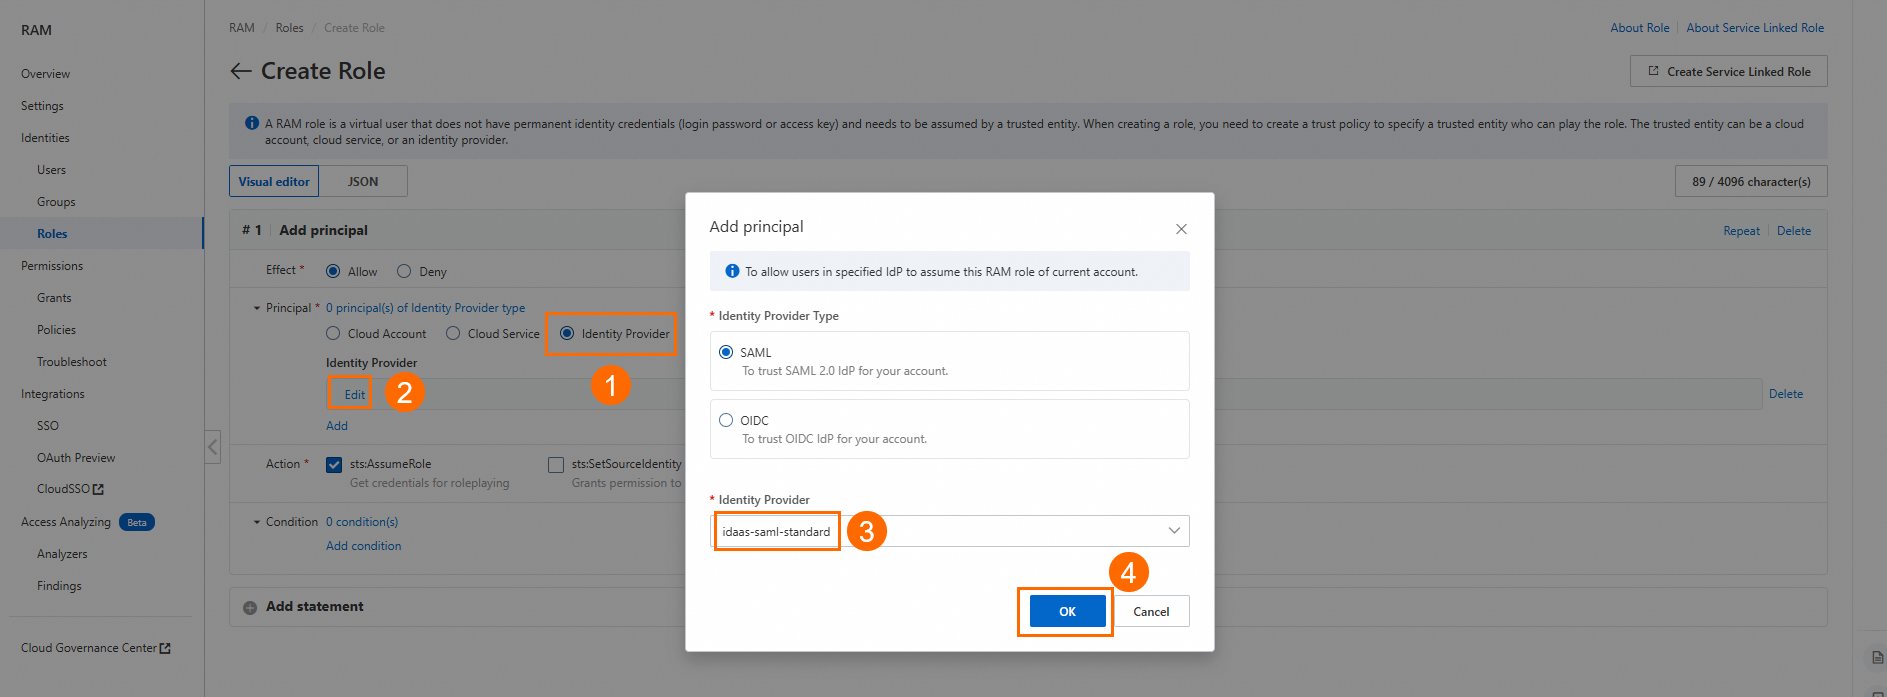
Log on to the RAM console with your Alibaba Cloud account. Go to Integrations > SSO.
On the Role-based SSO tab, click the SAML tab, then click Create Identity Provider.
On the Create IdP page, enter an IdP Name. This guide uses
idaas-saml-standardas an example.In the Metadata File section, click Upload Metadata File, upload the IdP metadata file you downloaded in Step 1, and click Create IdP.
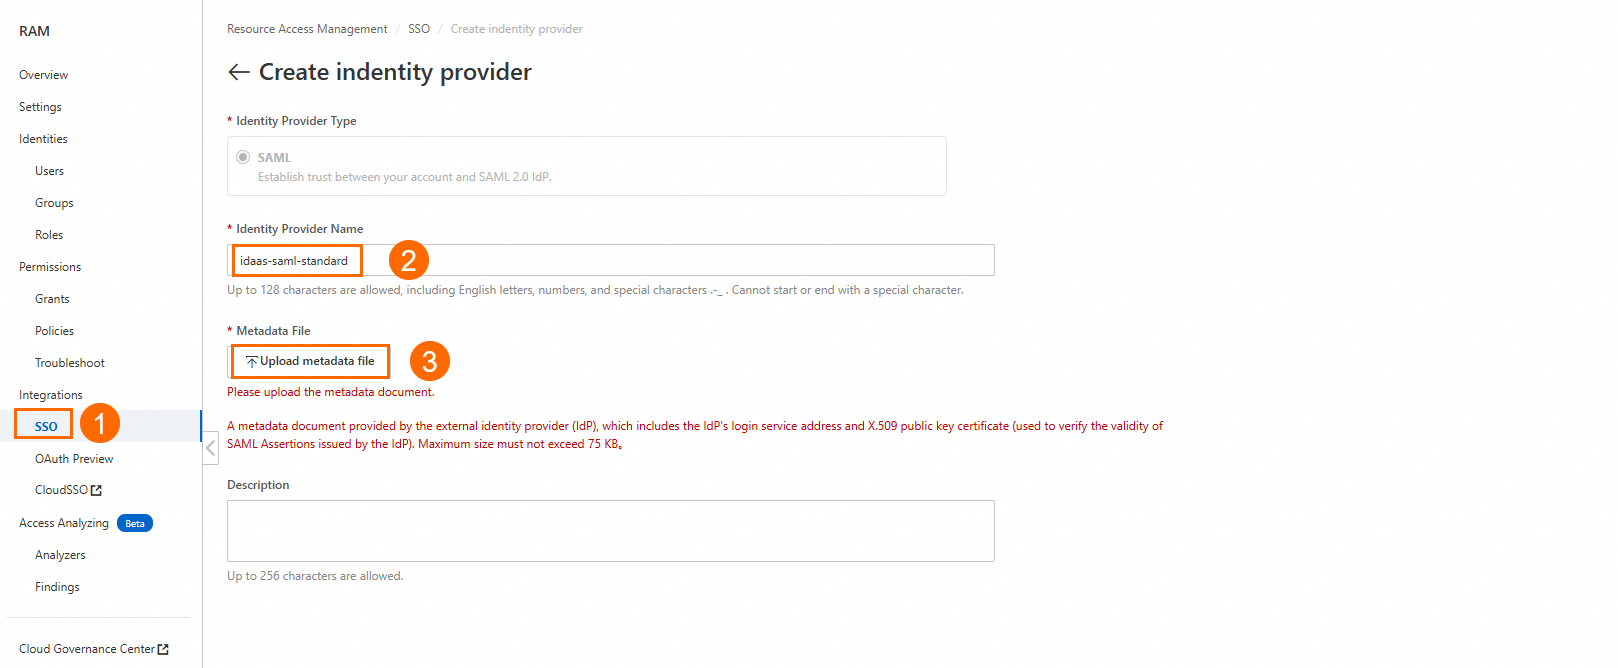
Save the IdP name (for example, idaas-saml-standard). You'll reference it in the SAML Attribute Statements in Step 4.2b. Create RAM roles
In the RAM console, go to Identities > Roles and click Create Role.

On the Create Role page, click Switch to Policy Editor in the upper-right corner.

In the editor, select the SAML IdP you created above.
Click OK, enter the role name
role1, and click OK again.
Repeat to create
role2.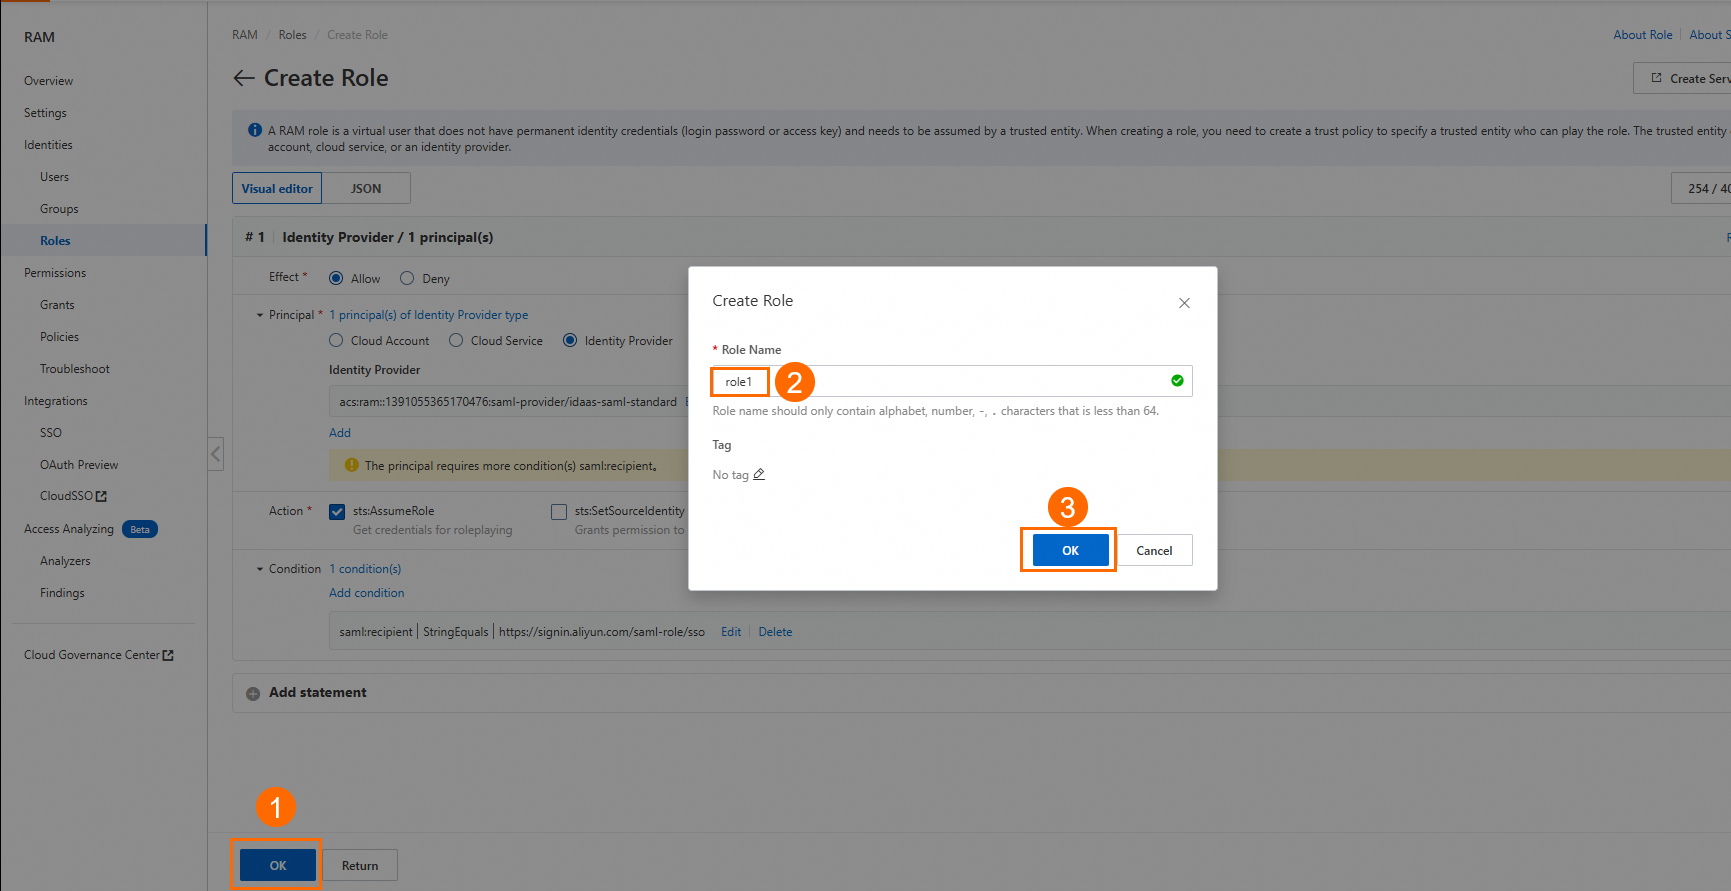
Step 3: Set up users and groups in IDaaS
3a. Create a user
In the IDaaS console, go to Account > Accounts and Orgs and click Create Account to create a user. This guide uses emp001 as an example. 
3b. Create groups
Each group maps to a RAM role through its External ID. The External ID must exactly match the RAM role name.
Go to Account > Group and click Create Group.
Set Group Name to
group01and External ID torole1.
Create a second group: Group Name
group02, External IDrole2.Add
emp001to both groups.

3c. Grant application access
On the details page of the SAML 2.0 application, go to Sign-In > Authorize and grant access to emp001, group01, and group02.
Step 4: Configure SAML Attribute Statements
On the SAML 2.0 application details page, click Show Advanced Settings and add the following two Attribute Statements. 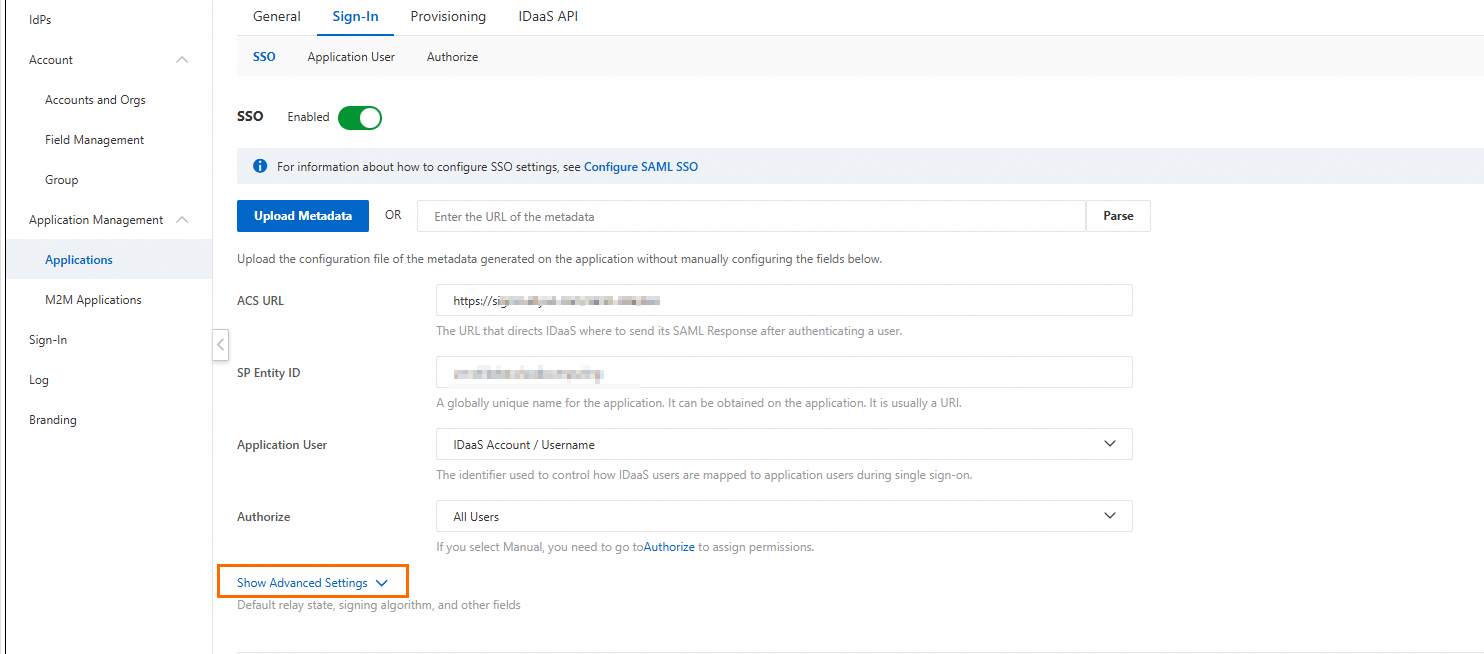
Attribute Statement 1 — Role mapping
| Field | Value |
|---|---|
| Key | https://www.aliyun.com/SAML-Role/Attributes/Role |
| Value | SamlArray(ArrayMap(user.groups, StringReplace("acs:ram::$uid:role/$roleName,acs:ram::$uid:saml-provider/$idp", "$roleName", __item.groupExternalId))) |
Replace the placeholders before saving:
| Placeholder | Description |
|---|---|
$uid | Your Alibaba Cloud account ID. You can find this ID on the Alibaba Cloud home page. |
$idp | Replace this with the name of the identity provider that you created in Step 2. |
Attribute Statement 2 — Session name
| Field | Value |
|---|---|
| Key | https://www.aliyun.com/SAML-Role/Attributes/RoleSessionName |
| Value | user.username |

Verify the configuration
Log on to the IDaaS EIAM portal with the
emp001account and open the SAML 2.0 application. IDaaS automatically redirects you to the Alibaba Cloud Management Console.
On the role selection page, select
role1orrole2to complete logon.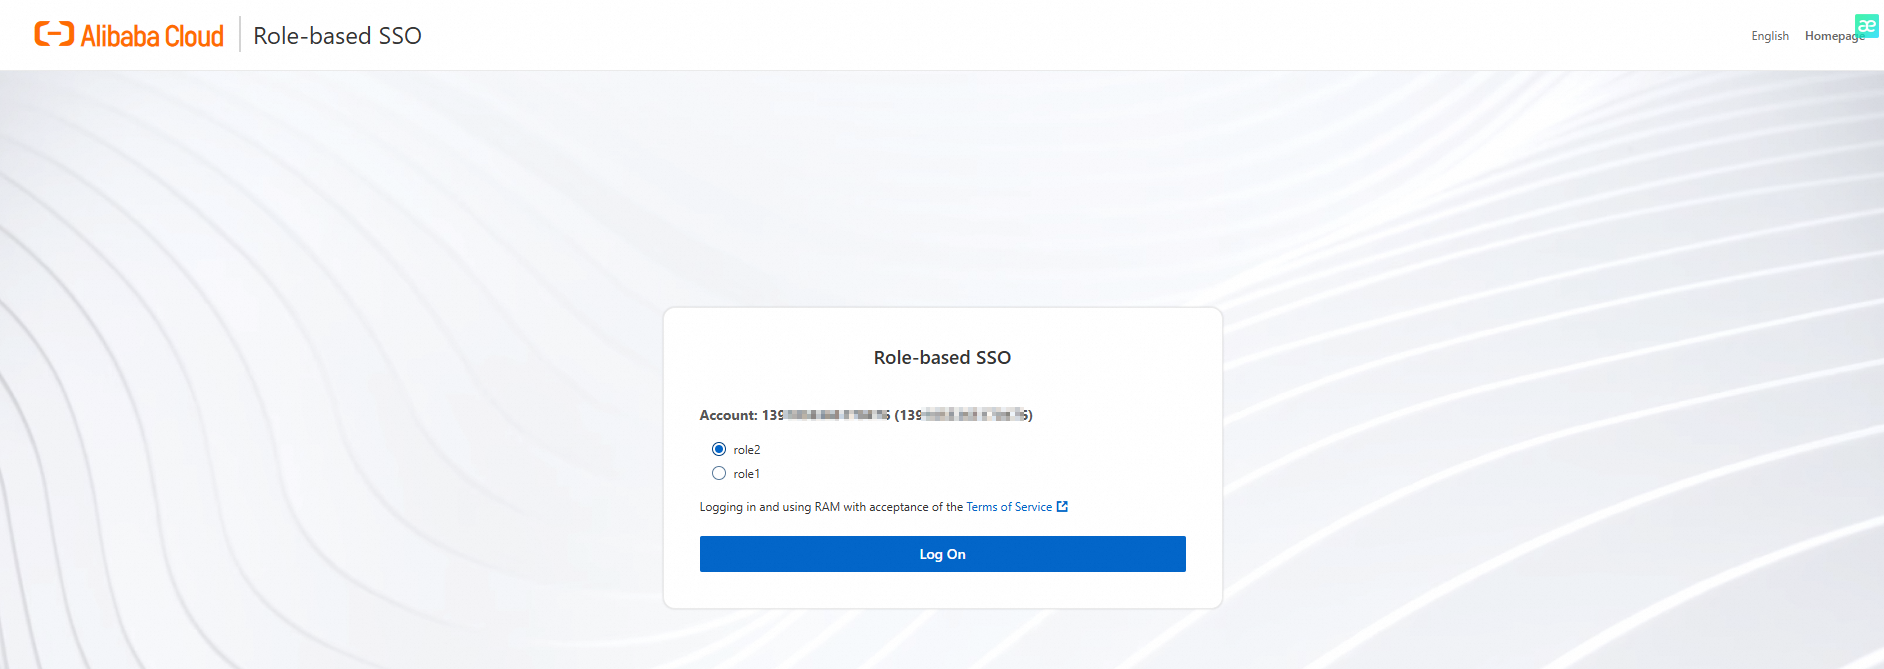
If both roles appear and logon succeeds, the configuration is complete.
How group-based permissions work
Adding a user to a group automatically grants them access to every application the group is authorized for, including the role mapping defined by the group's External ID. This approach provides:
Centralized control: Manage role mappings at the group level rather than per account.
Easy onboarding: Add new users to the appropriate group — no additional authorization steps required.
Consistent permissions: All members of a group follow the same SAML assertion rules.
Reduced overhead: Eliminates repetitive per-account authorization policies.