This topic shows how to integrate a Spring Boot application with Identity as a Service (IDaaS) for single sign-on (SSO) using the OpenID Connect (OIDC) Authorization Code grant type.
IDaaS supports the OIDC Authorization Code grant type, which is backward compatible with the OAuth 2.0 Authorization Code grant type. This lets you use the spring-boot-starter-oauth2-client toolkit, which handles all authorization calls and id_token parsing in the OIDC Authorization Code flow automatically.
Prerequisites
Before you begin, ensure that you have:
An IDaaS application with
client_id,client_secret, andissuerURI. For instructions, see Connect self-developed applications to IDaaS for SSO.Java 8 or later
Maven
How it works
The OIDC Authorization Code flow works as follows:
A user visits a protected page in your Spring Boot application.
Spring Security redirects the user to the IDaaS logon page.
After the user logs on, IDaaS redirects the browser to a callback route (
/login/oauth2/code/aliyunidaas) with an authorization code.Spring Security exchanges the code for an
id_tokenand access token, verifies theid_token, and creates an authenticated session.The user's browser is redirected to the originally requested page.
The spring-boot-starter-oauth2-client toolkit handles steps 4–5 automatically — no custom callback logic required.
Step 1: Add the dependency
Add spring-boot-starter-oauth2-client to your pom.xml:
<parent>
    <groupId>org.springframework.boot</groupId>
    <artifactId>spring-boot-starter-parent</artifactId>
    <version>2.4.1</version>
</parent>

<properties>
    <java.version>8</java.version>
</properties>

<dependencies>
    <dependency>
        <groupId>org.springframework.boot</groupId>
        <artifactId>spring-boot-starter-web</artifactId>
    </dependency>
    <dependency>
        <groupId>org.springframework.boot</groupId>
        <artifactId>spring-boot-starter-oauth2-client</artifactId>
    </dependency>
</dependencies>
Step 2: Configure IDaaS credentials
Add the following to your application.properties file. Replace the placeholder values with the credentials from your IDaaS application.
# registrationId "aliyunidaas" is a label you choose — it appears in the
# default callback URL: /login/oauth2/code/aliyunidaas
spring.security.oauth2.client.registration.aliyunidaas.client-id=app_***
spring.security.oauth2.client.registration.aliyunidaas.client-secret=CS***

# issuer-uri: the OIDC Discovery endpoint base URL for your IDaaS instance
spring.security.oauth2.client.provider.aliyunidaas.issuer-uri=<issuer>
The property keys follow the pattern spring.security.oauth2.client.registration.<registrationId>.* and spring.security.oauth2.client.provider.<registrationId>.*, where aliyunidaas is the registration ID you choose. This ID appears in the default callback URL path.
| Placeholder | Description |
|---|---|
app_*** | The client_id of your IDaaS application |
CS*** | The client_secret of your IDaaS application |
<issuer> | The issuer URI from your IDaaS application configuration |
Step 3: Require authentication
Create a Spring Security configuration class to protect all endpoints:
import org.springframework.security.config.annotation.web.builders.HttpSecurity;
import org.springframework.security.config.annotation.web.configuration.EnableWebSecurity;
import org.springframework.security.config.annotation.web.configuration.WebSecurityConfigurerAdapter;

@EnableWebSecurity
public class SecurityConfig extends WebSecurityConfigurerAdapter {
    @Override
    protected void configure(HttpSecurity http) throws Exception {
        http.authorizeRequests()
            .anyRequest().authenticated()  // All requests require authentication
            .and()
            .oauth2Login();                // Enable OIDC/OAuth2 logon
    }
}
Step 4: Access user information
After logon, inject @AuthenticationPrincipal OAuth2User to retrieve user attributes from the id_token:
import org.springframework.security.core.annotation.AuthenticationPrincipal;
import org.springframework.security.oauth2.core.user.OAuth2User;
import org.springframework.web.bind.annotation.GetMapping;
import org.springframework.web.bind.annotation.RestController;

@RestController
public class SampleController {

    @GetMapping("/user")
    public OAuth2User user(@AuthenticationPrincipal OAuth2User user) {
        return user;
    }
}
The /user endpoint returns the user's attributes as a JSON object.
Use the returned user attributes to complete the SSO process and establish a session in your application.
Deploy behind a proxy
When your Spring Boot application runs behind a reverse proxy — such as Alibaba Cloud Server Load Balancer (SLB) or NGINX — Spring Boot may generate an incorrect redirect_uri during the OIDC flow.
Root cause: The proxy terminates HTTPS and forwards requests to Spring Boot over HTTP on an internal address (for example, http://127.0.0.1:8080). Without the original request context, Spring Boot constructs the redirect_uri using the internal address instead of the public domain, causing the logon to fail.
The fix is to pass the original Host and X-Forwarded-Proto headers from the proxy to Spring Boot, and configure Spring Boot to trust them.
Configure Spring Boot to trust forwarded headers
Add the following to application.properties:
server.forward-headers-strategy = NATIVEConfigure the proxy
Follow the instructions for your proxy type:
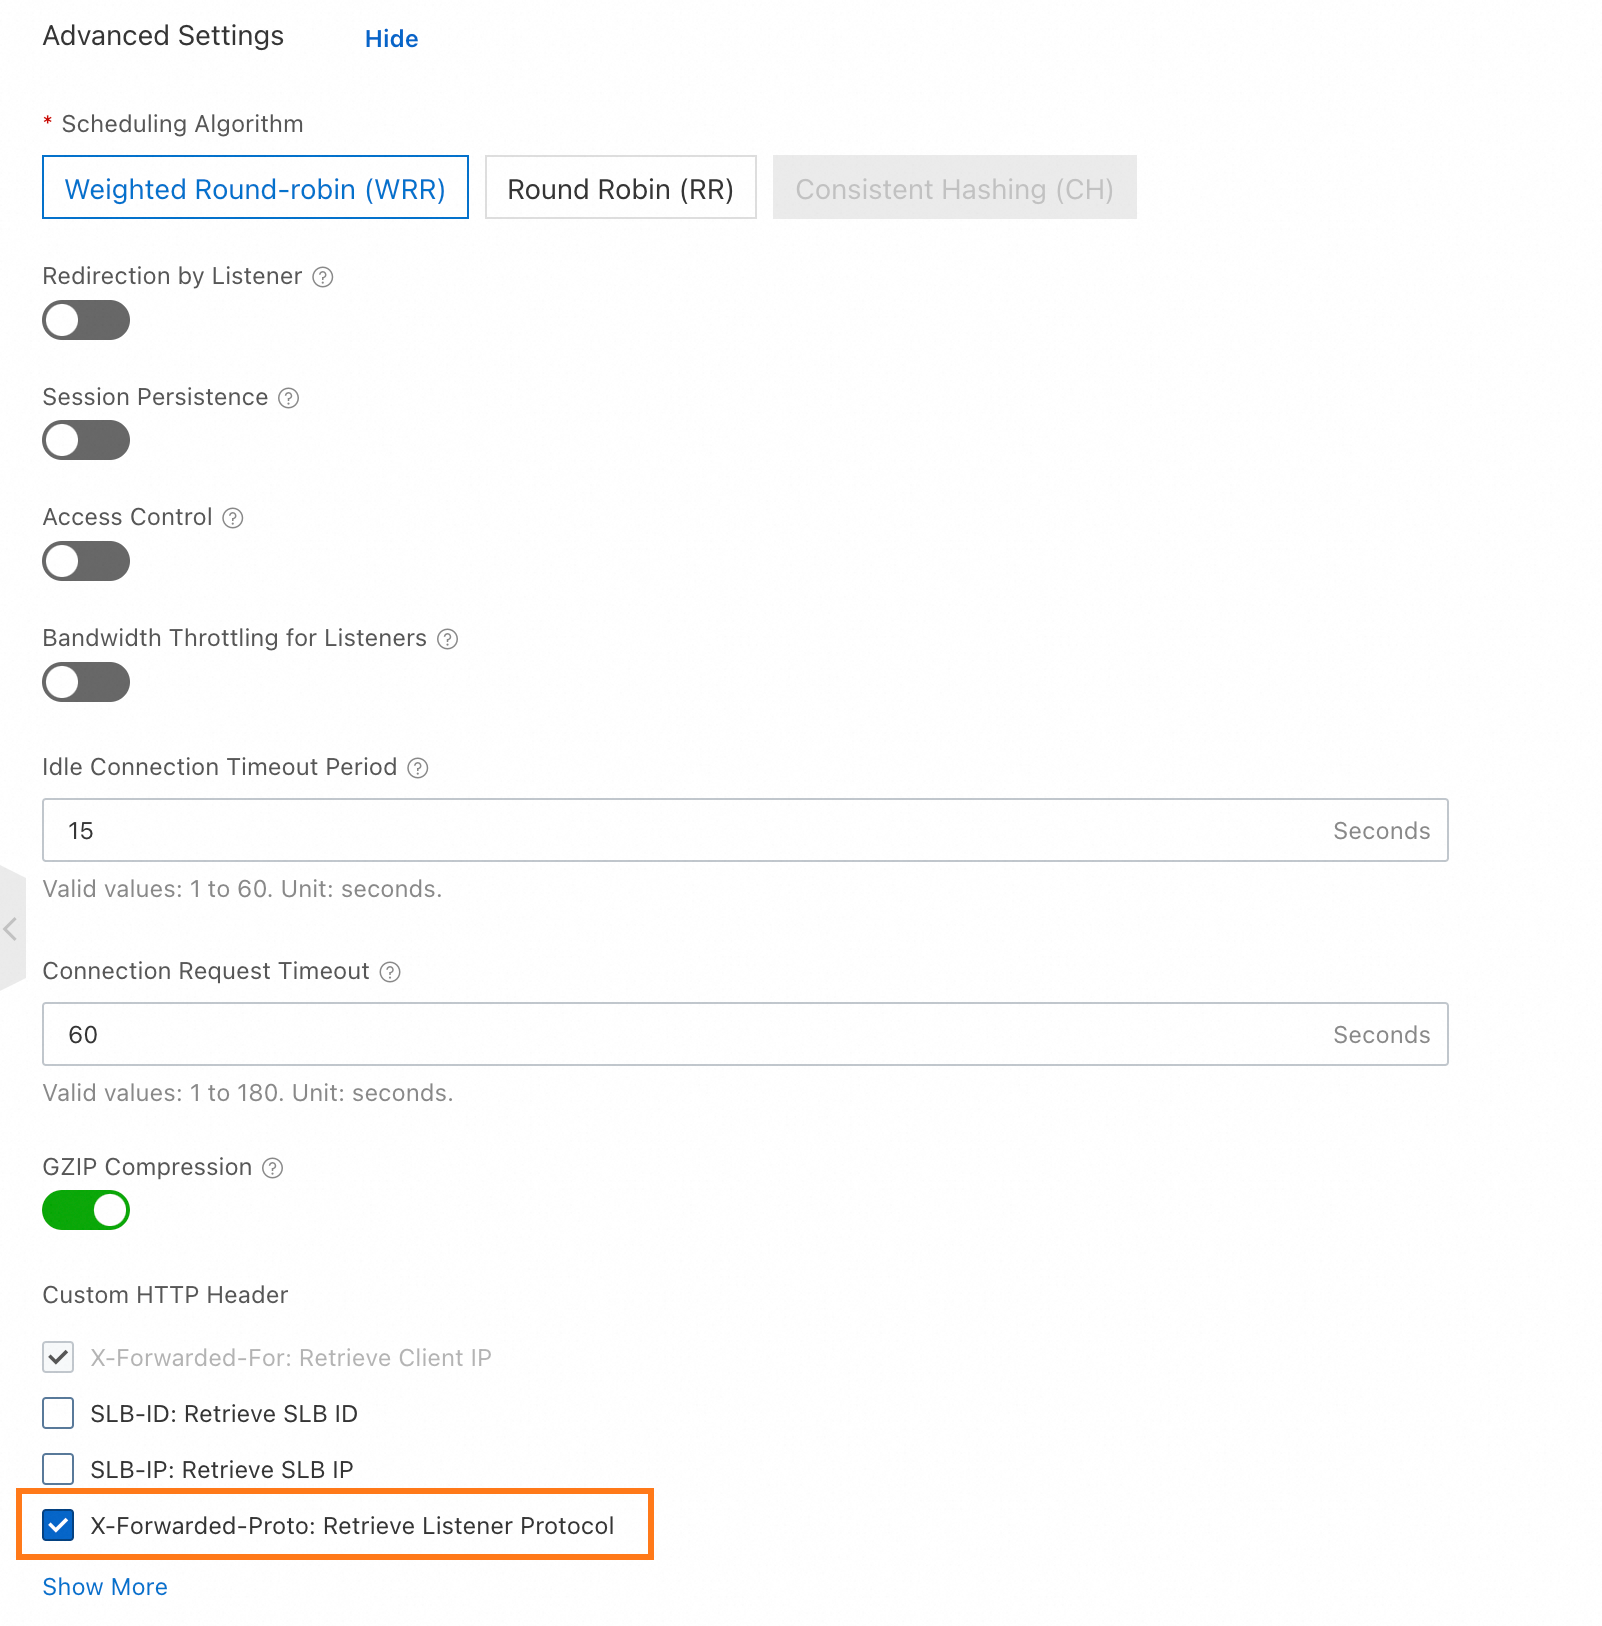
Alibaba Cloud SLB
In the advanced configuration of your SLB listener, enable Use the X-Forwarded-Proto header to retrieve the listener protocol.
NGINX between SLB and the application
Add these headers to your NGINX proxy configuration:
proxy_set_header Host $host;
proxy_set_header X-Forwarded-Proto $proxy_x_forwarded_proto;
NGINX providing HTTPS directly
Add these headers to your NGINX proxy configuration:
proxy_set_header Host $host;
proxy_set_header X-Forwarded-Proto https;
Other proxy software
Verify that your proxy forwards the Host and X-Forwarded-Proto headers to Spring Boot with the correct values.