This quick start walks you through the full workflow of enabling full-text search on HBase data using an integrated Search instance powered by Solr. By the end, you will have:
Created an HBase table and a full-text index
Defined a column mapping between HBase and the Search collection
Written a record to HBase and queried it through the Search service
Retrieved the original record from HBase using a rowkey
Prerequisites
Before you begin, ensure that you have:
The latest version of HBase Shell, downloaded from the HBase Enhanced Edition Shell access page and configured according to the usage instructions
A whitelist configured for your HBase cluster
A running Search instance with the web console accessible
Step 1: Create a table in your HBase cluster
Run the following command in HBase Shell to create a table named testTable with a column family f:
hbase(main):002:0> create 'testTable', {NAME => 'f'}Step 2: Create an index in the Search instance
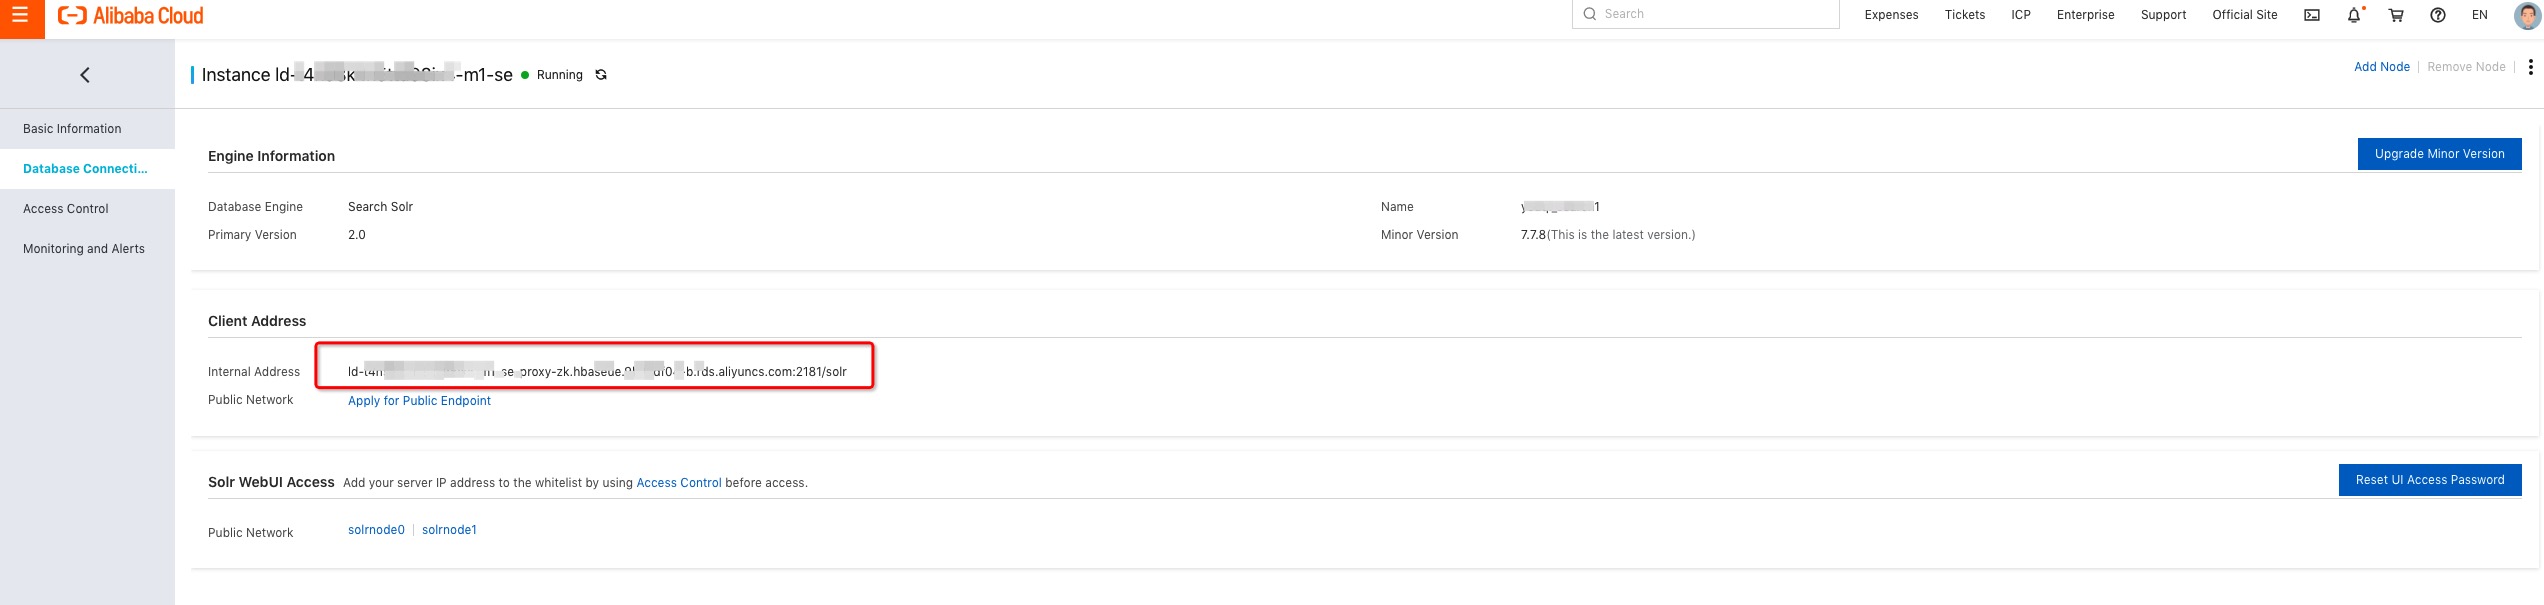
On the details page of the Search instance, click Database Connection.
In the Access a Web UI section, open the web console.
Configure the whitelist and set a password before accessing the web console.
Create a collection with the following settings, and keep the defaults for all other parameters:
Parameter Value config set_indexer_defaultnumShardsNumber of nodes in your cluster 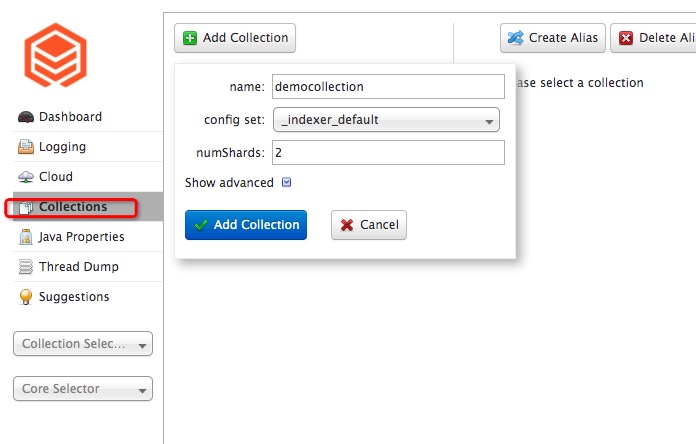
Step 3: Create a mapping
A mapping defines which HBase columns sync to Solr fields. In this example, the f:name column in testTable maps to the name_s field in the democollection collection, where f is the column family and name is the column qualifier.
Create a file named schema.json with the following content:
{
  "sourceNamespace": "default",
  "sourceTable": "testTable",
  "targetIndexName": "democollection",
  "indexType": "SOLR",
  "rowkeyFormatterType": "STRING",
  "fields": [
    {
      "source": "f:name",
      "targetField": "name_s",
      "type": "STRING"
    }
  ]
}
Key fields in the schema:
| Field | Description |
|---|---|
sourceNamespace | The HBase namespace. Use "default" for the default namespace. |
sourceTable | The name of the HBase source table. |
targetIndexName | The name of the Solr collection. |
indexType | The index type. Set to "SOLR". |
rowkeyFormatterType | The rowkey format. Set to "STRING" for string rowkeys. |
fields[].source | The HBase column in <column-family>:<column-qualifier> format. |
fields[].targetField | The target Solr field name. |
fields[].type | The data type of the field. |
For the full list of supported parameters, see Manage HBase full-text indexes.
Apply the mapping by running:
hbase(main):006:0> alter_external_index 'testTable', 'schema.json'After the command is run, the mapping between the source column and the destination column is created.
Step 4: Write data to HBase
Write a sample record to testTable:
hbase(main):008:0> put 'testTable', 'row1', 'f:name', 'foo'
Took 0.1697 seconds
Step 5: Query data in the Search instance
Open the web console of the Search service.
Select the
democollectionindex.Click Query to search the data.
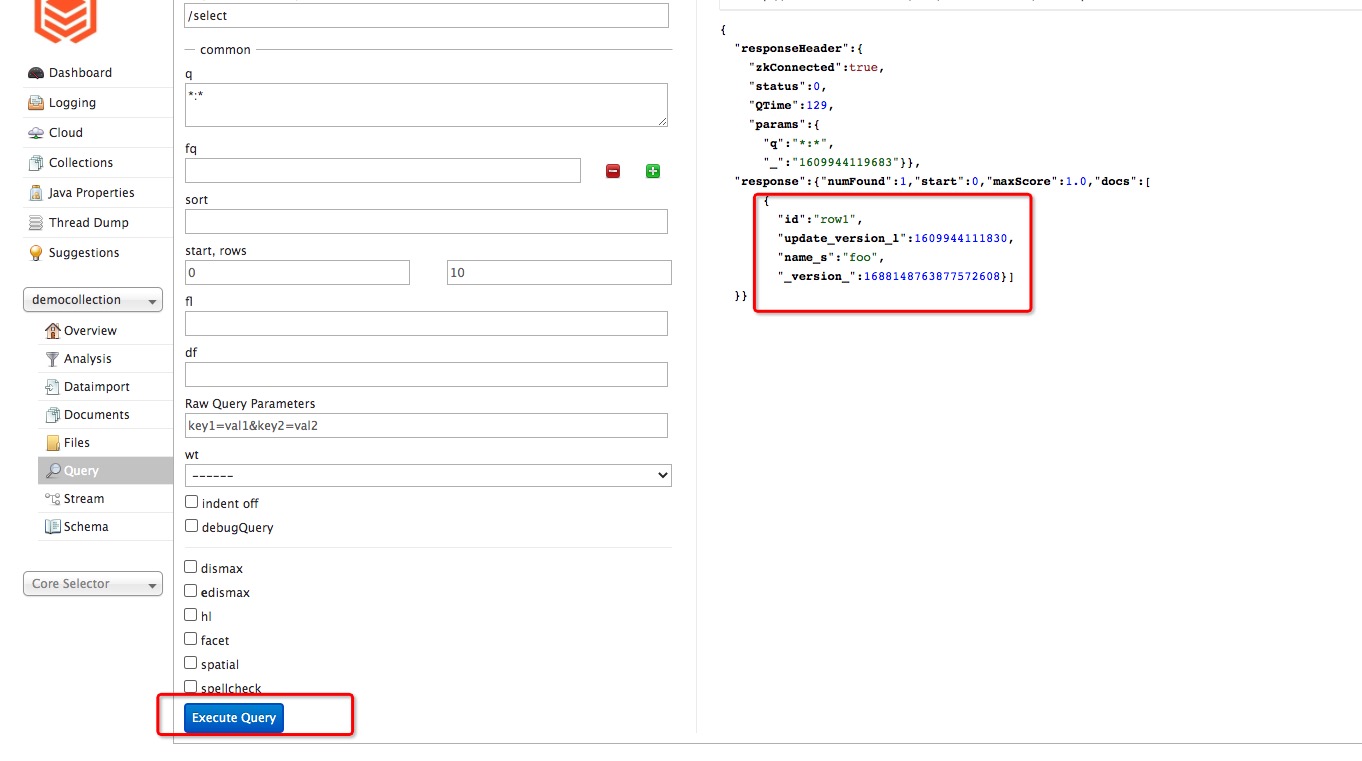
The record you wrote in Step 4 appears in the results. Each result includes an ID field, which is the rowkey of the corresponding row in HBase.
Step 6: Look up the original HBase record
The Search service synchronizes only the columns defined in the mapping file, not the full HBase row. To retrieve the complete record, use the ID value from the search result as the rowkey and query HBase directly.
What's next
To learn about advanced mapping options, see Manage HBase full-text indexes.