Managed Service for Grafana supports unified authentication with Azure AD. You can set up unified authentication with Azure AD and configure roles for users and groups based on Azure AD application permissions.
Prerequisites
-
You have created a Grafana workspace.
-
You have configured Azure AD.
For more information, see the documentation for Azure AD authentication in open source Grafana .
Step 1: Create an app registration
-
Log on to the Azure Portal. In the left-side navigation pane, select Azure AD.
NoteIf you have multiple AD domains, select the AD domain and tenant to use.
-
In the left-side navigation pane, click App registration > New Registration.
-
Add a redirection URL. For the platform, select Web. Enter the Grafana URL in the following format:
https://<my_grafana_server_name_or_ip>:<grafana_server_port>/login/azuread. Then, click Register. Azure then redirects you to the overview page of the new app. -
In the Certificates & secrets section, add a new client secret.
Step 2: Set permissions
-
In the left-side navigation pane, click Manifest to define the roles and permissions for the application.
Grafana provides three roles: Viewer, Editor, and Admin. If you do not assign a role, Grafana assigns the Viewer role to all users by default. Each role requires a unique ID. You can use a UUID generator or the PowerShell command New-Guid to generate unique IDs. Example:
NoteReplace each SOME_UNIQUE_ID placeholder with a generated unique ID.
"appRoles": [ { "allowedMemberTypes": [ "User" ], "description": "Grafana org admin Users", "displayName": "Grafana Org Admin", "id": "SOME_UNIQUE_ID", "isEnabled": true, "lang": null, "origin": "Application", "value": "Admin" }, { "allowedMemberTypes": [ "User" ], "description": "Grafana read only Users", "displayName": "Grafana Viewer", "id": "SOME_UNIQUE_ID", "isEnabled": true, "lang": null, "origin": "Application", "value": "Viewer" }, { "allowedMemberTypes": [ "User" ], "description": "Grafana Editor Users", "displayName": "Grafana Editor", "id": "SOME_UNIQUE_ID", "isEnabled": true, "lang": null, "origin": "Application", "value": "Editor" } ], -
In Azure AD, go to the Enterprise applications page, then find and select your application.
-
Click Users and groups, and then add users and assign roles.
Step 3: Configure Grafana parameters
-
Log on to the Managed Service for Grafana console. In the left-side navigation pane, click Workspace Management.
-
On the Workspace Management page, click the ID of the workspace that you want to manage.
-
In the left-side navigation pane, click Parameter Settings.
-
In the list of parameters on the left, select
auth.azureadand then click Modify Parameters. -
Configure the parameters as follows and click Save and Apply.
[auth.azuread] name = Azure AD enabled = true allow_sign_up = true client_id = <client_id> client_secret = <client_secret> scopes = openid email profile auth_url= https://login.microsoftonline.com/<application-id>/oauth2/v2.0/authorize token_url = https://login.microsoftonline.com/<application-id>/oauth2/v2.0/token allowed_domains = allowed_groups =NoteThe
client_id,client_secret, andapplication-idare the values from your Azure app registration.Parameter description:
-
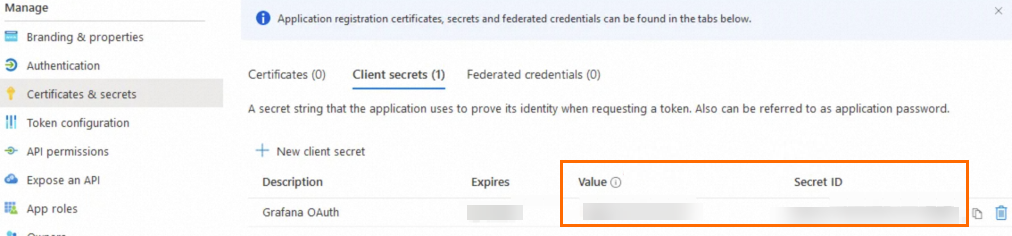
You can find the client ID and client secret on the Certificates & secrets page.
-
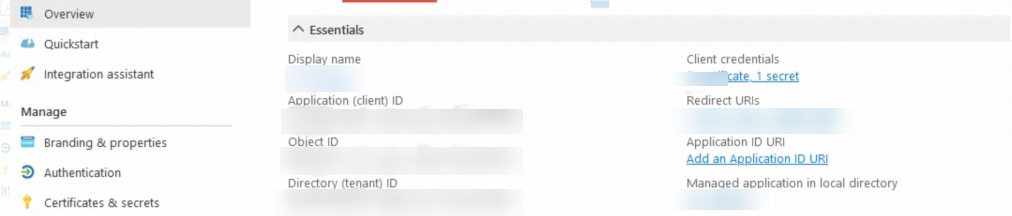
You can find the Auth URL and Token URL by clicking Endpoints on the Overview page.
-
Step 4: Sign in to Grafana
After you configure the Azure parameters, wait about one minute for the settings to take effect. Open your Grafana URL and click Sign in with Azure AD. A successful sign-in confirms that unified authentication with Azure AD is configured correctly.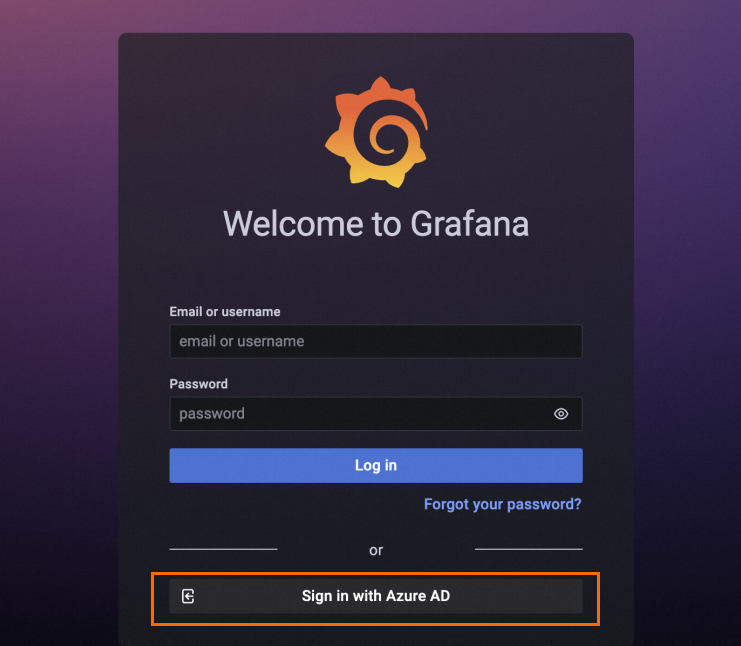
If you cannot sign in to Grafana, ensure that your device's IP address is in the public IP address whitelist or private access whitelist for the workspace . .