You can use the Function Compute console, SDKs, or Serverless Devs to experience best practices of GPU-accelerated instances. This topic uses Python as an example to describe how to implement edge detection on raw images by using code in the Function Compute console.
Scenarios and benefits
Compared with instances that are powered by CPUs, GPU-accelerated instances of Function Compute allow developers:
Real-time and quasi-real-time application scenarios
Process graphics and images several times faster and push production content to users in a more efficient manner.
Cost-prioritized image processing scenarios
Retain GPU-accelerated instances based on their business requirements. This way, GPU-accelerated instances of Function Compute offer much higher cost efficiency than self-built GPU clusters.
Use GPU resources in 1/2 or exclusive mode through the GPU virtualization technology. This way, GPU-accelerated instances can be configured in a fine-grained manner.
Efficiency-prioritized image processing scenarios
Focus on code development and the business objectives without the need to perform the O&M of GPU clusters, such as driver and CUDA version management, machine operation management, and GPU bad card management.
For more information about GPU-accelerated instances, see Instance types and instance modes.
Tutorial description
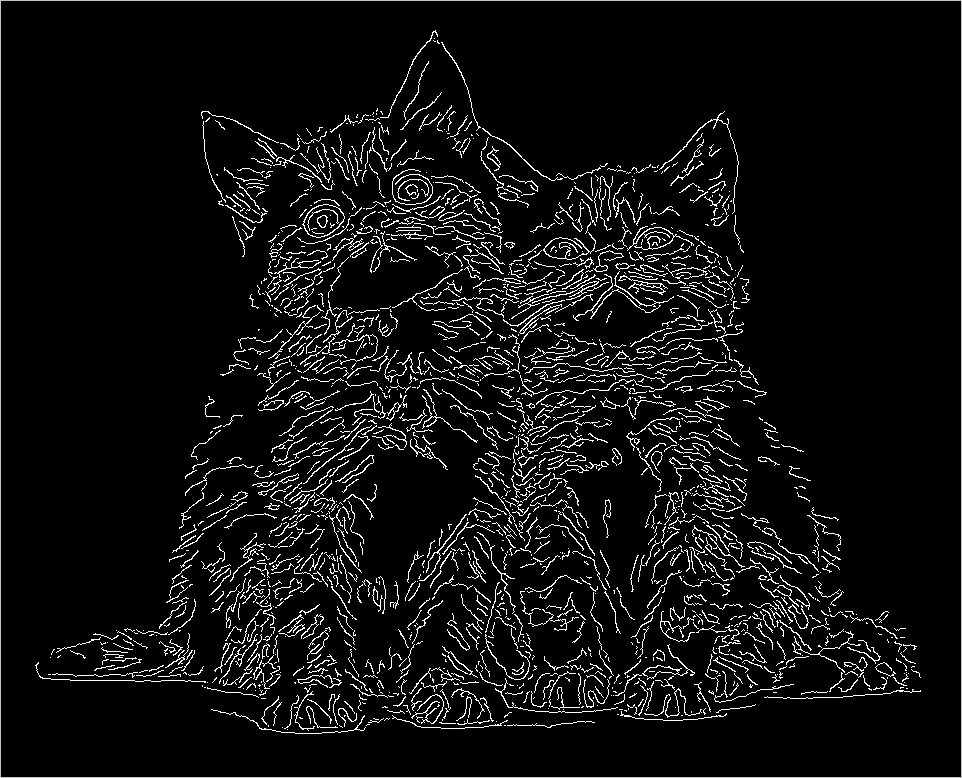
The following table shows an example of performing edge detection on the source image (left) to generate a new image (right) in Function Compute.
Source image | New image |
|
|

Prerequisites
OpenCV is compiled. OpenCV must be compiled before you can use GPU acceleration. You can use one of the following methods to compile OpenCV:
(Recommended) Use compiled OpenCV through Docker. Download address: opencv-cuda-docker or cuda-opencv.
Manually compile OpenCV. For more information, see the compilation guide.
Upload the audio and video resources that you want to process to an Object Storage Service (OSS) bucket in the region where the GPU-accelerated instances are located. Make sure that you have the read and write permissions on the objects in the bucket. For more information about how to upload audio and video resources, see Upload objects. For more information about permissions, see Modify the ACL of a bucket.
Use the Function Compute console to deploy a GPU application
Deploy an image.
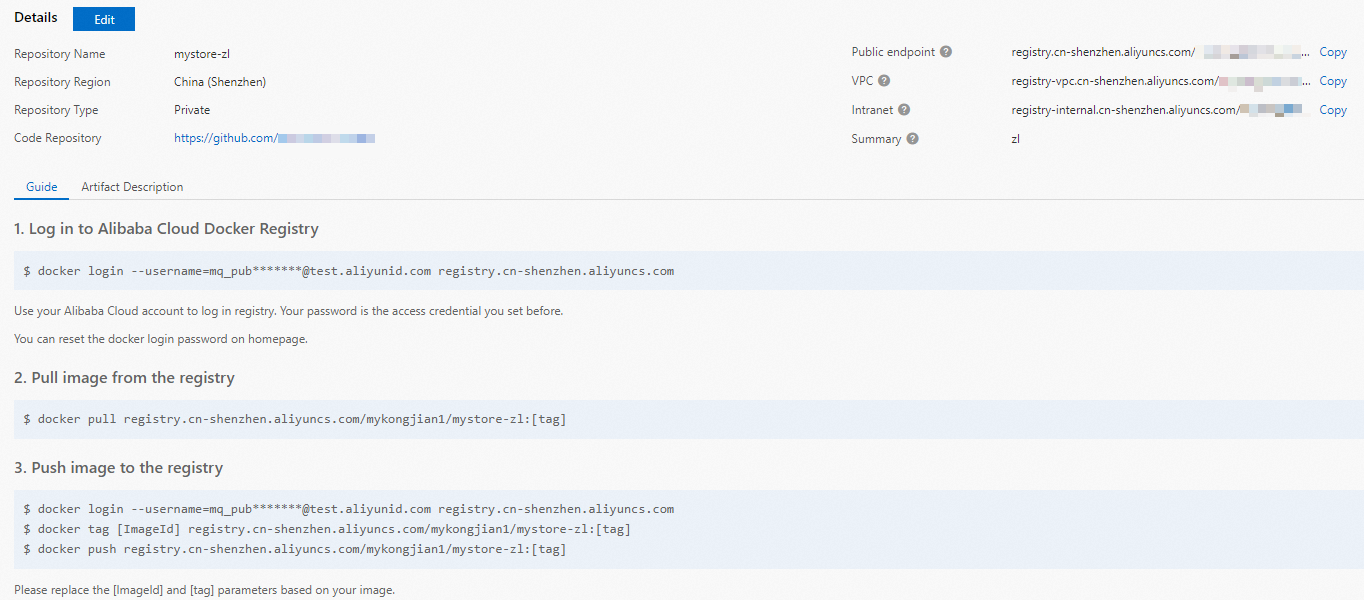
Create a Container Registry Enterprise Edition instance or Container Registry Personal Edition instance.
We recommend that you create an Enterprise Edition instance. For more information, see Create a Container Registry Enterprise Edition instance.
Create a namespace and an image repository.
For more information, see the Step 2: Create a namespace and Step 3: Create an image repository sections of the "Use Container Registry Enterprise Edition instances to build images" topic.
Perform operations on Docker as prompted in the Container Registry console. Then, push the preceding sample app.py and Dockerfile to the instance image repository. For more information about the files, see app.py and Dockerfile in the /code directory when you deploy a GPU application by using Serverless Devs.
Create a GPU function. For more information, see Create a custom container function.
Change the execution timeout period of the function.
Click the name of the function that you want to manage. In the navigation bar of the details page, click the Configurations tab. In the Environment Information section, click Modify.
In the panel that appears, configure the Execution Timeout Period parameter and click OK.
NoteThe CPU transcoding duration exceeds the default value of 60 seconds. Therefore, we recommend that you set the Execution Timeout Period parameter to a larger value.
Configure a provisioned GPU instance. For more information about how to configure provisioned instances, see Configure provisioned instances and auto scaling rules.
After the configuration is complete, you can check whether the provisioned GPU-accelerated instances are ready in the rule list. Specifically, check whether the value of the Current Reserved Instances parameter is the specified number of provisioned instances.
Use cURL to test the function.
On the function details page, click the Triggers tab to view trigger configurations and obtain the trigger endpoint.
Run the following command in the CLI to invoke the GPU function:
View the version of the online function
curl "https://tgpu-op-console-tgpu-op-console-ajezokddpx.cn-shenzhen.fcapp.run"
{"function": "opencv_edge_canny"}
Perform edge detection on the image
curl "https://tgpu-op-console-tgpu-op-console-ajezokddpx.cn-shenzhen.fcapp.run" -H "RUN-MODE: normal"
{"result": "CUDA-capable device supported | process image ok!"}
Execution result
You can view the image after edge detection by accessing the following domain name in your browser:
https://cri-zfen7xhpsx******-registry.oss-cn-shenzhen.aliyuncs.com/cats2.pngThis domain name is used as an example. The actual domain name prevails.