A user-defined aggregate function (UDAF) can be used to combine multiple rows of data into one row and sort the data based on a specific column. This topic describes how to use a UDAF to aggregate and sort data in the Realtime Compute for Apache Flink console. In this example, the data of residential power grid terminals is used.
Sample data
Data of residential power grid terminals is stored in the electric_info table, which contains the event_id, user_id, event_time, and status columns. Data in the status column needs to be sorted in ascending order based on the event_time column.
electric_info
event_id
user_id
event_time
status
1
1222
2023-06-30 11:14:00
LD
2
1333
2023-06-30 11:12:00
LD
3
1222
2023-06-30 11:11:00
TD
4
1333
2023-06-30 11:12:00
LD
5
1222
2023-06-30 11:15:00
TD
6
1333
2023-06-30 11:18:00
LD
7
1222
2023-06-30 11:19:00
TD
8
1333
2023-06-30 11:10:00
TD
9
1555
2023-06-30 11:16:00
TD
10
1555
2023-06-30 11:17:00
LD
Expected result
user_id
status
1222
TD,LD,TD,TD
1333
TD,LD,LD,LD
1555
TD,LD
Step 1: Prepare a data source
In this example, an ApsaraDB RDS data source is used.
Create an ApsaraDB RDS for MySQL instance.
NoteWe recommend that you create an ApsaraDB RDS for MySQL instance in the same virtual private cloud (VPC) as the Realtime Compute for Apache Flink workspace. If the ApsaraDB RDS for MySQL instance and the Realtime Compute for Apache Flink workspace reside in different VPCs, you must establish a connection between them. For more information, see FAQ about network connectivity.
Create a database and an account.
Create a database named electric and create a privileged account or a standard account that has the read and write permissions on the electric database.
Log on to the ApsaraDB RDS for MySQL instance by using Data Management (DMS), create tables named electric_info and electric_info_SortListAgg in the electric database, and insert data into the electric_info table.
CREATE TABLE `electric_info` (
  event_id bigint NOT NULL PRIMARY KEY COMMENT 'Event ID',
  user_id bigint NOT NULL COMMENT 'User ID',
  event_time timestamp NOT NULL COMMENT 'Event time',
  status varchar(10) NOT NULL COMMENT 'User terminal status'
);

CREATE TABLE `electric_info_SortListAgg` (
  user_id bigint NOT NULL PRIMARY KEY COMMENT 'User ID',
  status_sort varchar(50) NULL COMMENT 'User terminal status sorted in ascending order based on the event time'
);

-- Prepare data.
INSERT INTO electric_info VALUES
(1,1222,'2023-06-30 11:14','LD'),
(2,1333,'2023-06-30 11:12','LD'),
(3,1222,'2023-06-30 11:11','TD'),
(4,1333,'2023-06-30 11:12','LD'),
(5,1222,'2023-06-30 11:15','TD'),
(6,1333,'2023-06-30 11:18','LD'),
(7,1222,'2023-06-30 11:19','TD'),
(8,1333,'2023-06-30 11:10','TD'),
(9,1555,'2023-06-30 11:16','TD'),
(10,1555,'2023-06-30 11:17','LD');
Step 2: Register a UDF
Download the ASI_UDX-1.0-SNAPSHOT.jar package.
The minimum dependency information required by the user-defined function (UDF) in Flink 1.17.1 is configured in the pom.xml file. For more information about how to use UDFs, see UDFs.
Use ASI_UDAF to combine multiple rows of data into one row and sort data based on the specified column. The following sample code shows an example. You can modify the code based on your business requirements.
package ASI_UDAF;

import org.apache.commons.lang3.StringUtils;
import org.apache.flink.table.functions.AggregateFunction;

import java.util.ArrayList;
import java.util.Comparator;
import java.util.Iterator;
import java.util.List;

public class ASI_UDAF{
	/**Accumulator class*/
	public static class AcList {
		public  List<String> list;
	}

	/**Aggregate function class*/
	public static class SortListAgg extends AggregateFunction<String,AcList> {
		public String getValue(AcList asc) {
			/**Sort the data in the list according to a specific rule*/
			asc.list.sort(new Comparator<String>() {
				@Override
				public int compare(String o1, String o2) {
					return Integer.parseInt(o1.split("#")[1]) - Integer.parseInt(o2.split("#")[1]);
				}
			});
			/**Traverse the sorted list, extract the required fields, and join them into a string*/
			List<String> ret = new ArrayList<String>();
			Iterator<String> strlist = asc.list.iterator();
			while (strlist.hasNext()) {
				ret.add(strlist.next().split("#")[0]);
			}
			String str = StringUtils.join(ret, ',');
			return str;
		}

		/**Method to create an accumulator*/
		public AcList createAccumulator() {
			AcList ac = new AcList();
			List<String> list = new ArrayList<String>();
			ac.list = list;
			return ac;
		}

		/**Accumulation method: add the input data to the accumulator*/
		public void accumulate(AcList acc, String tuple1) {
			acc.list.add(tuple1);
		}

		/**Retraction method*/
		public void retract(AcList acc, String num) {
		}
	}
}
Go to the Register UDF Artifact dialog box.
After you register a UDF, the UDF code can be reused for subsequent development. For a Java UDF, you can also upload the JAR file by using the dependency for the UDF. For more information, see UDAFs.
Log on to the Realtime Compute for Apache Flink console.
Find the workspace that you want to manage and click Console in the Actions column.
In the left-side navigation pane, click .
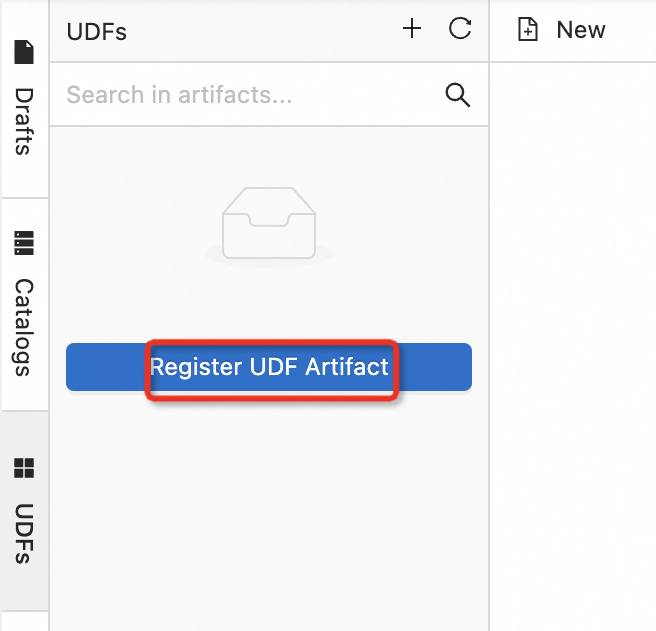
In the left-side pane of the SQL Editor page, click the UDFs tab and click Register UDF Artifact.
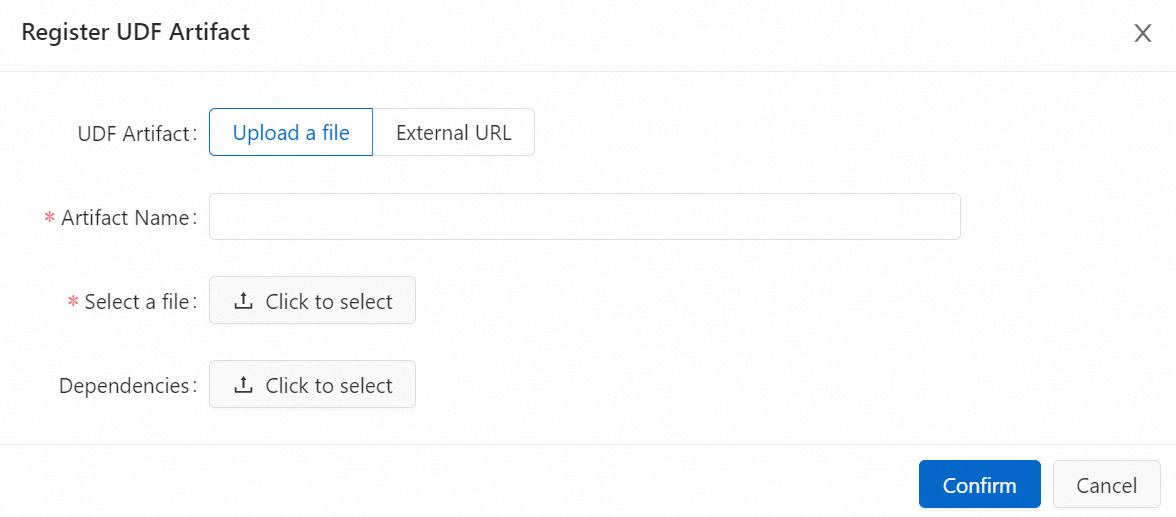
Click Click to select in the Select a file section to upload the JAR file obtained in Step 1, and click Confirm.
 Note
NoteThe JAR file of the UDF is uploaded to the sql-artifacts directory of the Object Storage Service (OSS) bucket that is associated with the workspace.
Realtime Compute for Apache Flink parses the UDF JAR file and checks whether the classes of the Flink UDF, UDAF, and user-defined table-valued function (UDTF) interfaces are used in the file. Then, Realtime Compute for Apache Flink automatically extracts the class names and specifies the class names in the Function Name field.
In the Manage Functions dialog box, click Create Functions.
On the UDFs tab in the left-side pane of the SQL Editor page, you can view the UDF that is registered.
Step 3: Create a Realtime Compute for Apache Flink draft
In the left-side navigation pane, click . In the upper-left corner of the SQL Editor page, click New.

On the SQL Scripts tab of the New Draft dialog box, click Blank Stream Draft and click Next.
Click Next.
On the page that appears, configure the parameters of the draft. The following table describes the parameters.
Parameter
Description
Name
The name of the draft that you want to create.
NoteThe draft name must be unique in the current namespace.
Location
The folder in which the code file of the draft is saved.
You can also click the
 icon to the right of an existing folder to create a subfolder.
 Engine Version
The engine version of the Realtime Compute for Apache Flink deployment. The value must be the same as the version in the pom.xml file that is used.
For more information about engine versions, version mappings, and important time points in the lifecycle of each version, see Engine version.
Write DDL and DML statements.
-- Create a temporary table named electric_info.
CREATE TEMPORARY TABLE electric_info (
  event_id bigint not null,
  `user_id` bigint not null,
  event_time timestamp(6) not null,
  status string not null,
  primary key(event_id) not enforced
) WITH (
  'connector' = 'mysql',
  'hostname' = 'rm-bp1s1xgll21******.mysql.rds.aliyuncs.com',
  'port' = '3306',
  'username' = 'your_username',
  'password' = '${secret_values.mysql_pw}',
  'database-name' = 'electric',
  'table-name' = 'electric_info'
);

CREATE TEMPORARY TABLE electric_info_sortlistagg (
  `user_id` bigint not null,
  status_sort varchar(50) not null,
  primary key(user_id) not enforced
) WITH (
  'connector' = 'mysql',
  'hostname' = 'rm-bp1s1xgll21******.mysql.rds.aliyuncs.com',
  'port' = '3306',
  'username' = 'your_username',
  'password' = '${secret_values.mysql_pw}',
  'database-name' = 'electric',
  'table-name' = 'electric_info_sortlistagg'
);

-- Aggregate data in the electric_info table and insert the data into the electric_info_sortlistagg table.
-- Concatenate the status and event_time fields into a new string and pass the new string as a parameter to the registered UDF named ASI_UDAF$SortListAgg.
INSERT INTO electric_info_sortlistagg
SELECT `user_id`, `ASI_UDAF$SortListAgg`(CONCAT(status,'#',CAST(UNIX_TIMESTAMP(event_time) as STRING)))
FROM electric_info GROUP BY user_id;
The following table describes the parameters. You can modify the parameters based on your business requirements. For more information about the parameters of the MySQL connector, see MySQL connector.
Parameter
Description
Remarks
connector
The connector type.
In this example, the value of this parameter is
mysql.hostname
The IP address or hostname that is used to access the MySQL database.
In this example, the internal endpoint of the ApsaraDB RDS for MySQL instance is used.
username
The username that is used to access the MySQL database.
N/A
password
The password that is used to access the MySQL database.
In this example, a key named mysql_pw is used to protect the password to prevent information from being leaked. For more information, see Manage variables.
database-name
The name of the MySQL database that you want to access.
In this example, the electric database that is created in Step 1: Prepare a data source is used.
table-name
The name of the MySQL table.
In this example, the table name is electric or electric_info_sortlistagg.
port
The port that is used to access the MySQL database.
N/A
Optional. Click Validate and Debug in sequence in the upper-right corner of the SQL Editor page. For more information, see Develop an SQL draft.
Click Deploy and click Confirm.
On the page, find the deployment that you want to manage and click Start in the Actions column. In the Start Job panel, select Initial Mode.
Step 4: View the result
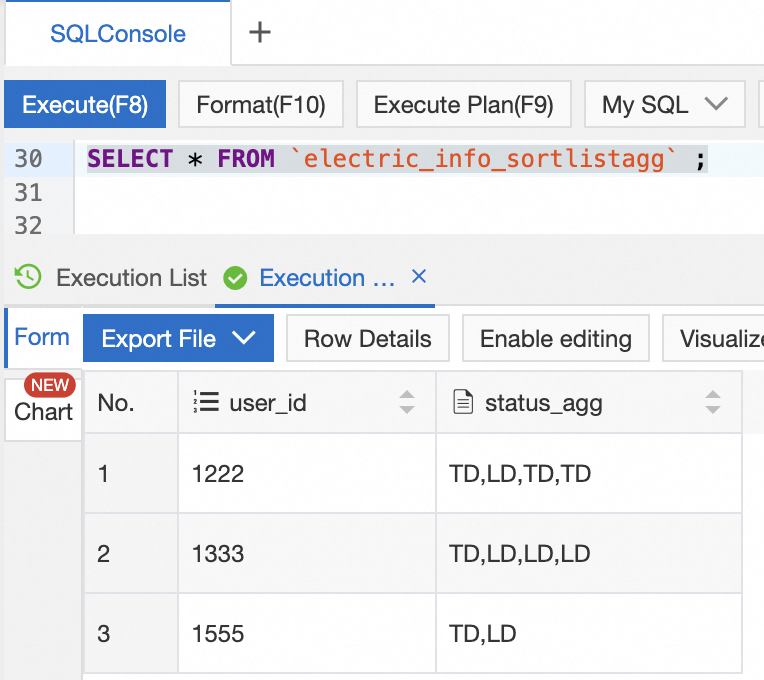
In the DMS console for the ApsaraDB RDS for MySQL instance, execute the following statement on the SQLConsole tab to view the sorting result of terminal status of users:
SELECT * FROM `electric_info_sortlistagg`;The following figure shows the query result.
References
For more information about the built-in functions that are supported by Realtime Compute for Apache Flink, see Built-in functions.
For more information about how to create a deployment, see Create a deployment. For more information about how to start a deployment, see Start a deployment.
For more information about how to modify the parameter configurations of a deployment, see Configure a deployment. You can dynamically update the configurations of specific parameters of a deployment. This reduces the service interruption time caused by the start and cancellation of the deployment. For more information, see Dynamically update the parameter configuration for dynamic scaling.
For more information about how to use Python UDFs in SQL deployments, see UDFs.