This topic describes how to use Realtime Compute for Apache Flink to process order and infant information from MySQL in real time, build a wide table, and write the results to Elasticsearch. You can then use Kibana to perform grouping and aggregation and display the data on a dashboard to reveal the potential relationship between order volume and infant births.
Background information
With the implementation of the 'universal two-child' policy and the steady growth of disposable income, China's maternal and infant consumption market is entering a golden age. At the same time, upgrades in national consumption and the rise of parents born in the 1990s are driving profound changes in consumption demand and philosophy. According to a recent report by Roland Berger, the maternal and infant industry was expected to reach a market size of CNY 3.6 trillion by 2020, with a compound annual growth rate (CAGR) of 17% from 2016 to 2020. This indicates vast prospects for growth. Against this backdrop, what are the consumption behaviors of the maternal and infant population? Which items dominate their spending?
In this scenario, both order and infant information are stored in a MySQL database. To simplify the analysis, the order table is joined with the infant information to build a detailed wide table. Then, Realtime Compute for Apache Flink writes the data to Elasticsearch in real time. Afterward, you can use Kibana for grouping, aggregation, and dynamic dashboard visualization to reveal the potential relationship between order volume and infant births.
Prerequisites
You have created a Flink workspace. For more information, see Activate Realtime Compute for Apache Flink.
You have created an ApsaraDB RDS for MySQL instance, a database, and an account. For more information, see Quickly create an ApsaraDB RDS for MySQL instance and Create a database and an account.
You have created an Elasticsearch instance. This topic uses version 8.17.0 as an example. For more information, see Create an Alibaba Cloud Elasticsearch instance.
ImportantThe Flink workspace, ApsaraDB RDS for MySQL instance, and Elasticsearch instance must be in the same virtual private cloud (VPC). You must also configure IP address whitelists for the ApsaraDB RDS for MySQL and Elasticsearch instances. For more information, see Configure a whitelist for an ApsaraDB RDS for MySQL instance and Configure a whitelist for an Elasticsearch instance.
Step 1: Create RDS MySQL tables and import data
In this example, you will create three data tables. The `orders_dataset_tmp` table is a temporary table for data import. The other two tables are source tables for the real-time query of Taobao maternal and infant orders.
Go to the Instances page. In the top navigation bar, select the region in which the RDS instance resides. Then, find the RDS instance and click the ID of the instance.
Click Log On To Database at the top of the page. In the Log on to Database Instance dialog, set Access mode to Account + password login, enter the database account and password, and then click Login.
In the left pane, click Database Instances. In the Instances Connected section, double-click the name of the target database.
In the SQL editor on the right, enter the following statements and click Execute(F8) to create the tables.
create table orders_dataset_tmp(
    user_id bigint comment 'User ID information',
    auction_id bigint comment 'Purchase behavior ID',
    cat_id bigint comment 'Product category serial number',
    cat1 bigint comment 'Product serial number (root category)',
    property TEXT comment 'Product properties',
    buy_mount int comment 'Quantity purchased',
    day TEXT comment 'Purchase date'
);

create table orders_dataset(
    order_id BIGINT NOT NULL AUTO_INCREMENT PRIMARY KEY comment 'Order ID',
    user_id bigint comment 'User ID information',
    auction_id bigint comment 'Purchase behavior ID',
    cat_id bigint comment 'Product category serial number',
    cat1 bigint comment 'Product serial number (root category)',
    property TEXT comment 'Product properties',
    buy_mount int comment 'Quantity purchased',
    day TEXT comment 'Purchase date'
);


create table baby_dataset(
    user_id bigint NOT NULL PRIMARY KEY,
    birthday text comment 'Infant birthday',
    gender int comment '0 denotes female, 1 denotes male, 2 denotes unknown'
);
Import data.
Import the E-commerce Infant Users file into the orders_dataset_tmp table and the Infant Information file into the baby_dataset table.
Click Data Import at the top.
Configure the import settings.
Configuration Item
Description
Database
Perform a fuzzy search for the database name and click the target MySQL instance.
File Encoding
Set it to Automatic Identification.
Import Mode
Select Speed Mode.
File Type
Select CSV.
Destination Table Name
Enter
orders_dataset_tmporbaby_dataset.Attachment
Click File and import the corresponding file for the table.
Click Submit. In Step 4, click Execute Change. In the Task Settings dialog, select Running immediately and click Confirm Execution.
After the import is complete, execute the following SQL statement to import the order data into the source table orders_dataset.
insert into orders_dataset(user_id,auction_id,cat_id,cat1,property,buy_mount,day)
select * from orders_dataset_tmp;
Step 2: Configure automatic index creation in Elasticsearch
Log on to the Alibaba Cloud Elasticsearch console. In the top menu bar, select a resource group and a region.
In the left navigation menu, select Elasticsearch Clusters, and click the target cluster ID.
On the Basic Information page, click .

Click Modify Configuration. In the YML File Configuration panel, set Auto Indexing to Enable and click OK.
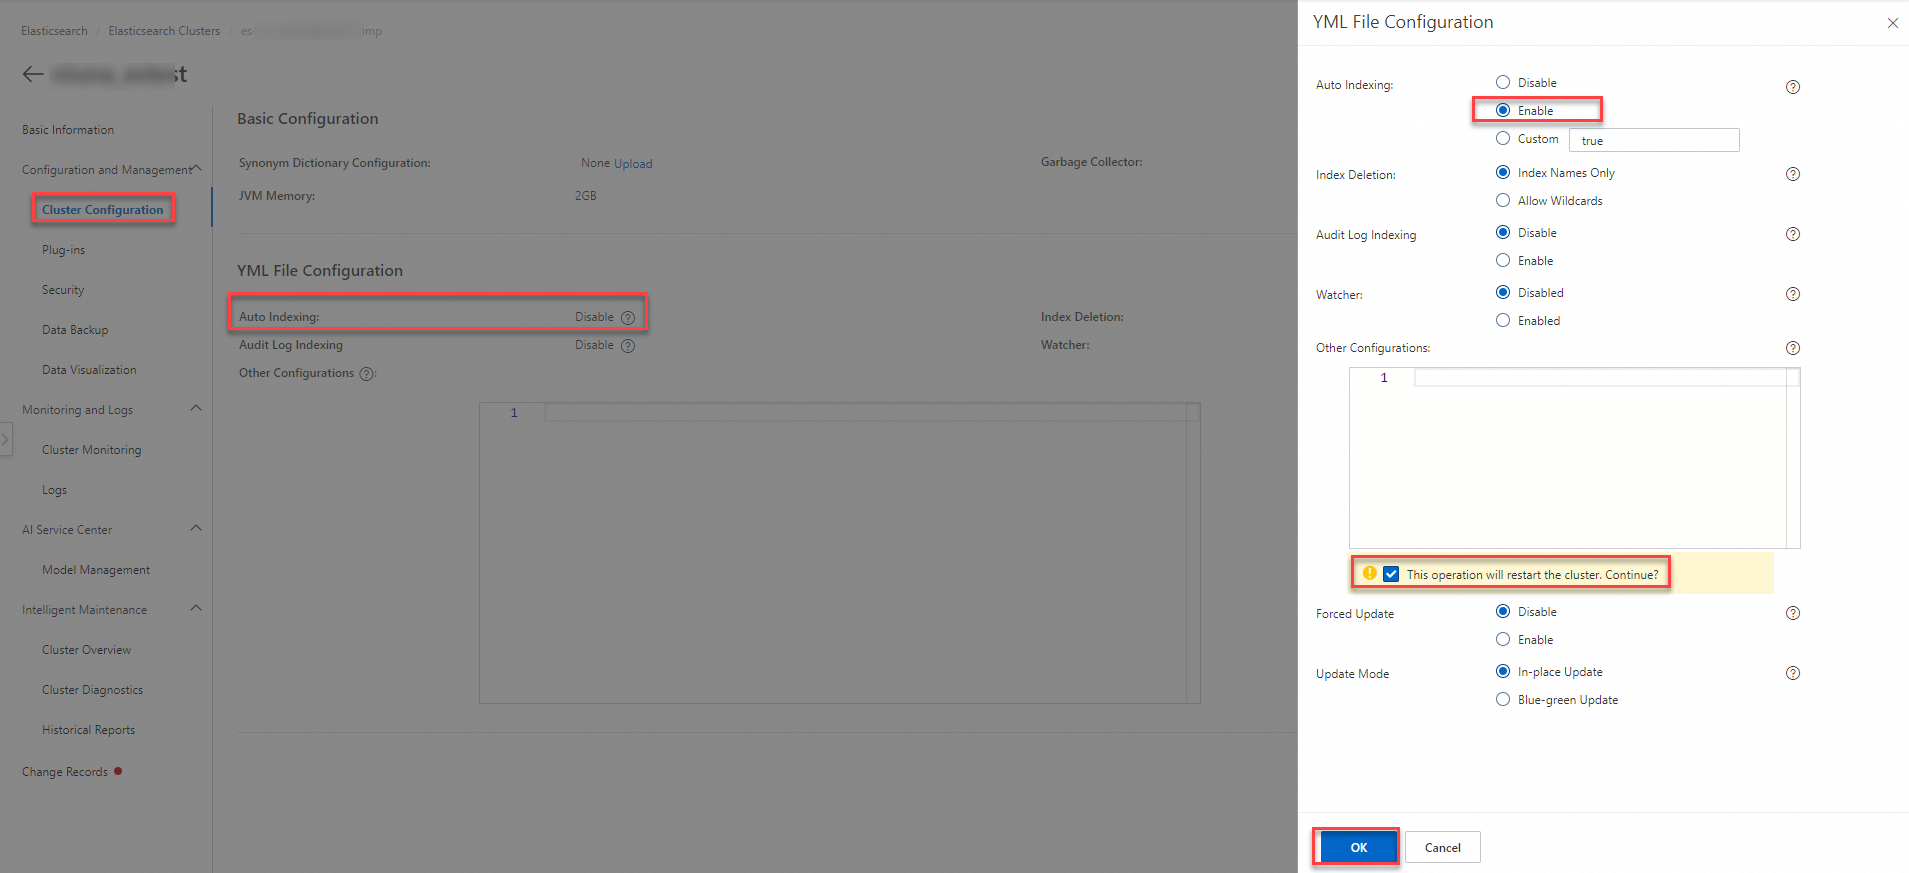 Important
This operation restarts the cluster. Confirm that you want to proceed.
Step 3: Create a Flink SQL streaming job
Log on to Realtime Compute for Apache Flink's Management Console. For the target workspace, click Console in the Actions column.
In the left navigation menu, click .
Click
 and select New Blank Stream Draft. Enter a name, select an engine version, and click Create.
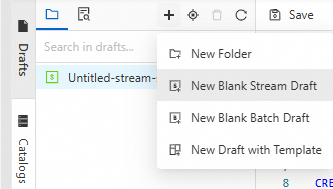
Job Parameter
Description
Example
File Name
The name of the job.
NoteThe job name must be unique within the current project.
flink-test
Engine Version
The Flink engine version used by the current job. For more information about engine version numbers, version mappings, and important lifecycle dates, see Engine versions.
vvr-8.0.11-flink-1.17
Write Flink SQL code.
Copy the following SQL code into the SQL editor and replace the placeholders with your actual values.
This code defines two MySQL tables (
orders_datasetandbaby_dataset) as data sources. They store order and user information, respectively. The data is written to a single index (enriched_orders_view) through two Elasticsearch sink tables (es_sink1andes_sink2). By settingsink.delete-strategytoNON_PK_FIELD_TO_NULL, the code uses the partial update capability of Elasticsearch. When primary keys are identical, only non-primary key fields are updated, which ensures data consistency.CREATE TEMPORARY TABLE orders_dataset ( `order_id` BIGINT, `user_id` bigint, `auction_id` bigint, `cat_id` bigint, `cat1` bigint, `property` varchar, `buy_mount` int, `day` varchar , PRIMARY KEY(order_id) NOT ENFORCED ) WITH ( 'connector' = 'mysql', 'hostname' = 'rm-2zew*******.mysql.rds.aliyuncs.com', 'port' = '3306', 'username' = 'flinkrds***', 'password' = 'Flink***@1', 'database-name' = 'ecommerce', 'table-name' = 'orders_dataset' ); CREATE TEMPORARY TABLE baby_dataset ( `user_id` bigint, `birthday` varchar, `gender` int, PRIMARY KEY(user_id) NOT ENFORCED ) WITH ( 'connector' = 'mysql', 'hostname' = 'rm-2zew*******.mysql.rds.aliyuncs.com', 'port' = '3306', 'username' = 'flinkrds***', 'password' = 'Flink***@1', 'database-name' = 'ecommerce', 'table-name' = 'baby_dataset' ); CREATE TEMPORARY TABLE es_sink1( `order_id` BIGINT, `user_id` BIGINT, `buy_mount` INT, `day` VARCHAR, PRIMARY KEY(`user_id`) NOT ENFORCED ) WITH ( 'connector' = 'elasticsearch-8', 'hosts' = 'http://192.xx.xx.252:9200', 'index' = 'enriched_orders_view', 'username' ='elastic', 'password' ='Flink***@1', 'sink.delete-strategy' = 'NON_PK_FIELD_TO_NULL' ); CREATE TEMPORARY TABLE es_sink2( `user_id` BIGINT, `birthday` VARCHAR, `gender` INT, PRIMARY KEY(`user_id`) NOT ENFORCED ) WITH ( 'connector' = 'elasticsearch-8', 'hosts' = 'http://192.xx.xx.252:9200', 'index' = 'enriched_orders_view', 'username' ='elastic', 'password' ='Flink***@1', 'sink.delete-strategy' = 'NON_PK_FIELD_TO_NULL' ); BEGIN STATEMENT SET; INSERT INTO es_sink1 SELECT `order_id`, `user_id`, `buy_mount`, `day` FROM orders_dataset; INSERT INTO es_sink2 SELECT `user_id`, `birthday`, `gender` FROM baby_dataset; END;Storage Class
Parameter
Required
Description
MySQL
connector
Yes
The table type. The value is fixed as
mysql.hostname
Yes
The IP address or hostname of the MySQL database. Use a VPC address.
port
No
The port number of the MySQL database service.
username
Yes
The username for the MySQL database service.
password
Yes
The password for the MySQL database service.
database-name
Yes
The name of the MySQL database.
table-name
Yes
The name of the MySQL table.
Elasticsearch
connector
Yes
The type of the sink table.
hosts
Yes
The Elasticsearch endpoint.
The format is
http://host_name:port.index
Yes
The index name.
In this example, the value is enriched_orders_view.
Click Deploy.
On the Deployments page, start the job deployment without states.
Step 4: View the data results in the Elasticsearch console
After the enriched_orders_view index is created in Elasticsearch, follow these steps to view the written data.
1. Preparations
Restart the Elasticsearch cluster.
On the page that appears, choose . In the Kibana section, click Access over Internet and enter your username and password.
The default username for the Kibana console is
elastic. The password is the one you set when you created the Alibaba Cloud Elasticsearch cluster.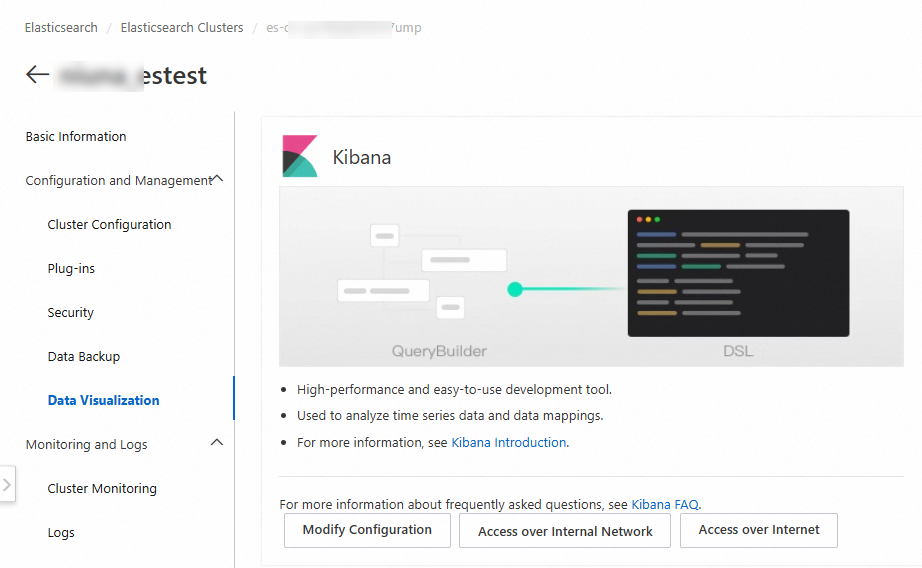
Process the data types of the data fields.
To use a histogram later, you must convert the data type of the
dayfield fromtexttodate. You can run the following commands in .Create a new index, such as
enriched_orders_view_new, and define its mapping.Set the type of the
dayfield todateand keep the mapping structure for the other fields.PUT enriched_orders_view_new { "mappings": { "properties": { "birthday": { "type": "text", "fields": { "keyword": { "type": "keyword", "ignore_above": 256 } }, "fielddata": true }, "buy_mount": { "type": "long" }, "day": { "type": "date", "format": "yyyy-MM-dd" // Specify the date format to ensure consistency with the raw data. }, "gender": { "type": "long" }, "order_id": { "type": "long" }, "user_id": { "type": "long" } } } }Use the
_reindexAPI to copy data from the original index to the new index. During this process, convert the value of thedayfield to the date format.POST _reindex { "source": { "index": "enriched_orders_view" }, "dest": { "index": "enriched_orders_view_new" }, "script": { "source": """ if (ctx._source['day'] != null) { // Convert the date from 'yyyyMMdd' format to 'yyyy-MM-dd'. def originalDate = ctx._source['day']; if (originalDate.length() == 8) { ctx._source['day'] = originalDate.substring(0, 4) + '-' + originalDate.substring(4, 6) + '-' + originalDate.substring(6, 8); } else { ctx.op = 'noop'; // If the format is incorrect, skip the document. } } """ } }Verify that the day field in the new index is converted to the correct data format, such as
yyyy-MM-dd.GET enriched_orders_view_new/_search { "size": 10 }
Create a data view.
In the navigation pane on the left, click .
Click Create data view. Enter a name. Set Index pattern to
enriched_orders_view_newand Timestamp field to day. Click Save data view to Kibana.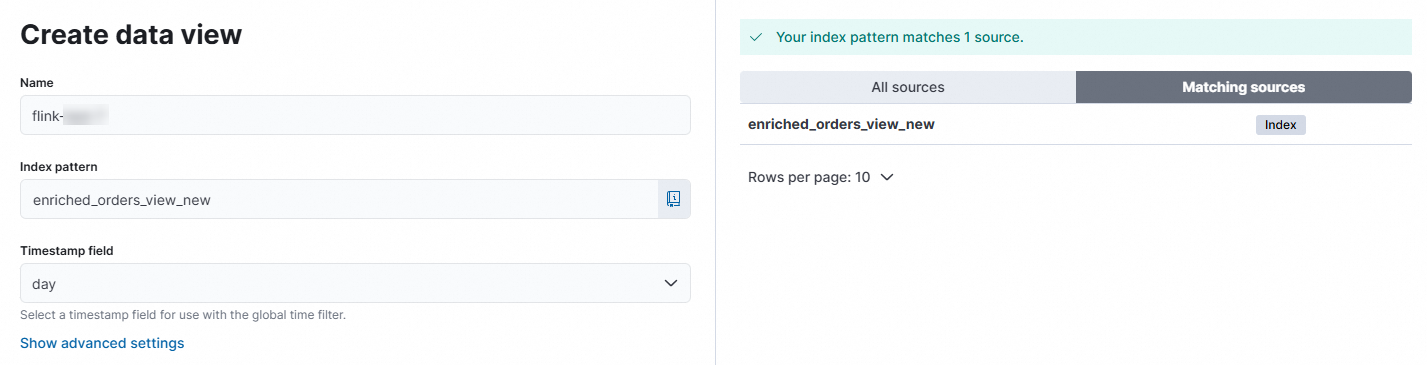
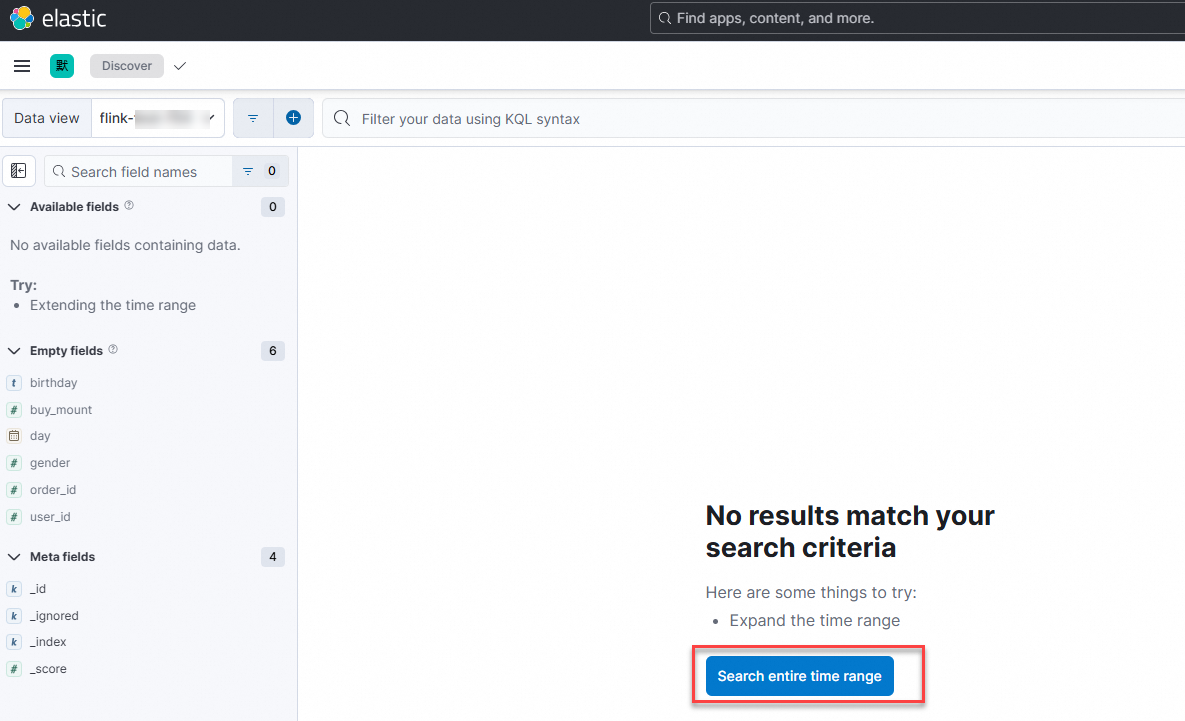
2. View the data writing status
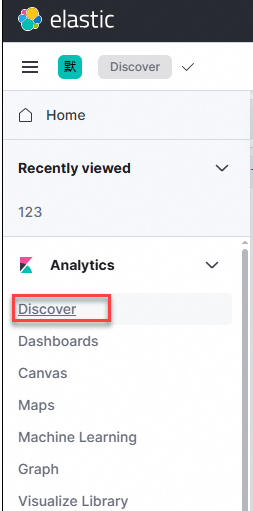
In the left navigation menu, click .
Switch to the data view that you just created.
Click Search entire time range.
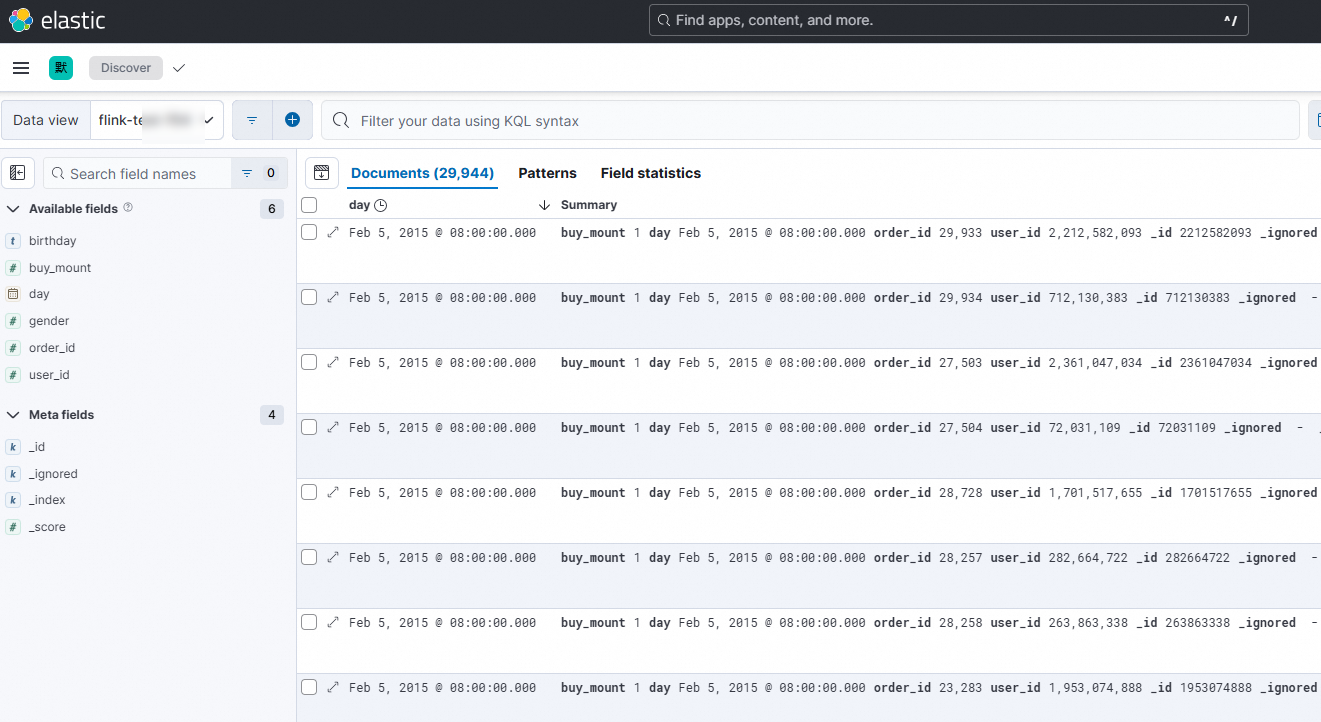
View the data writing status.
3. Configure the visualization chart
Select the
dayfield and click Visualize.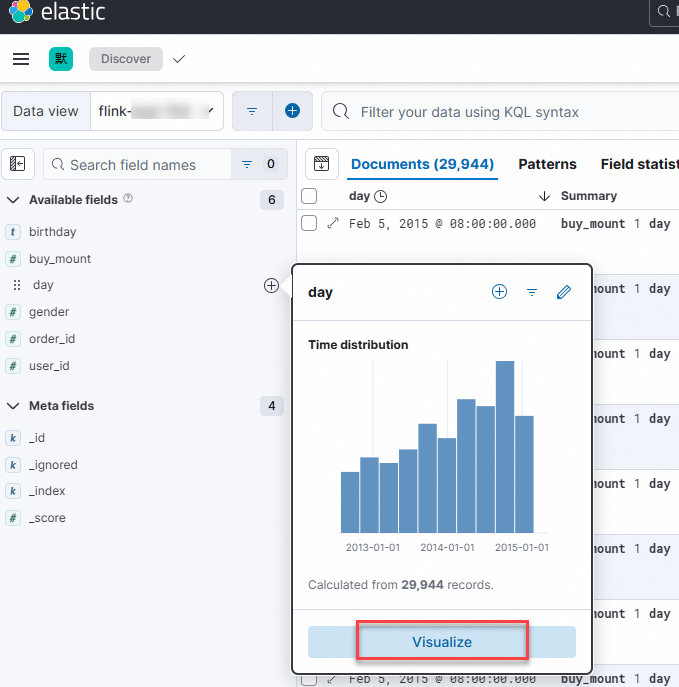
On the right side of the page, configure the horizontal and vertical axes for the vertical bar chart.
After you configure one axis, click Close and configure the other axis.
Configuration Item
Configuration Description
Figure
Horizontal axis
Set Functions to Date histogram.
Set Field to day.
Set Name to
year_month.
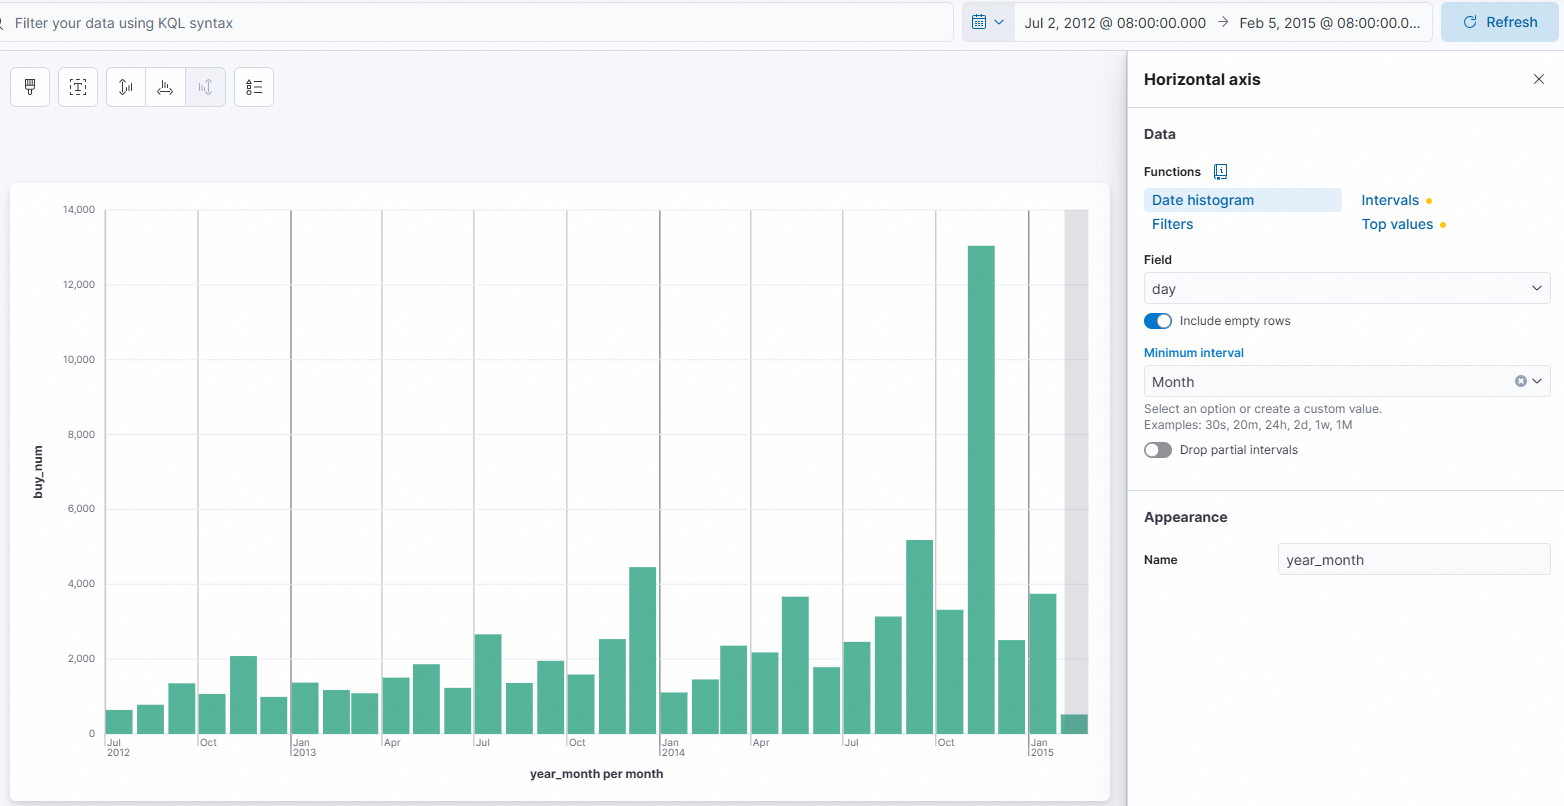
Vertical axis
Set Functions to Sum.
Set Field to buy_mount.
Set Name to
buy_num.Set Axis side to Left.

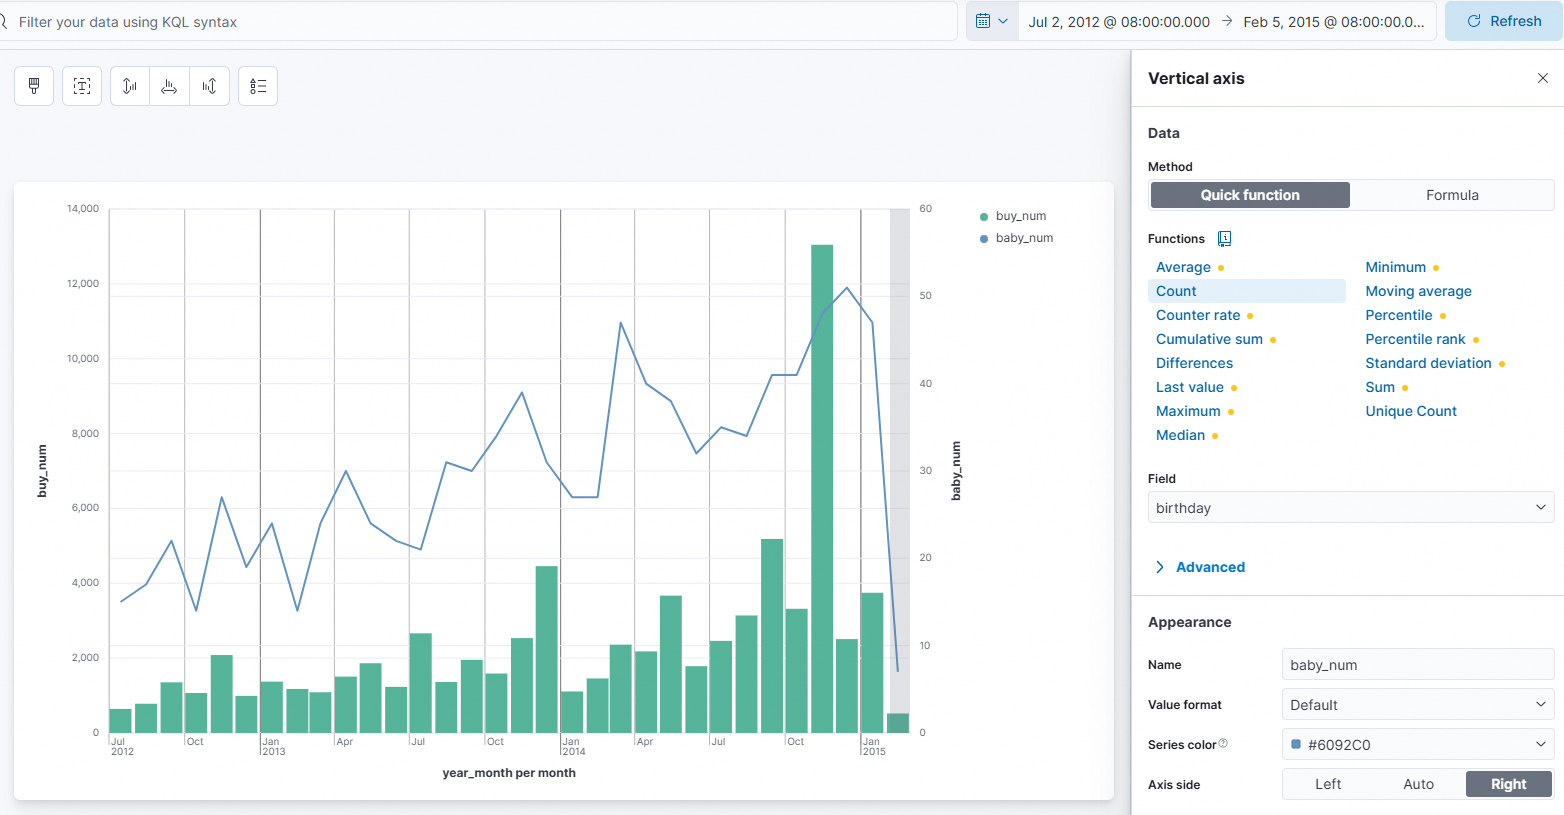
On the right side of the page, configure the horizontal and vertical axes for the Line chart.
In the lower-right corner, click Add layer. Select line chart for the visualization type. Then, configure the horizontal and vertical axes. Configure one axis, click Close, and then configure the other axis.
Configuration Item
Configuration Description
Figure
Horizontal axis
Set Functions to Date histogram.
Set Field to
day.Set Name to
year_month.

Vertical axis
Set Function to Count.
Set Field to
birthday.Set Name to
baby_num.Set Axis side to Right.
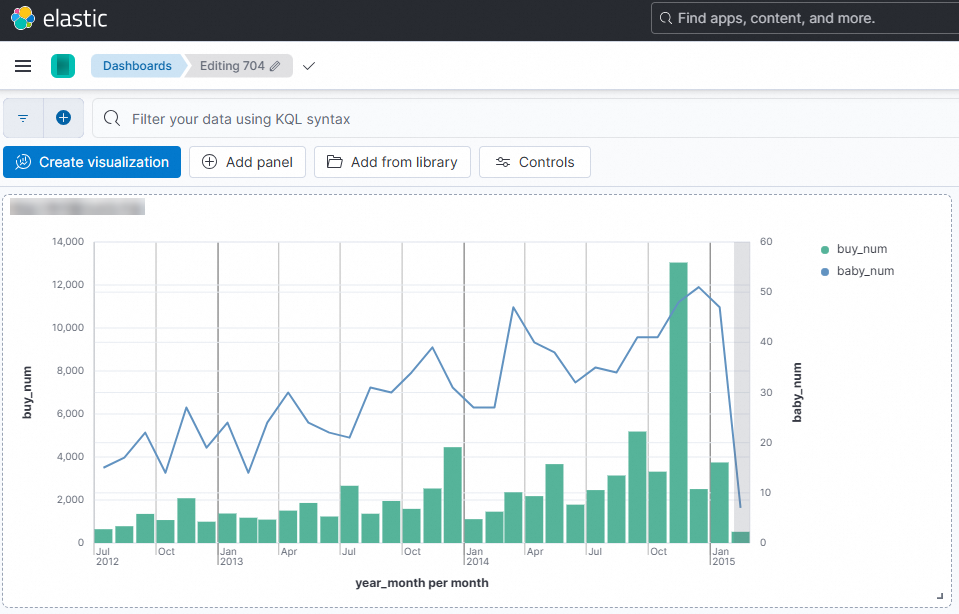
4. Save and view the visualization result
To save the composite line and column chart, click Save.
References
For more information about the syntax, connector options, and usage examples of the Elasticsearch connector, see Elasticsearch connector.
For more information about the syntax, connector options, and usage examples of the ApsaraDB RDS for MySQL connector, see ApsaraDB RDS for MySQL connector.