You can use Serverless Devs to deploy AI inference applications to the Function Compute console without managing infrastructure to implement on-demand and automatic expansion inference based on AI models. This helps reduce costs and accelerate iteration.
Background
This topic provides examples to verify whether the system can correctly recognize the animals in the following image. For more information about the code details, see Dog-Cat Classifier.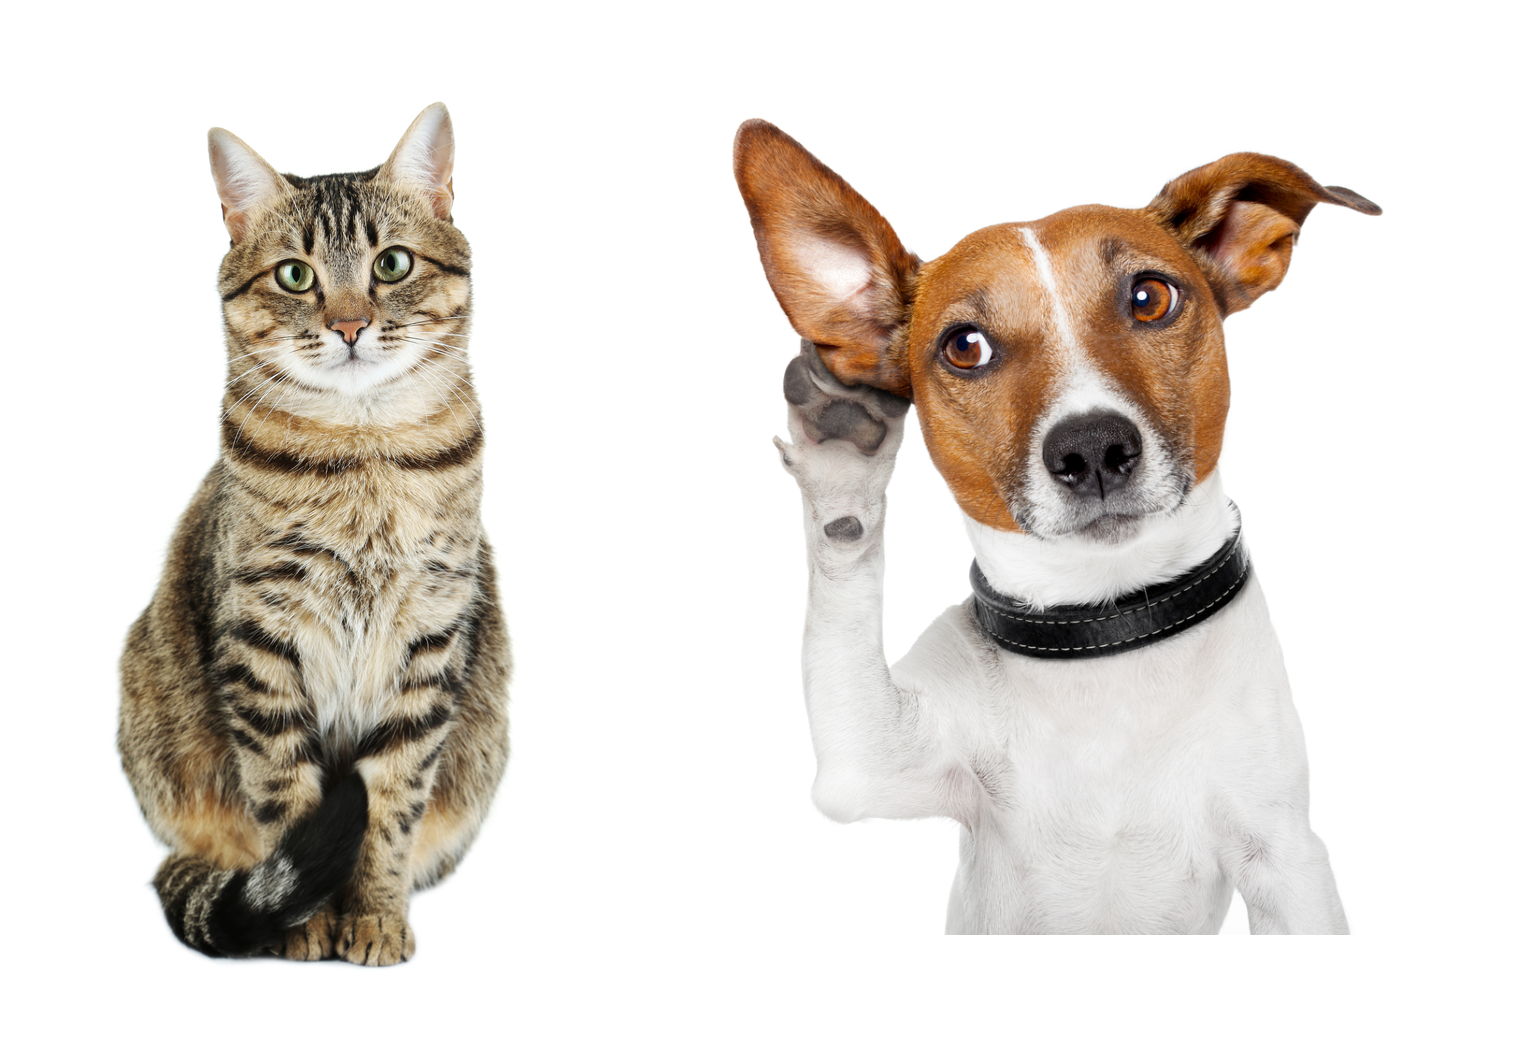
Prerequisites
Activate Function Compute. We recommend that you purchase Function Compute resources on a pay-as-you-go basis. For more information, see Activate Function Compute and Pay-as-you-go.
Activate File Storage NAS (NAS). For more information about NAS billing, see Get started with NAS and Billing of General-purpose NAS file systems.
Procedure
Run the following command to clone a project:
git clone https://github.com/awesome-fc/cat-dog-classify.gitInstall dependencies.
Run the following command to go to the project directory:
cd cat-dog-classifyRun the following command to install dependencies:
sudo s build --use-dockerSample command output:
[2021-12-09 07:26:39] [INFO] [S-CLI] - Start ...
[2021-12-09 07:26:40] [INFO] [FC-BUILD] - Build artifact start...
[2021-12-09 07:26:40] [INFO] [FC-BUILD] - Use docker for building.
[2021-12-09 07:26:40] [INFO] [FC-BUILD] - Build function using image: registry.<regionId>.aliyuncs.com/aliyunfc/runtime-python3.6:build-1.9.20
[2021-12-09 07:26:40] [INFO] [FC-BUILD] - begin pulling image registry.<regionId>.aliyuncs.com/aliyunfc/runtime-python3.6:build-1.9.20, you can also use docker pull registry.cn-beijing.aliyuncs.com/aliyunfc/runtime-python3.6:build-1.9.20 to pull image by yourself.
build-1.9.20: Pulling from aliyunfc/runtime-python3.6
f49cf87b52c1: Already exists
......
01ce50b4eb85: Already exists
02b807385deb: Pull complete
......
9b9fdb8de506: Pull complete
Digest: sha256:a9a6dab2d6319df741ee135d9749a90b2bb834fd11ee265d1fb106053890****
Status: Downloaded newer image for registry.<regionId>.aliyuncs.com/aliyunfc/runtime-python3.6:build-1.9.20
 builder begin to build
[2021-12-09 07:27:57] [INFO] [FC-BUILD] - Build artifact successfully.

Tips for next step
======================
* Invoke Event Function: s local invoke
* Invoke Http Function: s local start
* Deploy Resources: s deploy
End of method: build
After you run the command for installing dependencies, Serverless Devs automatically installs related dependencies and downloads third-party libraries to the .s/build/artifacts/cat-dog/classify/.s/python directory.
Upload the dependencies to NAS.
When you install the dependencies, code packages referenced by Function Compute are decompressed but the total size may reach the upper limit. To control the total size within the limit, you can store dependencies and models that are large in size to NAS.
Run the following command to initialize a NAS file system.
sudo s nas initSample command output:
[2021-12-09 07:29:58] [INFO] [S-CLI] - Start ...
[2021-12-09 07:29:59] [INFO] [FC-DEPLOY] - Using region: cn-shenzhen
[2021-12-09 07:29:59] [INFO] [FC-DEPLOY] - Using access alias: default
[2021-12-09 07:29:59] [INFO] [FC-DEPLOY] - Using accessKeyID: yourAccessKeyID
[2021-12-09 07:29:59] [INFO] [FC-DEPLOY] - Using accessKeySecret: yourAccessKeySecret
......
[2021-12-09 07:30:01] [INFO] [FC-DEPLOY] - Generated vpcConfig:
securityGroupId: sg-wz90u1syk2h1f14b****
vSwitchId: vsw-wz9qnuult4q5g4f7n****
vpcId: vpc-wz9x9bzs0wtvjgt6n****

......
[2021-12-09 07:30:15] [INFO] [FC-DEPLOY] - Checking Trigger httpTrigger exists
 Make service _FC_NAS_cat-dog success.
 Make function _FC_NAS_cat-dog/nas_dir_checker success.
 Make trigger _FC_NAS_cat-dog/nas_dir_checker/httpTrigger success.
[2021-12-09 07:30:25] [INFO] [FC-DEPLOY] - Checking Service _FC_NAS_cat-dog exists
[2021-12-09 07:30:25] [INFO] [FC-DEPLOY] - Checking Function nas_dir_checker exists
[2021-12-09 07:30:26] [INFO] [FC-DEPLOY] - Checking Trigger httpTrigger exists

There is auto config in the service: _FC_NAS_cat-dog
[2021-12-09 07:30:26] [INFO] [FC-DEPLOY] - Generated nasConfig:
groupId: 10003
mountPoints:
  - fcDir: /mnt/auto
    nasDir: /cat-dog
    serverAddr: 2bfb748****.cn-shenzhen.nas.aliyuncs.com
userId: 10003

cat-dog:
  userId:      10003
  groupId:     10003
  mountPoints:
    -
      serverAddr: 2bfb748****.cn-shenzhen.nas.aliyuncs.com
      nasDir:     /cat-dog
      fcDir:      /mnt/auto
Run the following command to deploy a service:
sudo s deploy serviceRun the following command to upload dependencies to NAS:
sudo s nas upload -r .s/build/artifacts/cat-dog/classify/.s/python/ /mnt/auto/pythonSample command output:
[2021-12-09 07:33:14] [INFO] [S-CLI] - Start ...
Packing ...
Package complete.
 Upload done

Tips for next step
======================
* Invoke remote function: s invoke
End of method: nas
Run the following command to upload models to NAS:
sudo s nas upload -r src/model/ /mnt/auto/modelSample command output:
[2021-12-09 07:52:26] [INFO] [S-CLI] - Start ...
Packing ...
Package complete.
 Upload done

Tips for next step
======================
* Invoke remote function: s invoke
End of method: nas
Run the following command to view the NAS directory:
sudo s nas command ls /mnt/auto/Sample command output:
[2021-12-09 07:53:01] [INFO] [S-CLI] - Start ...
model
python


Tips for next step
======================
* Invoke remote function: s invoke
End of method: nas
Run the following command to deploy the project:
sudo s deploySample command output:
[2021-12-09 07:56:15] [INFO] [S-CLI] - Start ...
[2021-12-09 07:56:16] [INFO] [FC-DEPLOY] - Using region: cn-shenzhen
[2021-12-09 07:56:16] [INFO] [FC-DEPLOY] - Using access alias: default
[2021-12-09 07:56:16] [INFO] [FC-DEPLOY] - Using accessKeyID: yourAccessKeyID
[2021-12-09 07:56:16] [INFO] [FC-DEPLOY] - Using accessKeySecret: yourAccessKeySecret
 ......
[2021-12-09 07:56:19] [INFO] [FC-DEPLOY] - Generated logConfig:
enableInstanceMetrics: true
enableRequestMetrics: true
logBeginRule: ~
logstore: fc-service-cat-dog-logstore
project: 188077086902****-cn-shenzhen-logproject
......
There is auto config in the service: cat-dog

Tips for next step
======================
* Display information of the deployed resource: s info
* Display metrics: s metrics
* Display logs: s logs
* Invoke remote function: s invoke
* Remove Service: s remove service
* Remove Function: s remove function
* Remove Trigger: s remove trigger
* Remove CustomDomain: s remove domain


cat-dog:
  region:   cn-shenzhen
  service:
    name: cat-dog
  function:
    name:       classify
    runtime:    python3
    handler:    predict.handler
    memorySize: 1024
    timeout:    120
  url:
    system_url:    https://188077086902****.cn-shenzhen.fc.aliyuncs.com/2016-08-15/proxy/cat-dog/classify/
    custom_domain:
      -
        domain: http://classify.cat-dog.188077086902****.cn-shenzhen.fc.devsapp.net
  triggers:
    -
      type: http
      name: httpTrigger
After the project is deployed, Function Compute generates a temporary domain name for the project. You can view the domain name in the command output. Then, you can use the domain name to access the function that you deployed. The domain name is in the
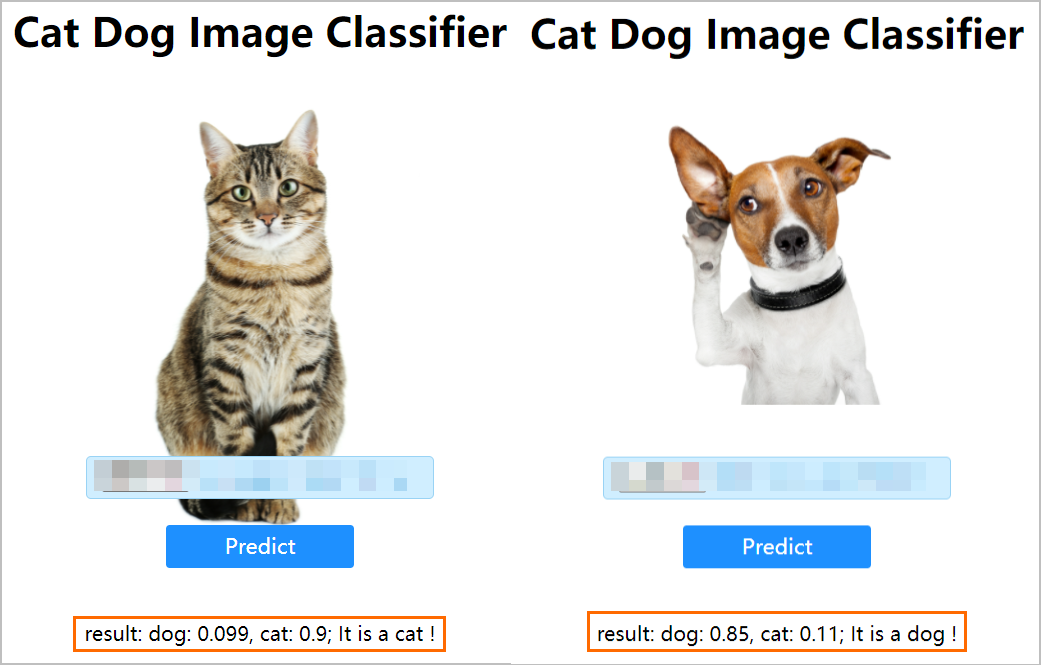
http://classify.cat-dog.<account_id>.<region_id>.fc.devsapp.netformat.Replace variables in the domain name based on your business requirements and use a browser to access the domain name. After the image is uploaded, the following outputs are returned:
 Note The temporary domain name is used only for demonstration and development purposes. It is valid for a limited period of time. You must use a domain name that has obtained an Internet Content Provider (ICP) filing from Alibaba Cloud for production. For more information, see Configure a custom domain name.
Use provisioned instances to eliminate cold start glitches
Function Compute automatically scales out the execution environment based on the number of concurrent requests. The Cat-dog Image Classifier example is a typical case for deep learning. Loading dependencies and models is time-consuming. The function that is used to recognize animals in the image has 1 GB of memory, and requires 10s to process concurrent access requests. However, in specific scenarios, it can require 20s or longer.
If such an event appears, the cold start period is greater than 10s when the function is invoked. To prevent cold start glitches, you can configure whether to use provisioned instances. You can run the following command in the project directory to eliminate cold start glitches:
sudo s provision put --target 10 --qualifier LATESTIf you want to understand the robustness of a server under heavy loads for efficient business running and development, run the stress testing commands provided by Serverless Devs on functions. For more information, see Serverless Devs commands.
You can run the following command to obtain the provisioned instance details:
sudo s provision get --qualifier LATESTAfter you complete the stress test and you no longer want to use provisioned instances, run the following command to release the provisioned instances:
sudo s provision put --target 0 --qualifier LATEST
References
If you want to use Serverless Devs to perform operations such as building functions or installing dependencies, see Build commands (s build).
If you want to use Serverless Devs to perform operations such as viewing or updating provisioned configurations, see Provision commands (s provision).