You can use event rules to filter events and route them to Tablestore. This topic describes the prerequisites and procedure for routing custom events to Tablestore. This topic also describes how to verify the result.
Before you start
Step 1: Add a custom event source
Log on to the EventBridge console. In the left-side navigation pane, click Event Buses.
In the top navigation bar, select a region. On the Event Buses page, click the name of the custom event bus that you want to manage.
In the left-side navigation pane, click Event Sources and then click Add Event Source.
In the Add Custom Event Source panel, configure the Name and Description parameters, select Custom Application from the Event Provider drop-down list, and then click OK.
Step 2: Create an event rule
Log on to the EventBridge console. In the left-side navigation pane, click Event Buses.
In the top navigation bar, select a region. On the Event Buses page, click the name of the event bus that you want to manage.
In the left-side navigation pane, click Event Rules. On the page that appears, click Create Rule.
In the Create Rule wizard, complete the following operations:
In the Configure Basic Info step, configure the Name and Description parameters. Then, click Next Step.
In the Configure Event Pattern step, select Custom Event Source for the Event Source Type parameter, select the event source that you added in Step 1 from the Event Source drop-down list, and then click Next Step.
In the Configure Targets step, follow the on-screen instructions to configure the parameters and click Create. The following tables describe the parameters.
Wide table
Parameter
Example
Description
Service Type
Tablestore
Select Tablestore from the drop-down list.
Instance Name
test_eb
Select the Tablestore instance that you created from the drop-down list.
Destination Table
test
Select the wide table that you created from the drop-down list.
Primary Key
$.data.nameSpecify the primary key value. You can extract the primary key value from event data using a JSONPath expression.
Attribute Column
None
(Optional) Add the attribute column. If you want to add an attribute column, click Add Attribute Column.
Operation Mode
put
Specify the write mode. Valid values:
put: If the primary keys of two data entries are the same, the new data entry overwrites the old data entry.
update: If the primary keys of two data entries are the same, the new data entry is written to the row and the old data entry is retained.
delete: The corresponding primary keys are deleted.
Network Configuration
Internet
Specify the network type. Valid values:
Internet
VPC: If you select this value, you must create a VPC, a vSwitch, and a security group in advance.
Retry Policy and Dead-letter Queue
None
Configure the retry policy and dead-letter queue. For more information, see Retry policies and dead-letter queues.
Time series table
Parameter
Example
Description
Service Type
Tablestore
Select Tablestore from the drop-down list.
Instance Name
test_eb
Select the Tablestore instance that you created from the drop-down list.
Destination Table
test1
Select the time series table that you created from the drop-down list.
Metric Name
default
Specify the metric name to be inserted. The following methods are supported:
Fixed Value: You can specify a constant. Default value: default.
Partial Event: You can use a JSONPath expression to extract the value. Example:
$.data.
Data Source
default
(Optional) Specify the data source to be inserted. The following methods are supported:
Fixed Value: You can specify a constant. Default value: default.
Partial Event: You can use a JSONPath expression to extract the value. Example:
$.data.
Tag
None
(Optional) Configure the Name and Value columns.
Name: You can specify a constant or use a
JSONPathexpression to extract the value.Value: You can only use a
JSONPathexpression to extract the value. Example:$.data.name.Attribute Column
test
Configure the following fields:
Name: You can specify a constant or use a
JSONPathexpression to extract the value. Example:$.data, $.id.Type: The type of the attribute column can be String, Integer, Binary, Floating-point, or Boolean.
Value: You can use a JSONPath expression to extract the value from event data. Example:
$.data.name.Storage Format: The default and JSON storage formats are supported.
Time
2025-01-05 14:30:00
You can specify a timestamp in seconds. The value must be of the INTEGER or FLOAT type.
You can specify a time string in a format similar to 2023-04-05 14:30:00. The value must be of the STRING type.
Time Zone
Asia/China(UTC+8:00)
Select a time zone from the drop-down list.
Network Configuration
Internet
Specify the network type. Valid values:
Internet
VPC: If you select this value, you must create a VPC, a vSwitch, and a security group in advance.
Retry Policy and Dead-letter Queue
None
Configure the retry policy and dead-letter queue. For more information, see Retry policies and dead-letter queues.
Step 3: Publish an event
Log on to the EventBridge console. In the left-side navigation pane, click Event Buses.
- In the top navigation bar, select a region.
- On the Event Buses page, find the event bus to which you want to publish an event and click Publish Event in the Operations column. Note You can publish events only to custom event buses in the EventBridge console.
- In the Publish Event to Custom Event Bus panel, select a custom event source from the Custom Event Source drop-down list, enter the event content in the Event Body code editor, and then click OK. For more information about the event parameters, see Overview.
Verify the result
You can view data in the destination data table in the Tablestore console.
Log on to the Tablestore console. In the left-side navigation pane, click All Instances.
On the All Instances page, click the name of the instance that you want to manage.
On the Instance Management page, click the Instance Details tab. Then, in the Usage Details section, find the data table that you want to manage and click its name.
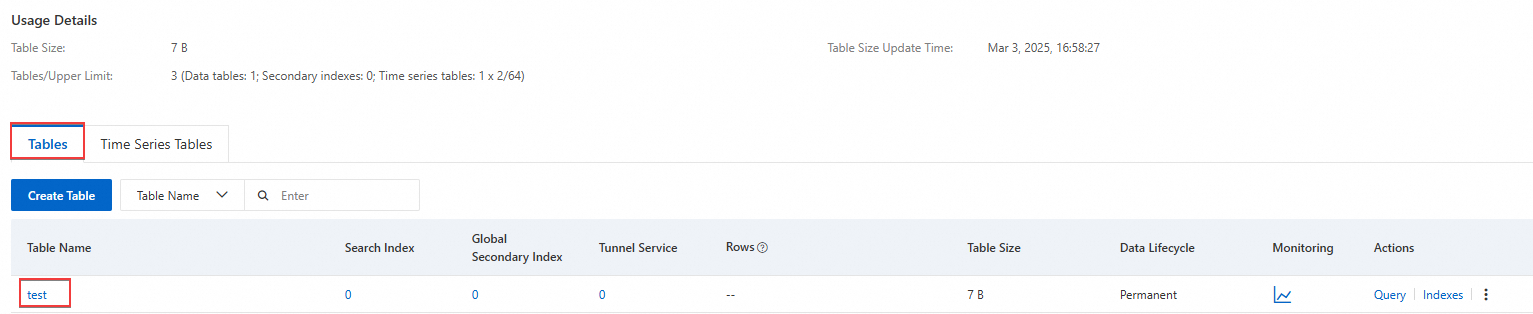
On the Query Data tab of the data table, view the inserted data.
