You can use event rules to filter events and route the events to Object Storage Service (OSS). This topic describes the prerequisites and procedure for routing custom events to OSS. This topic also describes how to verify the result.
Before you start
Step 1: Add a custom event source
Log on to the EventBridge console. In the left-side navigation pane, click Event Buses.
In the top navigation bar, select a region. On the Event Buses page, click the name of the custom event bus that you want to manage.
In the left-side navigation pane, click Event Sources and then click Add Event Source.
In the Add Custom Event Source panel, configure the Name and Description parameters, select Custom Application from the Event Provider drop-down list, and then click OK.
Step 2: Create an event rule
Log on to the EventBridge console. In the left-side navigation pane, click Event Buses.
In the top navigation bar, select a region. On the Event Buses page, click the name of the event bus that you want to manage.
In the left-side navigation pane, click Event Rules. On the page that appears, click Create Rule.
In the Create Rule wizard, perform the following steps:
In the Configure Basic Info step, configure the Name and Description parameters and click Next Step.
In the Configure Event Pattern step, set the Event Source Type parameter to Custom Event Source, select the created event source from the Event Source drop-down list, and then click Next Step.
In the Configure Targets step, configure the parameters and click Create.
Parameter
Description
Example
Service Type
Select OSS from the drop-down list.
OSS
OSS Bucket
Select the bucket that you create from the drop-down list.
test
Storage Path
Define the path in which data is stored in the OSS bucket.
NoteThe following types of values are supported:
Custom OSS path parameters specified using JSONPath rules. Examples:
{$.data}and{$.data.partition}.Time variables
{yyyy},{MM},{dd}, and{HH}.Constants.
The value must end with a forward slash (
/).
/EB-test/Time Zone
If you specify time variables as the value of the Storage Path parameter, select the time zone on which the variables are based.
Asia/China (UTC +8:00)
Delivery Settings
The following configurations are supported:
Batch Aggregate Object Size: Specify the size of the files to be aggregated. Valid values: 1 to 1024. Unit: MiB. When the size of the files reaches the specified value, the files are sent to OSS in a batch.
Batch Aggregation Time Window: Specify the time window for aggregating files. Valid values: 1 to 1440. Unit: minutes. After the specified time elapses, the files are sent to OSS in a batch.
Batch Aggregation Object Size: 128 MiB
Batch Aggregation Time Window: 60 Minutes
File Compression
Specify the compression method for files. Valid values:
No Compression Required
GZIP
Snappy
Zstd
No Compression Required
File Content
Select Complete Event or Partial Event. If you select Partial Event, refer to Partial Event to complete the settings.
Complete Event
Retry Policy and Dead-letter Queue
For more information, see Retry policies and dead-letter queues.
None.
NoteThe rule requires approximately 1 minute to be created.
Step 3: Publish an event
Log on to the EventBridge console. In the left-side navigation pane, click Event Buses.
- In the top navigation bar, select a region.
On the Event Buses page, find the custom event bus that you want to manage and click Publish Event in the Operations column.
NoteYou can publish events only to custom event buses in the EventBridge console.
In the Publish Event to Custom Event Bus panel, select a custom event source from the Custom Event Source drop-down list, enter the event content in the Event Body code editor, and then click OK.
NoteFor information about the event parameters, see Overview.
After you click OK, the event ID is automatically copied.
Verify the result
Log on to the OSS console.
In the left-side navigation pane, click Buckets. On the Buckets page, click the name of the bucket that you want to manage.
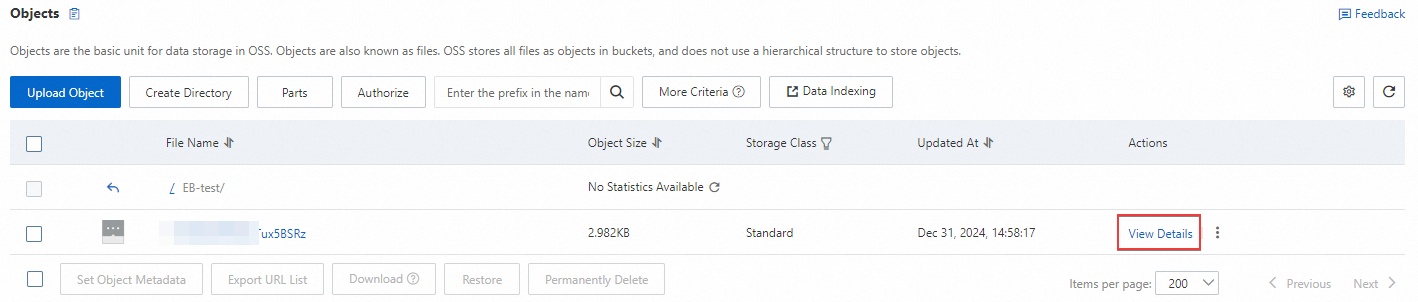
On the Objects page, find the object that you want to manage and click its name. In this example, the object name is
EB-test/.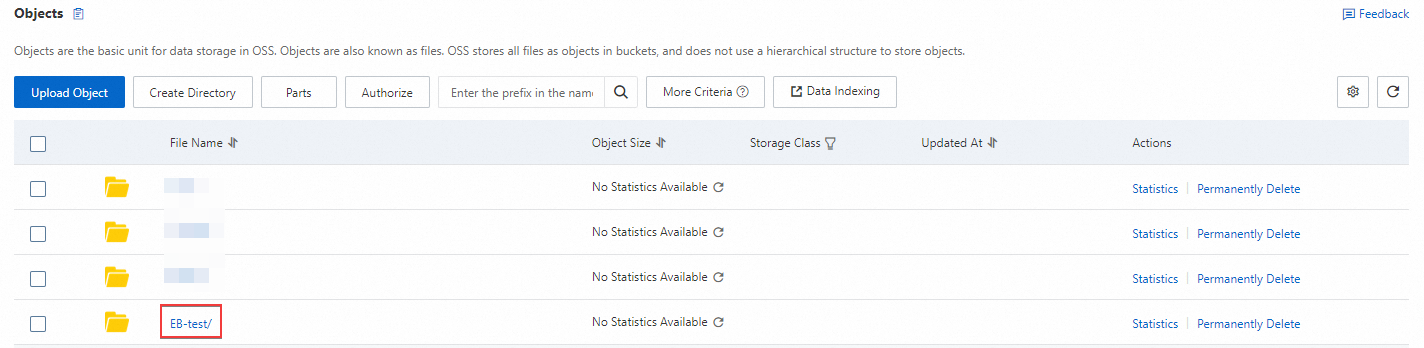
Find the file that you want to manage and click View Details in the Actions column to view the object details.