When events occur in your applications or cloud services, you often need to notify your team immediately without building a dedicated notification system. EventBridge solves this by forwarding events from a custom event bus to a Lark group chat through a webhook URL, delivering real-time notifications directly where your team collaborates.
In this tutorial, you will:
Create a custom event bus and an event source
Set up a Lark chatbot with a webhook URL
Configure an event rule that routes events to the Lark chatbot
Publish a sample event and verify the notification in your Lark group
Event flow from EventBridge to Lark
A Lark chatbot receives messages through a webhook URL without requiring approval from the tenant administrator. Because EventBridge supports HTTP/HTTPS event targets, you can point an event rule directly at the chatbot's webhook URL to deliver formatted event data to your Lark group.
Event source → Custom event bus → Event rule (with template) → Webhook URL → Lark chatbot → Lark groupFor more information about HTTP event targets, see Route events to HTTP endpoints.
Use cases
Real-time alerting: Get notified in Lark when infrastructure changes, deployments complete, or errors occur.
Lightweight notifications: Push event-driven messages to a Lark group with server-side code only, without building a separate notification service.
Prerequisites
Before you begin, ensure that you have:
A Lark account with an existing Lark group
EventBridge activated with the required permissions granted to a Resource Access Management (RAM) user. For details, see Activate EventBridge and grant permissions to a RAM user
Step 1: Create a custom event bus
Log on to the EventBridge console.
In the left-side navigation pane, click Event Buses.
On the Event Buses page, select a region in the top navigation bar, then click Quickly Create in the Custom Event Buses section.

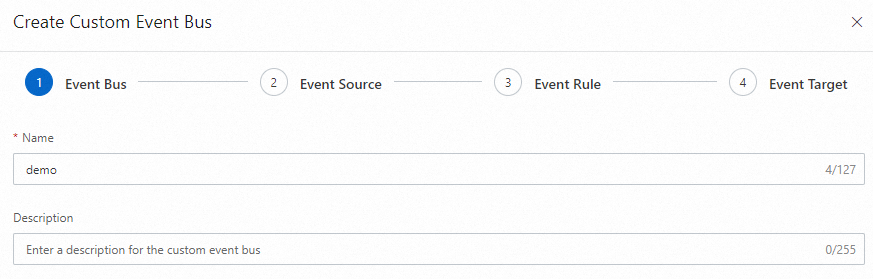
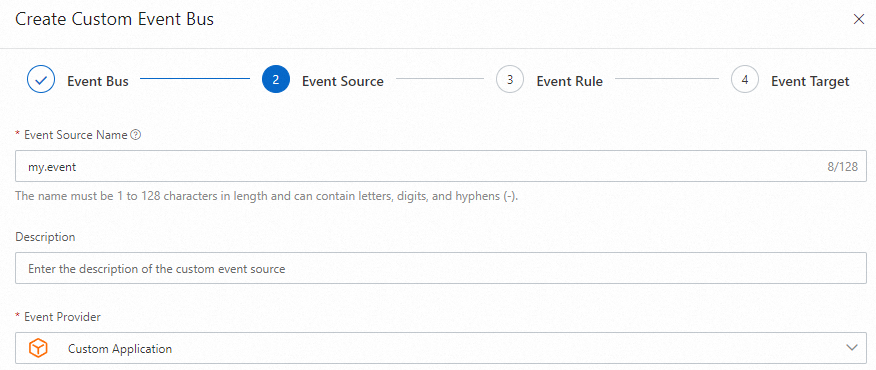
In the Create Custom Event Bus wizard, complete the following steps:
Event Bus: Enter a Name and Description for the event bus, then click Next Step.
Event Source: Enter an Event Source Name, set Event Provider to Custom Application, then click Next Step.
Event Rule: Click Skip, then click OK in the Skip Subsequent Steps confirmation dialog.
NoteYou will configure the event rule in Step 3 after setting up the Lark chatbot.
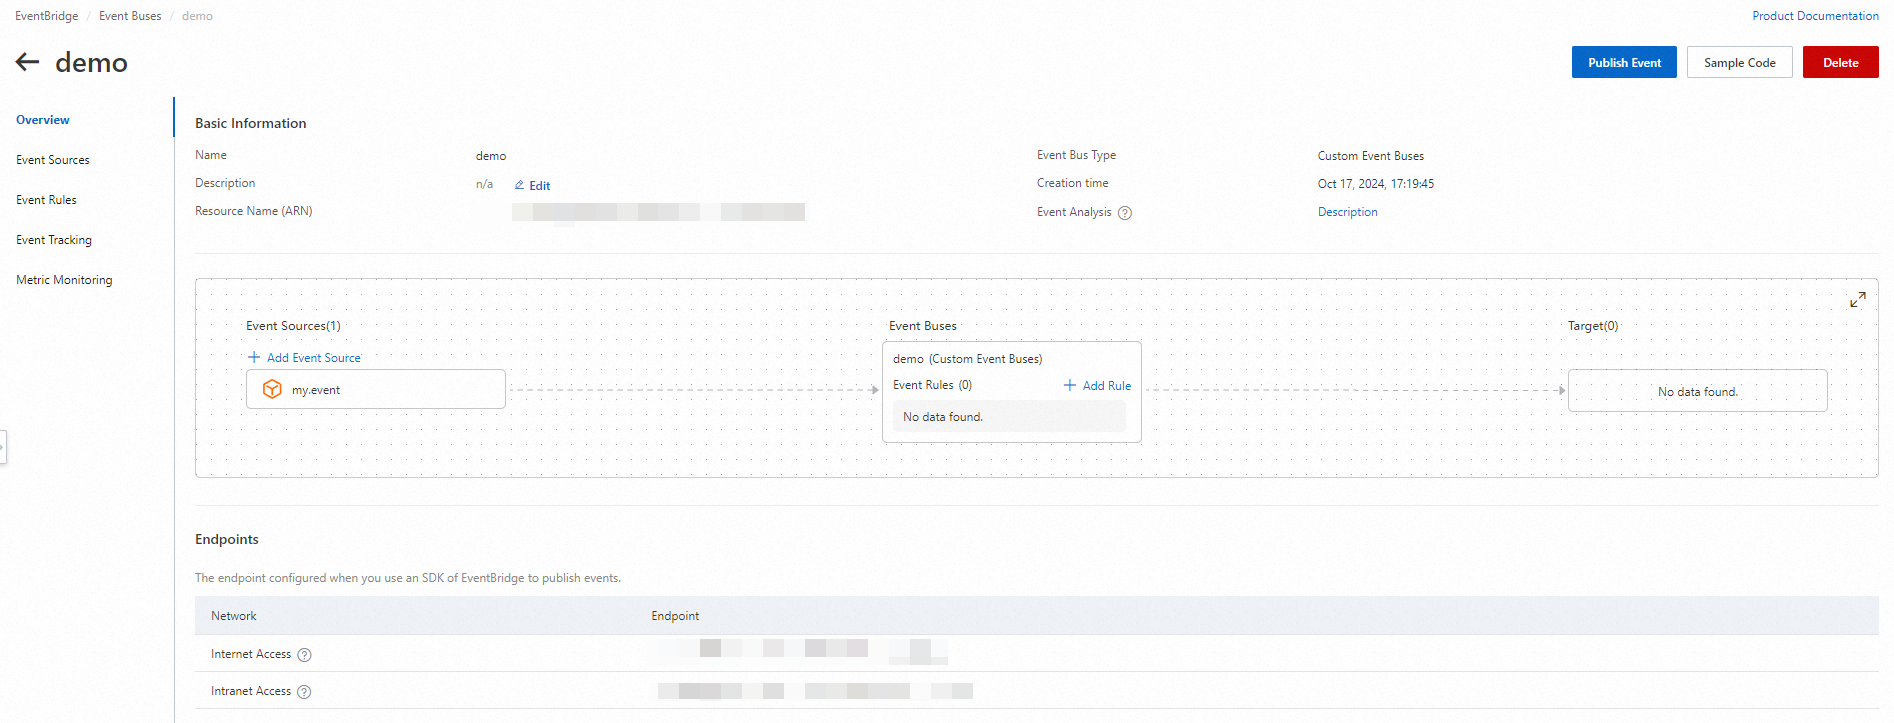
Verify that the custom event bus appears on the Event Buses page.
Step 2: Create a Lark chatbot
Open Lark on your PC and navigate to the group where you want to receive event notifications.
In the upper-right corner of the group chat, click the settings icon (
 ) and choose Settings.
In the Settings panel, click Bots.
In the Add Bot panel, click Custom Bot.
Enter a name and description for the chatbot, then click Add.
Copy the webhook URL that appears. Configure the Security settings based on your requirements, then click Finish.
ImportantStore the webhook URL securely. Anyone with this URL can send messages to your Lark group. To validate that incoming requests originate from EventBridge, enable signature verification under Security settings.
Step 3: Configure an event rule
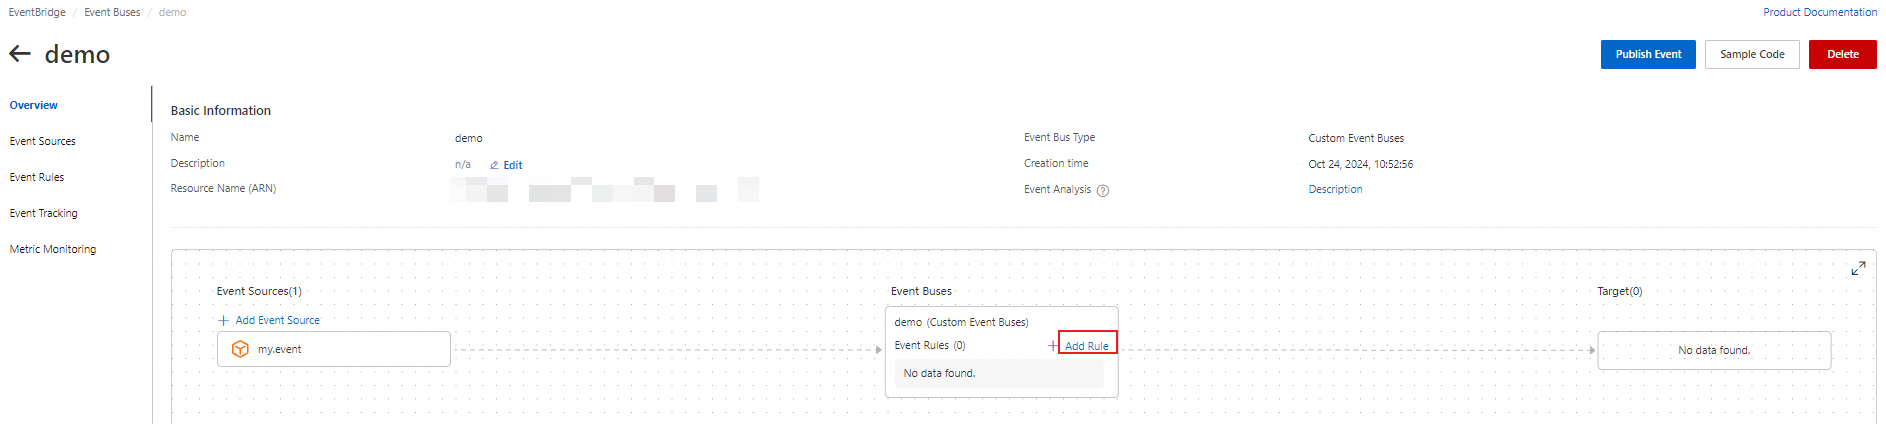
Go to the Overview page of the custom event bus you created in Step 1, then click Add Rule.
In the Create Rule wizard, complete the following steps:
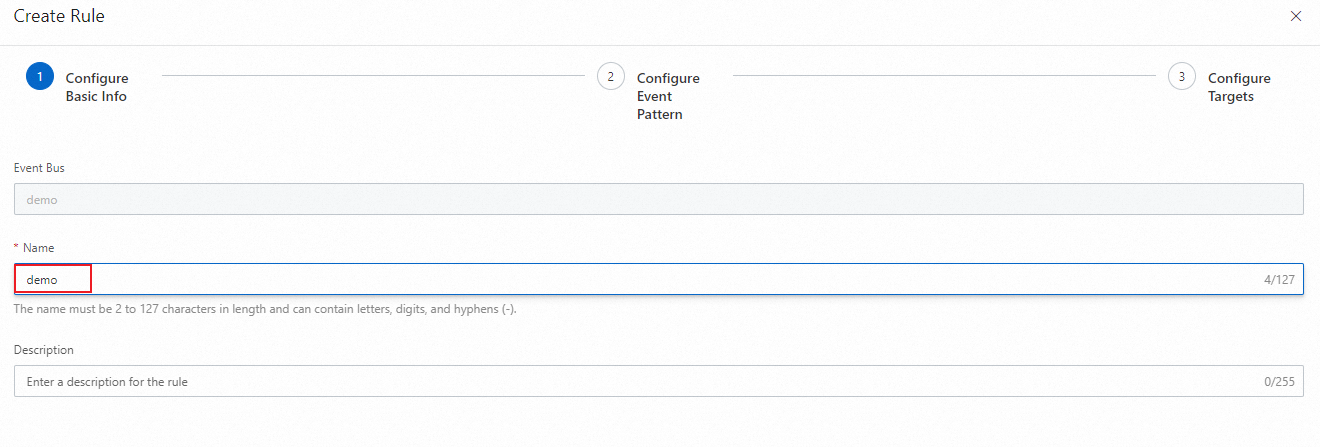
Configure Basic Info: Enter a name for the rule, then click Next Step.
Configure Event Pattern: Click Next Step.
ImportantIn this example, the event pattern is not configured. In a production environment, configure the Event Source and Event Type parameters to filter events based on your business requirements.
Configure Targets: Set the target to deliver matched events to your Lark chatbot. Configure the following parameters:
Parameter Value Service Type HTTPS URL The webhook URL you copied in Step 2 Body Template In the Variables editor, map event fields to template variables with JSONPath:
{
    "msg_source": "$.source",
    "msg_type": "$.type"
}
In the Template editor, define the message body that Lark receives. The format must conform to the Lark bot message specification:
{
    "msg_type": "text",
    "content": {
        "text": "Event source: ${msg_source}. Event Type: ${msg_type}"
    }
}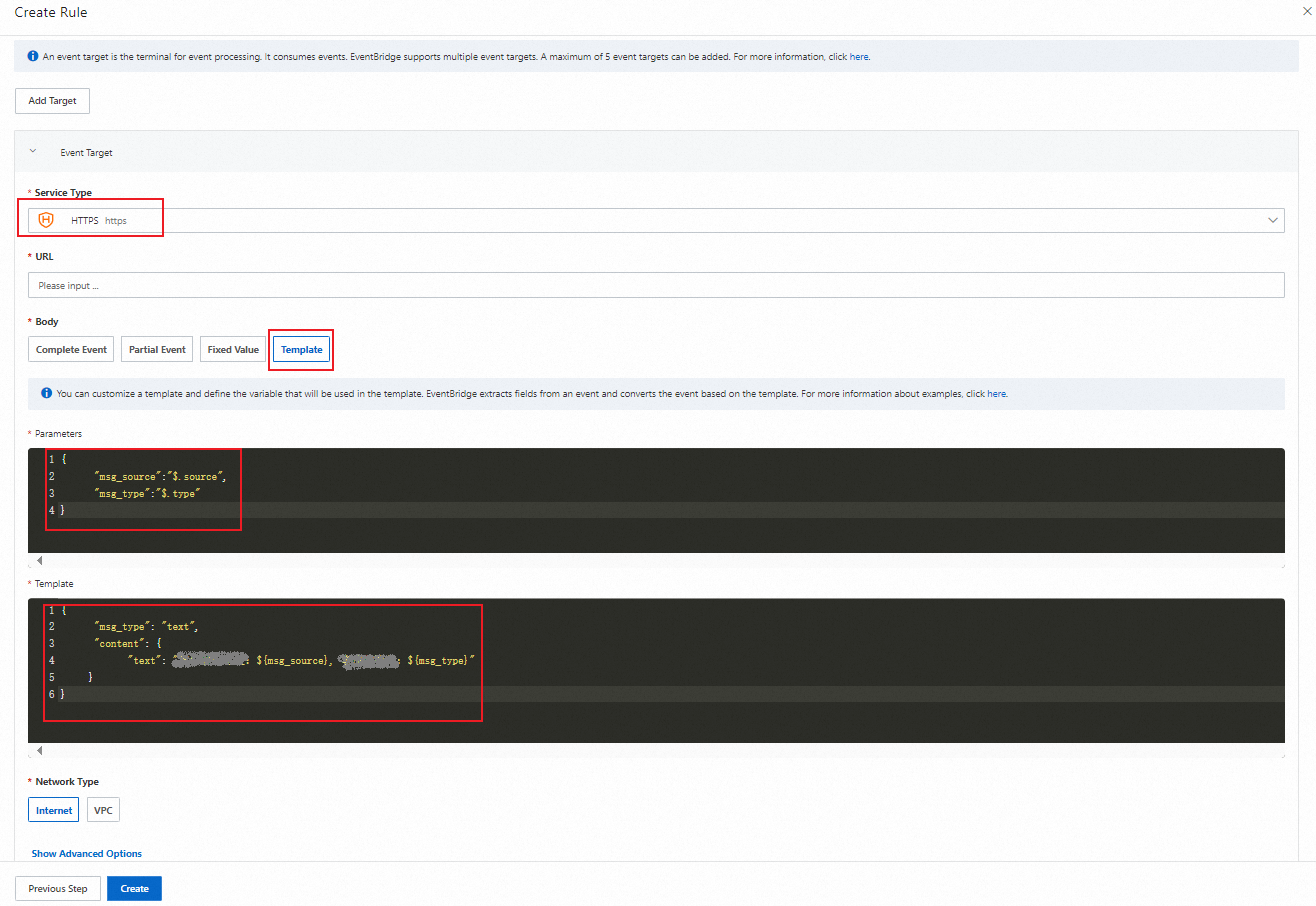
Click Create to save the rule.
NoteThis example uses a plain text message. For richer formatting such as interactive cards, see the Lark bot documentation. For EventBridge template syntax, see Event transformation.
Template examples
The following table shows common template patterns for Lark messages.
| Pattern | Variables | Template | Lark output |
|---|---|---|---|
| Plain text | {"src": "$.source"} | {"msg_type": "text", "content": {"text": "Source: ${src}"}} | Source: my.app |
| Multi-field | {"src": "$.source", "type": "$.type", "time": "$.time"} | {"msg_type": "text", "content": {"text": "Source: ${src}\nType: ${type}\nTime: ${time}"}} | Source: my.app Type: oss:ObjectCreated Time: 2026-03-11T08:00:00Z |
Step 4: Verify the result
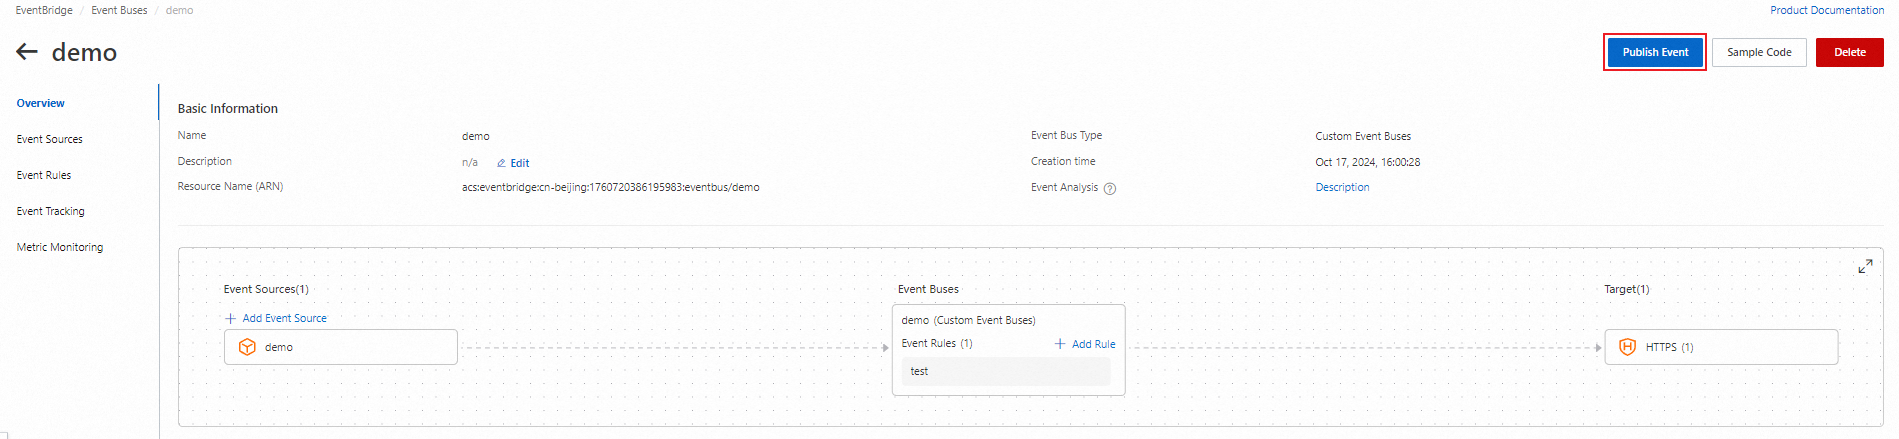
On the Overview page of your custom event bus, click Publish Event.
In the Publish Event to Custom Event Bus panel, select your event source from the Custom Event Source drop-down list.
Enter a test event in the Event Body editor, then click OK. The event body must include the fields referenced in your template variables. For the template in Step 3, include at least
sourceandtype:{ "source": "my.test.application", "type": "test:lark:notification", "data": { "message": "Hello from EventBridge" } }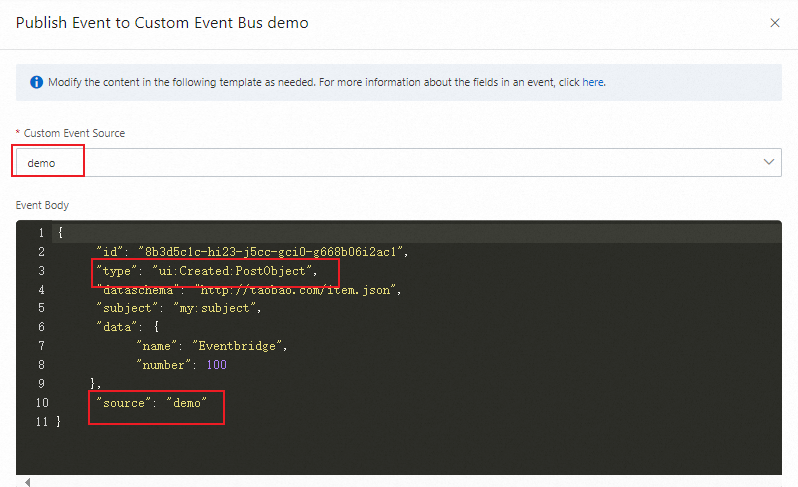
Check your Lark group for the notification message. If the message does not appear, verify the following:
The webhook URL in the event rule is correct.
The event pattern matches the test event (or no event pattern filter is configured).
The message template conforms to the Lark bot message format.
Clean up resources
To avoid unnecessary costs, delete resources you created solely for this tutorial:
Delete the event rule: On the Overview page of your custom event bus, locate the rule and delete it.
Delete the custom event bus: On the Event Buses page, find the event bus and delete it.
Remove the Lark chatbot (optional): In the Lark group, go to Settings > Bots, select the chatbot, and remove it.