Alibaba Cloud Toolkit lets you deploy applications directly from IntelliJ IDEA to Enterprise Distributed Application Service (EDAS). Configure your deployment parameters once, then redeploy with a single click -- useful for fast iteration and batch deployments.
Before you begin
Complete these tasks before you start:
An application is created in EDAS and is deployed for the first time. See Use an image to deploy a Java microservices application in a Kubernetes cluster
Remote debugging enabled for your microservices namespace (not required for the default namespace). See Enable remote debugging for a microservices namespace below
Alibaba Cloud Toolkit installed and configured in IntelliJ IDEA. See Install and configure Alibaba Cloud Toolkit in IntelliJ IDEA
Enable remote debugging for a microservices namespace
Skip this section if your application runs in the default microservices namespace.
Log on to the EDAS console.
In the left-side navigation pane, choose Resource Management > Microservice Namespaces.
In the top navigation bar, select the region where your namespace is located.
On the Microservices Namespace page, find your namespace and click Edit in the Actions column.
In the Edit Microservices Namespace dialog box, turn on Allow Remote Debugging.
Deploy the application
Open your project in IntelliJ IDEA.
In the Project panel, right-click your project name and choose Alibaba Cloud > Deploy to EDAS... > EDAS for Kubernetes Application.
The project name shown in the menu matches your project name in IntelliJ IDEA (for example,
Java_demo).In the Deploy to EDAS Container Service K8s Cluster dialog box, configure the parameters on the Settings tab. Deployment method Choose one of the following methods based on your build workflow:
Target application
Parameter Description Region The region where you want to deploy the application. Namespace The microservices namespace that contains the target application. Application The name of the EDAS application to deploy to. Method When to use Configuration Maven Build Your project uses Maven. No additional configuration. The plugin builds and deploys the artifact automatically. Upload File Your project does not use Maven, or you have a deployment package. Select the local file to upload. Build Image You want to build a container image from source code. Specify the Content Directory (the build context path), the Dockerfile path, and the image Version tag. Select Image You want to deploy an existing container image. Select the image from the Select Image drop-down list. 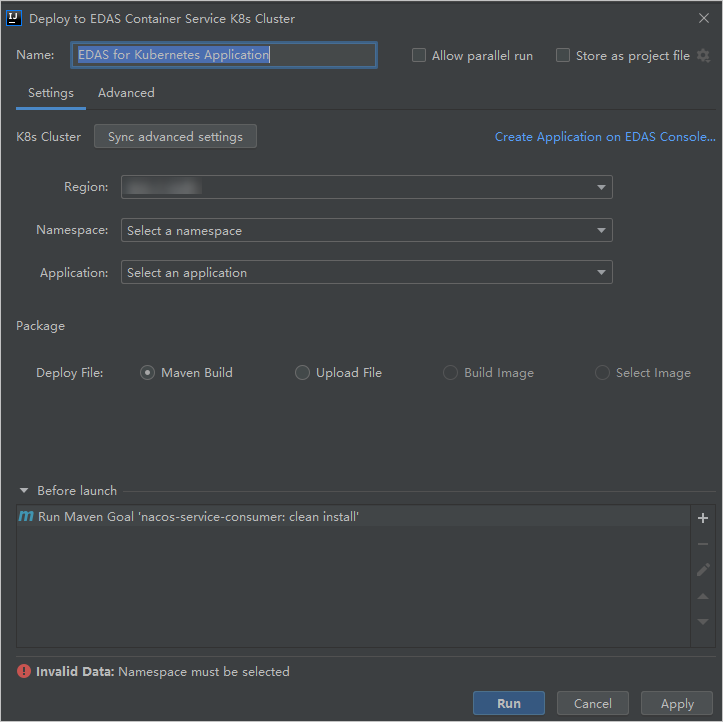
Click the Advanced tab and configure additional parameters as needed.
Parameter Description Application Environment The runtime environment for the application. Startup Command A custom startup command for the application. Environments Environment variables to inject into the application container at startup, specified as key-value pairs. Persistence Network-attached storage (NAS) volumes to mount to the application container for persistent data. Storage Additional storage configuration for the application container. Application Management Application lifecycle settings. 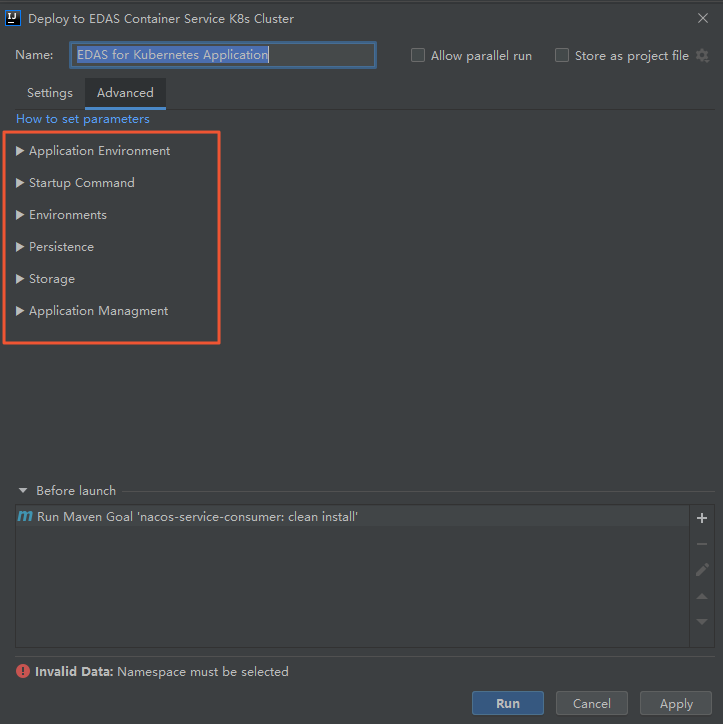
Click Apply, then click Run to start the deployment.
Verify the deployment
After deployment starts, IntelliJ IDEA displays deployment logs in the Console panel. Check these logs to confirm the deployment completed without errors.
To verify in the EDAS console:
Log on to the EDAS console.
Find your application and click the application name to open the details page.
In the left-side navigation pane, click Change List to view the deployment history and status.