As your application workload grows, you may need to add Elastic Compute Service (ECS) instances to an existing Enterprise Distributed Application Service (EDAS) cluster. You can scale out by purchasing new instances or by importing instances that already exist in your account.
EDAS does not support Windows-based ECS instances.
Scale-out options
| Approach | When to use |
|---|---|
| Purchase new ECS instances | Add new instances based on existing specifications or a launch template. Supports subscription and pay-as-you-go billing. |
| Import existing ECS instances | Add instances that are already running in your account. Import methods vary by network type and operating system. |
Prerequisites
Before you begin, make sure that you have:
An ECS cluster created in the EDAS console. For more information, see Create an ECS cluster in the EDAS console
Purchase new ECS instances
Purchase new instances and add them to the cluster in a single operation.
- Classic network clusters do not support launch templates.
- Do not delete the Auto Scaling (ESS) tag from instances purchased during scale-out.
- Pay-as-you-go instances purchased for scale-out are not stopped or released when the cluster scales in. However, if you manually stop a pay-as-you-go instance, the instance is released.
Log on to the EDAS console.
In the left-side navigation pane, choose Resource Management > ECS Clusters.
In the top navigation bar, select a region. On the ECS Cluster page, select a Microservice Namespace from the drop-down list, and then click the cluster ID.
On the Cluster Details page, in the ECS Instance section, click Purchase ECS for Scale-out.
In the Scale out Cluster dialog box, select a scale-out method and click Next:
Purchase Based on Existing Instance Specifications -- Select an existing instance in the Instances section. The new instances inherit the selected instance's specifications.
Purchase Based on Instance Launch Template -- Select a launch template and version. Not available for classic network clusters.
Configure the purchase parameters and click Next.
Parameter Description Billing Method Select Subscription or Pay-as-you-go. Purchased Duration Required for subscription billing. Specify the subscription period. Quantity The number of instances to purchase. Password Select a logon password from the drop-down list. If no password is available, create a key pair in the ECS console. For more information, see Create an SSH key pair. This parameter is available only when you purchase based on existing instance specifications. Terms of Service Read and agree to Elastic Compute Service Terms of Service | Terms of Service for Images. Confirm the scale-out details and click Confirm.
Verify the result
After you confirm the purchase, the message "Automatic purchasing is triggered. Check the real-time information in the application change process." appears at the top of the page.
Return to the Cluster Details page. When the Health Check column displays Running for the new instances, the scale-out is complete.
Import existing ECS instances
Import ECS instances that are already running in your account into the cluster. Three import methods are available: direct import, OS conversion, and script-based import.
Log on to the EDAS console.
In the left-side navigation pane, choose Resource Management > ECS Clusters.
In the top navigation bar, select a region. On the ECS Cluster page, select a Microservice Namespace from the drop-down list, and then click the cluster ID.
On the Cluster Details page, in the ECS Instance section, click the
 icon and then click Add Existing ECS.
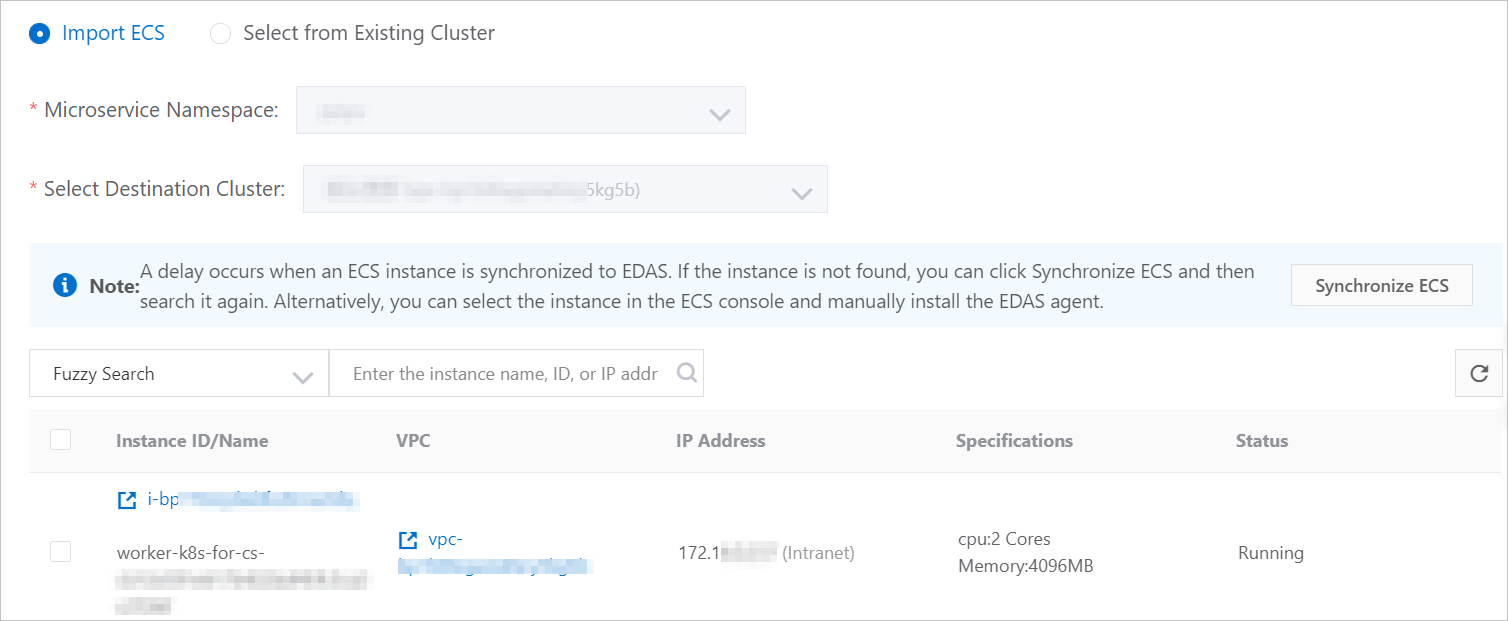
On the Add ECS Instance page, select an import source and the ECS instances to import, and then click Next.
Import ECS -- Import available instances from the current Microservice Namespace. The namespace and destination cluster are predefined and cannot be changed.
Select from Existing Cluster -- Specify a Microservice Namespace and source cluster, and then move instances from the All ECS Instances list to the Selected ECS Instances list.
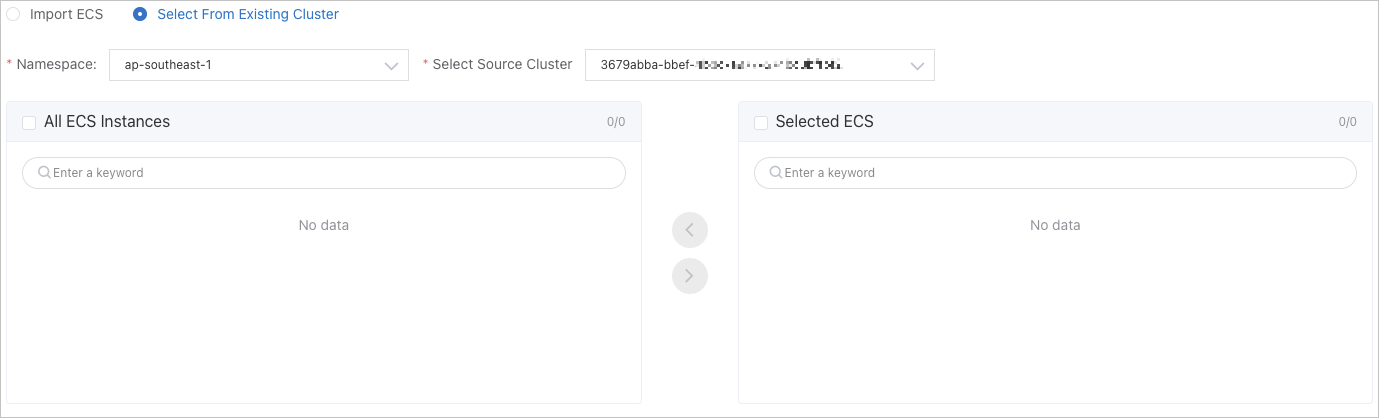
NoteIf no instances are available, click Create ECS Instance to go to the ECS purchase page and create instances first. For more information, see Create an ECS instance.
In the Ready to Import step, select an import method:
Direct import -- Select the instances and click Confirm and Import. No image conversion is required.
Convert and import -- Reinstall the operating system on the instances with an EDAS image and then import them. Select I agree to convert the preceding instances that need to be imported, and I understand that the data in the original system will be lost after the conversion, set a new password, and then click Confirm and Import.
NoteAfter the operating system is reinstalled, all data on the instances is deleted. You must set new passwords for the instances.
The following instances cannot be imported through OS conversion:
The instance was created before December 1, 2017.
The instance is created in the classic network and imported to a cluster that uses the classic network.
The instance is in the Stopped, Starting, or Stopping state, not in the Running state.
Script-based import -- Copy the script from the Ready to Import step, log on to the ECS instance as the root user, and then paste and run the script.
NoteScript-based import skips OS reinstallation. To import an Ubuntu-based ECS instance in the classic network to an ECS cluster, you must log on to the instance and execute a script. You do not need to reinstall the operating system.
In the Import step, monitor the import progress.
Verify the result
Return to the Cluster Details page. When the Health Check column displays Running for the imported instances, the import is complete.
Remove an ECS instance
On the Cluster Details page, in the ECS Instance section, find the instance and click Remove in the Actions column.
In the Remove ECS Instance dialog box, confirm the instance details and click Remove.
The instance is removed from the cluster and no longer appears in the ECS instance list.
FAQ
An ECS instance created in the ECS console does not appear during import
This issue typically occurs when the accounts or regions do not match. Check the following:
The account used to create the ECS instance is the same account logged on to the EDAS console.
The ECS instance and the target ECS cluster are in the same region.
The operating system version of the ECS instance is listed as a supported version in the Select Cluster and Existing ECS Instances step.
If everything matches but the instance still does not appear, synchronize the instance list:
Log on to the EDAS console.
In the left-side navigation pane, choose Resource Management > ECS.
In the upper-right corner, click Import ECS.
On the Select Cluster and Existing ECS Instances tab, click Synchronize ECS.
If the issue persists, join the DingTalk group (group ID: 31723701) for technical support.